If you’re here specifically looking for the manual material test files and instructions, click the arrow below.
Expand this section to see manual material test files
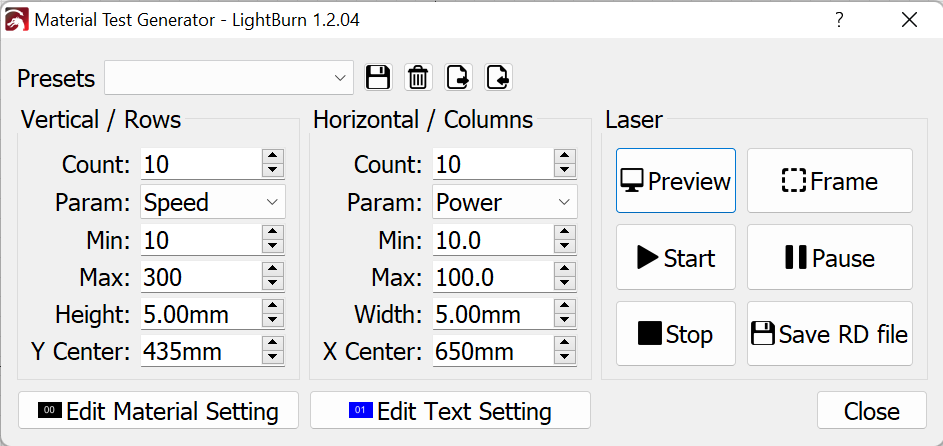
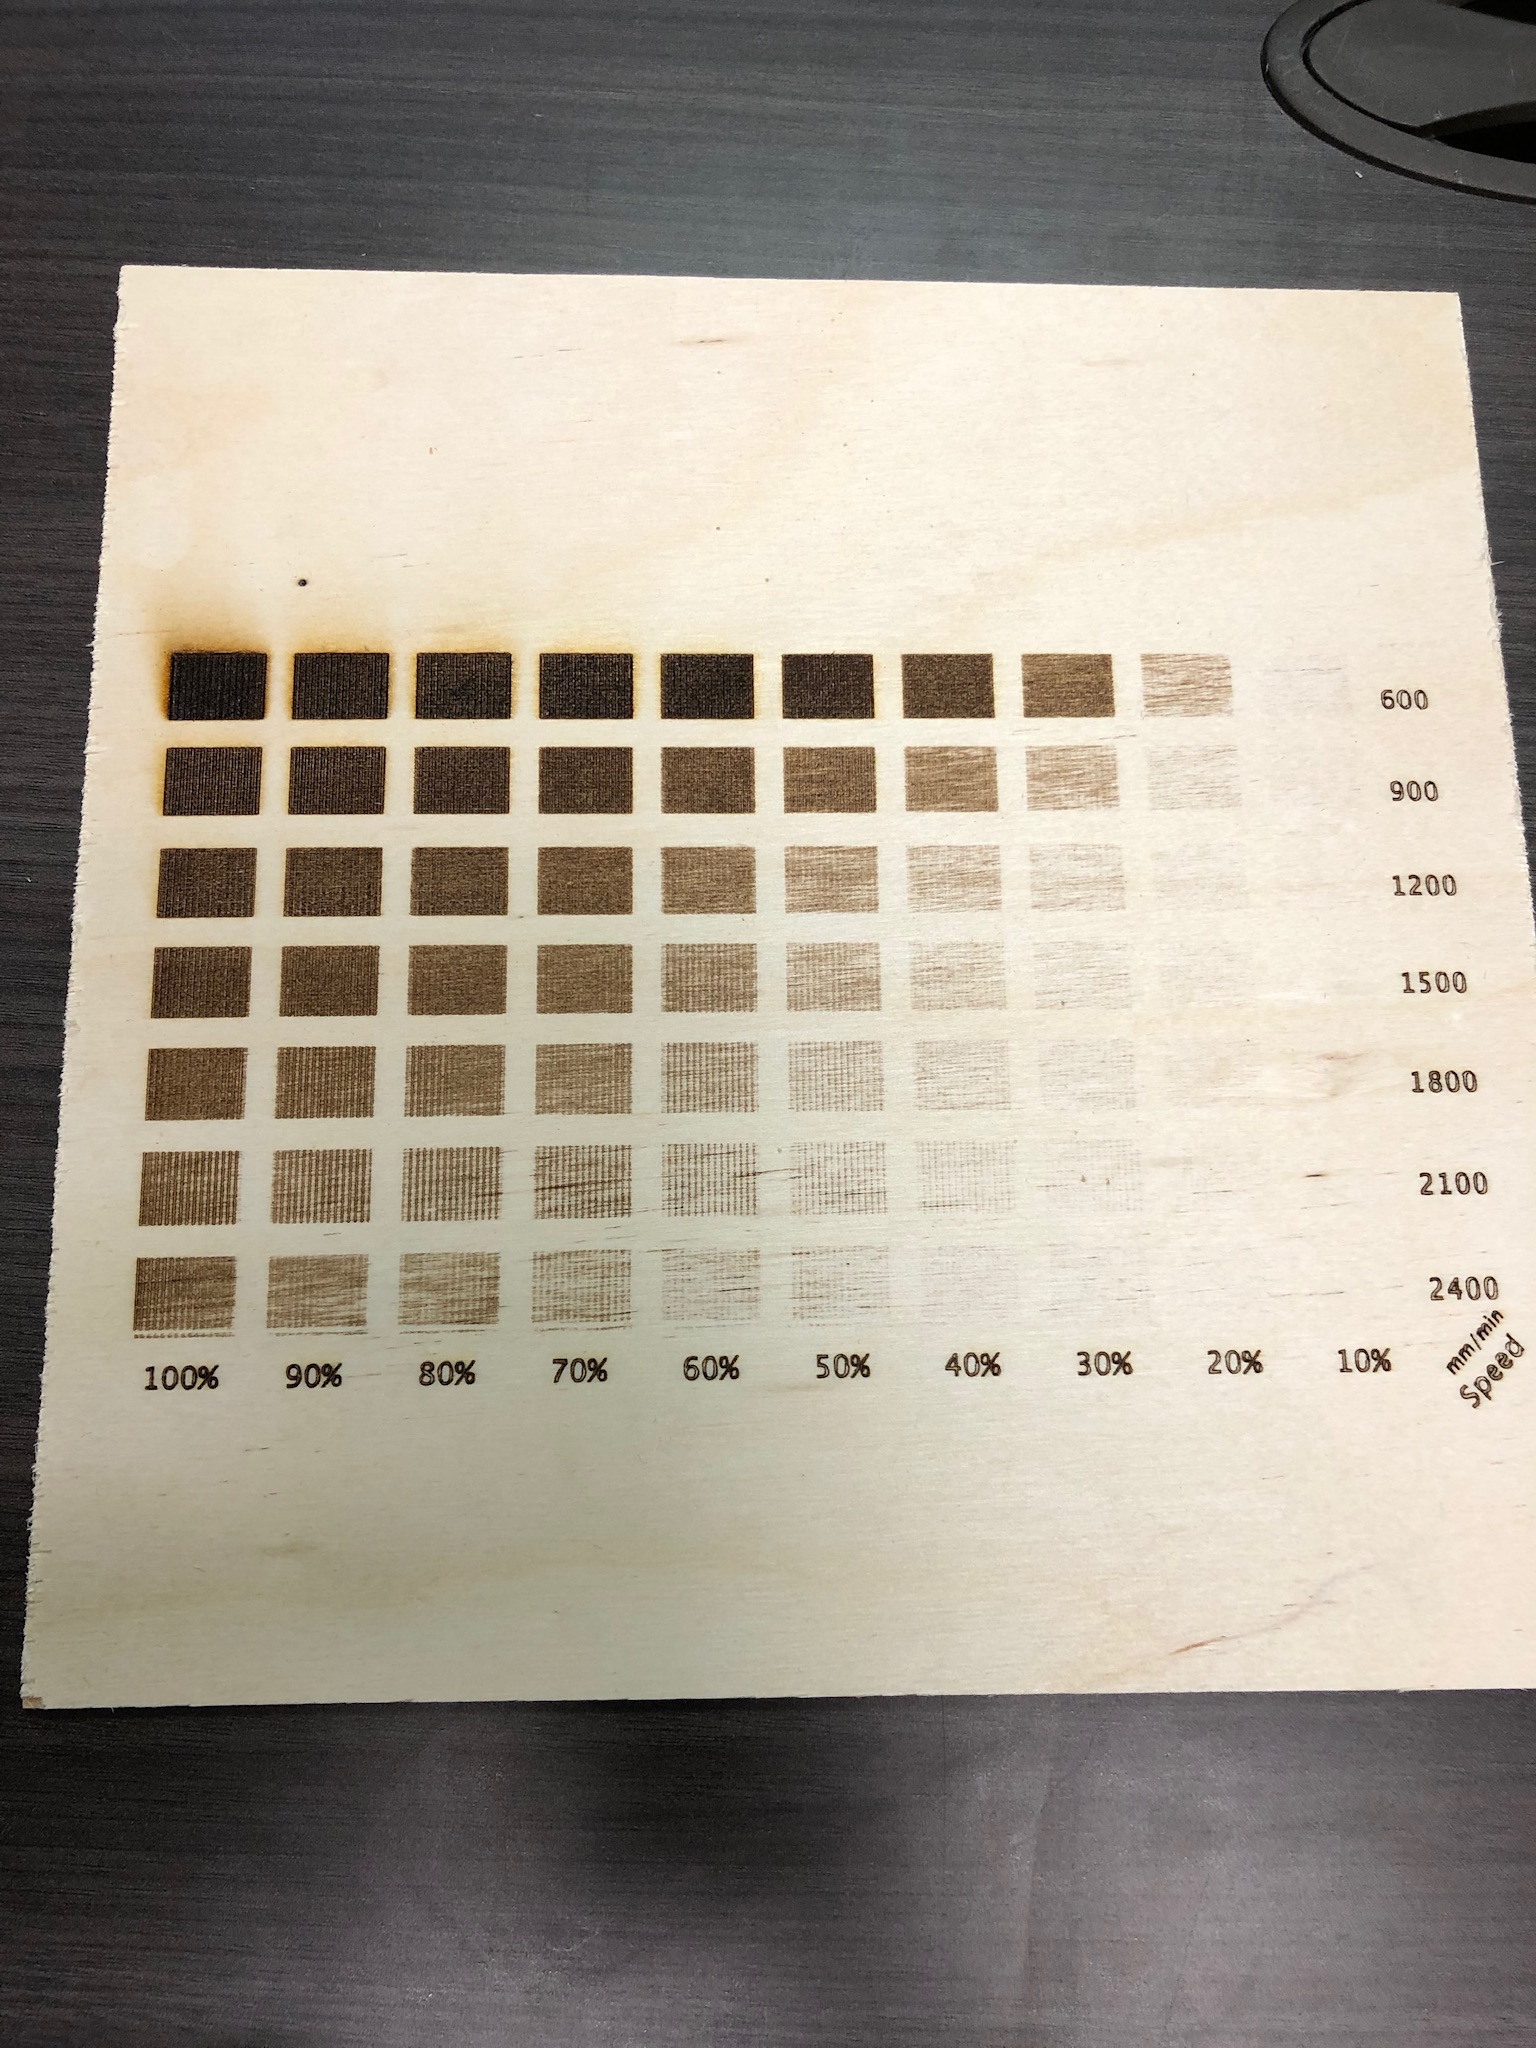
Here is a test file created using the ‘Array’ and ‘Power Scale’ features. (you must adjust the settings in this file for your setup and needs)
Setup grid array with all rows at 80% Max pwr 0% Min pwr. Set each row at different speed starting at 400mm/s down to 100mm/s from top to bottom of scale.
Viewing left to right, each column uses ‘Power Scale’ to adjust from 10% to 100% (of 80%).
If I load this file in the soon to be released “New Simulation” preview, I see that the total time is 44:07:3 based on my current cut order.
The new simulator is covered in a bit more detail here: Total time estimated issue
I’m still having a bit of trouble grasping the 100% power versus the amount of power I can select while still keeping my mA usage below 18.
On my 40w K40 the max I can set it is around 70% in order to keep it below 18mA draw. When I select 5% power on the laser I get nothing. Should I be tweaking the $ setting somehow in order to make 70% on my system equal to 100%? Or should I just keep things as is and not go over 70% when engraving?
The potentiometer dial or electronic control of power on the machine is the hard limit, no matter what software tells the laser to do.
It is attenuating the 0-5v signal that is coming from the software, it is not possible to overdrive your laser this way. 18ma seems like it might be high for a K40 should be more like 12ma I think.
So, another way to think of this is the software is always going to output 0-5V based on what power level you set between 0%-100%.
The attenuation of the dial scales that voltage down, so if your dial is set to max out at 12ma, then the 100% 5 volt signal from the software is going to be reduced to the voltage that tells the laser to fire at 12ma.
It’s like a brick under your gas pedal in a car, change where the brick is and you can only push it that far.
I have searched the web, and this site, but I cannot find out what the ultimate max current rating I should run at (or not exceed to maximize the life of the tube) I have a 80 watt Chinese laser.
Correct!
The software has no idea what the potentiometer is set to and is always outputting 0-5v scaled to the percentage you specify for the cut/raster.
The max milliamp rating is a specification of the tube manufacturer.
There is a minimum amount needed to start lasing as well.
The best thing to do is test from that minimum up to where the power level doesn’t increase the depth of cut anymore. That will typically be less than the maximum power rating the tube manufacturer specifies according to what I have seen from Russ on Youtube.
I highly suggest you spend a bunch of time watching his videos and learning more about the whole process, it will help immensely.
The exact number will depend on the manufacturer and model number of your tube.
My 80w red&black has a EFR model F2 tube in it. (says so on a sticker on the tube)
A quick look at the EFR website says maximum current of 28mA and “max current in long term operation” of 25mA or less.
EFR website: http://en.bjefr.com/xsproduct_EN/TypeId-368.html
For my particular tube/power supply combination, 28mA is about 80% indicated power and 25mA is about 70%.
Thank-you both for the information. I will look at the tube when I get home tonight and see if I can find a model #. Doing the research on Lasers, before buying, I had set the max to 80% as soon as I got it, but have always wondered if it was too high.