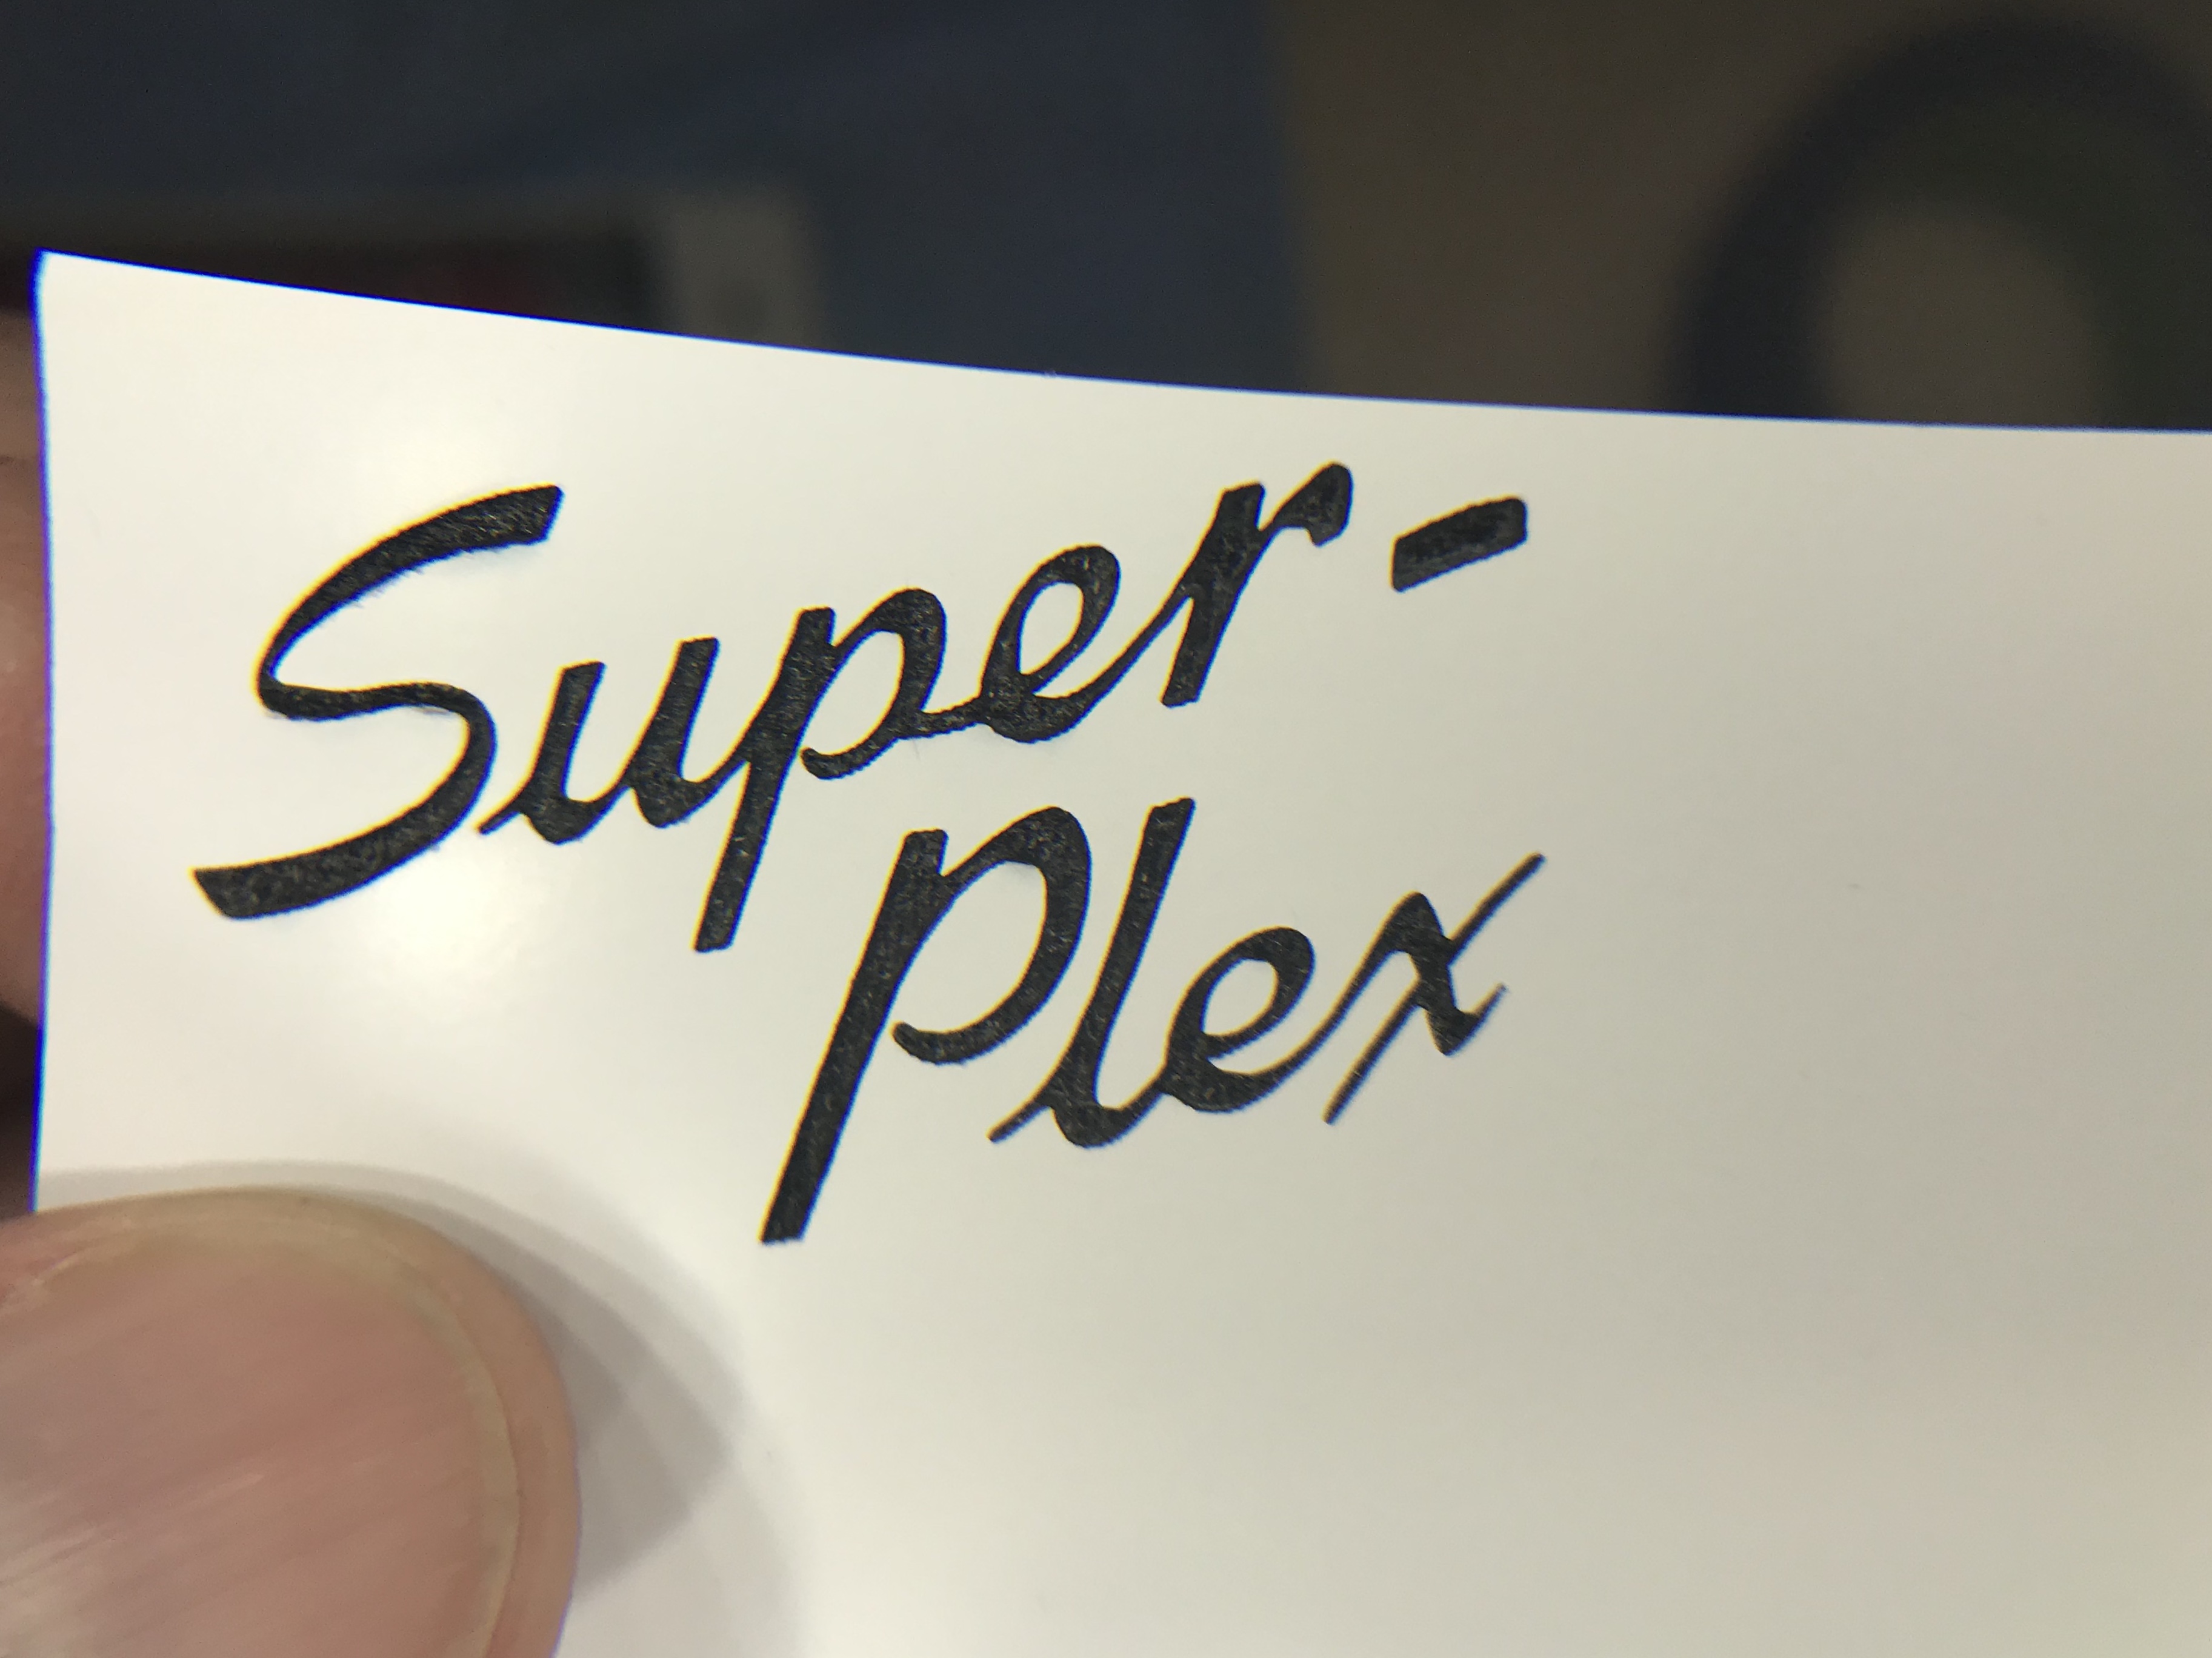
I had next to no time today, but did try engraving away power coating on this aluminum cover. I slowed the speed down to 100mm/S and power at 30%. The fill engrave looks pretty good, not perfect.

george
I had next to no time today, but did try engraving away power coating on this aluminum cover. I slowed the speed down to 100mm/S and power at 30%. The fill engrave looks pretty good, not perfect.
george
I didn’t let the paint dry long enough, I seem to lack patience. But this is good progress. 100mm/S 40% with stencil mask in place.
george
Seems there is still a critical flaw with this machine. No matter how much I slow it down and reduce acceleration in the X axis, vertical lines are far more narrow than horizontal. And that makes the results unusable. Incredibly frustrating.
The speed is 100mm/S Power at 30% (9-10mA) X axis accel @ 400
I think the issue lies with the mis-match between the tube and power supply. 80W tube, 130-150W supply. The tube won’t fire at all at less than 26% power, so it makes sense there is a delay to fire at 32%.
Open to any suggestions, otherwise dead in the water.
George
I am wondering if your lens is producing an oval dot instead of a perfect circle. Easy enough to check, if you rotate the lens 90 degrees the narrowing effect would switch from the X to the Y axis. May be worth a shot to take a look at this.
You should always set the upper mA of the controller - a 130W capable supply just means it has more capacity for more power, not that it uses 130W when driving an 80W tube.
Most Chinese PSUs have an adjustment varistor that you can use to set the maximum output. Usually a tiny hole on the side of the casing.
For example, I use a digital multimeter to set the maximum on my PSU’s to 25mA for my Reci W2’s and 26mA for Reci W1, which is their recommendation for longevity. I can run at 100% power all day long without worrying about over-driving the tube and I get the full 255-steps of PWM control.
As to what is causing your particular problem, it looks more like a motion-control issue, than a tube/power issue.
Your circles are visibly not circular.
Thanks! I will make the max power adjustment.
Interesting suggestion on the lens. I’ll look into that next.
I also emailed Lightobject support. The tube, power supply and countless other parts have been bought from them and the support guy is usually very helpful.
George
I meant to say, I have one spare PSU for all my machines - it’s capable of running the W4, but I have a couple of W2’s and it’s perfectly at home running those.
Marco from LO thinks my issue lies between the third mirror and the lens. I’ve only ever checked the third mirror alignment by lowering the head down to a piece of cardboard, tracing around the nozzle, then raising into focus and pulsing to make sure the bean is in the center of the hole.
Is there a better, more sure-fire way to adjust and confirm the third lens alignment?
Alignment up to the laser head appears right on:
But the issue persists.
Though it does look less so after I fine tuned the second to third mirror alignment.
George
This saga continues…
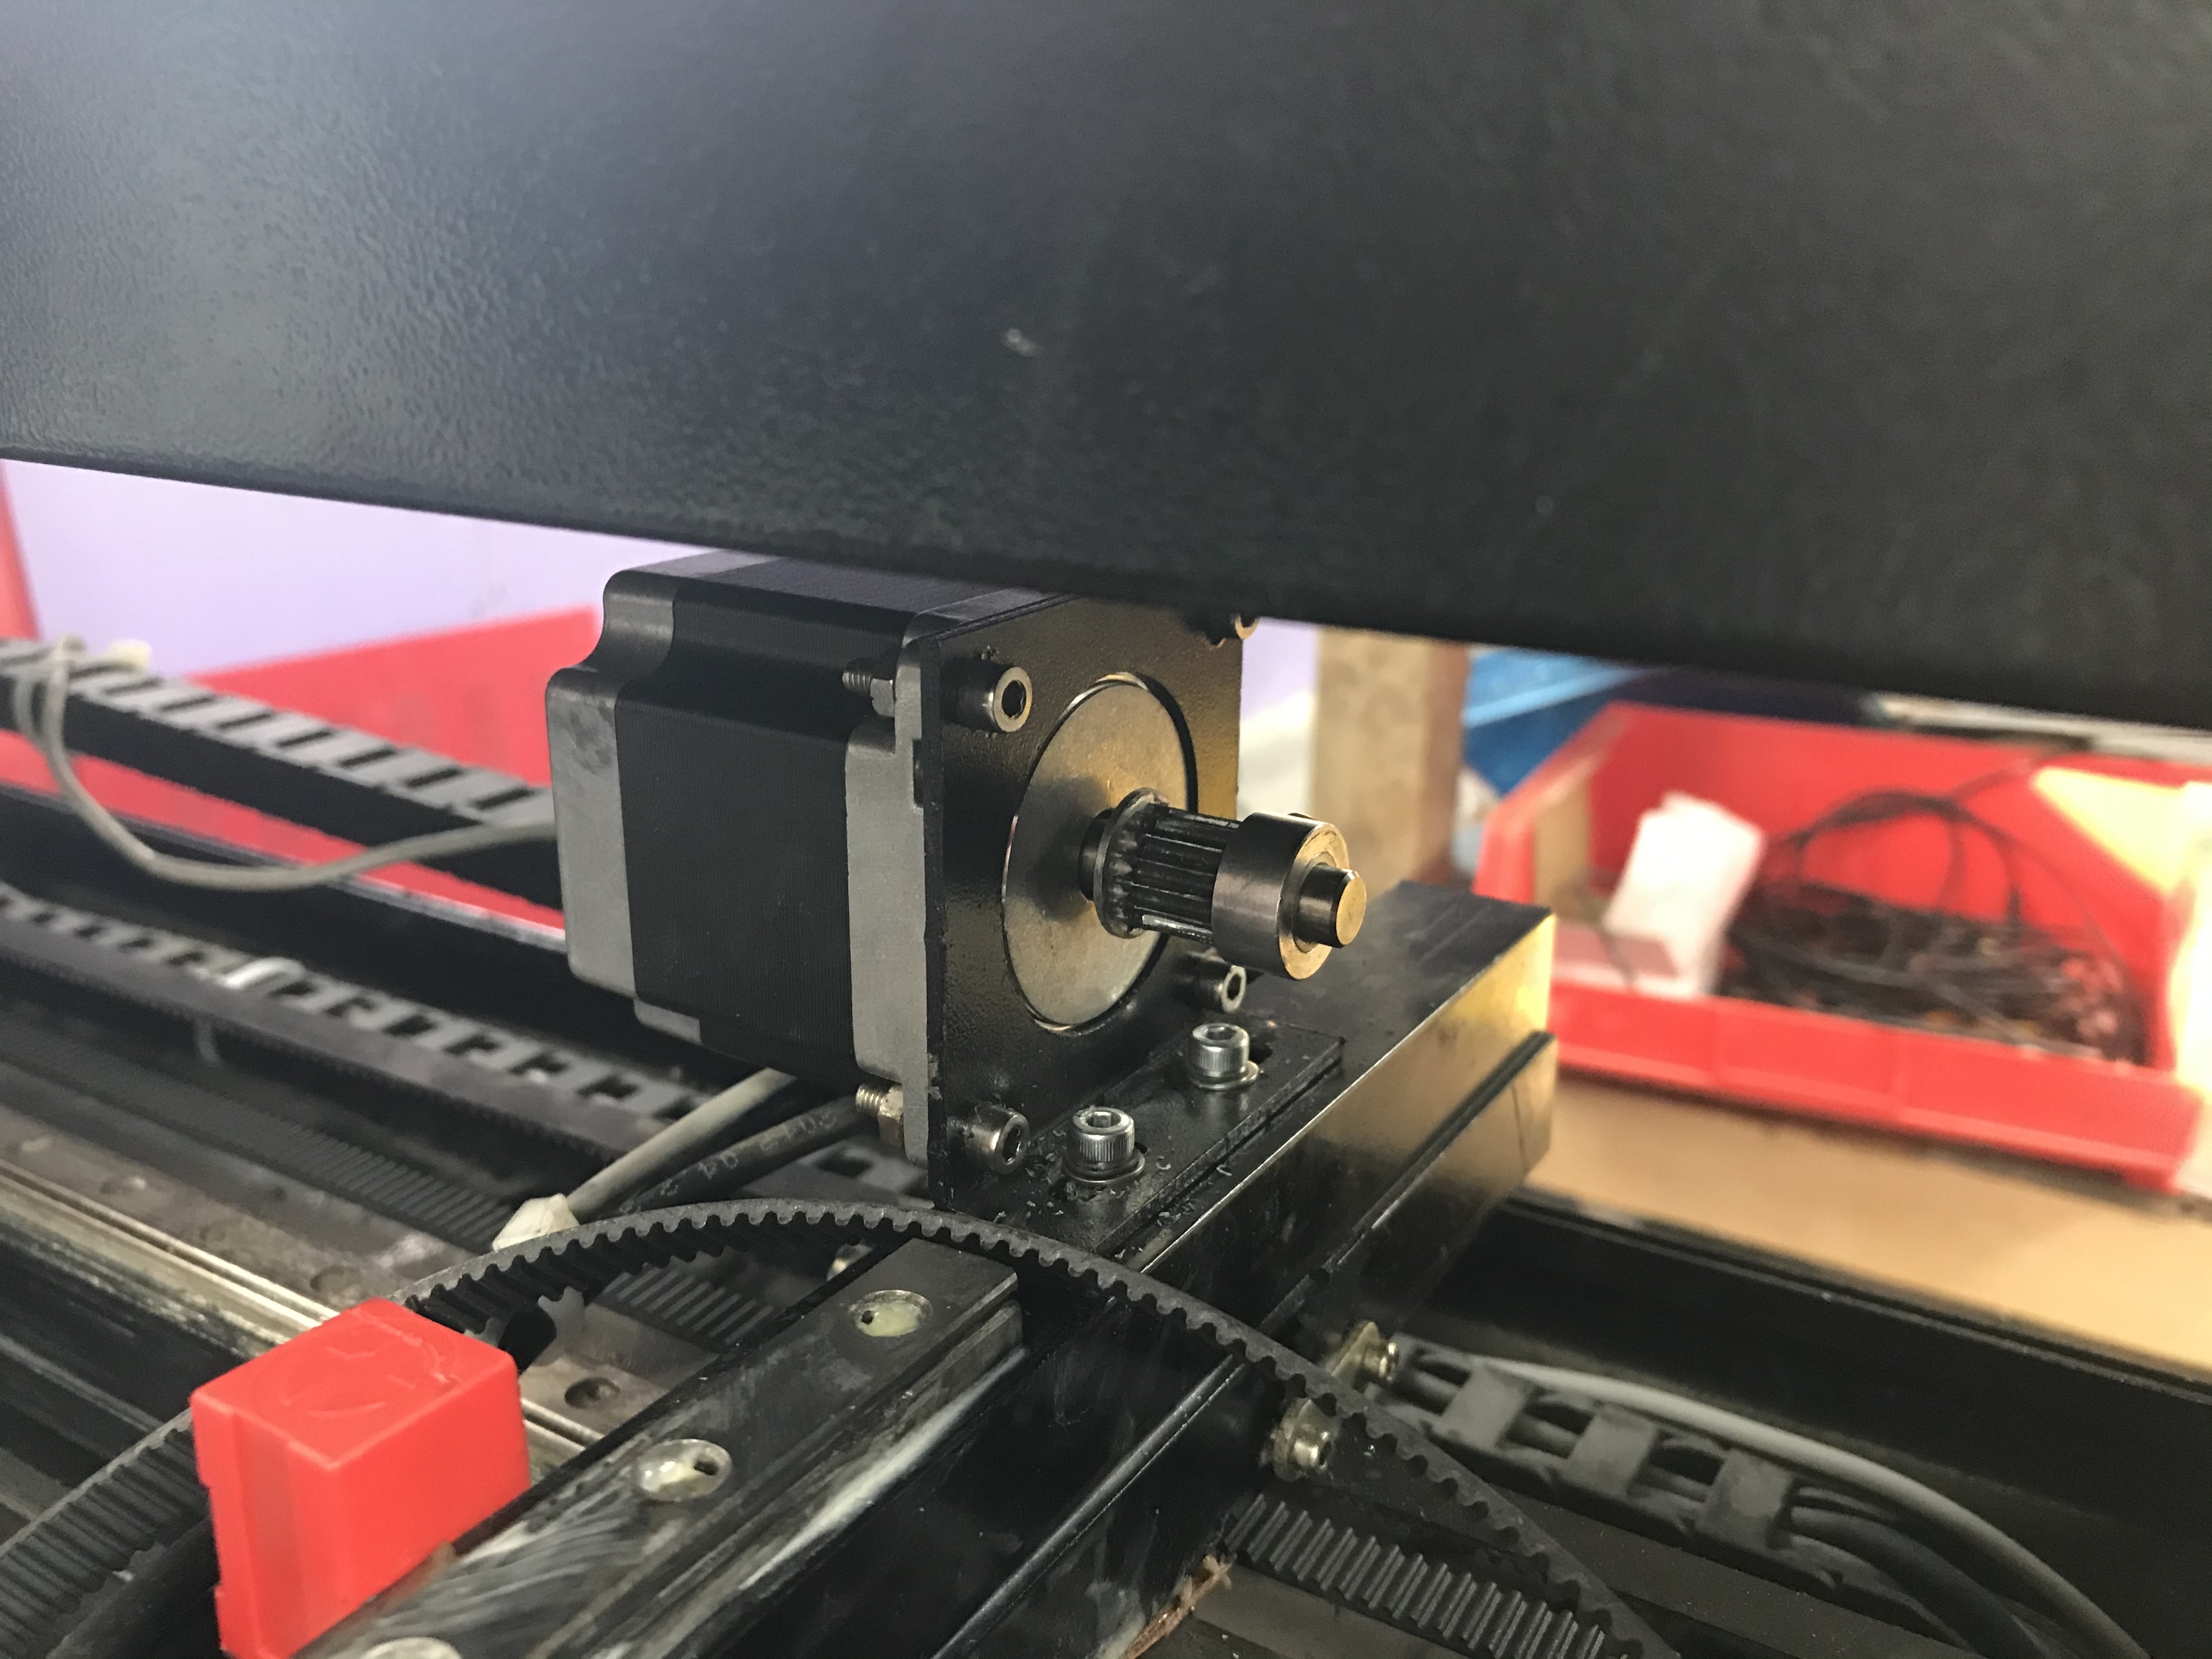
I found the lens holder on the laser head was loose, dis-assembled everything and tightened. Also found both screws holding the X axis stepper mounting bracket were stripped. I finagled in longer screws with nuts inside the gantry extrusion. The x stepper is solid now!
I have good belt tension and smooth movement along the rail. In fact, my best results in a line test were now at 400mm/S. Before it was unusable at any setting over 200. I have acceleration for X at 500 now. Previously, this topped out at 300.
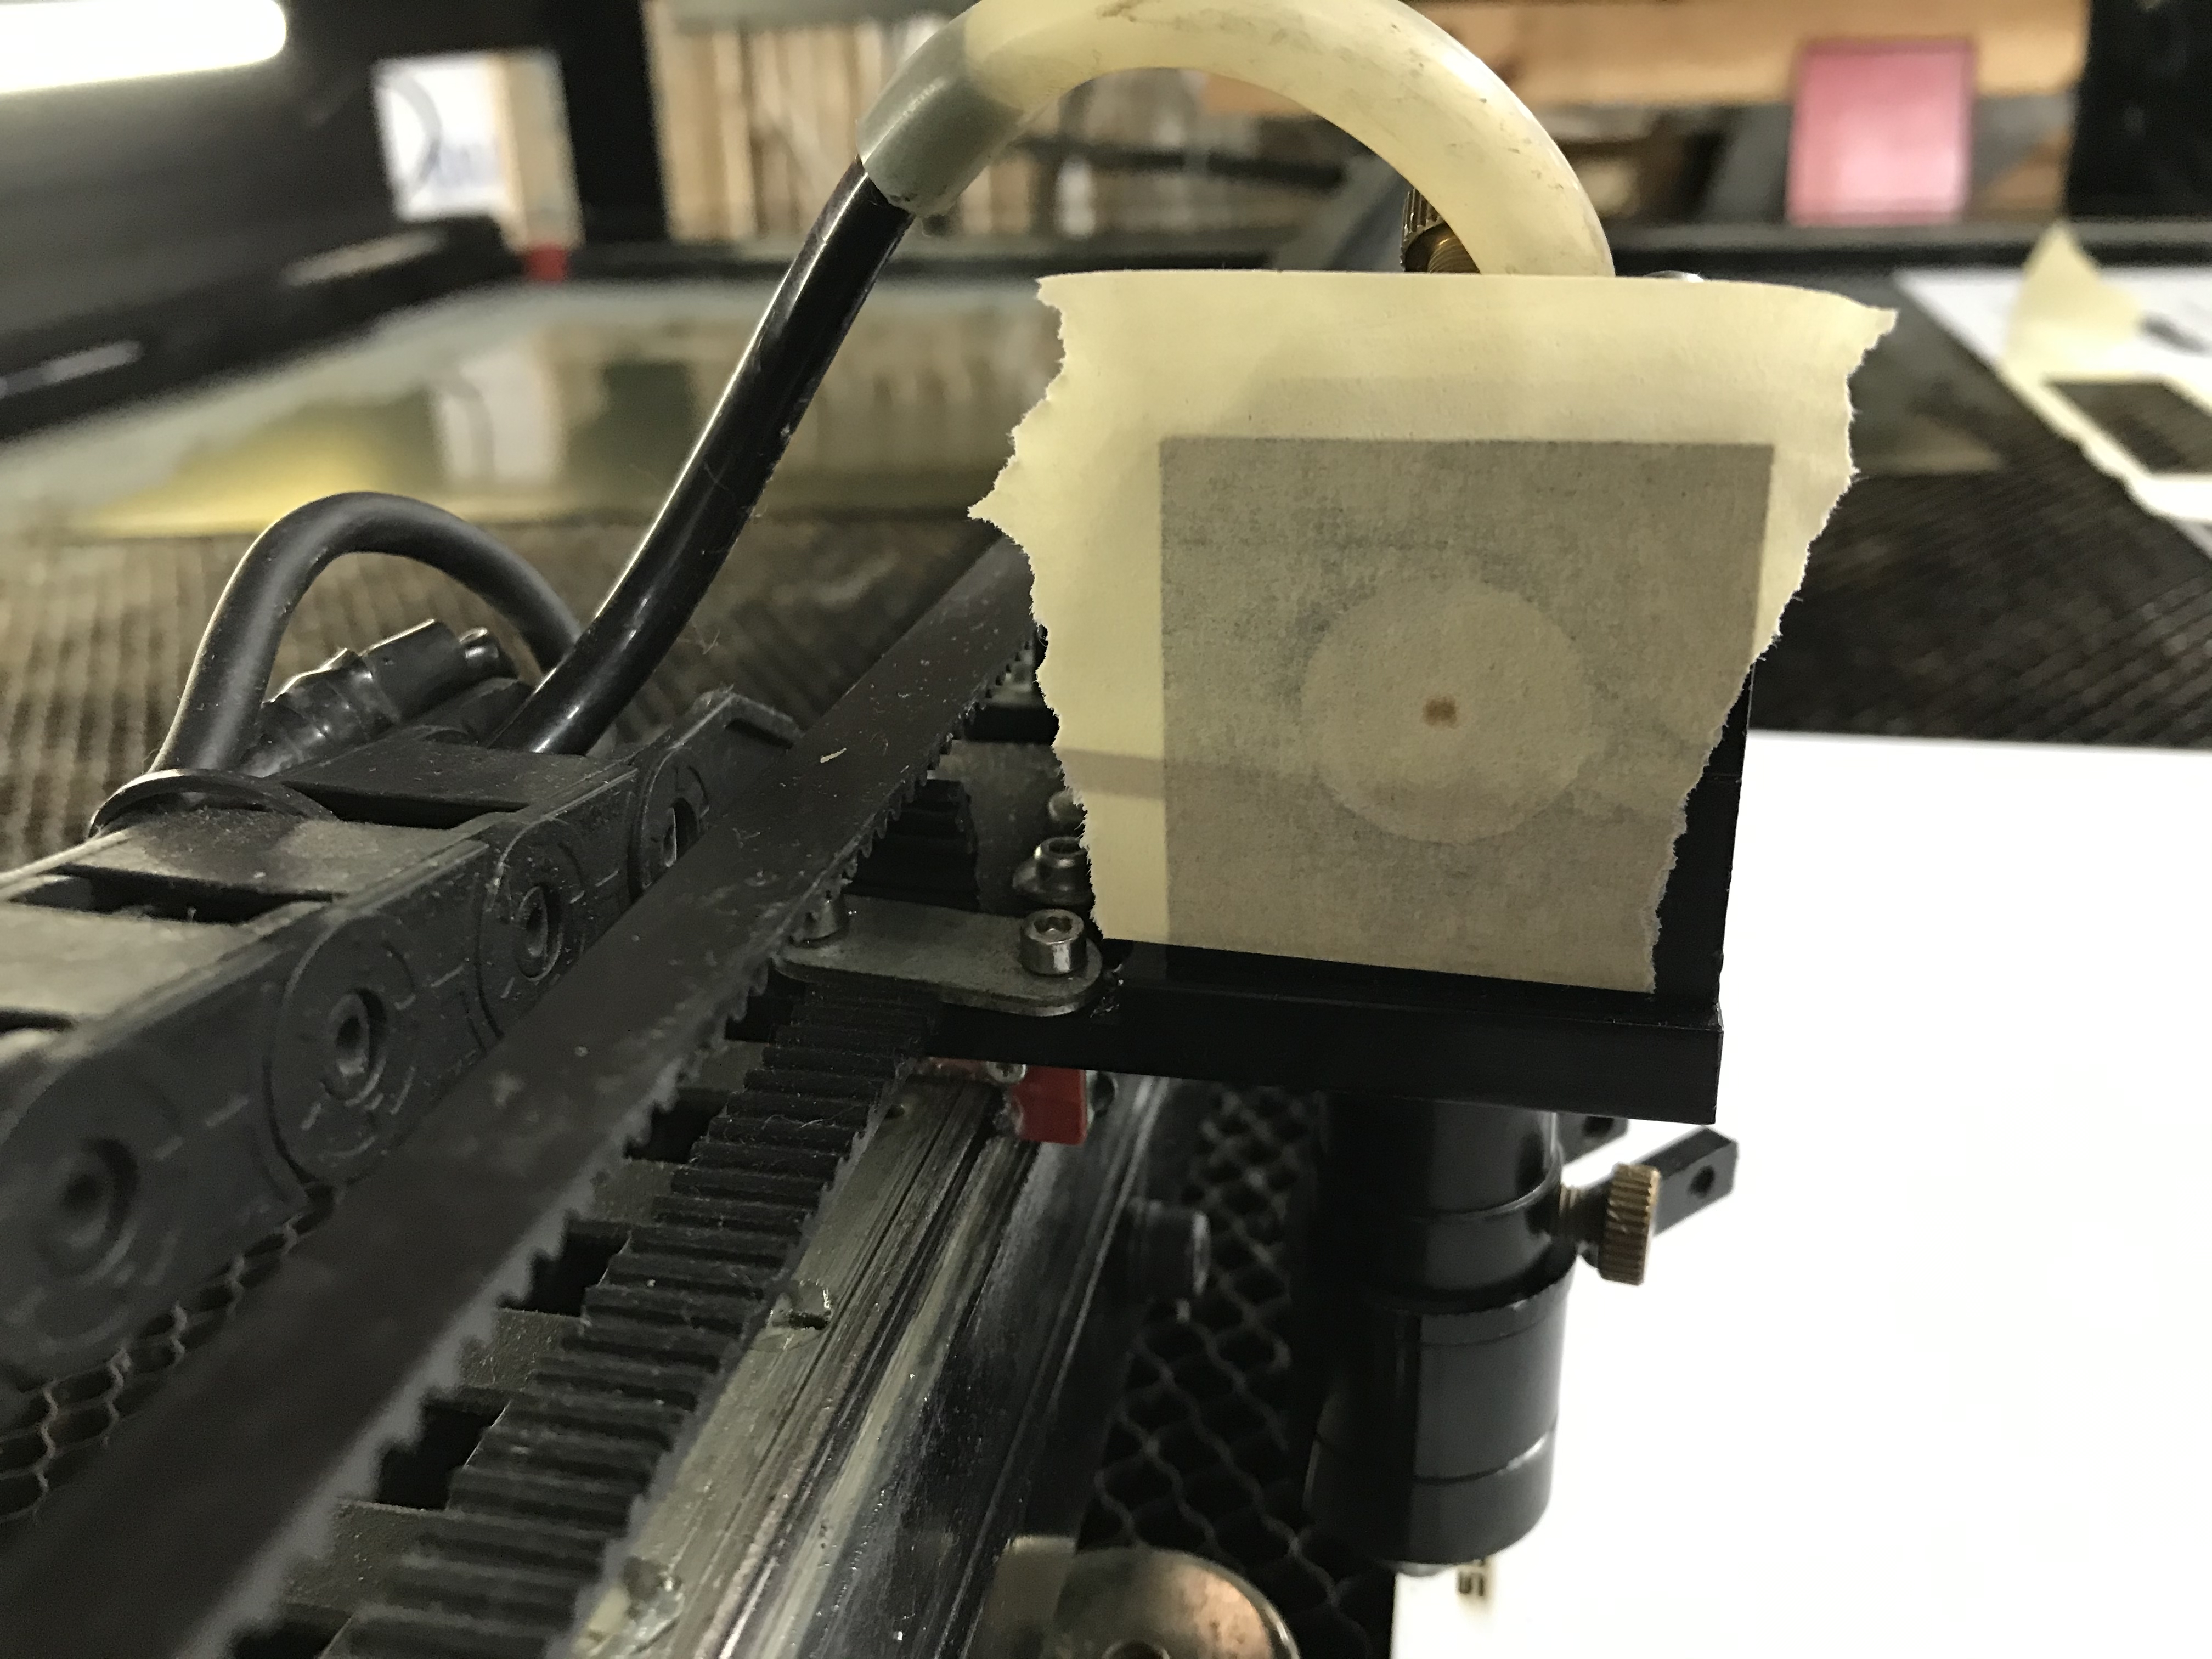
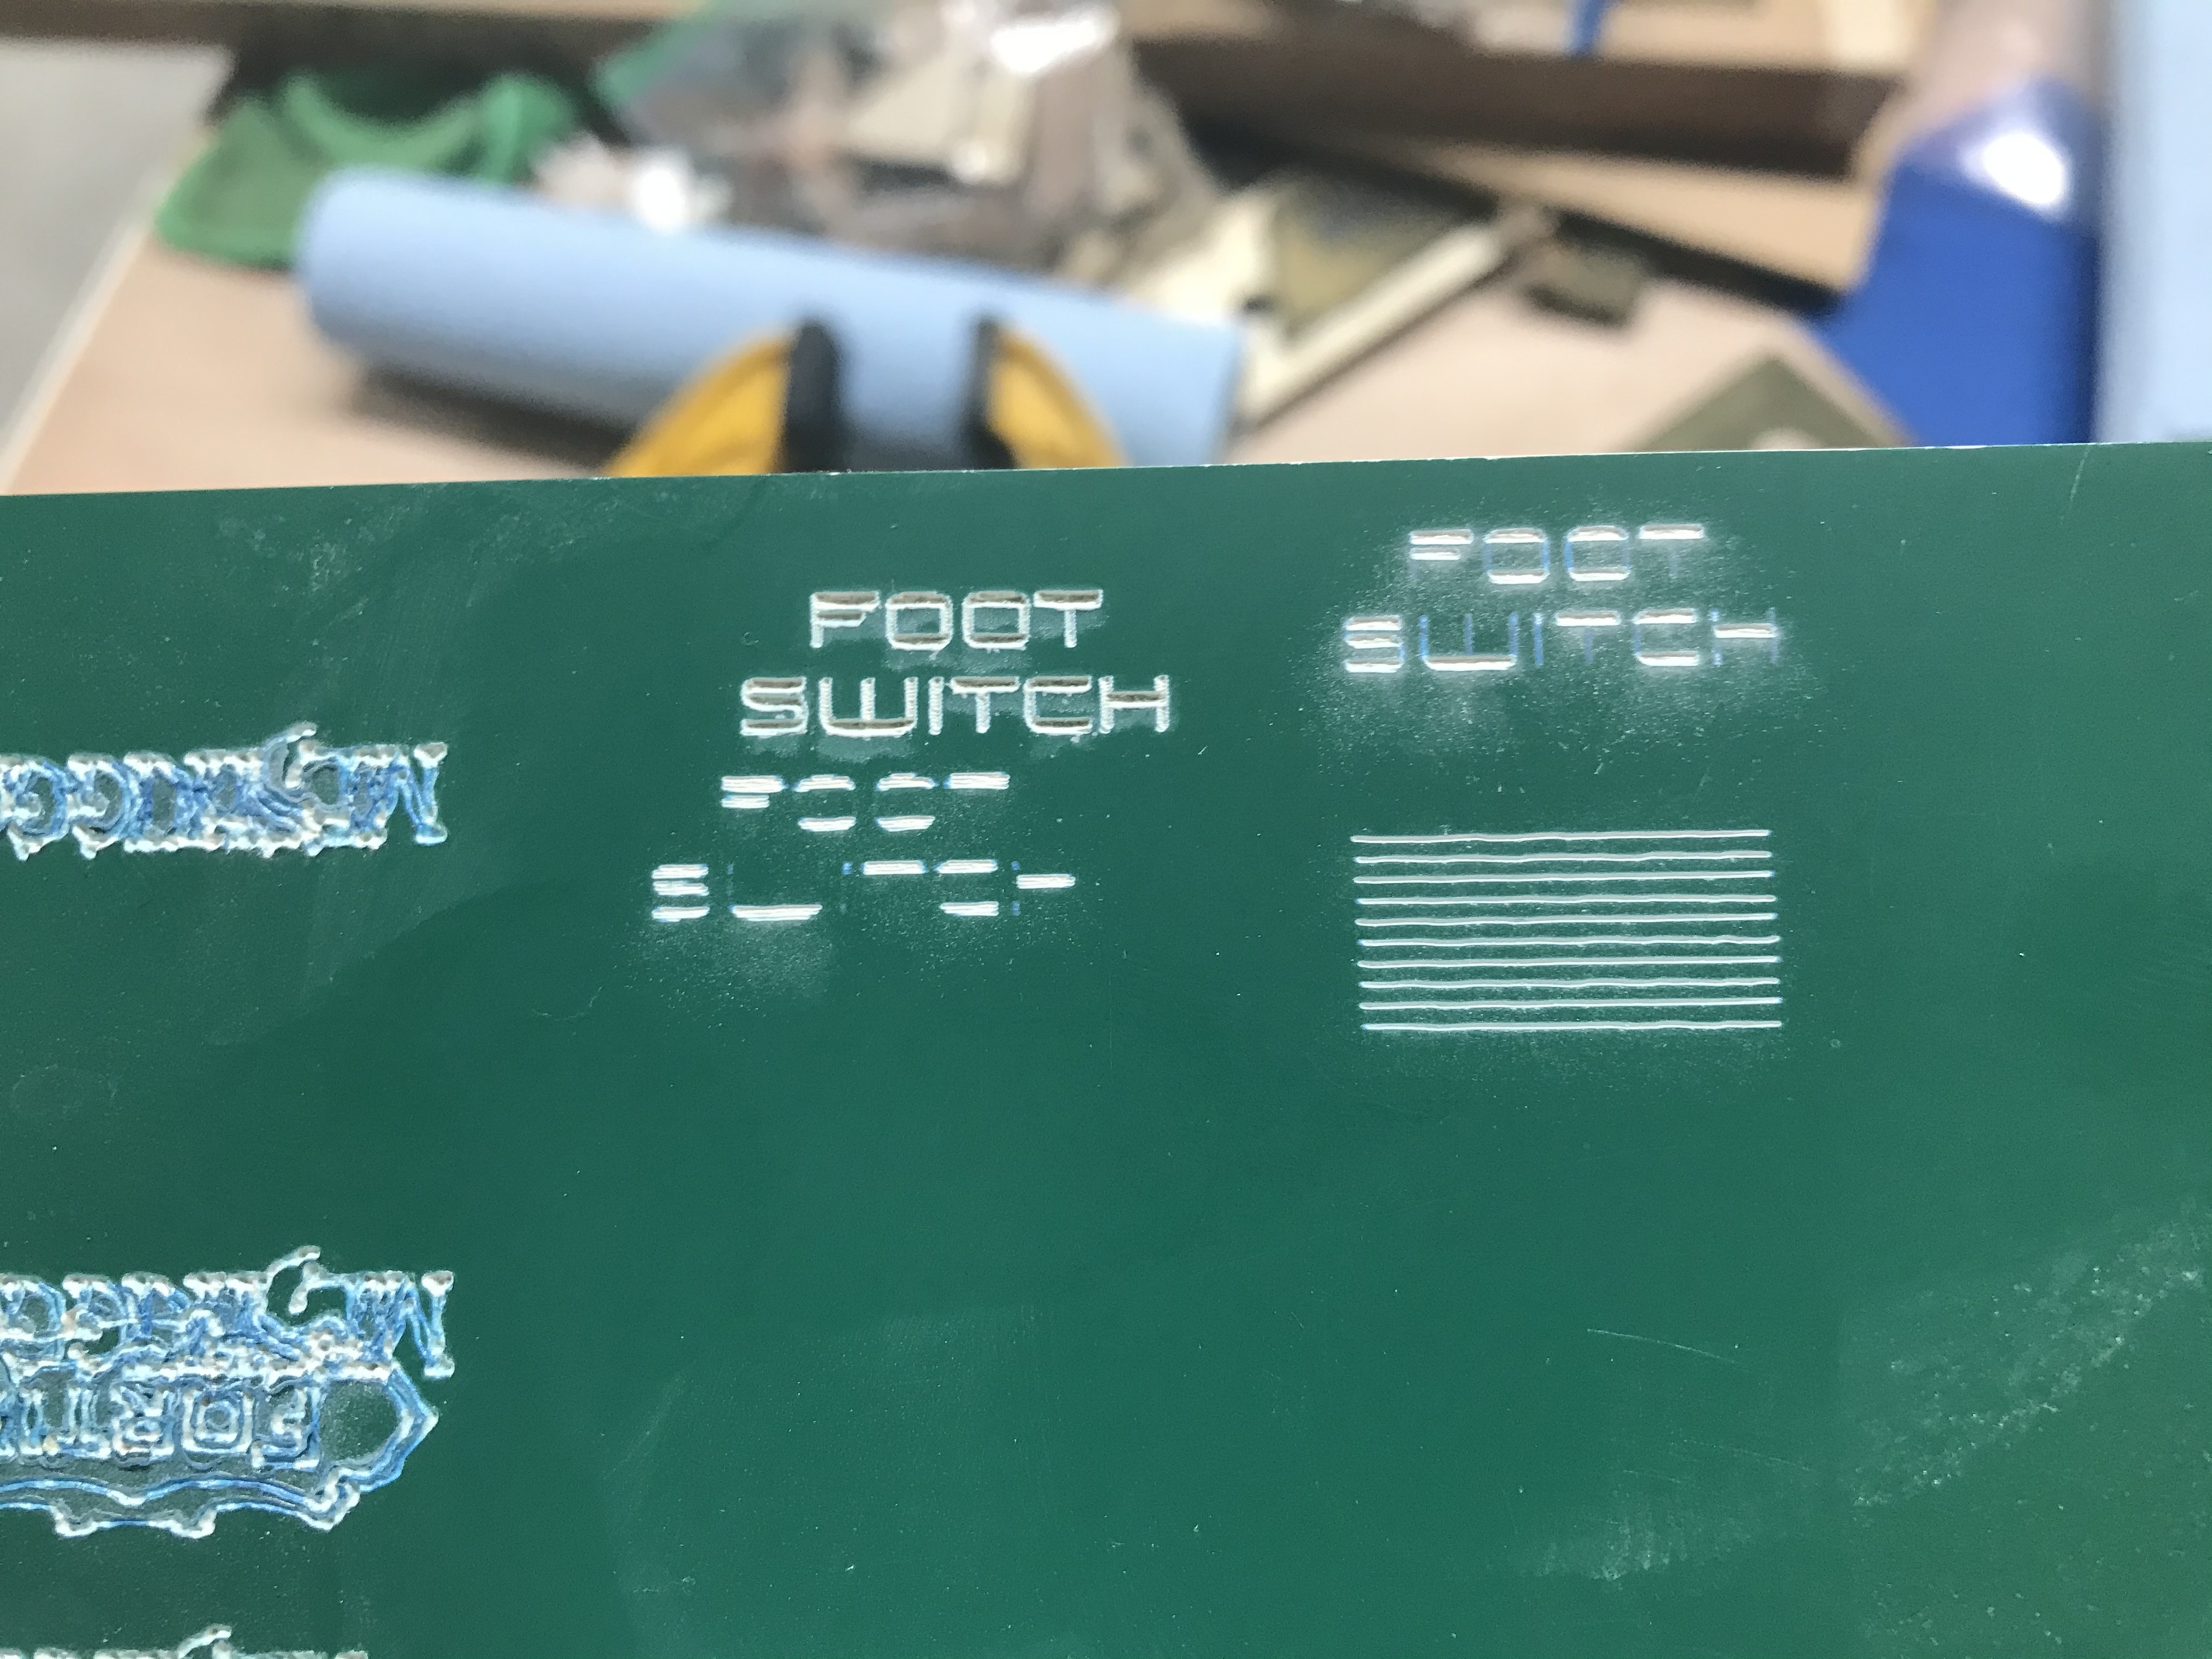
Cutting is OK, but not terrific. Take a look at this square fill test:
This was done at 400mm/S. Clearly still having wavy lines. But mostly consistent spacing between lines.
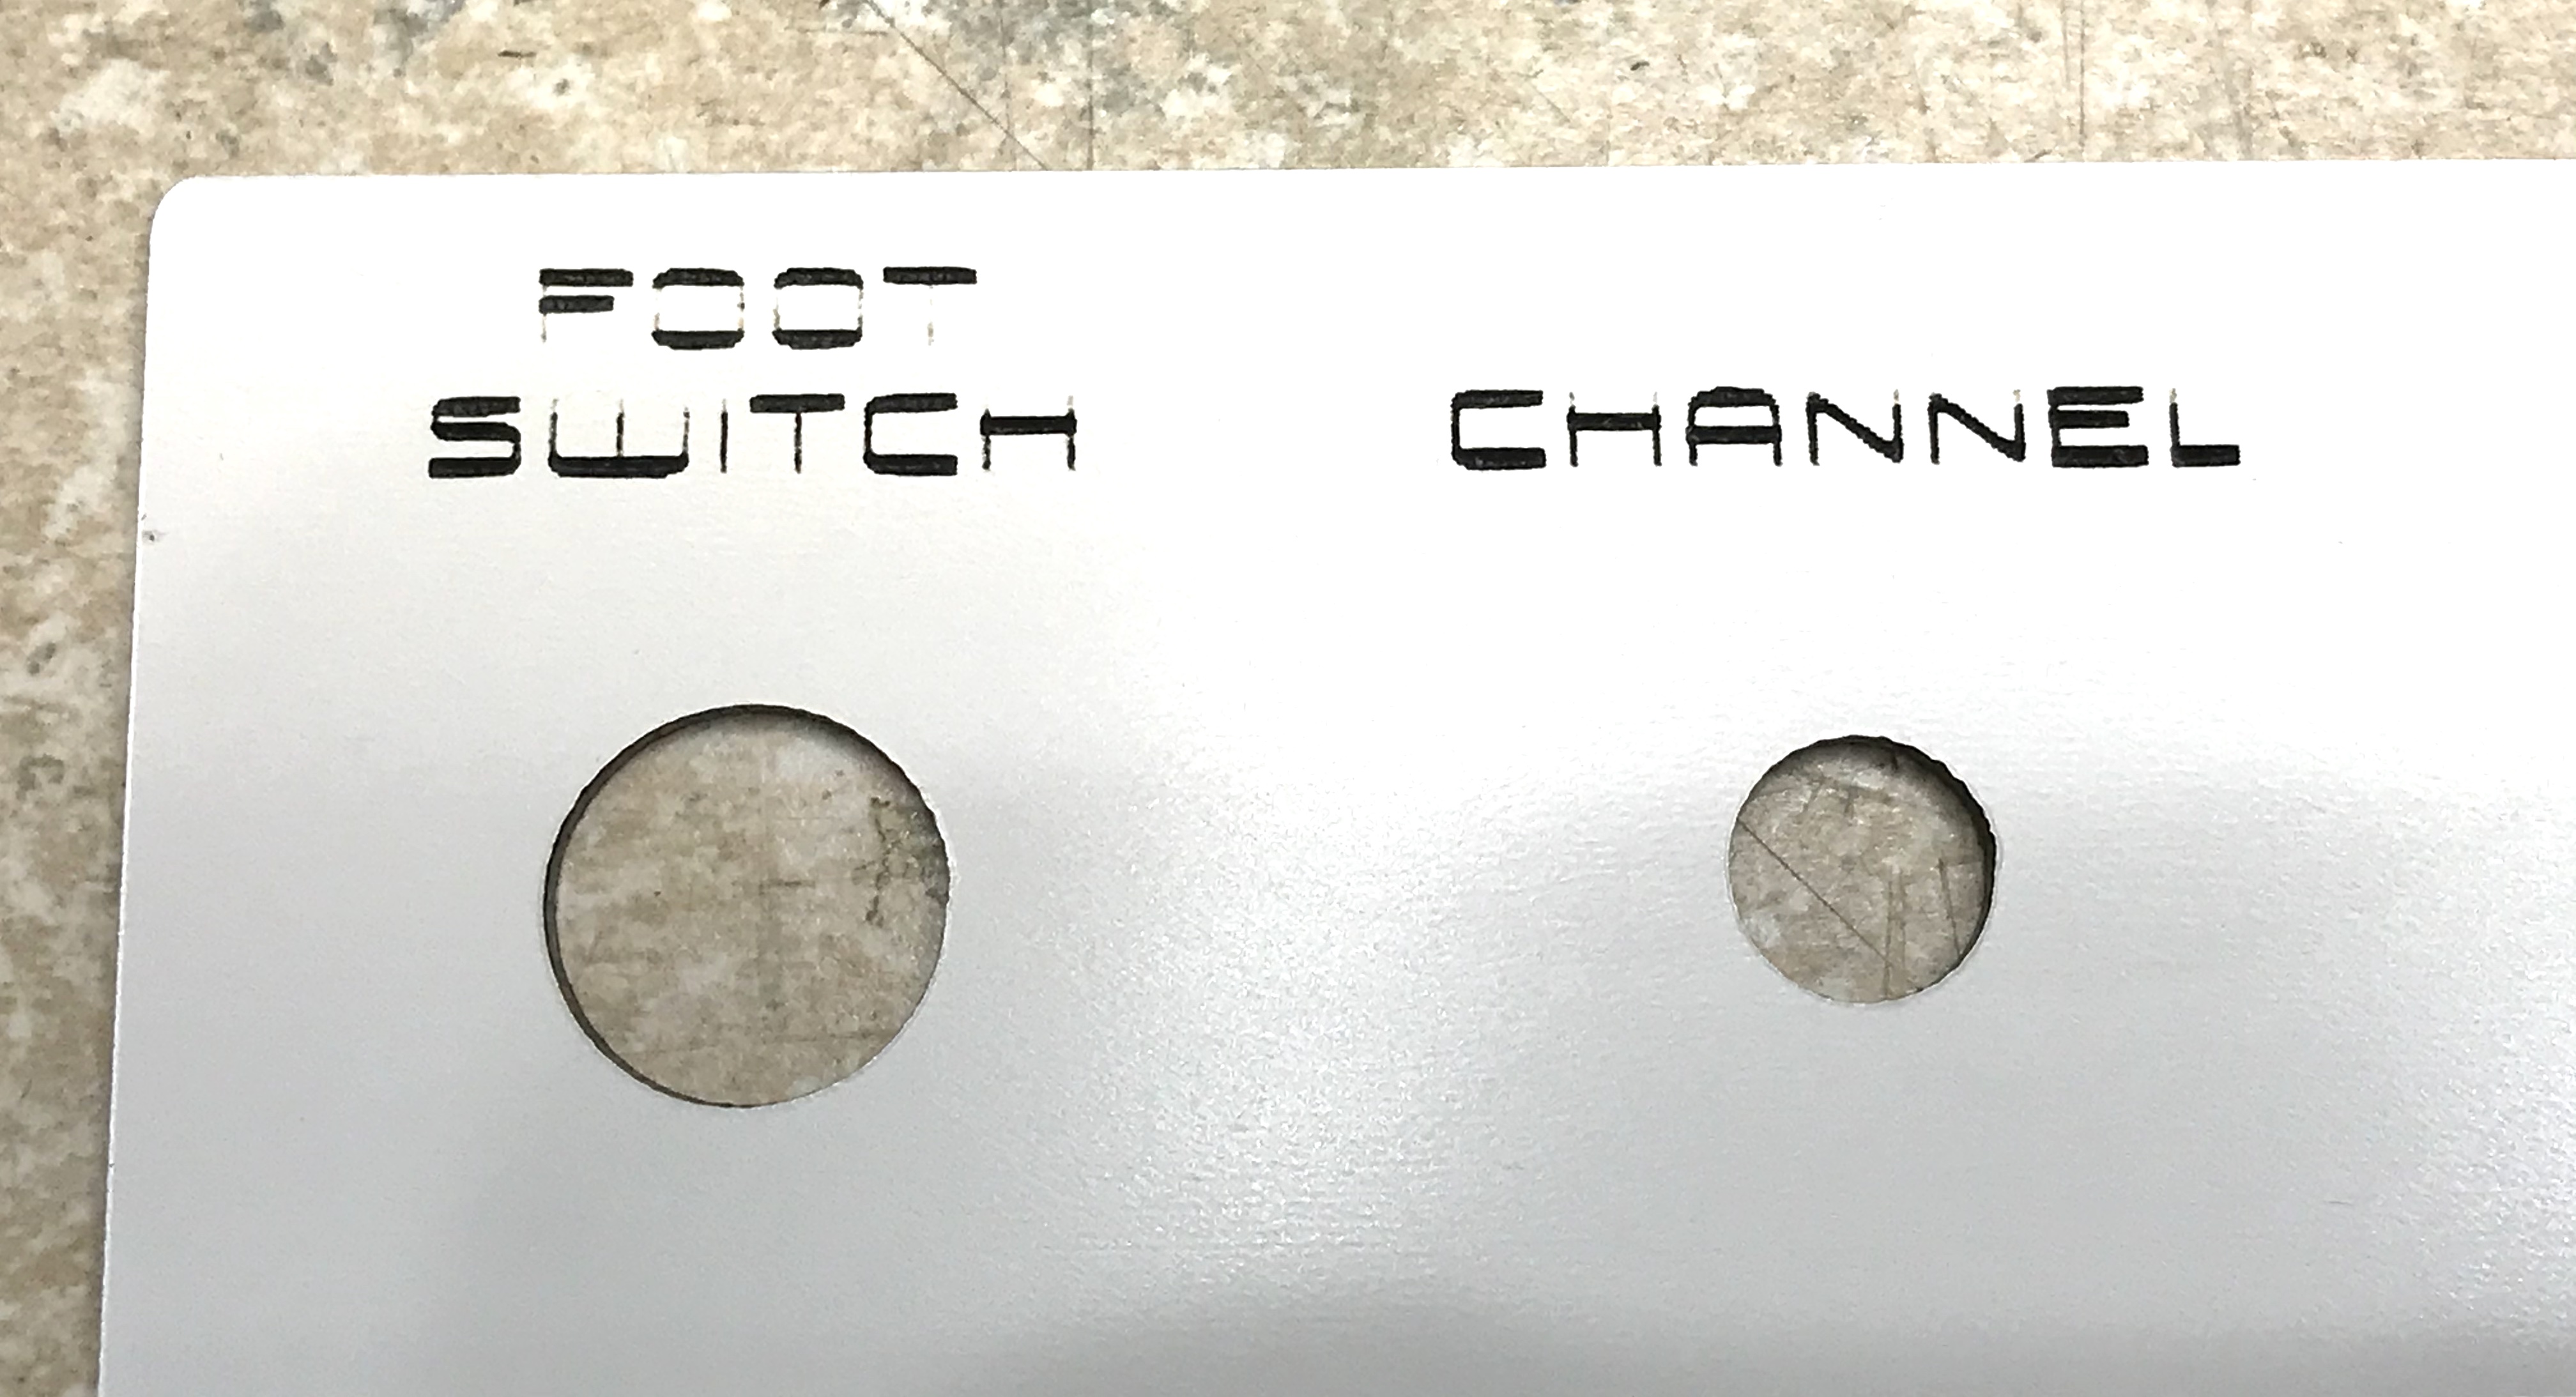
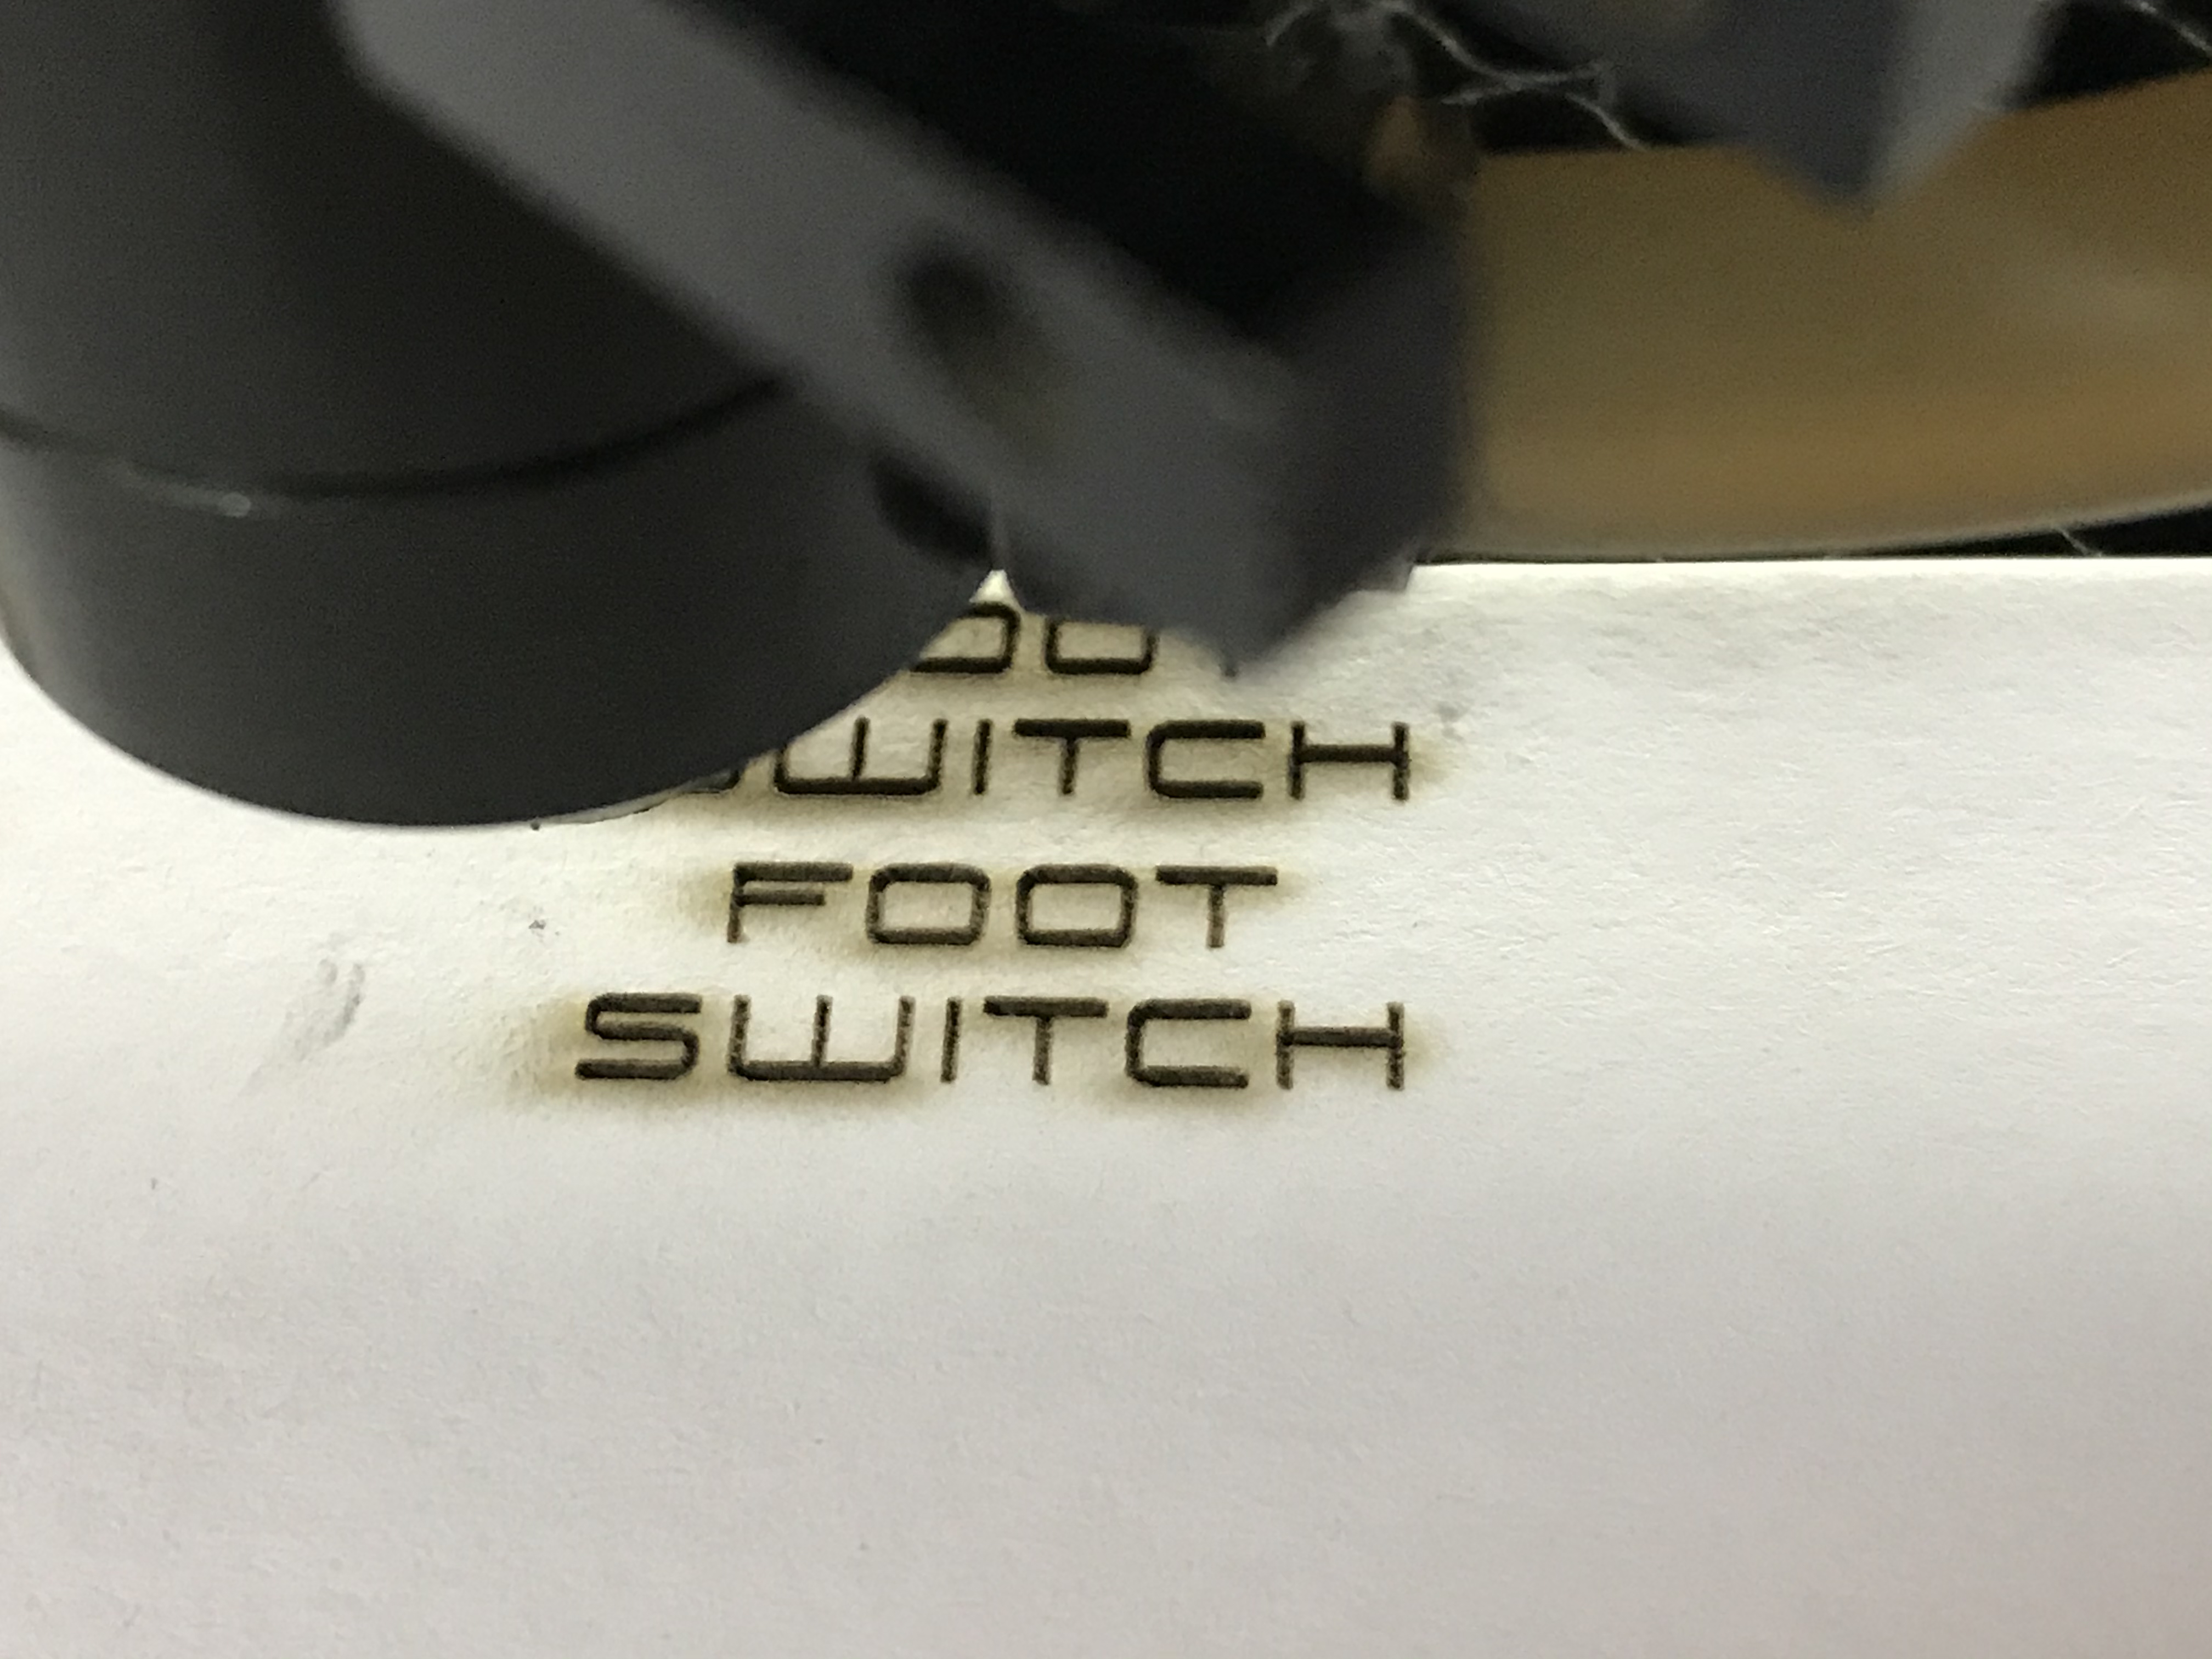
Also too clear, the issue engraving text. Notice three attempts at engraving “FOOT SWITCH”. Vertical sections are far thinner than horizontal sections and I’m out of suggestions how to fix this.
It’s something specific to engraving. Marco says it’s not to do with the tube and power supply, but I can’t help but observe this issue started after “upgrading” to the 80W RECI tube. Isn’t it possible that the 150W power supply triggers the 80W tube more slowly?
My old 130W tube lost CO2 and won’t fire, so I can’t re-install it to test this theory.
At this point, I am dead in the water. Unable to cut and engrave the control panels for the products I need to finish and ship. Frustrating how much money and time I have invested in this inferior machine.
George
Man, I thought X results were bad. Then I tried engraving a 20mm square with 1mm stepover and crosshatch selected. Yikes!
200mm/S 30% power. I think it’s time to give up on this machine. I would have to replace all the rails and steppers to fix the issues.
George
Despite my terrible mechanics on this machine, I’ve been reading up. I wonder if the Min and Max settings on my Ruida 6442S may be contributing to the difference between vertical and horizontal engraving?
Specifically, as noted in post #5.
george
If you’re engraving, you normally set Min / Max power to the same value, and that’s it. I’m not sure the controller pays any attention to the min power setting when engraving - it certainly doesn’t ramp power during engraving, as the overscan area is used to speed up the head to the proper velocity before firing, so ramping isn’t used.
I’ve had little time to dedicate to this heap lately. But, I did have a mechanical engineer friend stop in and take a look. He was pretty astonished at the construction. The Y axis stepper mount is secured with only two self-tapping screws! Into sheet metal! You can easily move the motor, the sheet metal flexes. Yikes.
Lots of movement in the first mirror mount also. Like the stepper mount, this is simply screwed into the sheet metal with self tappers.
I have some nice parts, maybe I’ll look at a frame kit.
George
Sounds wonderful. So you’re keeping the machine and going to tinker/ rebuild?
Yeah, I wouldn’t sell it to anyone with these issues. Might as well keep it and use the parts that are good. My Fiance likes to cut wood and acrylic for crafts with it.
george
Just to punctuate the closing of this chapter, I bought a K40 on Amazon and within an hour of arrival had it engraving better than my 1490 ever did. Oh the time and money lost.
George
Now all you need to do is get a COhesion3D laserboard installed in that K40 and you can use LightBurn with it. 
Absolutely! And adjustable bed, air assist…
It never ends. LOL
George
This topic was automatically closed 30 days after the last reply. New replies are no longer allowed.