Overall, I’m happy with the OMT laser. Given the price, I got better than I really expected. And Lightburn has been a Godsend! Especially the SVG editing capabilities - I’m definately not a graphic artist and while comfortable with Photoshop, I found Illustrator, Inkscape, etc. to be very challenging.
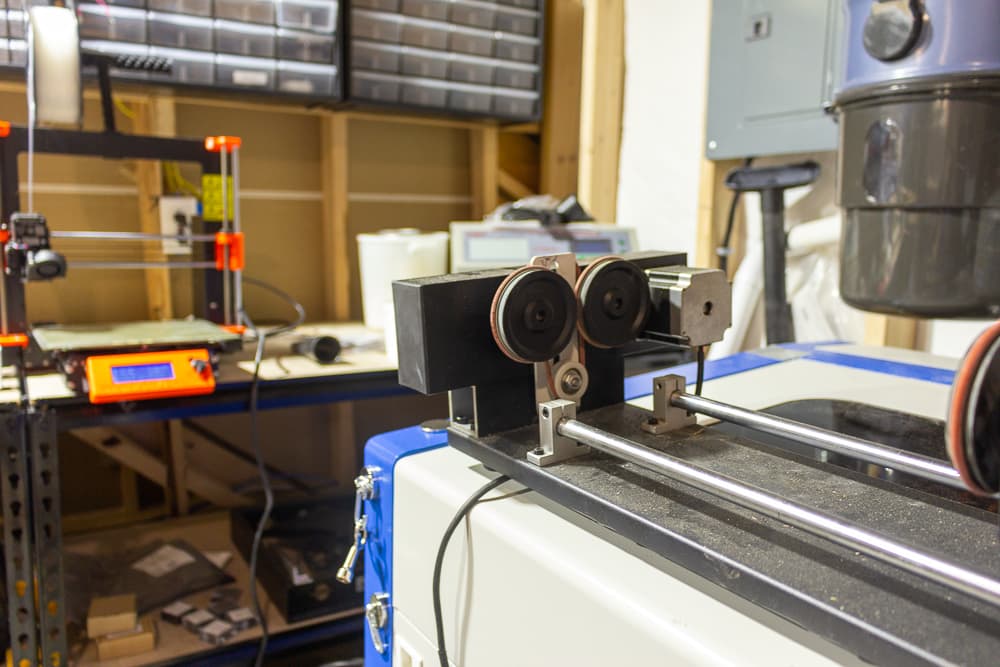
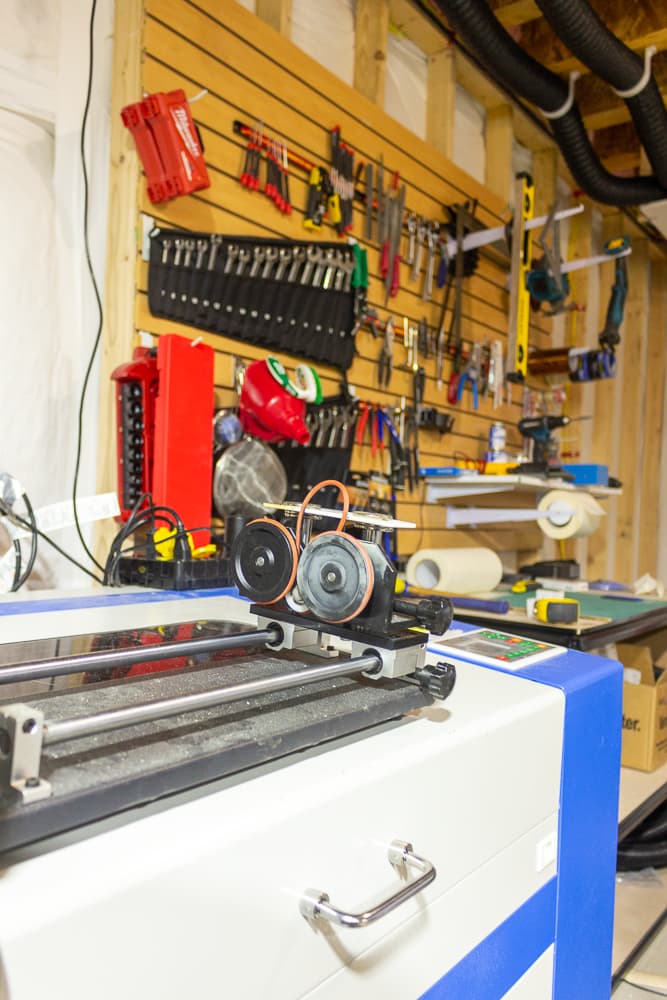
Today I finally got around to looking at backlash, which was only out 0.1mm. However, that testing highlighted something I’ve suspected for awhile - that the bearings on the Y-axis stepper are trash. There is not only a loud rumble when moving in the Y-axis, but when moved by hand I feel definite bumps. X-axis is smooth.
Thoughts, suggestions welcome!
I note that getting to that part of the machine is going to require pulling the entire traveller. There are only 4 bolts holding everything in place, and of course,wiring to motors and sensors.
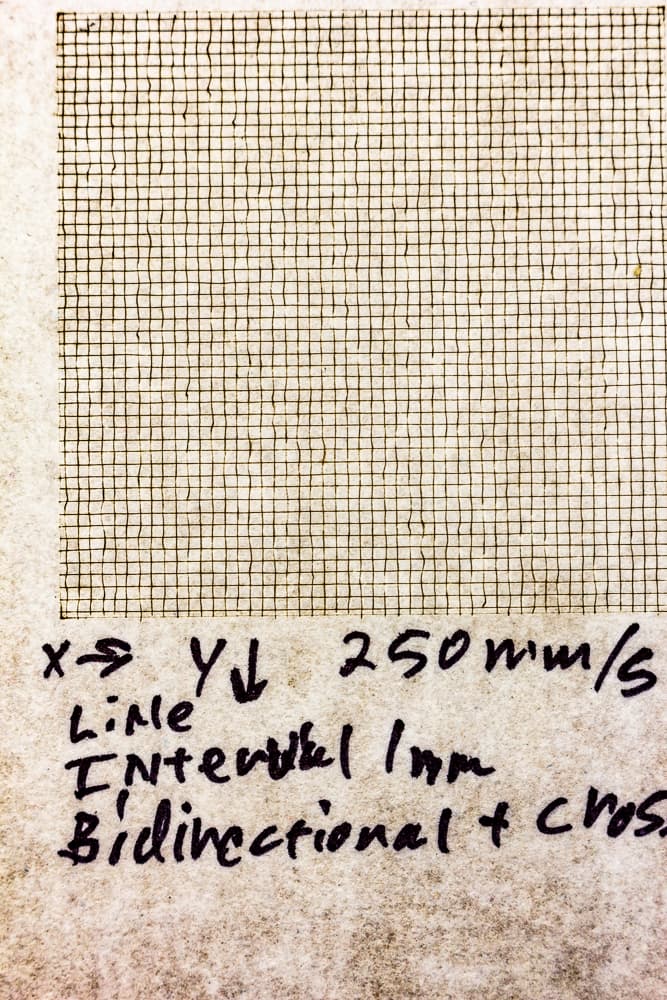
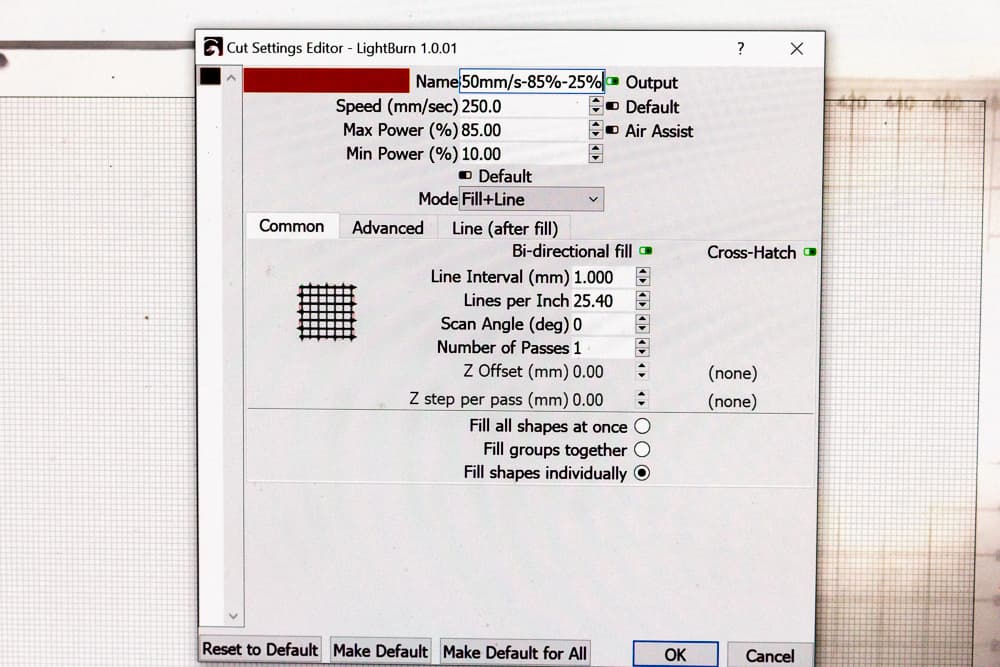
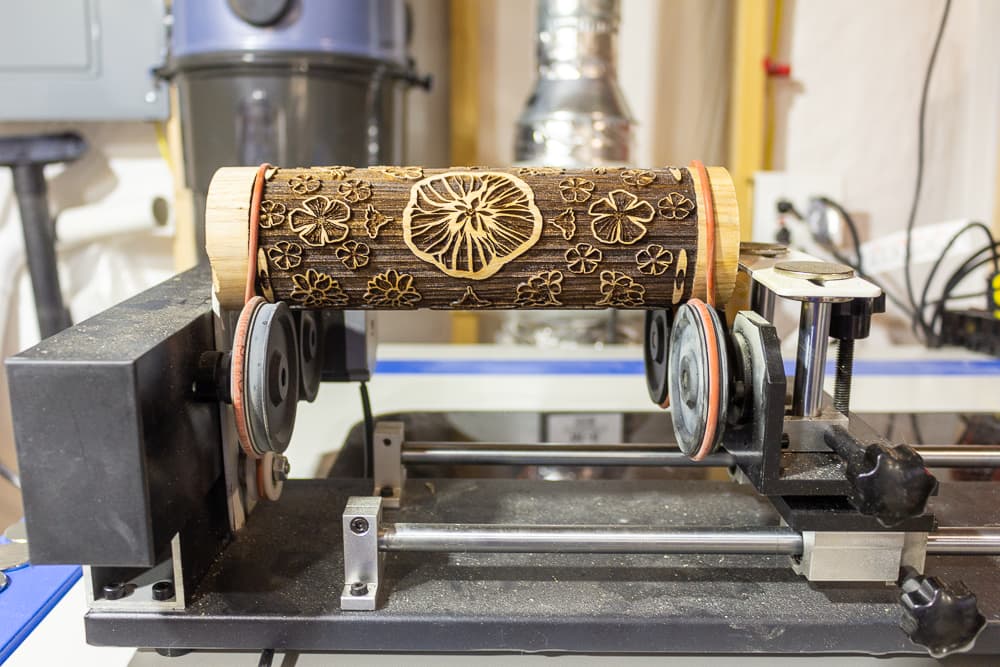
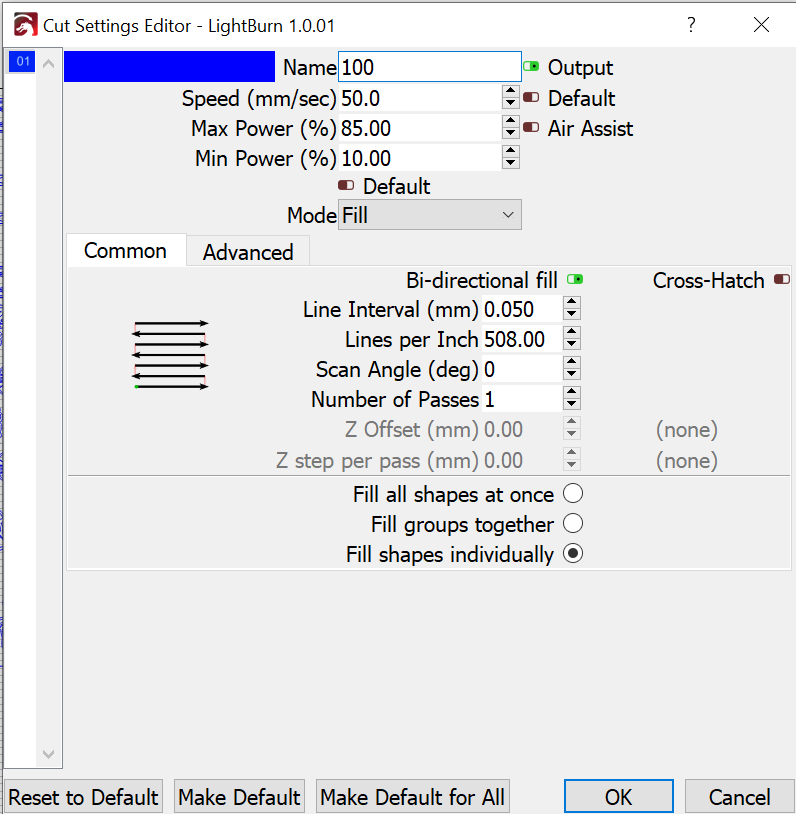
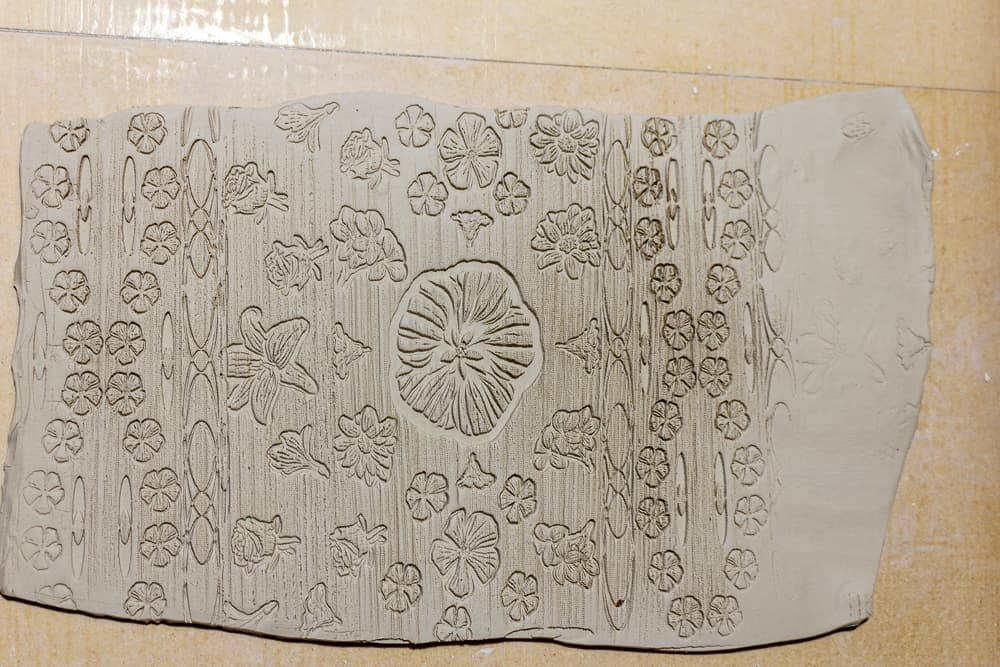
The file is just fill; no line. The ridging is due to the differing density in the growth rings. My current solution, since this pattern is used to emboss wet clay, is to get the “background” engraved deeply enough so it doesn’t get replicated in the clay. What seems to work best is to slightly defocus a couple of mm (using a cpd lens designed by Russ @ SabarMultimedia), run with a high line count to help “smooth” the surface and not too fast. Due to alignment issues, two passes don’t work. Also, when in rotary, there is massive Y drift if I enable crosshatching, which I’ve not been able to solve. The scanning offset seems to apply in both X and Y, so trying to fix there has not been successful (seems I have trashed any “good” example of the drift, or I’d add a photo).
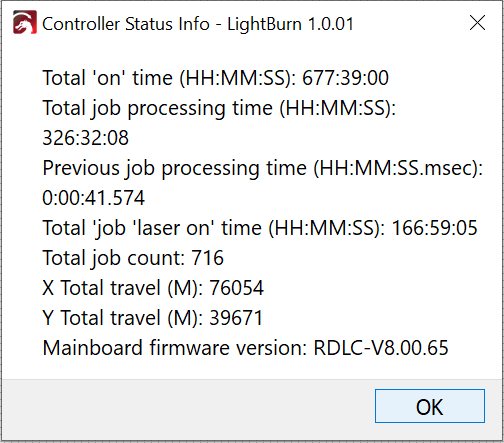
So, based on the controller status, total Laser ON time is 167 hrs after some 8 months of experimenting.
Just going by your post of the layer, where it says “Fill+Line”…
How deep is it embossed in clay?
Neat application, do you ‘ramp’ the walls for strength?
Do you mind posting some of your work, I’d like to see where it goes…
Being that the dowels are maple, no need. And when I make silicone castings I use a 70A material and I make the designs bold enough not to need ramps. Still experimenting with rubber stamp material.
Happy to do so. I hope to do a final firing in a week or so.
Thanks for asking!