I figured out the control issue…turned out to be a user issue  I mounted my camera using a combo of methods that were listed I basicaly made a clamshell of two pieces of acrylic and engraved deep enough to hold the card in place. It also had an additional inlay for the square portion of the camera. I was able to break the glue free with just a tad more force than I was comfortable using. I have not hooked up my laptop yet as I am at work. (my machine resides at my place of business) I will report back if all is functional.
This is why I say to hold the base, where the lens threads into, while trying to focus.
FYI, remember to do this before you mount the camera to the case so that you don’t have to disassemble ![]() Been there, done that. FWIW, I used a pair of needle nose pliers to grasp the square base of the lens and this appears to have worked without damage.
Been there, done that. FWIW, I used a pair of needle nose pliers to grasp the square base of the lens and this appears to have worked without damage.
That big glob of glue that still remains on the threads is unfortunate. Haven’t got things fully mounted yet, so I don’t know whether I will need to change focus. If it needs to be focused by screwing out, I should be OK. If I need to screw the lens inward, the glob of glue could make that hard to accomplish.
1 Like
No one was around so I sneaked back and tested. All is good and a quarter turn made all the difference in the world. Also my light bar in my laser seems to wash out the image. It looks better with the light off fyi
The top image is yesterday the bottome image is today. I did discover that now my alignment seems off buy about 1/4 inch. I assume focus affected it. So should I recalibrate then realign or just realign.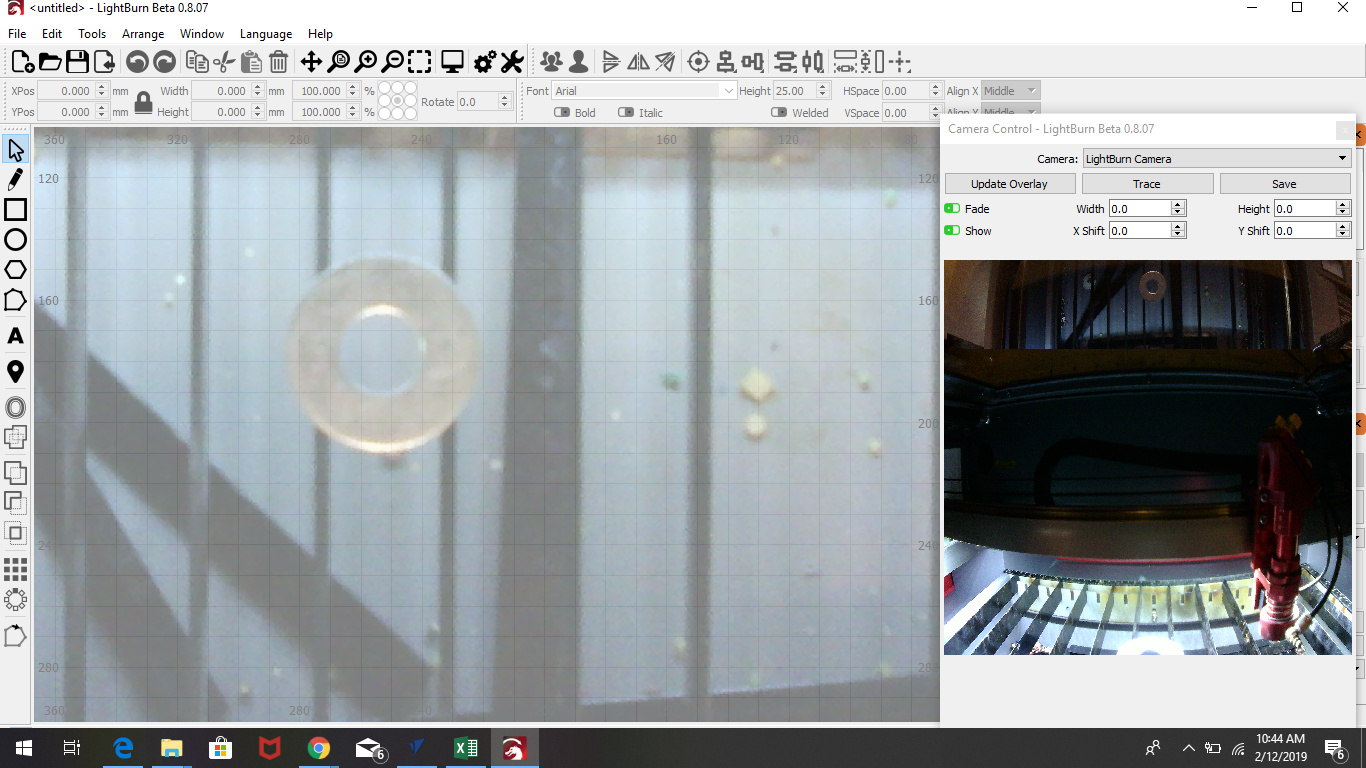

Thanks
1 Like
The amount you have to turn the lens for big changes is miniscule, you should be ok
I had to turn my light off too. Rather sensitive sensors. Now I think I need to adjust my focus and re-calibrate… damn it.
Yep I just did a realign not a calibrate and I am less than a millimeter off
Cut the inside of a fender washer using the camera control and it was perfect.


1 Like
Seeing all this camera activity is making me jealous 
When will the new order from China be showing up?
We expect new shipment sometime after Valentine’s day due to Chinese New Year, so soon.
I just did few things using mine…Camera control is Awseome!!
I don’t think I am even a quarter mm off…This opens new doors and since I basically got laid off. (I no longer get a salary just commission…that ain’t gonna work for long) I need to make this machine make me money…this should help
The glue on the threads will just peel off as you twist the threads, and honestly that little remaining grip might help keep the lens in focus if it’s changed.
That looks great, David - happy to hear it’s all working properly for you.
This is probably the best tip of all when it comes to buying a new camera. I can’t stress people how important this is to do.
I just ordered the Boss Laser 1420
What degree lens did you get? I did not see a recommendation and the laser won’t be here for a while to measure.
I also have the Boss 1420 and I ordered the 60 degree camera. I plan to mount it on the front face of the lid, using the handle mounting bolts. When the lid is open the front cover is about 26" (660 mm) above the bed. With the bed being 14" (355 mm) x 20" (508 mm)
Using the formula provided by LightBurn of Longest Dim/.825 (for 60 deg lens) = min distance above bed.
So largest dim is 508 mm
508/.825 = 616 mm = 24 inches
So based on this as long as the 60 deg lens is at least 24 inches above the bed it should be able to see all of the bed with very minimal distortion.
Since with the lid open the lens will be about 25 to 26 inches above the bed (depending on mounting), the 60 deg should work great. But I have not received the camera yet so I am hoping the math is correct.
1 Like
Any updates? I got a 1420 coming as well and would love to hear some feedback.
Yes, I did install the camera and it is really working well.
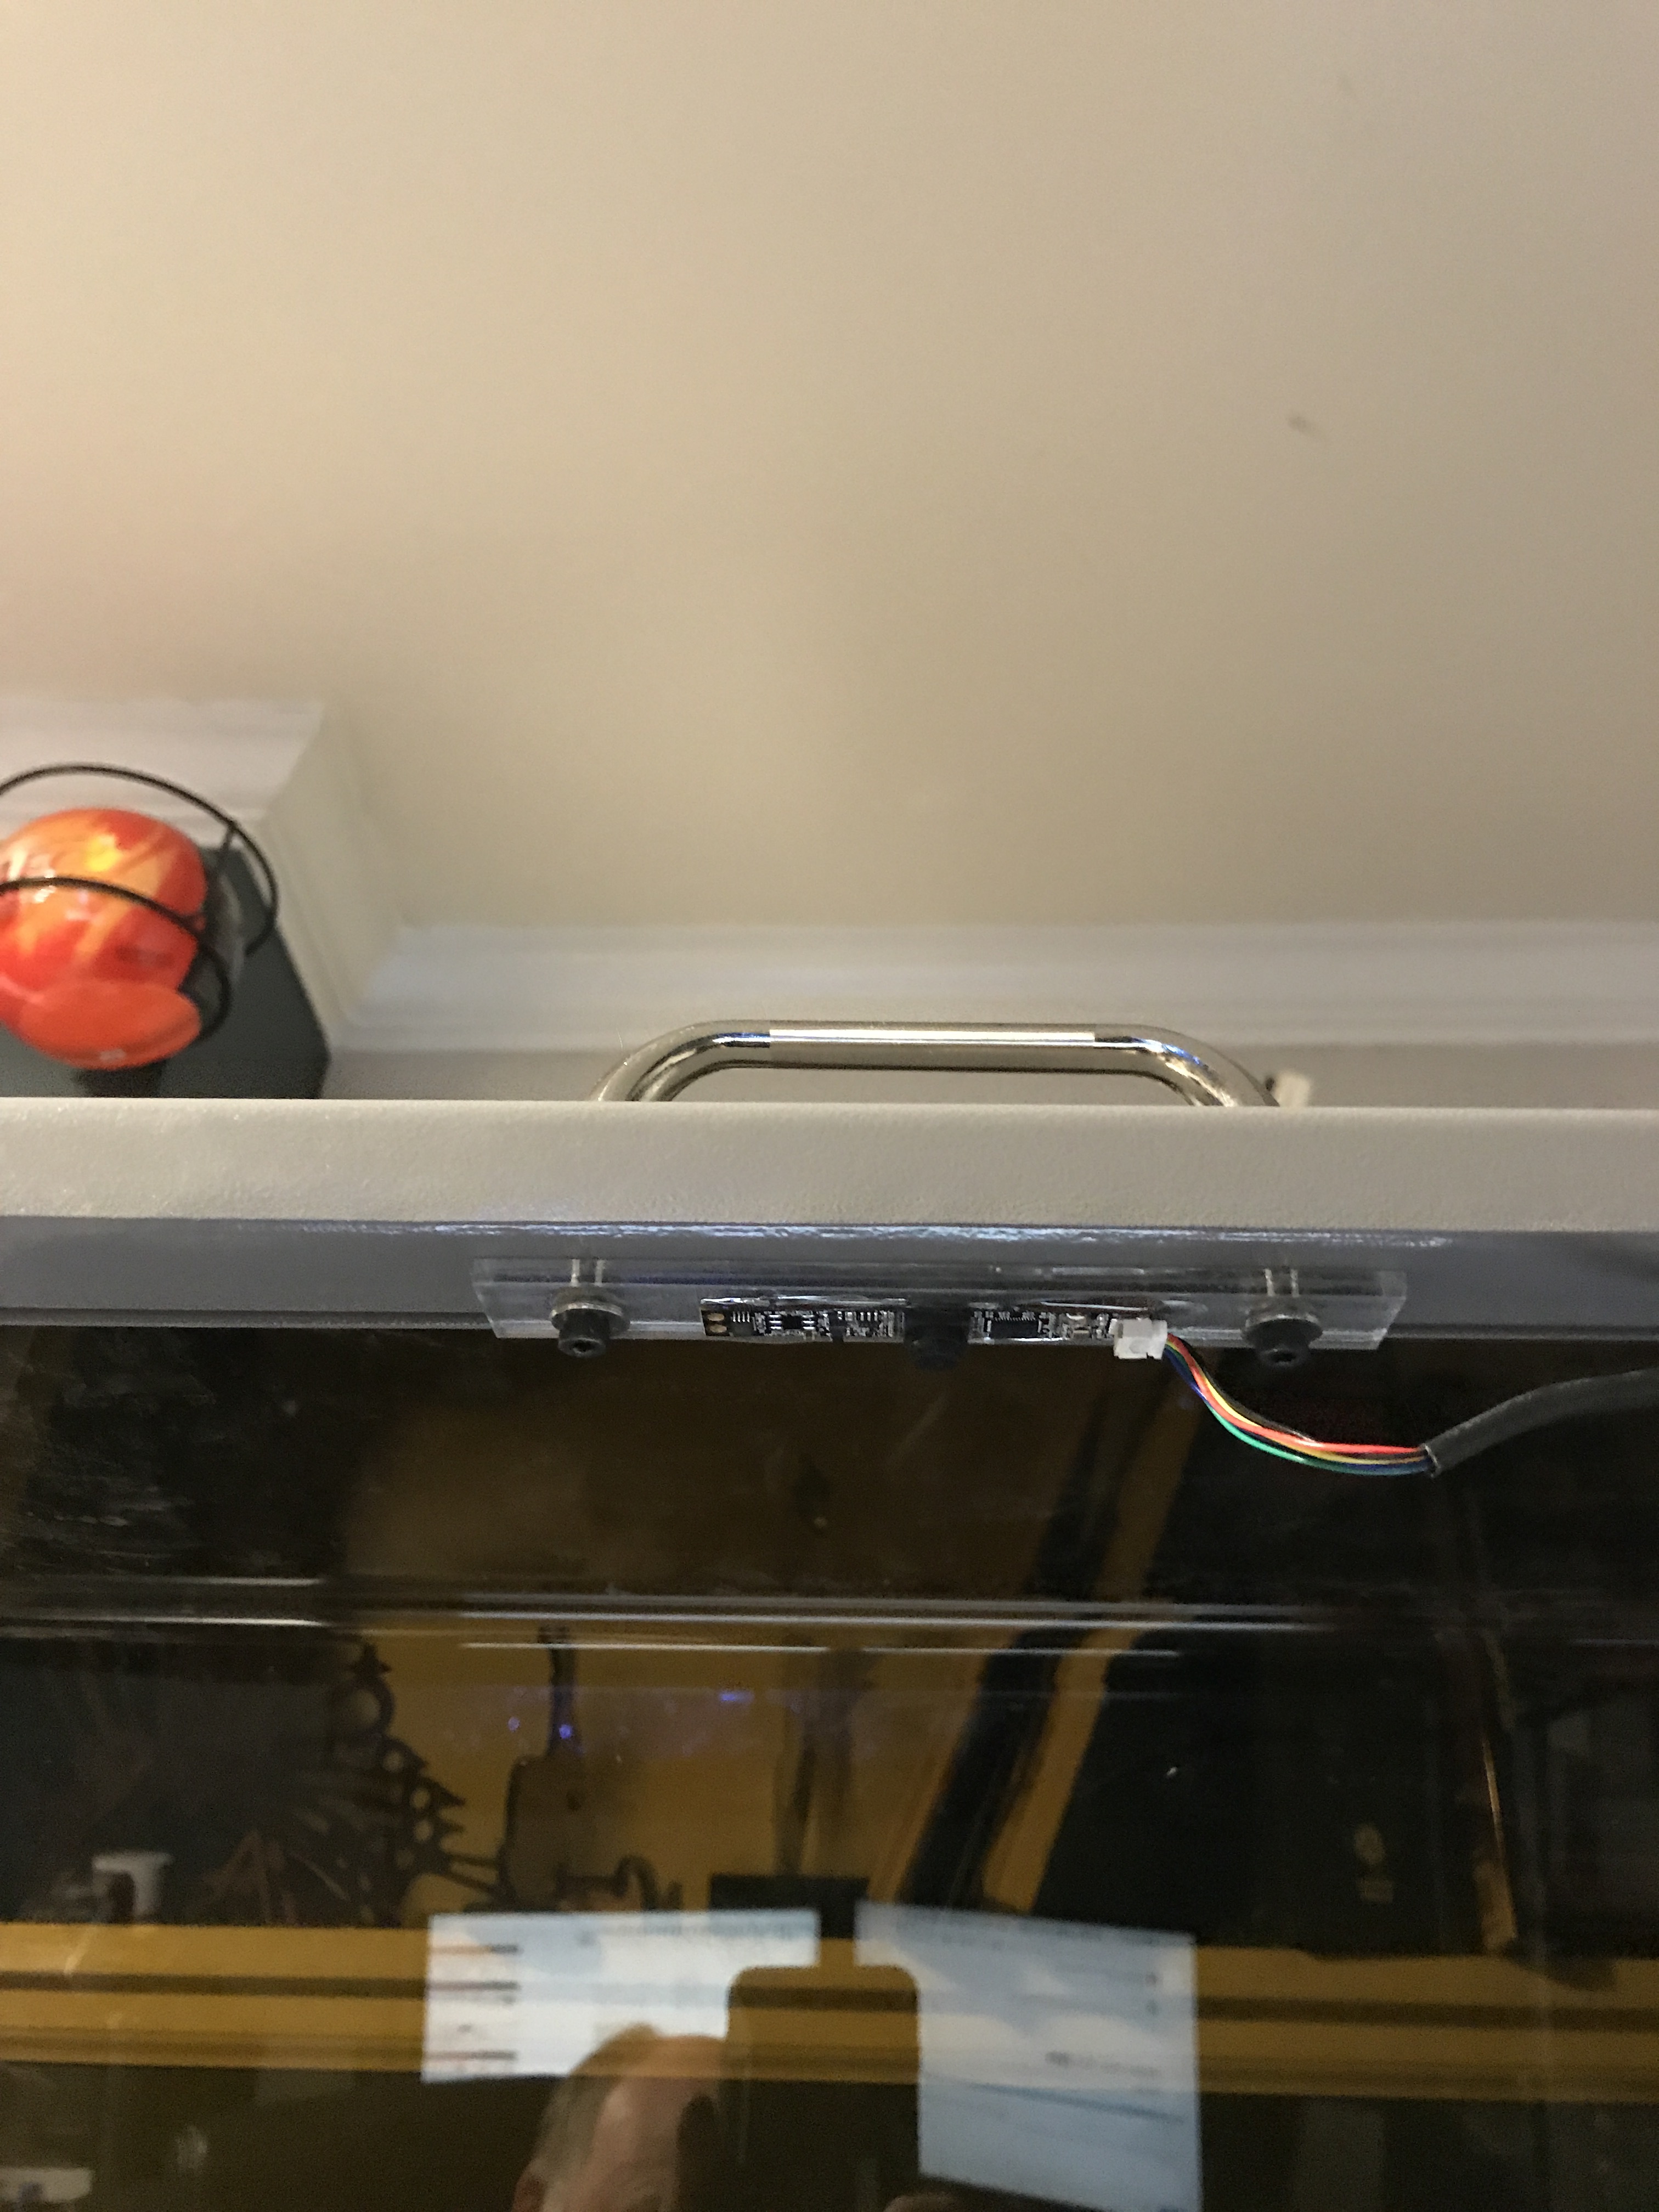
I mounted the 60 deg camera I purchased from LightBurn very simply, just cutting a rectangular (5 inch wide and 4 inch high) 4mm piece of acrylic with two holes (1.55 inch diameter) 3.86 inches apart so I could use the lid handle bolts to attach the camera to the lid.
I just used some UV epoxy to attach the camera module to the acrylic on the far end so the camera was over the center of the bed.
With the 4 mm acrylic the existing handle bolts were not long enough so I needed to purchase two M4-07 x 30 mm socket heads from Home Depot (about $1). These new bolts were then about .05 inches to long to snug into the handle so I added a thin washer between the acrylic and the case. The handle was able to attach nicely after that.
The camera gives me a very good view of the work area and the software makes it super easy to align work now.
1 Like
Can you send a picture of location that you have the camera mounted please?
Where the handle is on the front of the cover, there are two bolts. That is where the acrylic is mounted
Thank you for the picture, I did also installed my camera in the same place but I’m not getting near the quality that I think I should. That may be due to the size of my bed which is 55x36. I can only focus the camera under very small area on the center of the bed.