In stalled light burn camera from cohesion3d. when doing the calibration it will go beyond step 2, repeats same location of right side. Getting acceptable reading with first two steps, but does not show me moving to left side as I have watched in videos. No honey comb installed just solid back ground.
How do you mean? Is it saying “Good! Press next” and not letting you press the Next button?
It allows hitting the next button, and but keeps repeating step 2.
So you’re saying the position of the pattern in the example view doesn’t change? And the image number doesn’t change either?
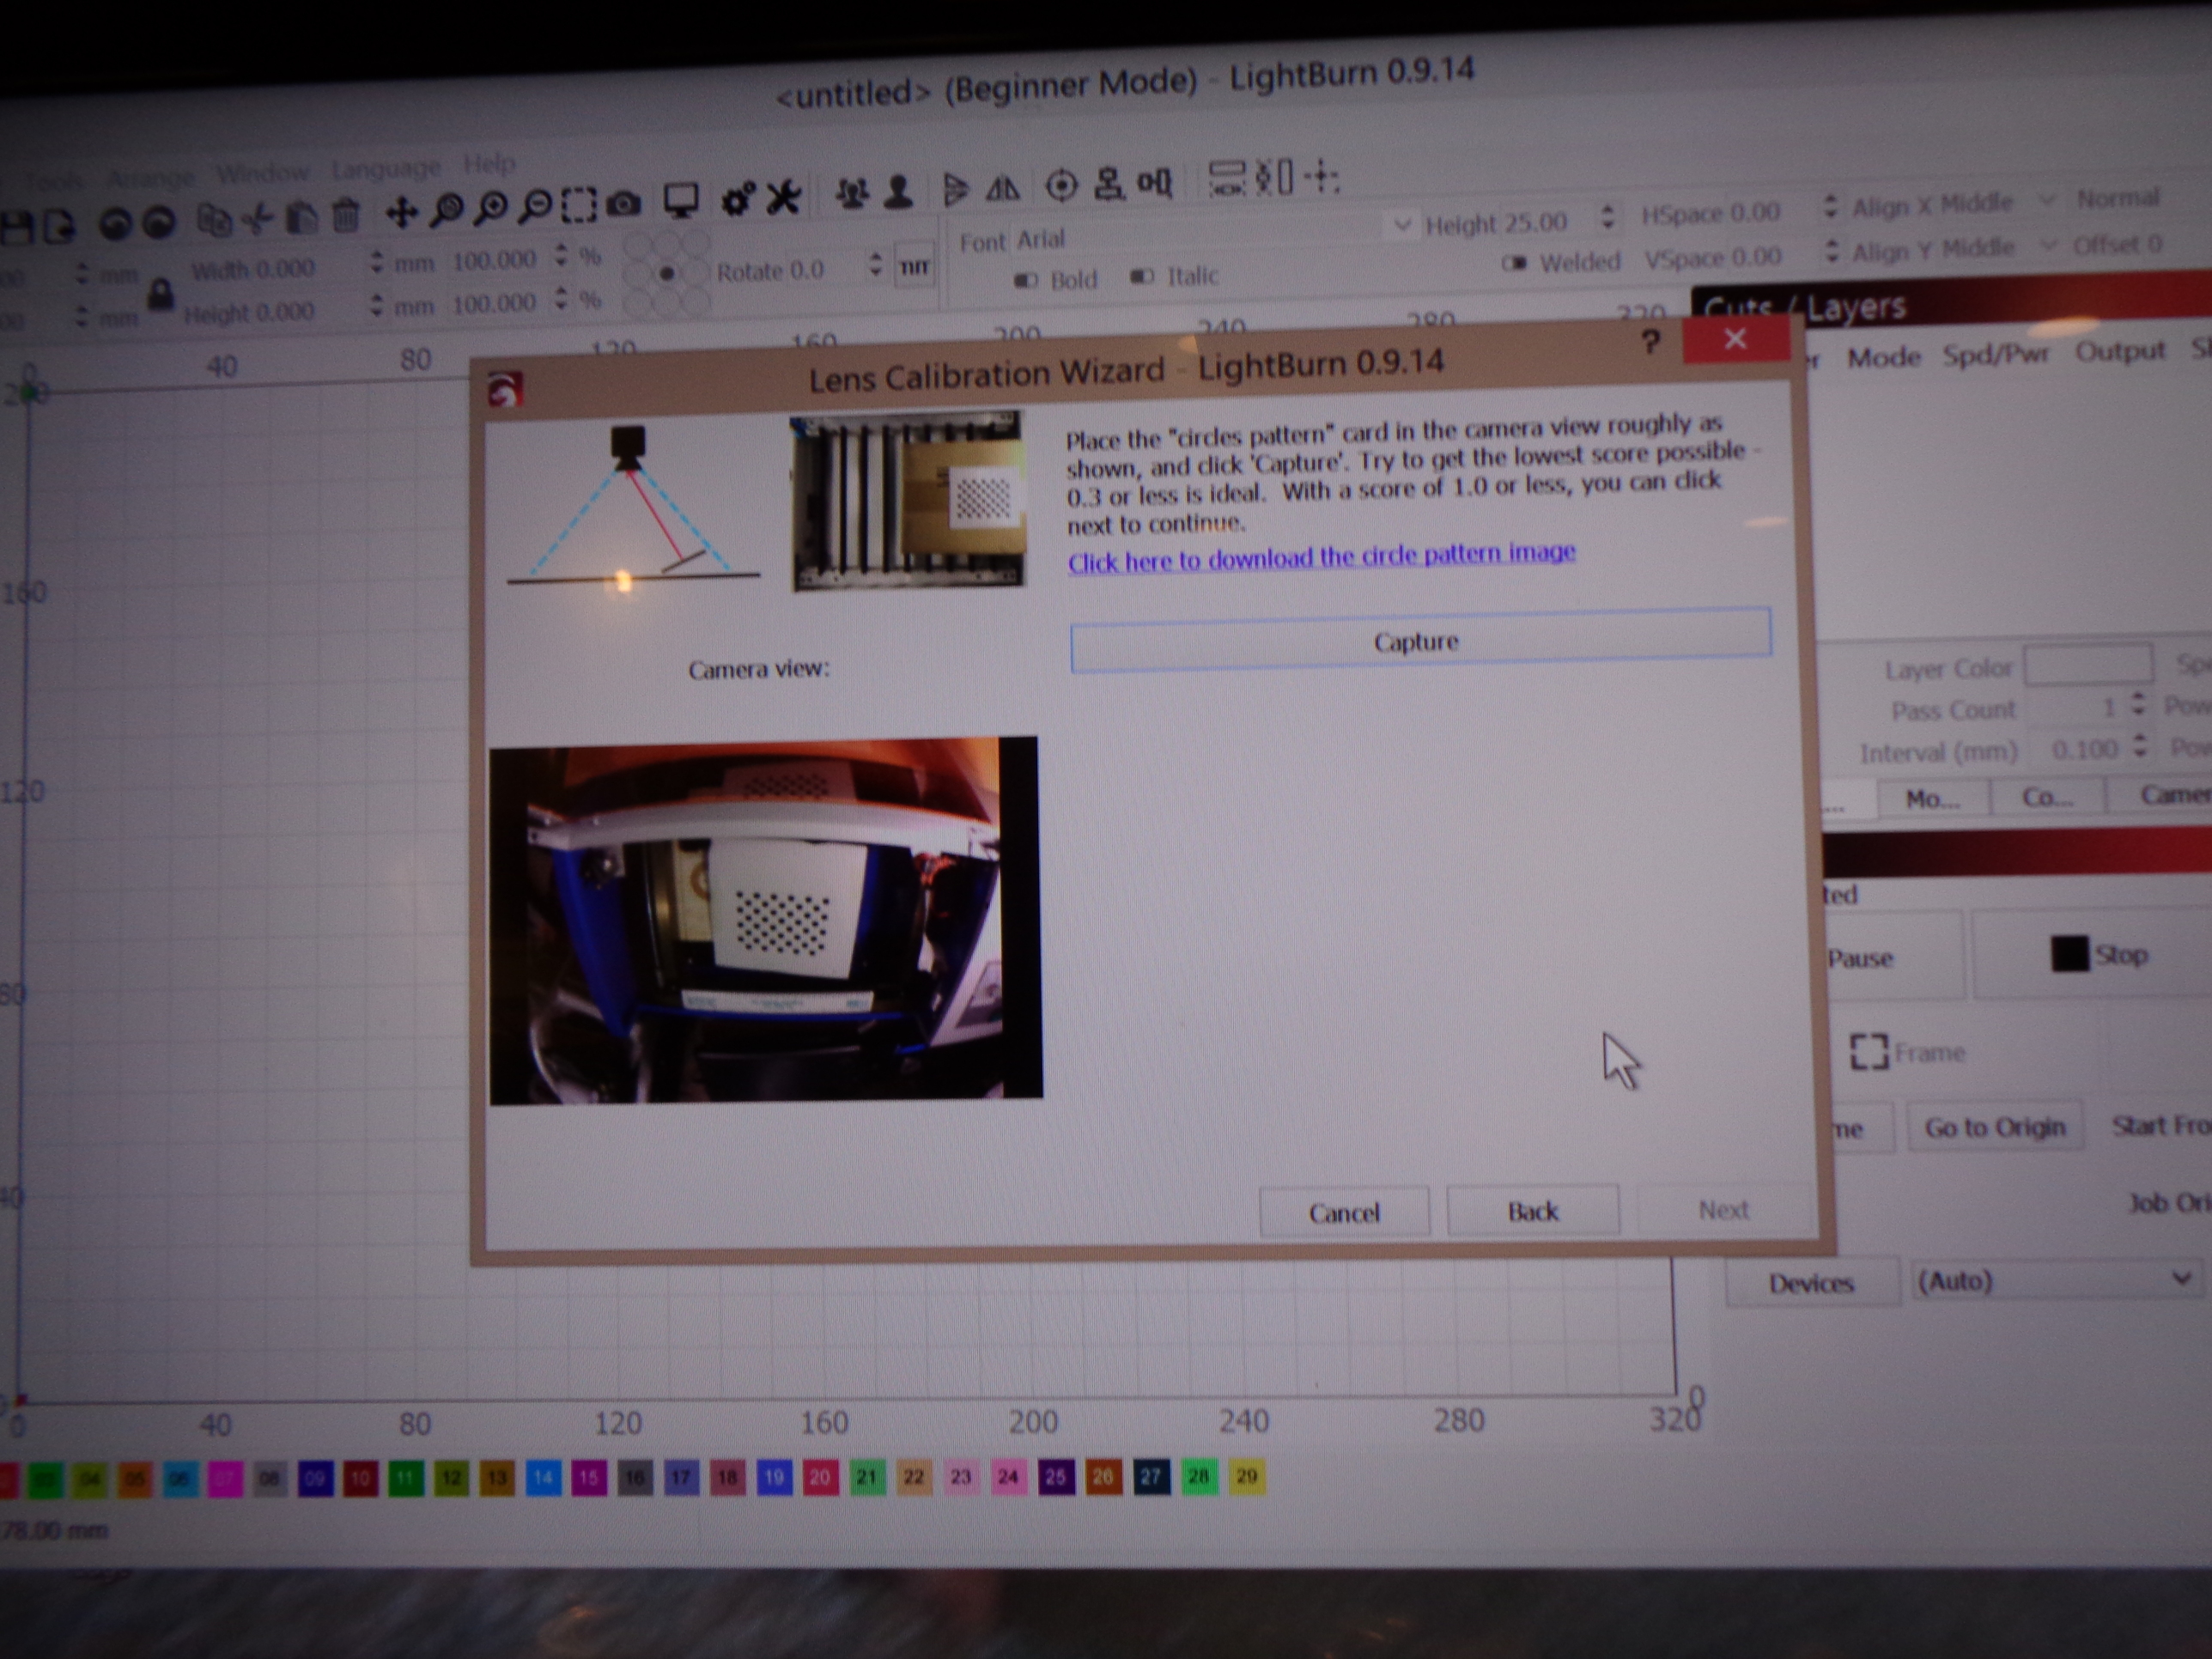
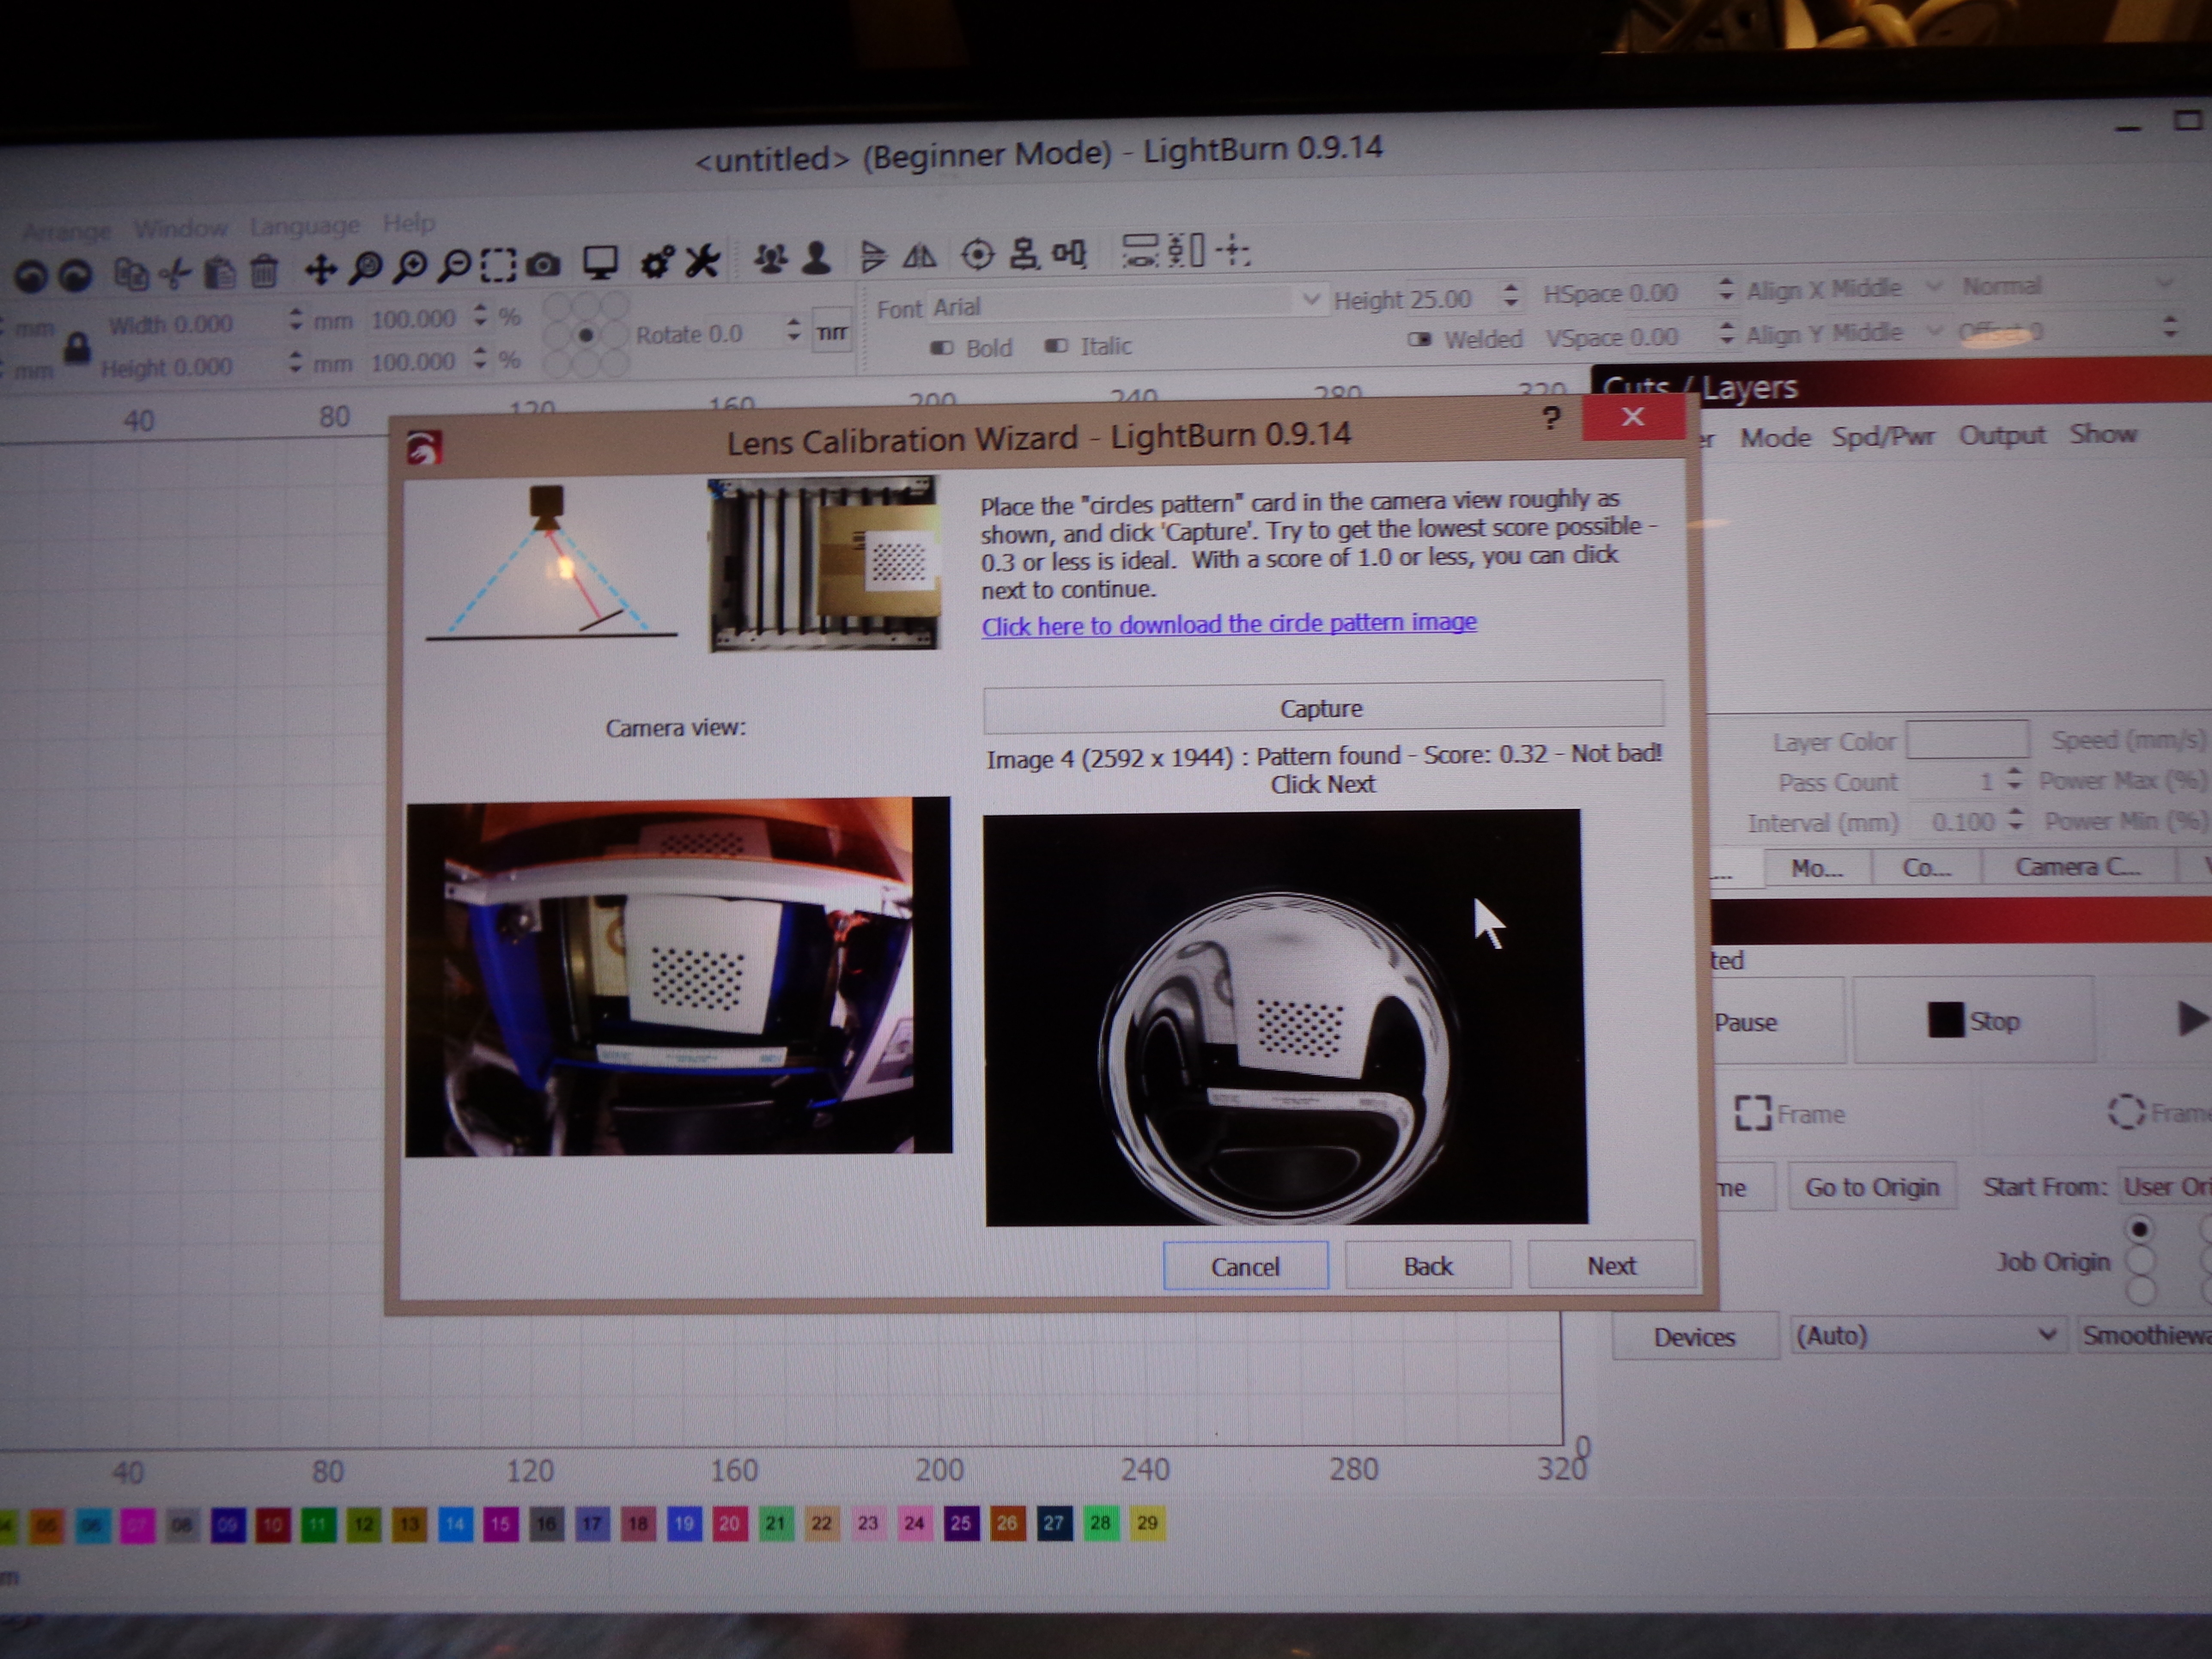
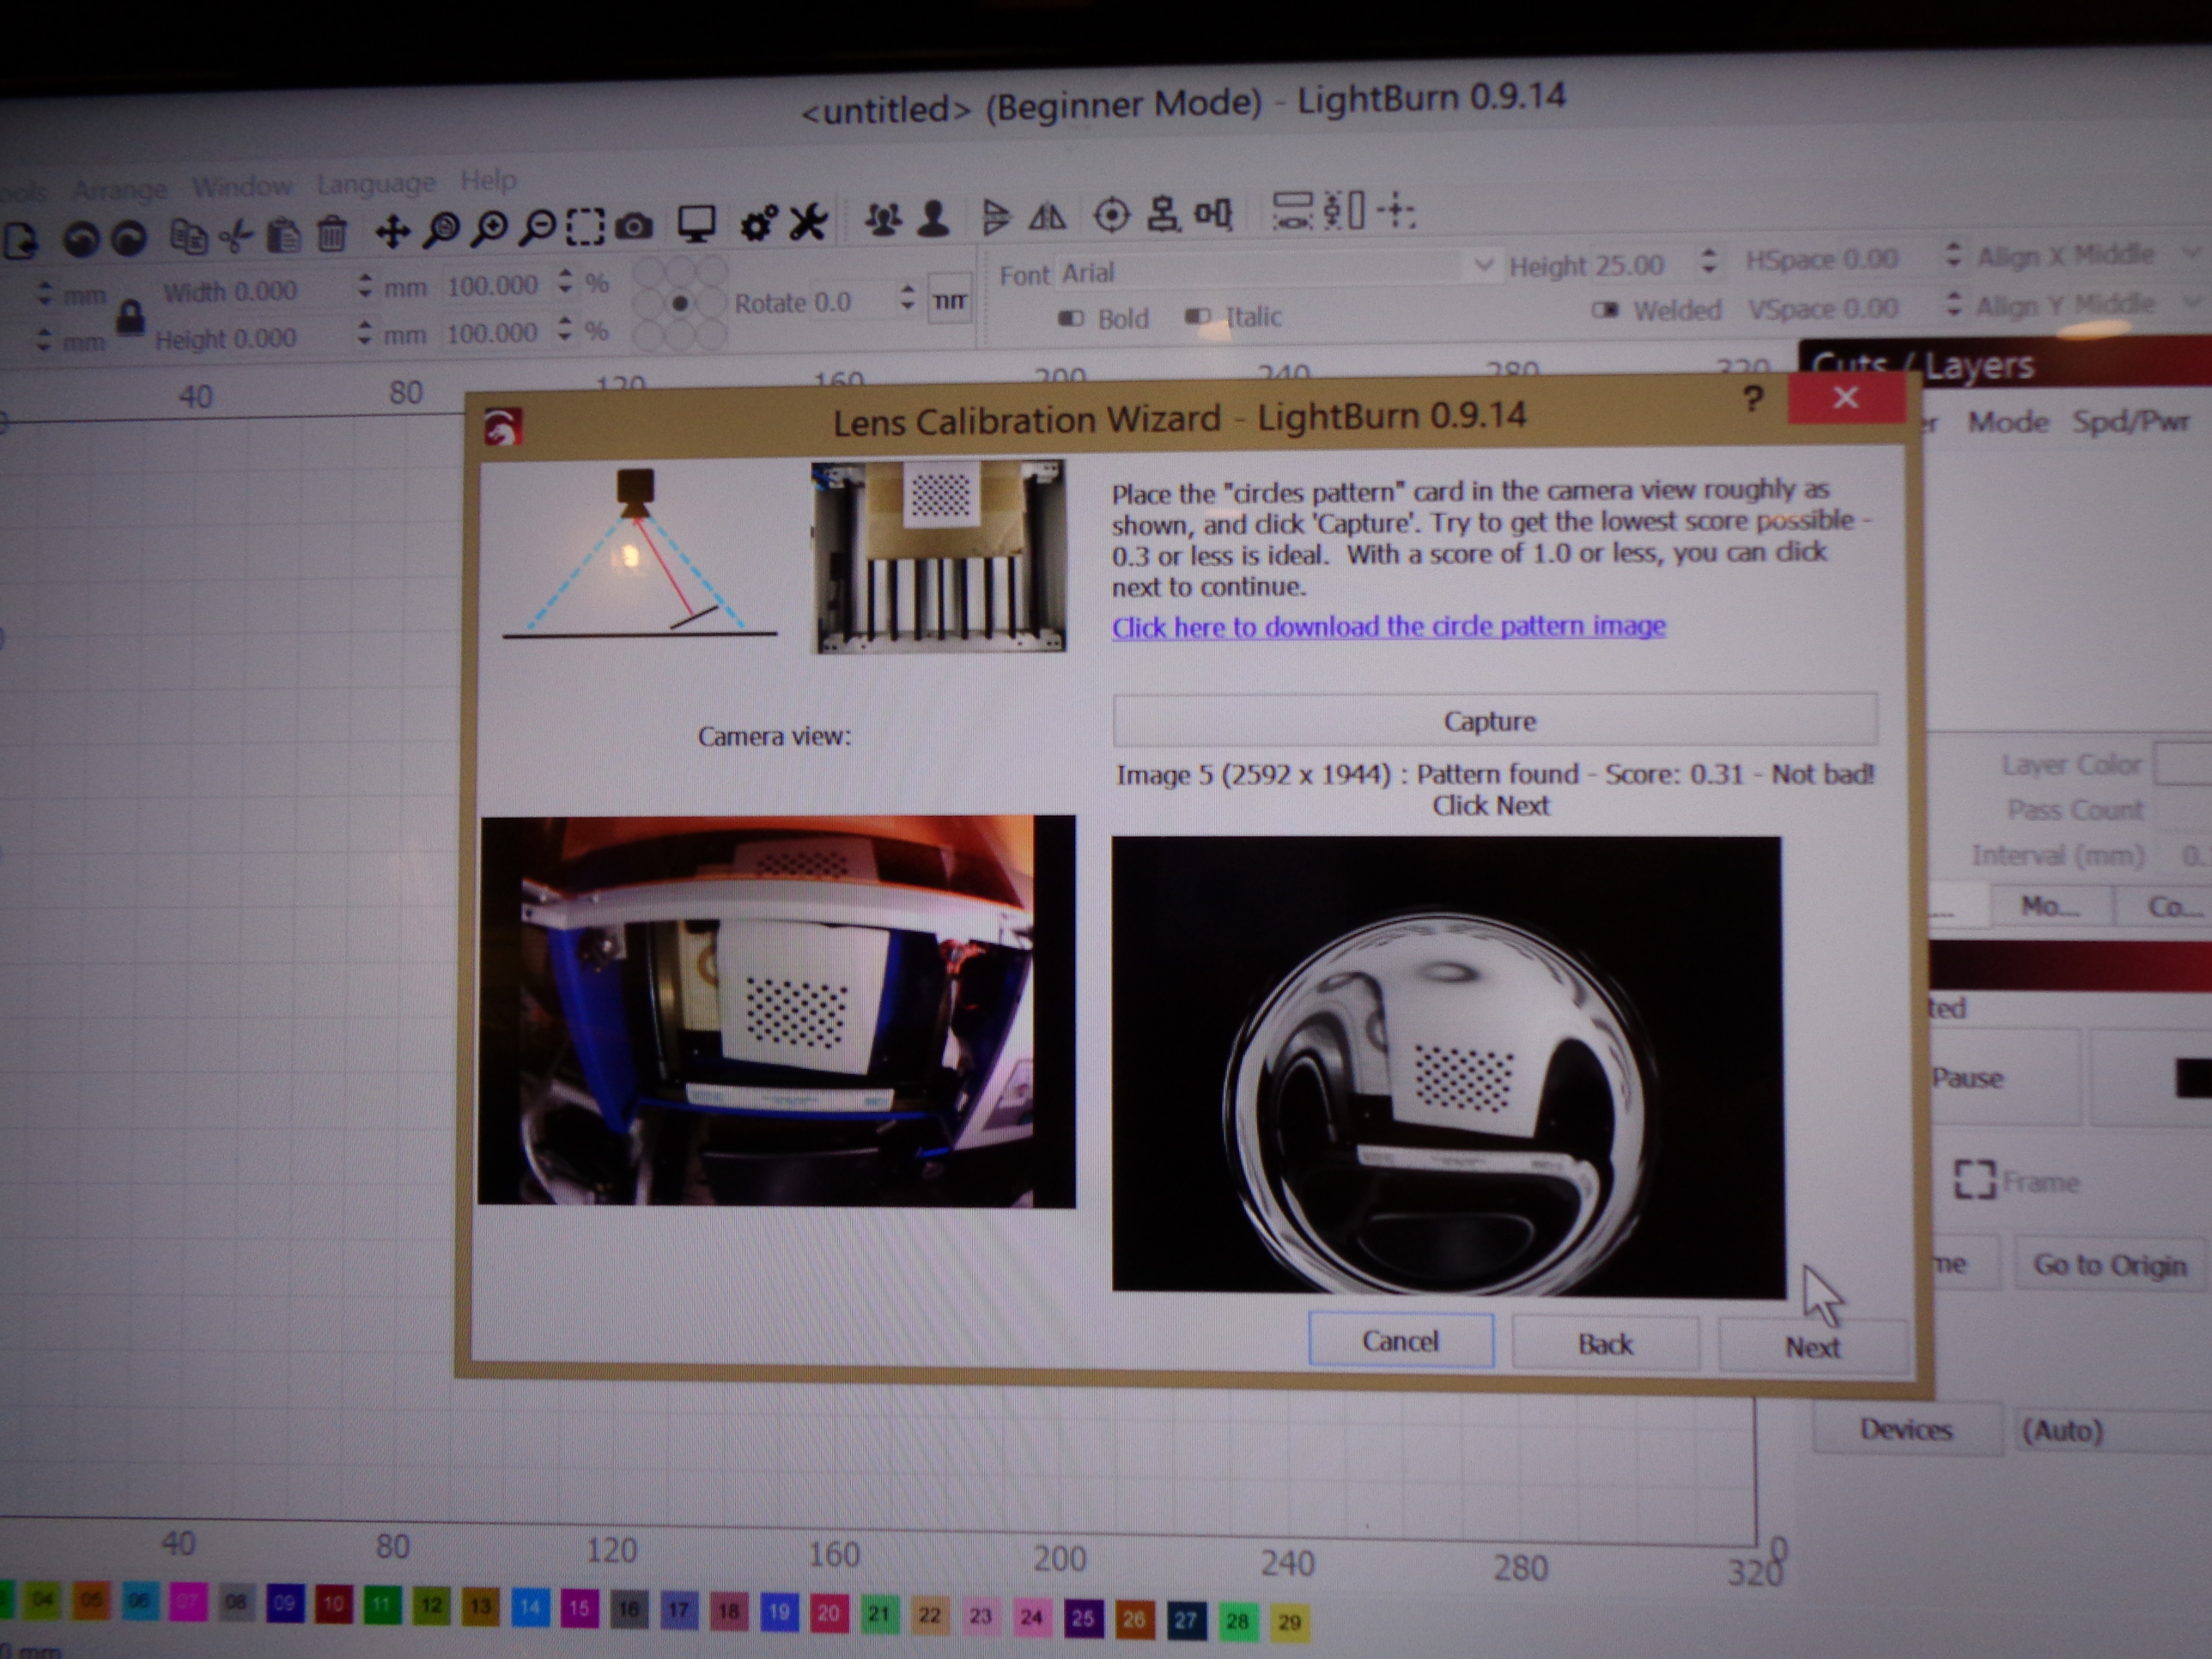
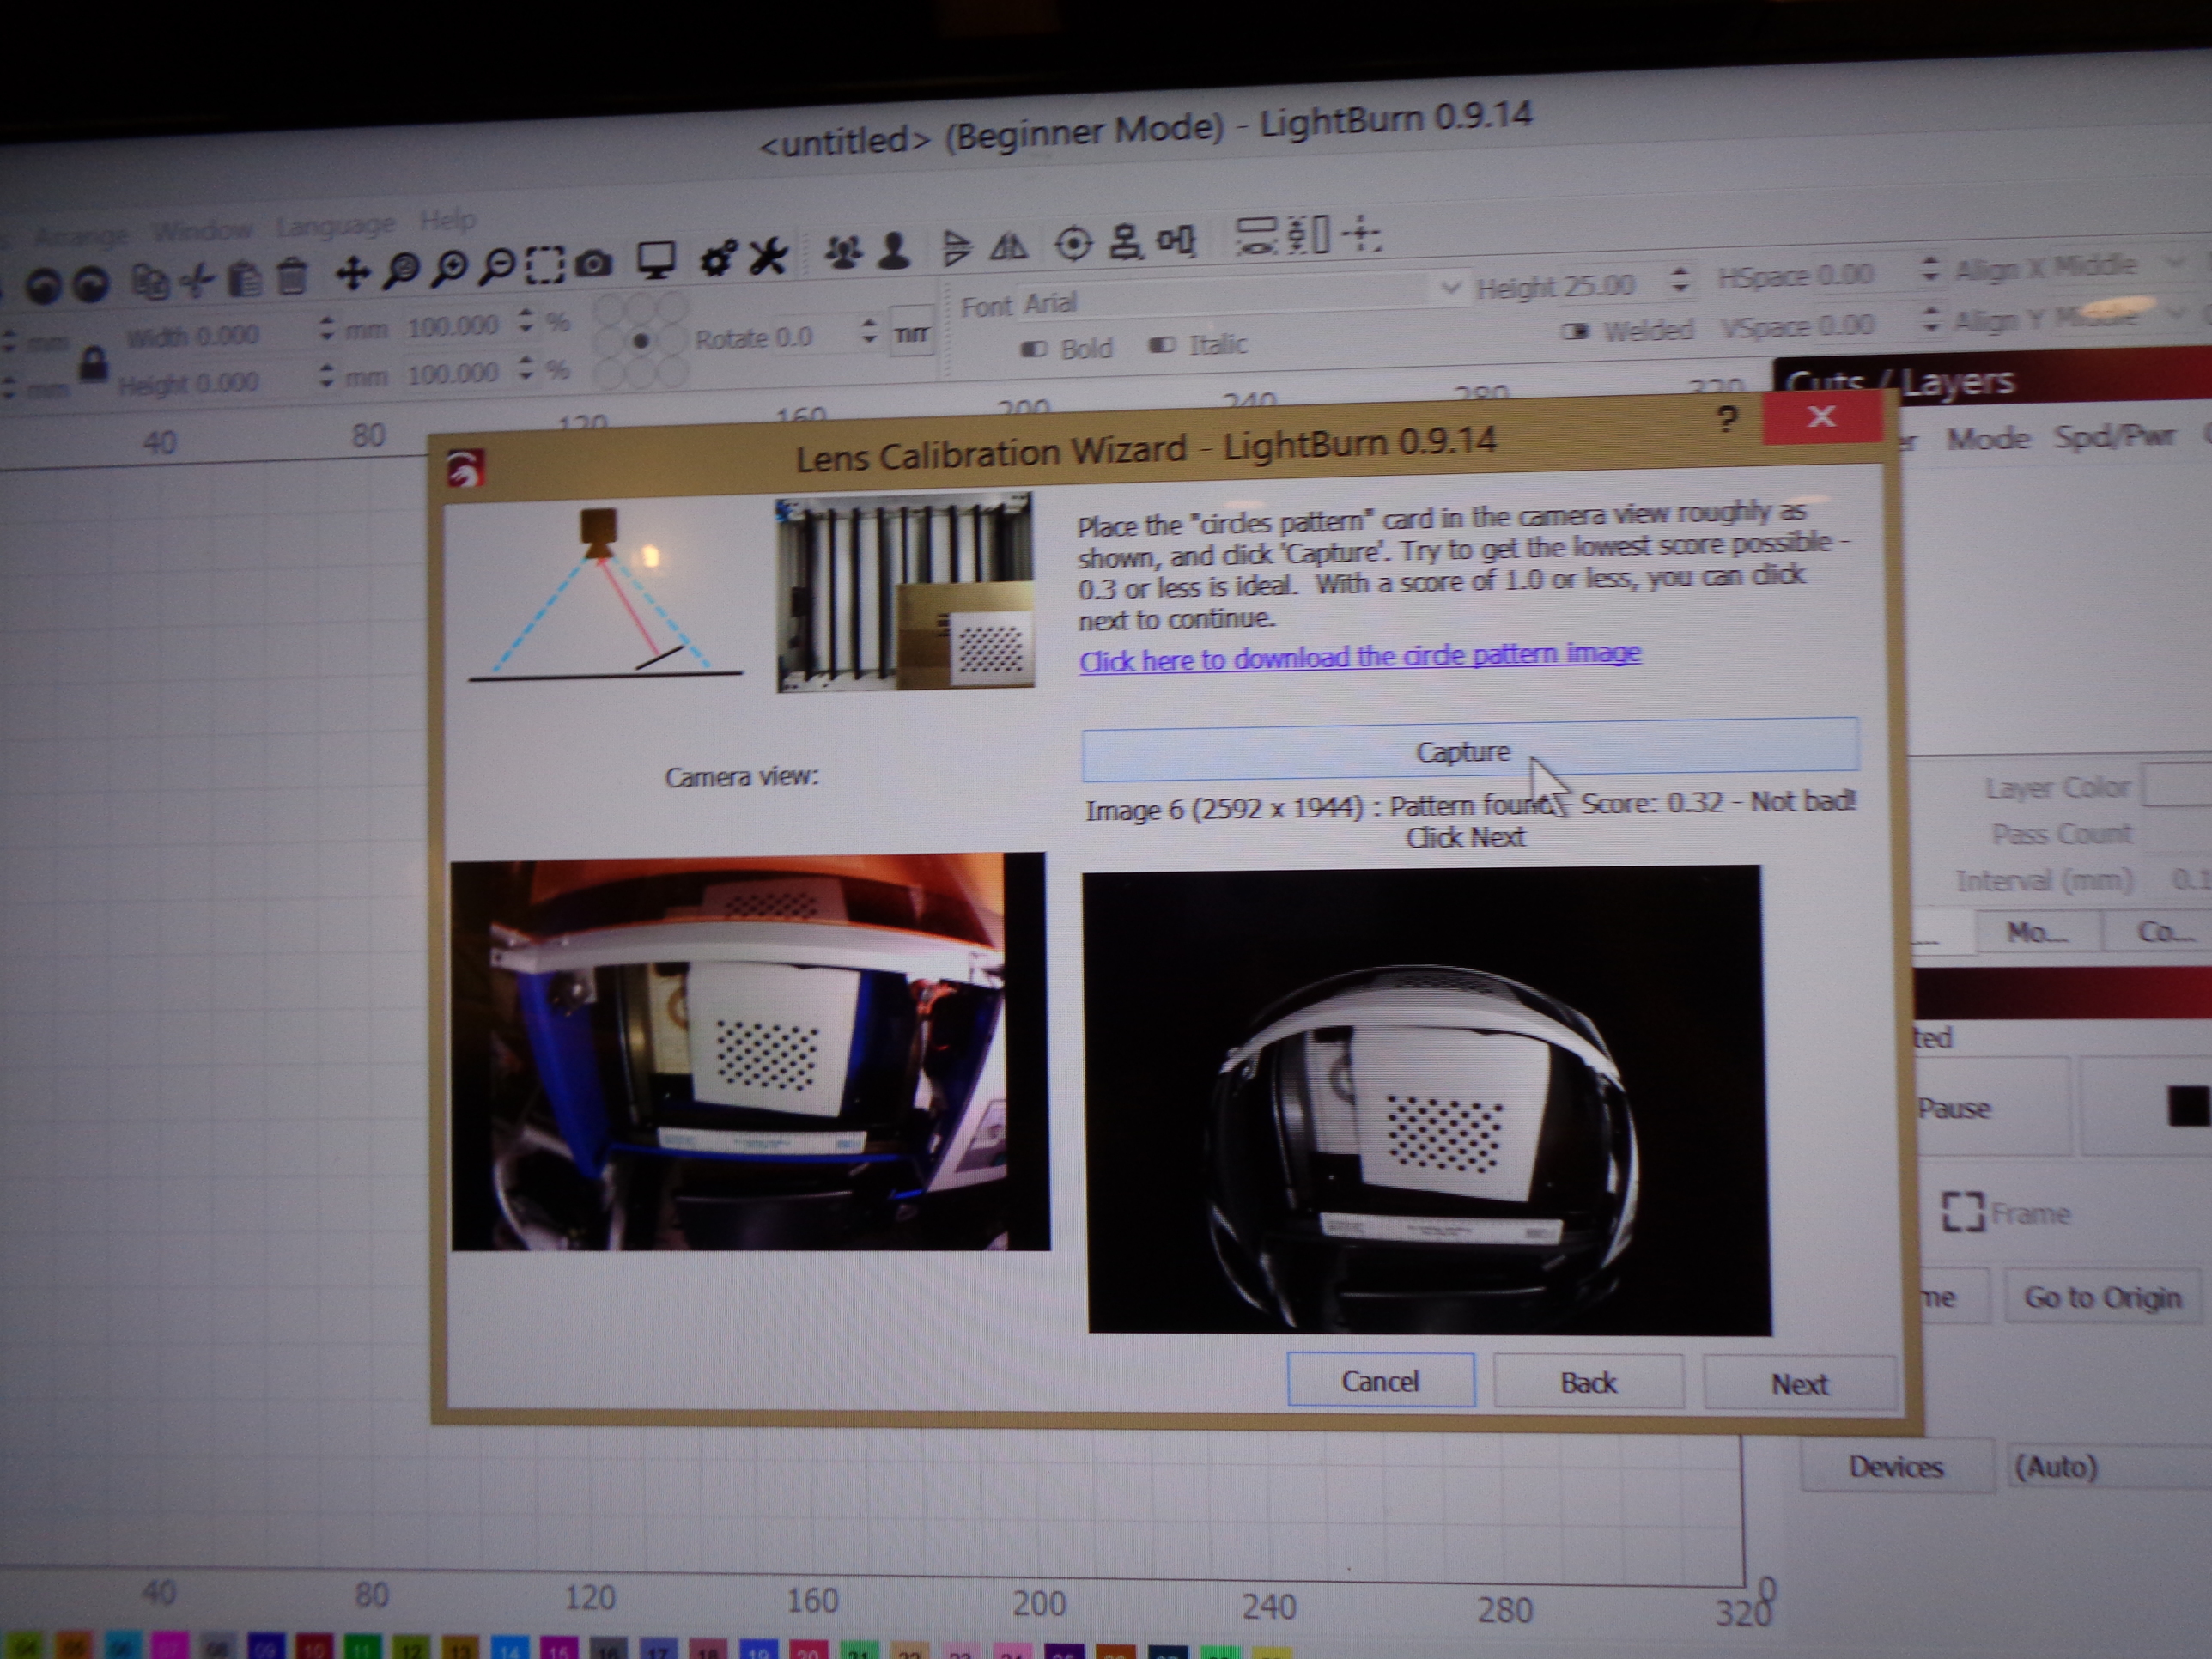
Step 1:
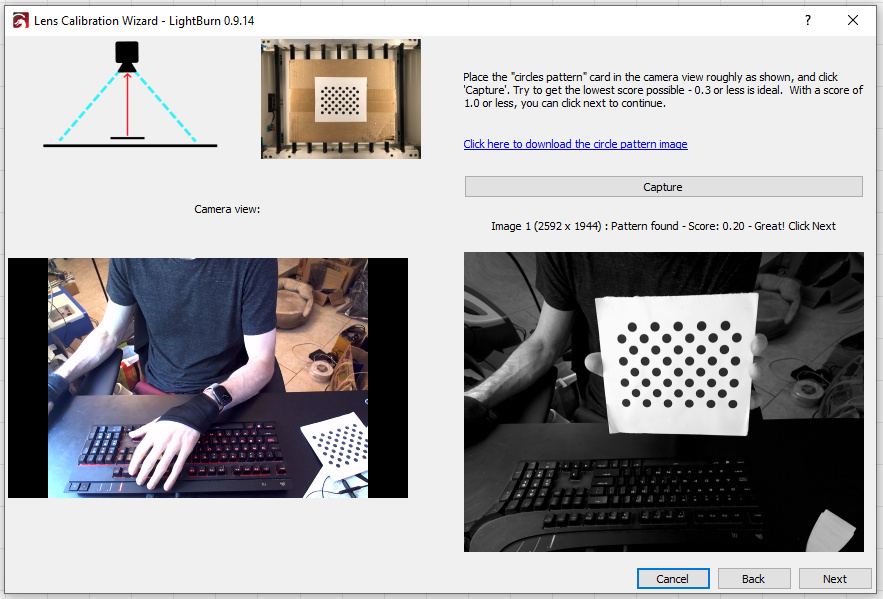
Step 2:
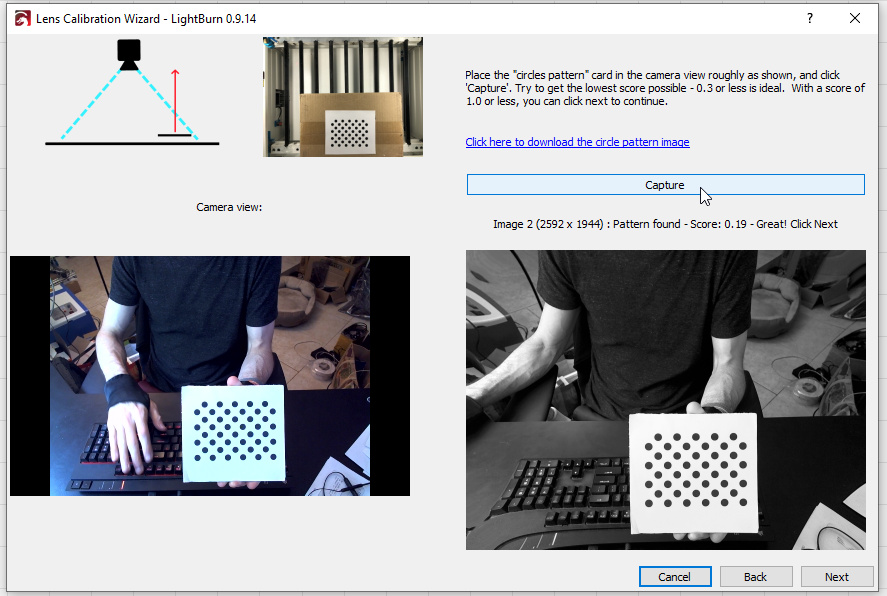
Step 3:

Step 4:
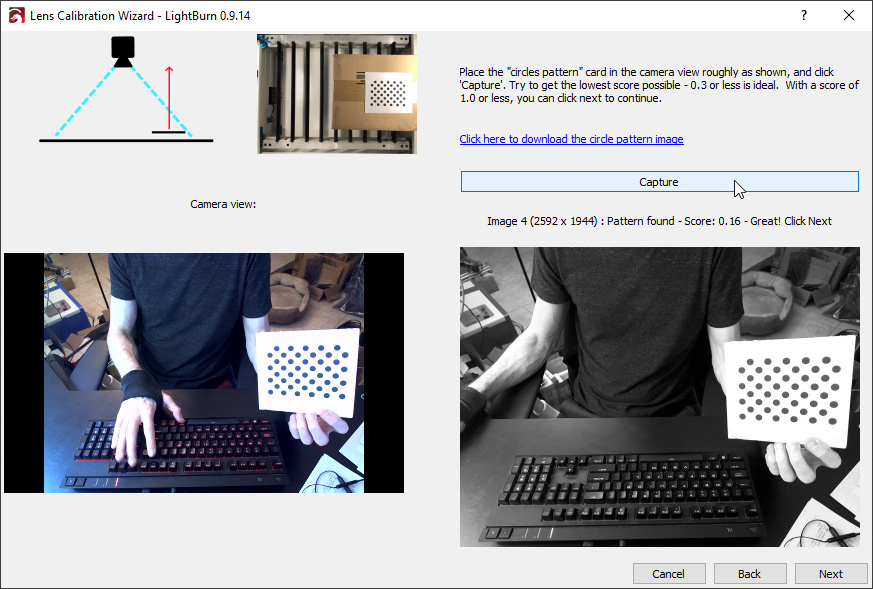
Notice that in each step it’s telling me a different image number, and the position of the pattern is changing in the little sample view up top. Are you saying these things are not changing for you?
wonder is the keyboard messing things up,being in the photo I mean
Those are my photos of everything working properly, and the keyboard is not causing an issue.
My step 2 shows holding the card to right on a angle, never saw your step 2 that has it laying flat to the right, Just for giggles I keep hitting next after capture and and position show on screen still has it at a angle on the right. never saw your step 2 to 4
Can you post a picture of this?
As i get to step 2, step 2 just repeats it self with the pattern card showing tilted of the right side of the machine. never does it show in the little window to do it flat on the right. I stepped through the next buttons several times an it never changed from step 2 directions. step 1 shows it centered and flat.
You understand that your description is not the same as a picture? I might spot something in the interface that wasn’t intended, or perhaps a cue you’ve missed. You’ve described the issue several times, and I’ve been through the process and haven’t been able to reproduce what you’re describing. You can post a picture (or series of pictures) to show what you see, and hopefully I catch something, or we’re at an impasse.
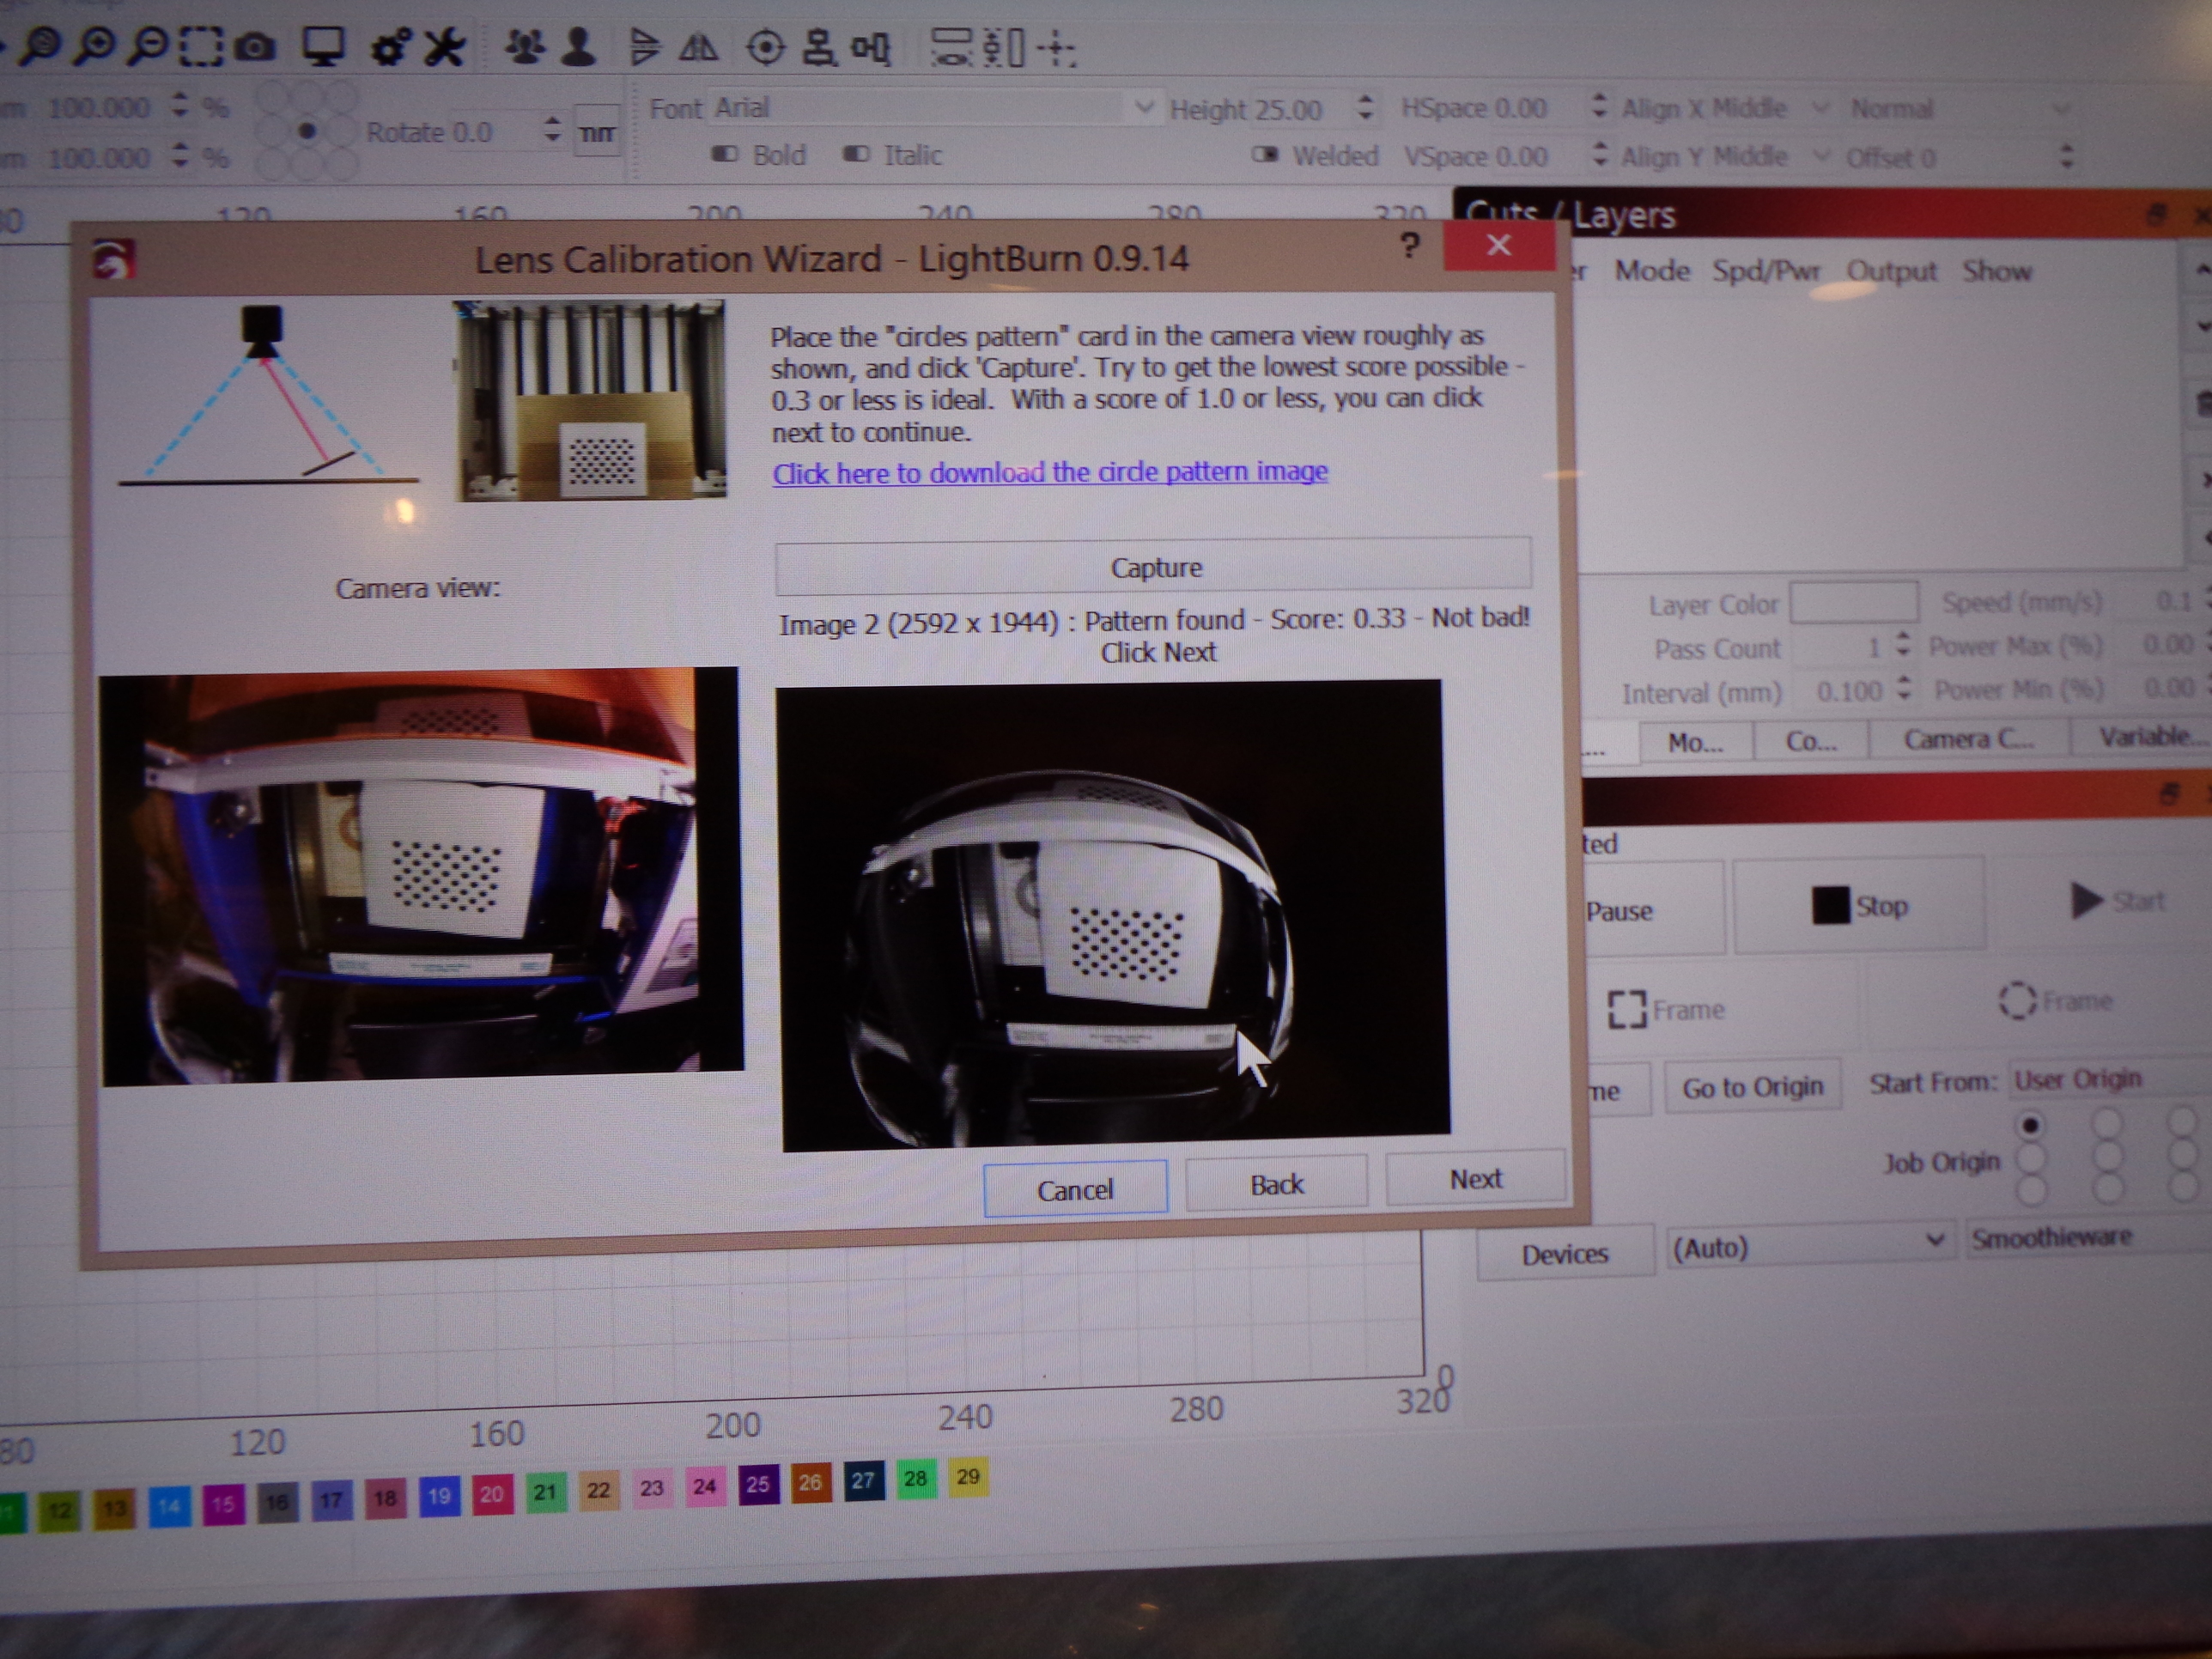
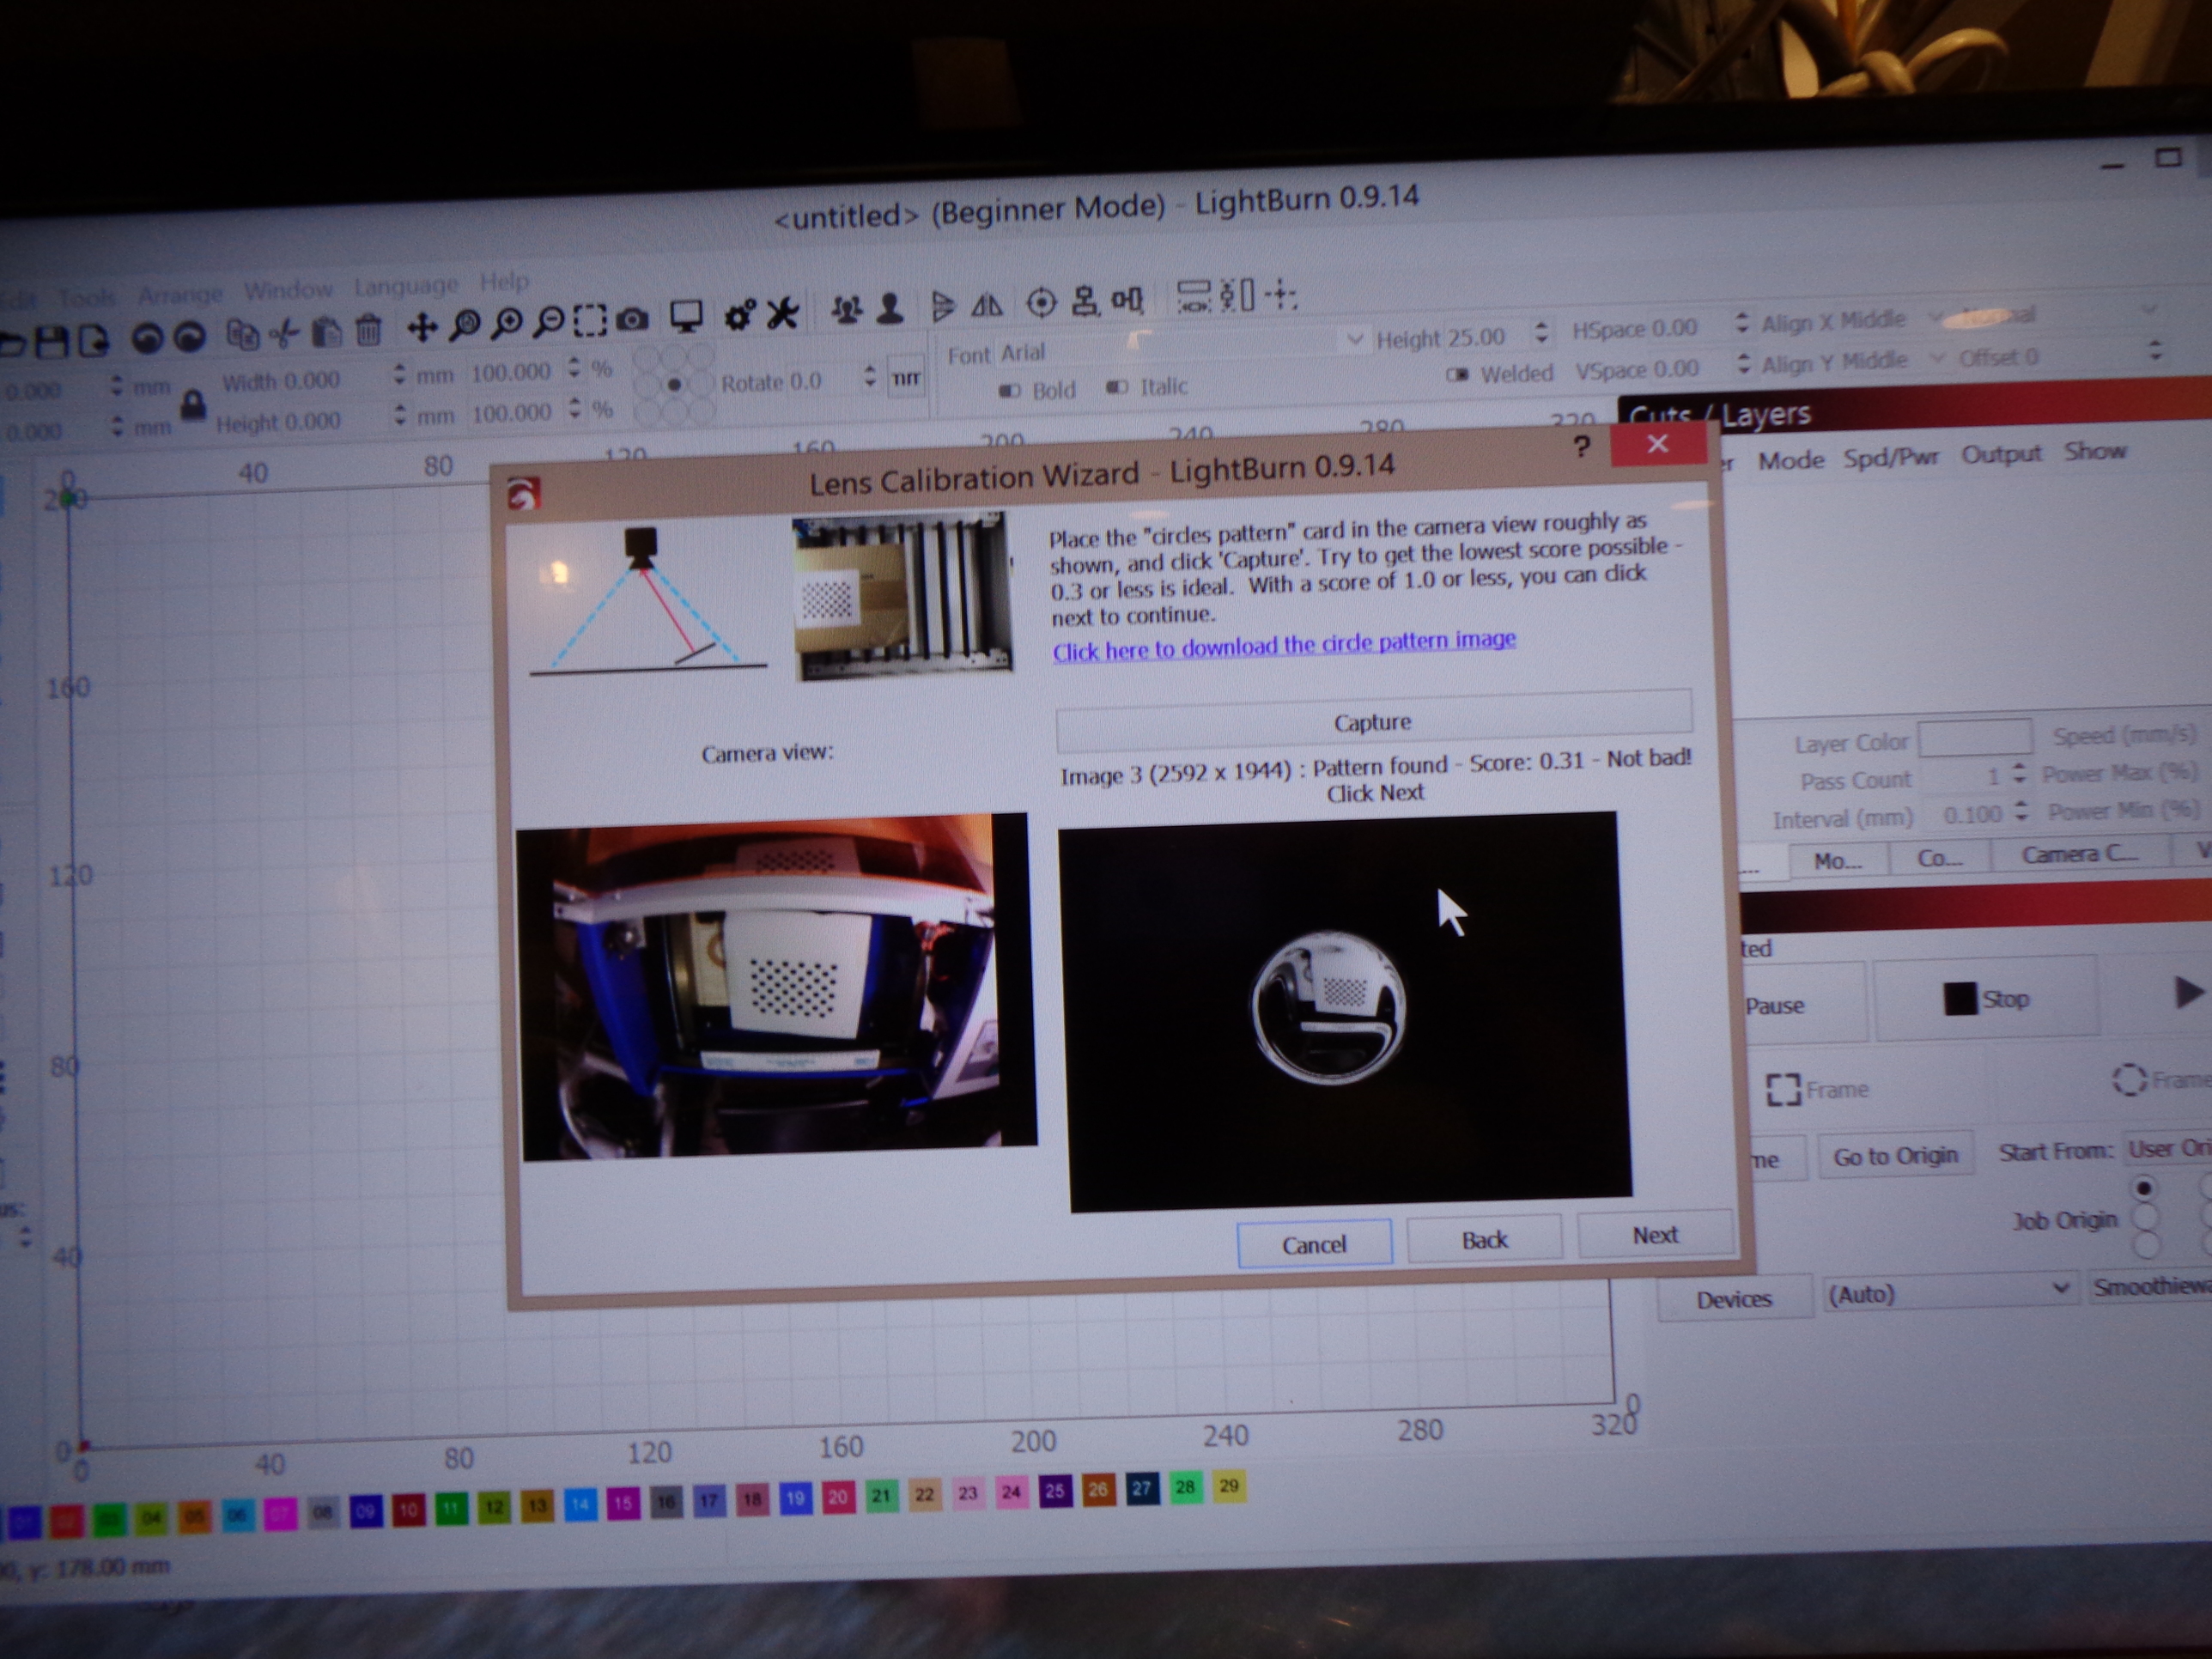
Here is a screen shot of step 2, step 3 will be the same, as well as 4,5,6,7,8,9 10, 11,12.
Gave up at 12.
Here’s what I see:
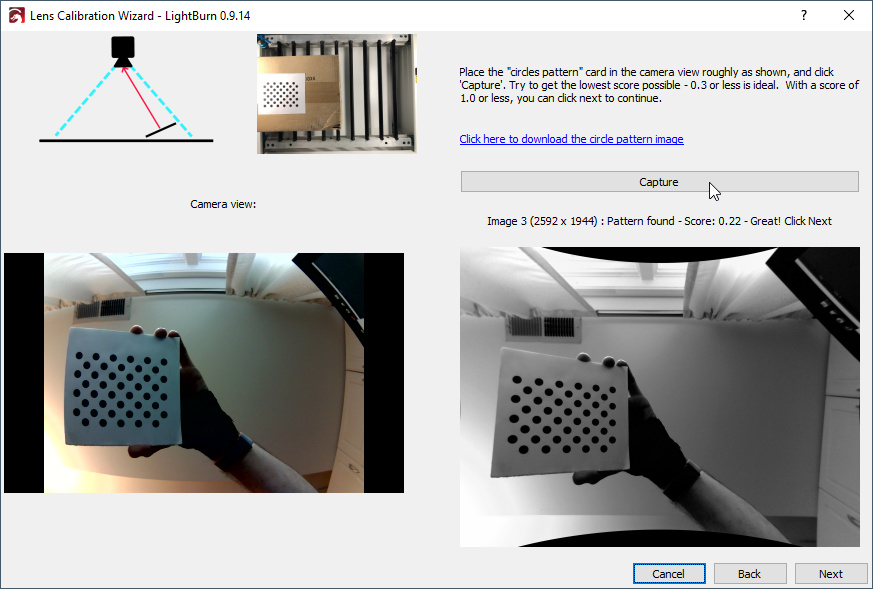

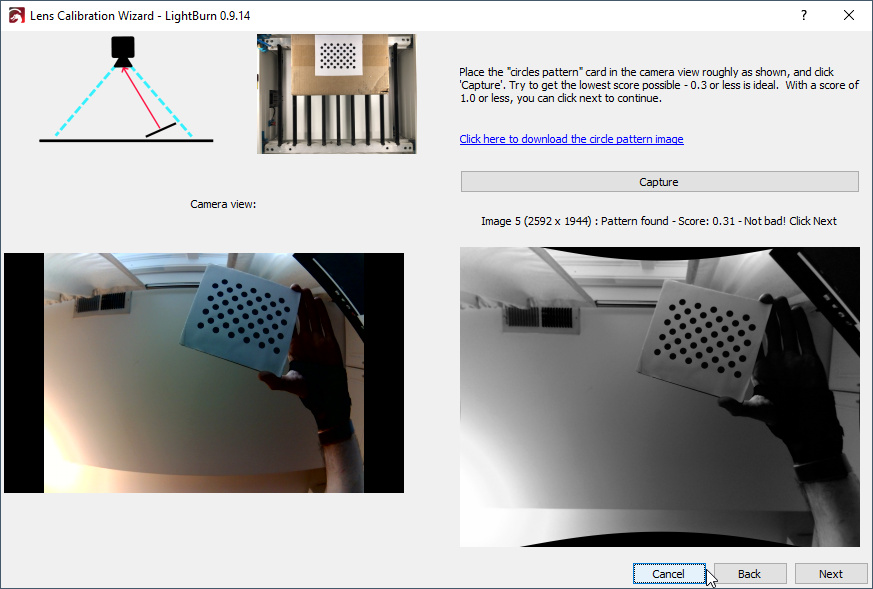
You can see that each time I capture it tells me ‘Click Next’. I do that, and the sample image changes to show me which entry to do next. You’ve only shown a single picture, so I can’t tell if your sample image is changing or not, or if the image number is increasing (mine says Image 2, Image 3, Image 4, Image 5, etc to tell me which one I’m capturing).
I’m trying to figure out if there’s a genuine bug here, or just a misunderstanding of how this works, but you’re not giving me what I’m asking for. I need to see what you see at each step, because I’m not able to reproduce what you claim is happening.

I missed recording step one but it was good and said next, some reason my open office will not allow me to make it perrty like yours, I might try power point.
You don’t appear to be moving the pattern card around like it’s asking you to:
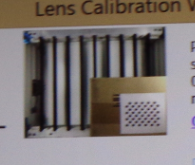
If you don’t move the pattern to the different parts of the camera view, the system can’t accurately measure the curvature of the lens.
I watched the video of how to set it up, like a tic tac toe. will try it tomorrow.
Success, cut piece of cardboard to cover whole area and followed directions which was probably the problem. Take notice of pattern position show in window and not the graphic showing card position. YouTube video several times, any every thing will chug along, Thanks for your patience. The worst student is a retired teacher with a lot of time on his hands.
I have a question about you “cut a piece of cardboard to cover whole area” Did you cut a piece of cardboard that covers the whole laser bed or a piece of cardboard to cover the piece of paper with the dots printed on it?
The reason I ask is because when I got my camera and was trying to set it up it kept telling me that it could not find the image? I put a piece of cardboard behind the page of dots I printed out approximately 8"x 11" but I did not cut a piece of cardboard to cover the whole bed of my laser approximately 24"x 36". I plan to take the time this week to try and get the camera all set up again and wanted to know if cutting a piece of cardboard the size of my bed 24" x 36" would help?
Thanks
Michael
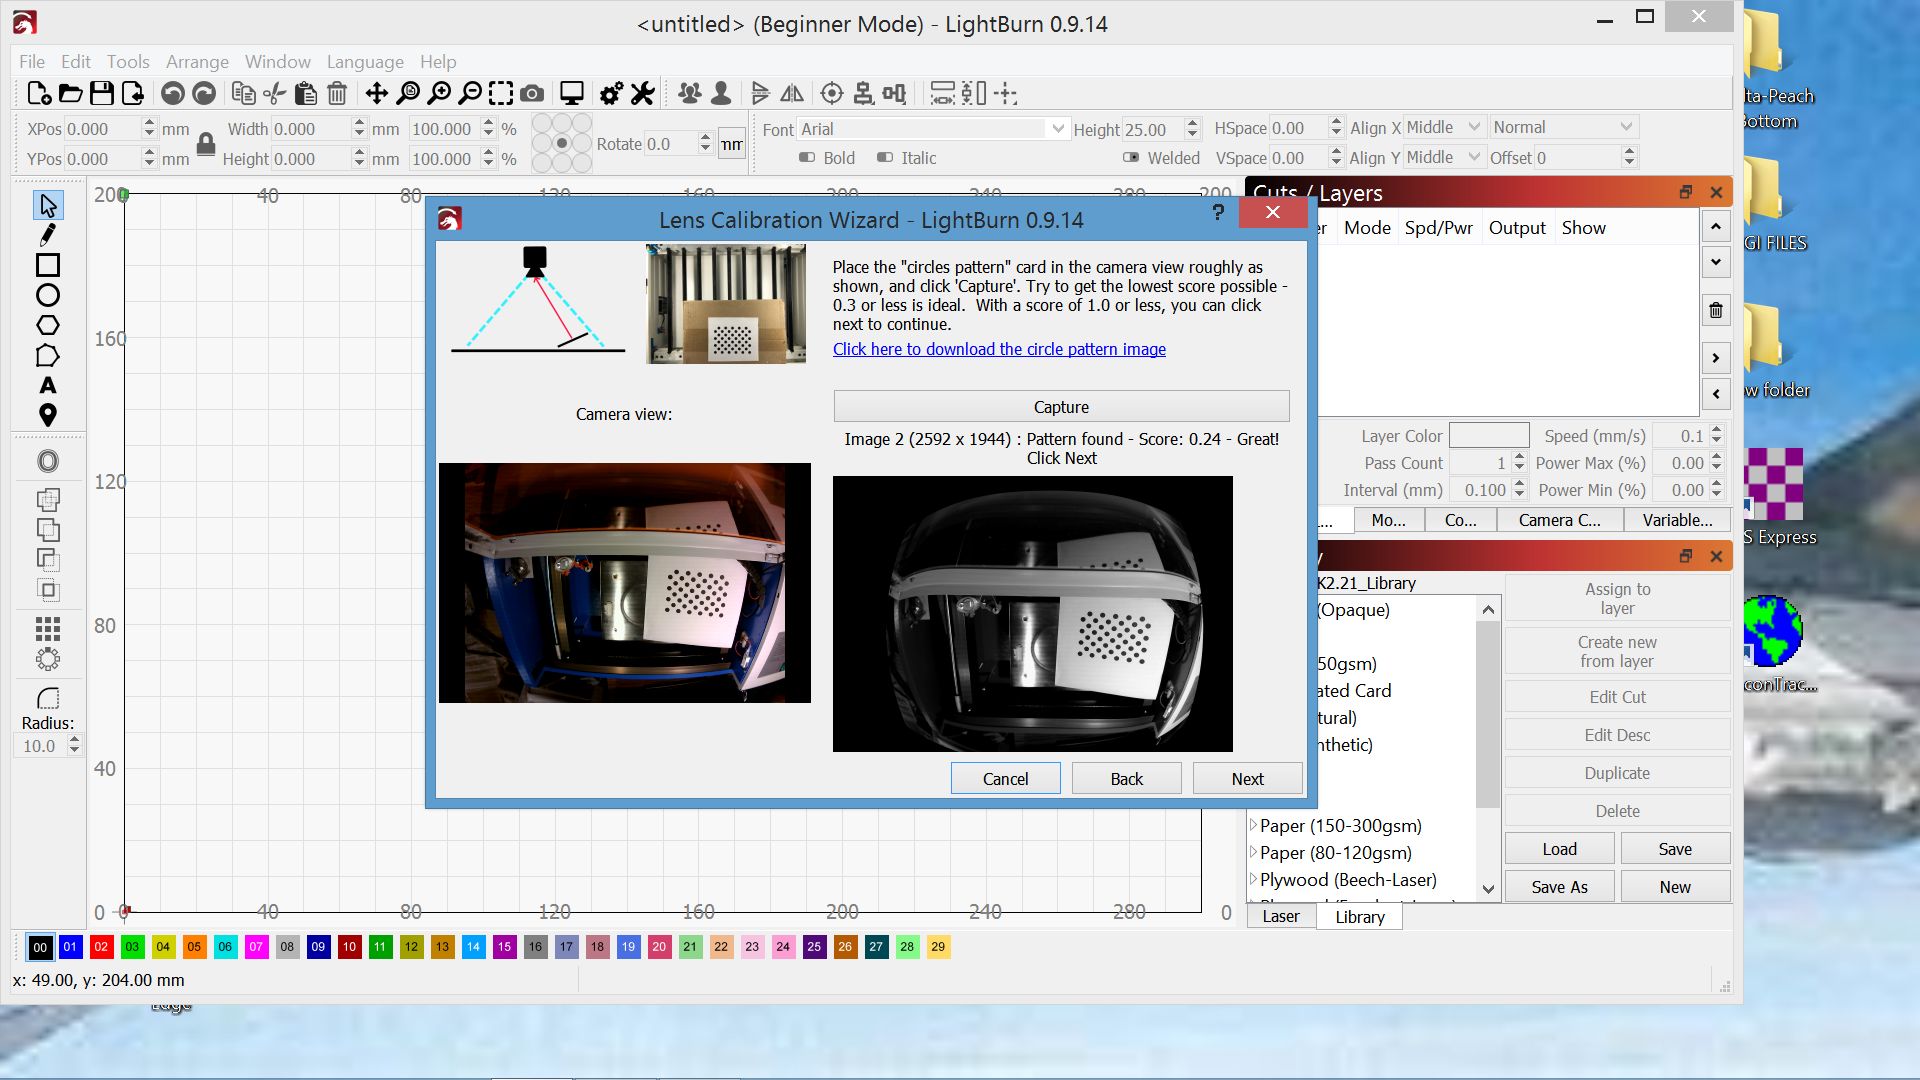
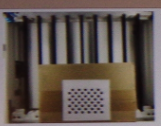
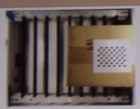
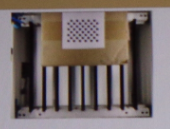
A honeycomb patterned bed looks like circles to the code that tries to find the circles pattern, so having the honeycomb bed visible confuses it, and it gets stuck trying to work out where they all are.
You don’t have to have the camera in the machine at all to do the lens calibration part - it doesn’t have anything to do with the laser for this, just the lens and the pattern card. Since the first thing everyone does is mount it to the machine, that’s out the window, so the next best thing is to cover the honeycomb pattern with a bedsheet, chunk of cardboard, sheets of paper, etc. You’re just hiding the honeycomb pattern so the camera doesn’t see it - nothing special.
This topic was automatically closed 30 days after the last reply. New replies are no longer allowed.