I’m new to this community and new in working with Lightburn.
I can best explain my question with an example.
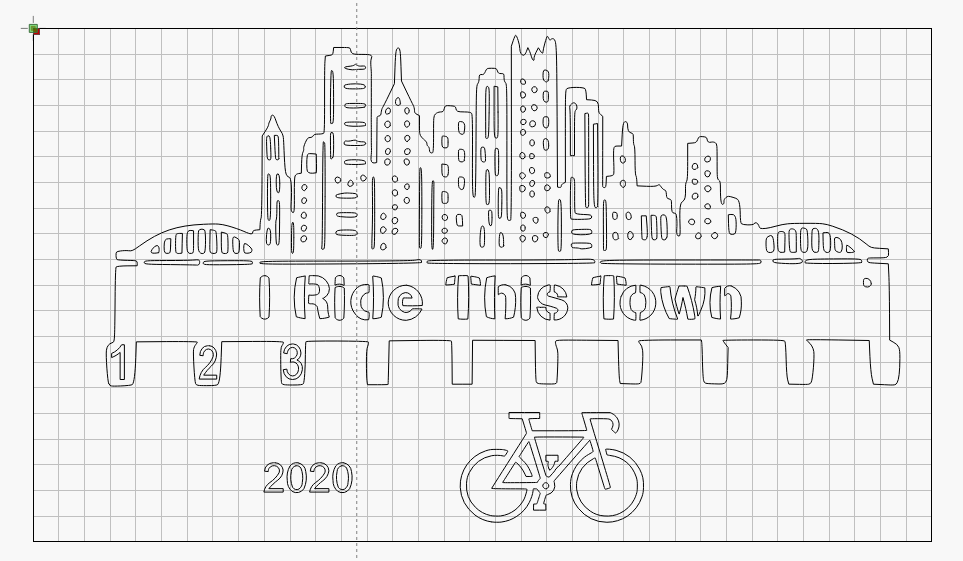
I have a medal hanger with for example a figure of a runner on top attached to each other. The figure of the runner I want to change to a bicycle or the text 2020.
Is it possible in Lightburn to remove the runner and replace it for the bicycle or the text 2020?
Or do I need another app for this?
Do you have the design in the form of an image and/or DXF and/or SVG?
Yes, you should be able to do so easily. if you’d share the design i can show you how.
In your first picture the buildings on top are part of the piece with “I ride this town”.
How can you separate this is Lightburn. What are the steps to do?
It’s hard to tell since i don’t see your file.
you probably need to select all, ungroup, select the part you want to move/edit/modify, and you should be good. it’s easy. you just need few minutes on youtube and you’re good to go.
That is right. In Lightburn I see a button “Edit Nodes”.
When I press this button and then the picture I see appear all the nodes as blue dots. These I can move around to change the lines. Can I also remove nodes?
you might have selected all. you need to select the shape, select edit nodes, then hover specific point or line segment. you do not need to selected all node points unless you want to delete all.
I’m now a “basic user” thanks to you
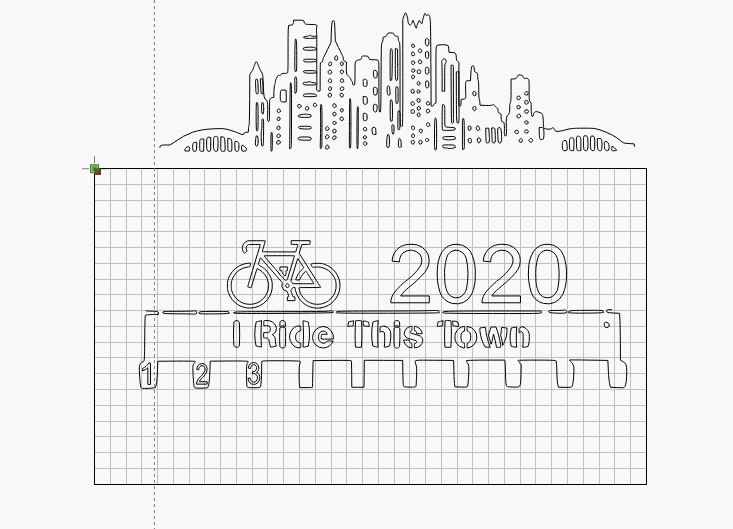
Attached a file in which my question.
You see the medal hanger
You see the text 2020
They should now be attached to each other as one object.
The laser must cut the hanger and the word 2020 as one.
When I lower 2020 down towards the hanger the horizontal lines will not be one.
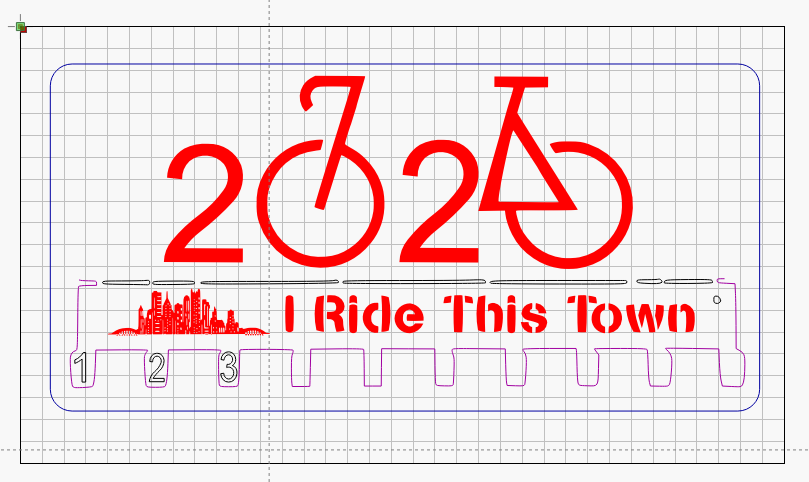
The attached 2020.txt is actually 2020.rar. these are dxf and svg of your file which i have edited.
Sorry if the 2020 is not dead center - i did not spend too much on this. you might want to center it.
I am pretty sure there are few ways of reaching the same goal.
I used nodes editing. removed the top line segment of the hanger and bottom segments of the 2020. then moved 2020 down to be in line and using line tool connected the dots. this way you have the bottom of each number separated lines which you can assign to a different layers if you chose to engrave the 2020 bottom. not a must. you can chose to only cut the red outline.
I did not send you a lightburn project since you’re using a different laser with different origin and bed size.


 thanks to you

