Controlling the exhaust blower with Ruida

One member wanted to know how I was controlling my exhaust blower with my RuiDa controller. In the “AUTO” mode the blower starts and stops with the job. In the “OFF” and “ON” modes you can override the controller.

6 Likes

Thanks for sharing that! I will be doing that to my laser this weekend.

Thanks again Stan for all your help! I started on it and will hopefully finish up tomorrow evening. Jason

Nice.

Here’s how to include a timer to give an “off” delay to clear smoke from the machine at the end of the job.

Ruida automatic fan upgrade with fan stop timer - ATK LASER

2 Likes

An “off delay” relay would be beneficial. Just make sure it is for 24VDC service.

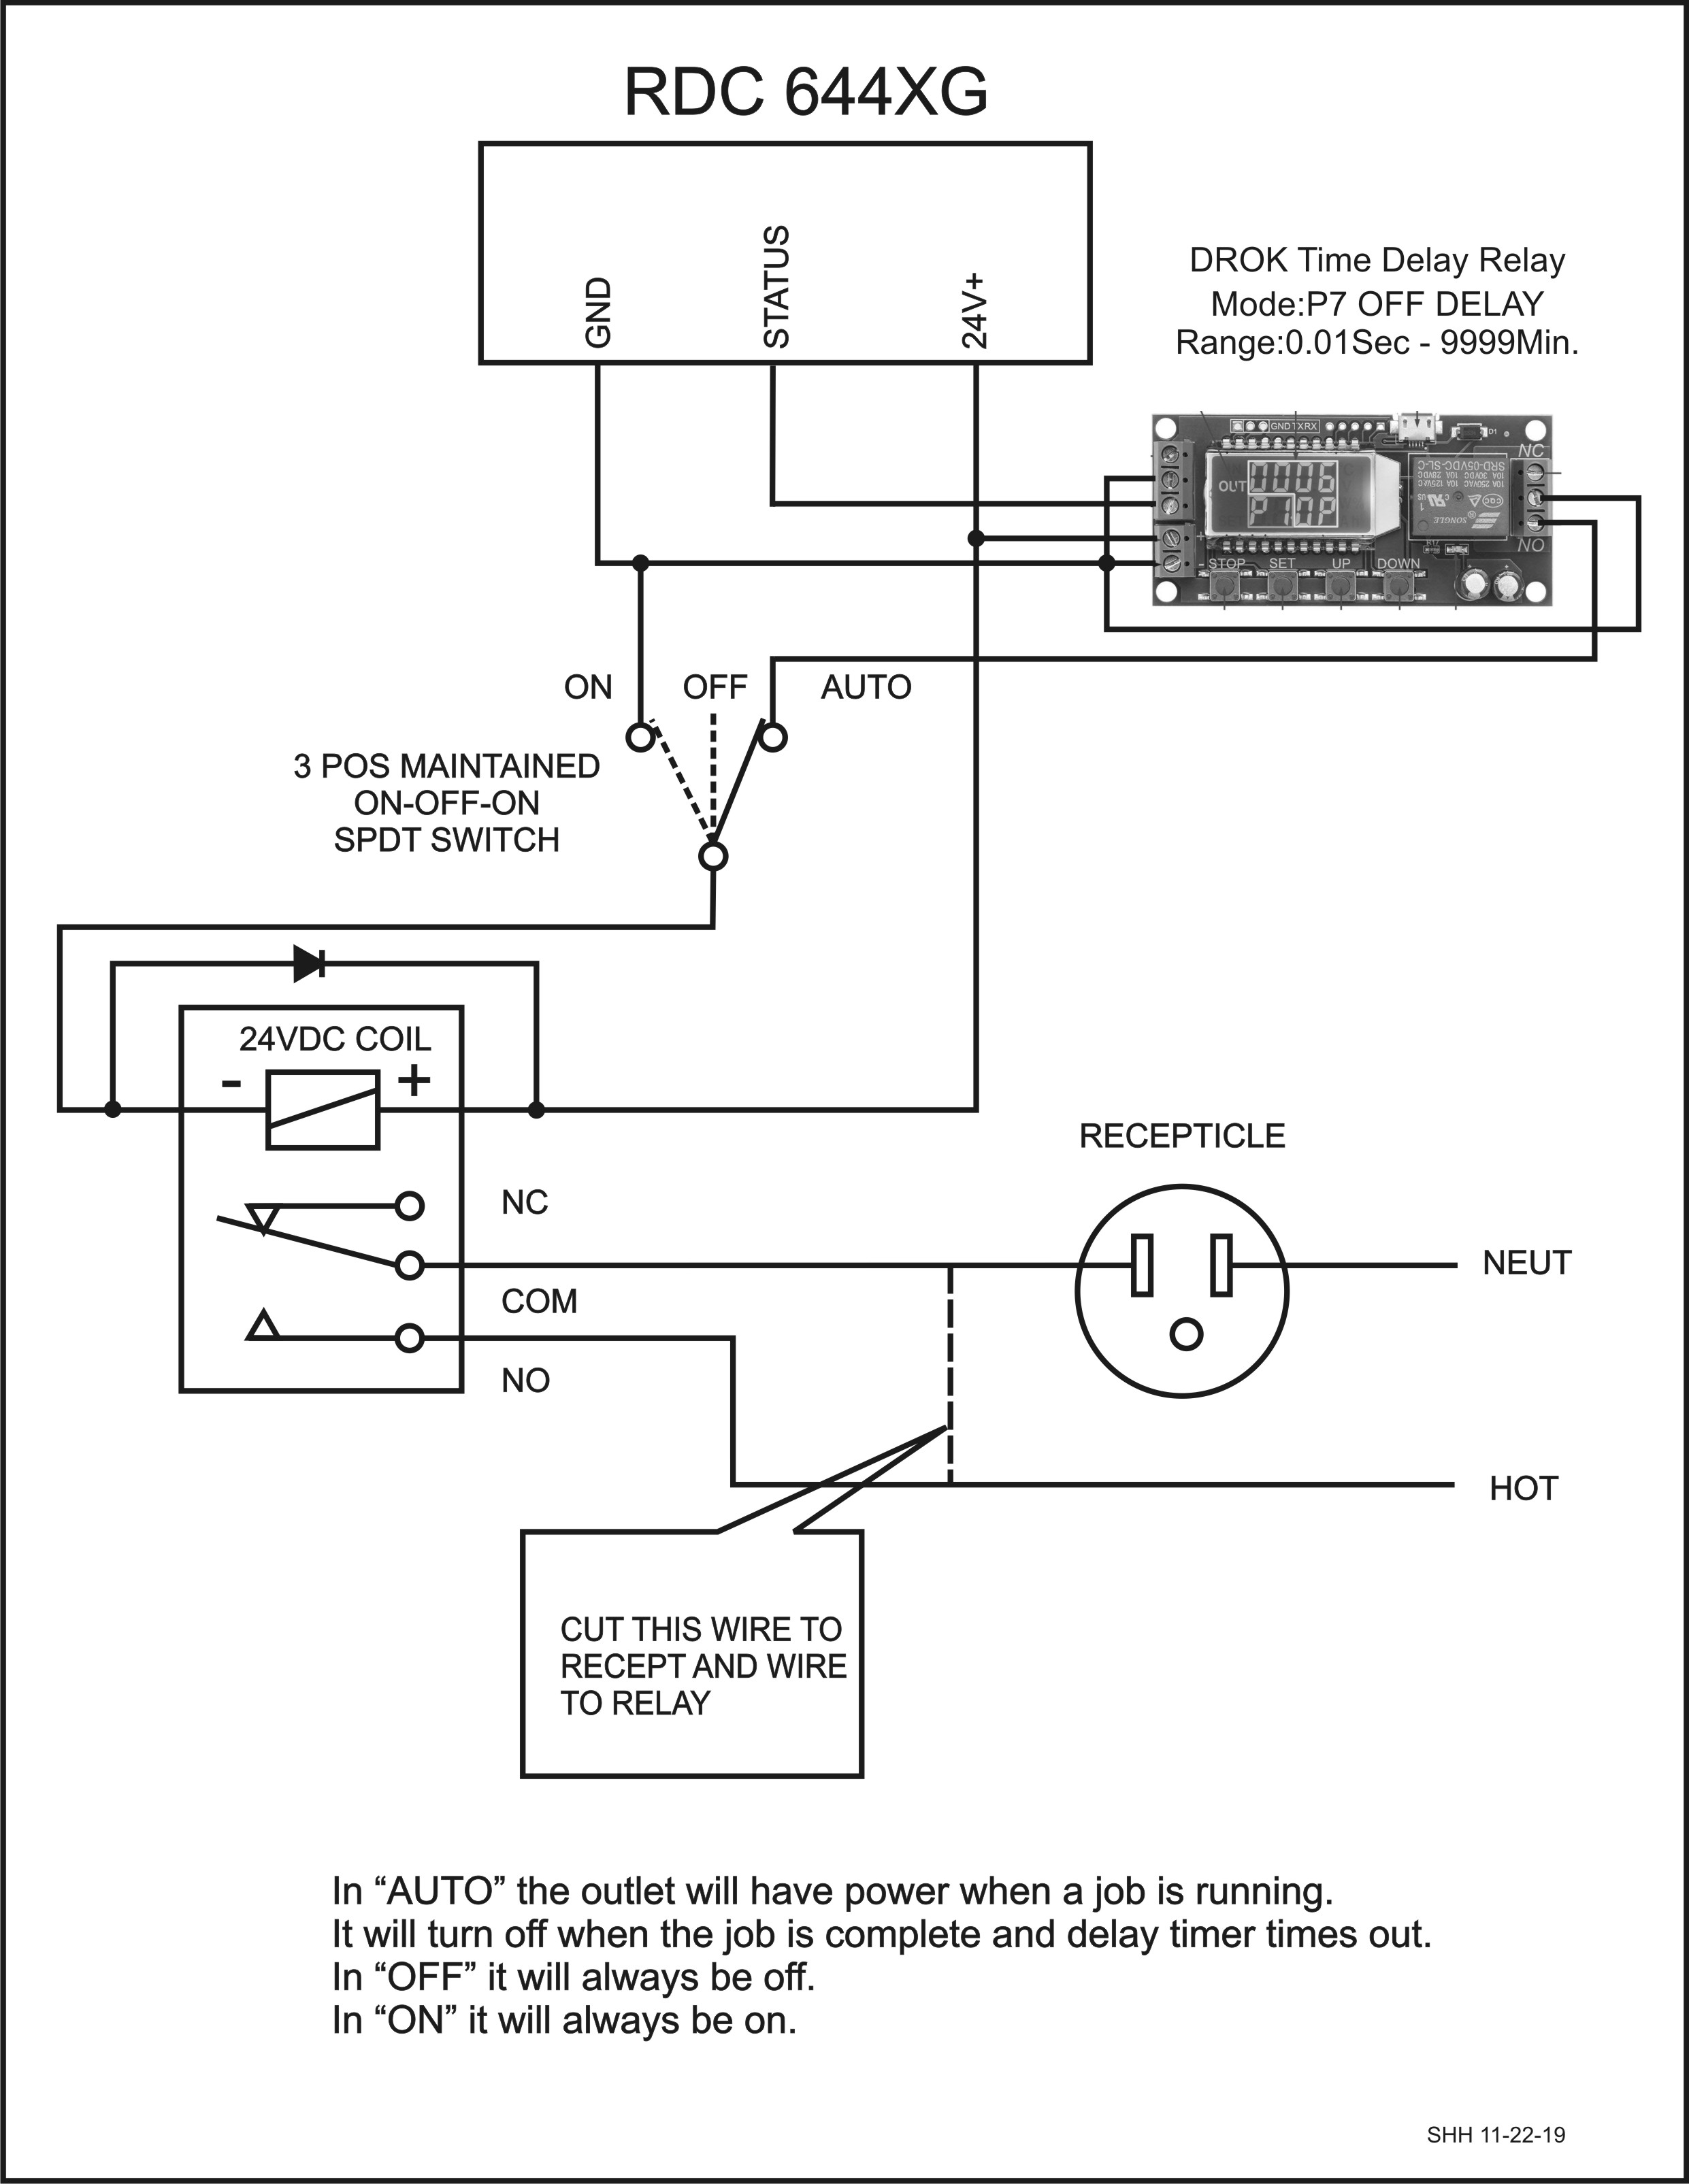
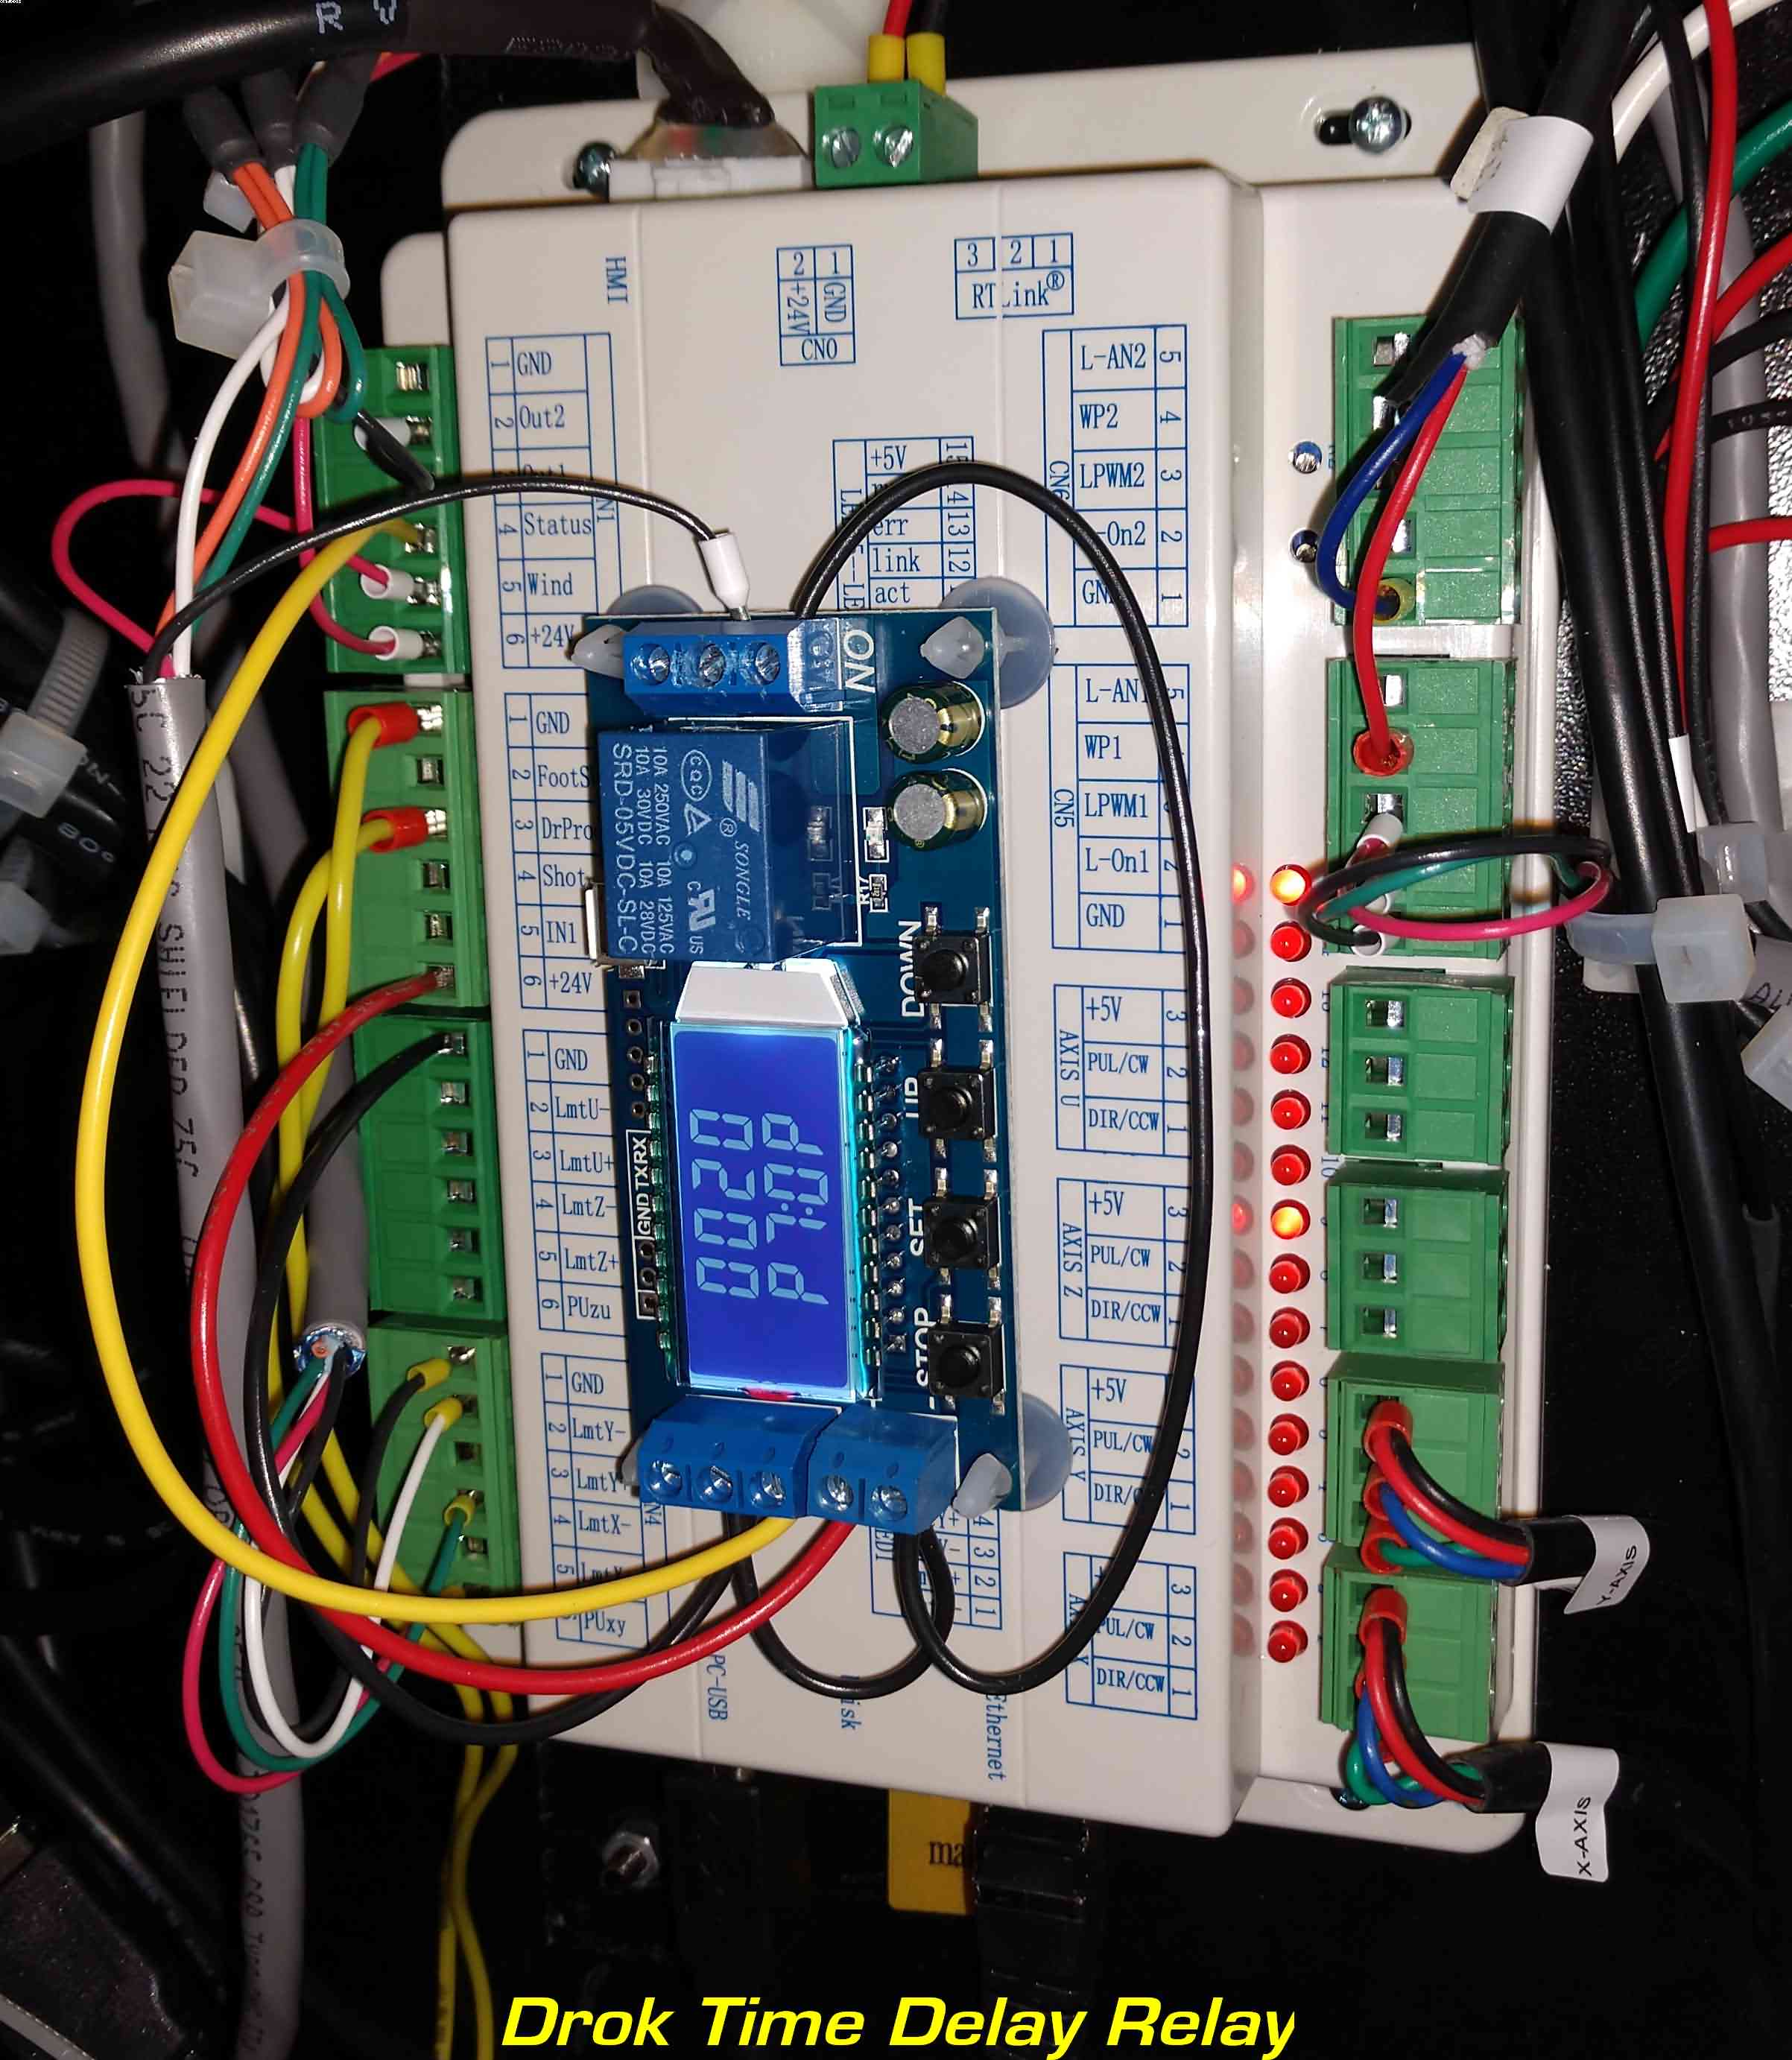
I took thx suggestion and added a time delay relay. I found this Drok relay on Amazon for less than $14. The relay came with standoffs so it was attached to the front of the controller with VHB tape. The delay time is easily adjustable. Use the P7 mode for a off-delay timer. The 24VDC was taken right off the control board.

5 Likes

For those who also have the air assist that use the ‘status’ output, this diode in the wire to the air assist circuit will keep the blower from turning on when the air assist is switched to manual.

3 Likes

The latest release of LightBurn now allows setting either of the two “generic” outputs on Ruida controllers as well. This would allow you to control an exhaust fan per layer, if you like.

1 Like

Wow. I thought those were fixed outputs by the controller. I had already wired all four outputs to relays and then found out I couldn’t control the last two. What menu allows you to configure these outputs?

Assuming my understanding of them is correct of course, it’s these:
image

When I tried to use them the first was like an inverted ‘status’ output but with some differences if I pause a job. The second was and error output I think. I need to test these to see if your switches override these functions.

The RDWorks documentation is incredibly clear on their operation:

image

image

Just tested with .7 and .9 versions. Output 2 comes on with a controller error (frame slop?). I can’t make it come on with output 2 selected in the layer menu.

I also noticed in the machine settings menu that water protect for laser 1 and laser 2 are swapped. To get water protect for laser 1 to stop the machine I have to select water protect for laser 2. I have been running without any water protect! You will also notice the status lights in the controller diagnostics screen show this too.

When I did get the water protect to stop a job the error on the display shows water error and output 2 turns on.

This must be the “function reserved” they are referring to! I haven’t tried output 1 but I assume it will have the same problem.

On the RDC6442G, output 1 turns on after the machine has homed and returns to its starting point. It is almost the inverse of the status output, but not quite. As soon as a job starts output 1 turns off (status turns on). If the job is paused, the output 1 turns on (status stays on). When the job is continued output 1 turns off (status stays on). When the job completes output 1 turns on and status turns off.

Not sure what anyone could do with this!

I hope you can find a way to utilize these outputs. Otherwise they are pretty much useless.

2 Likes

This topic was automatically closed 30 days after the last reply. New replies are no longer allowed.