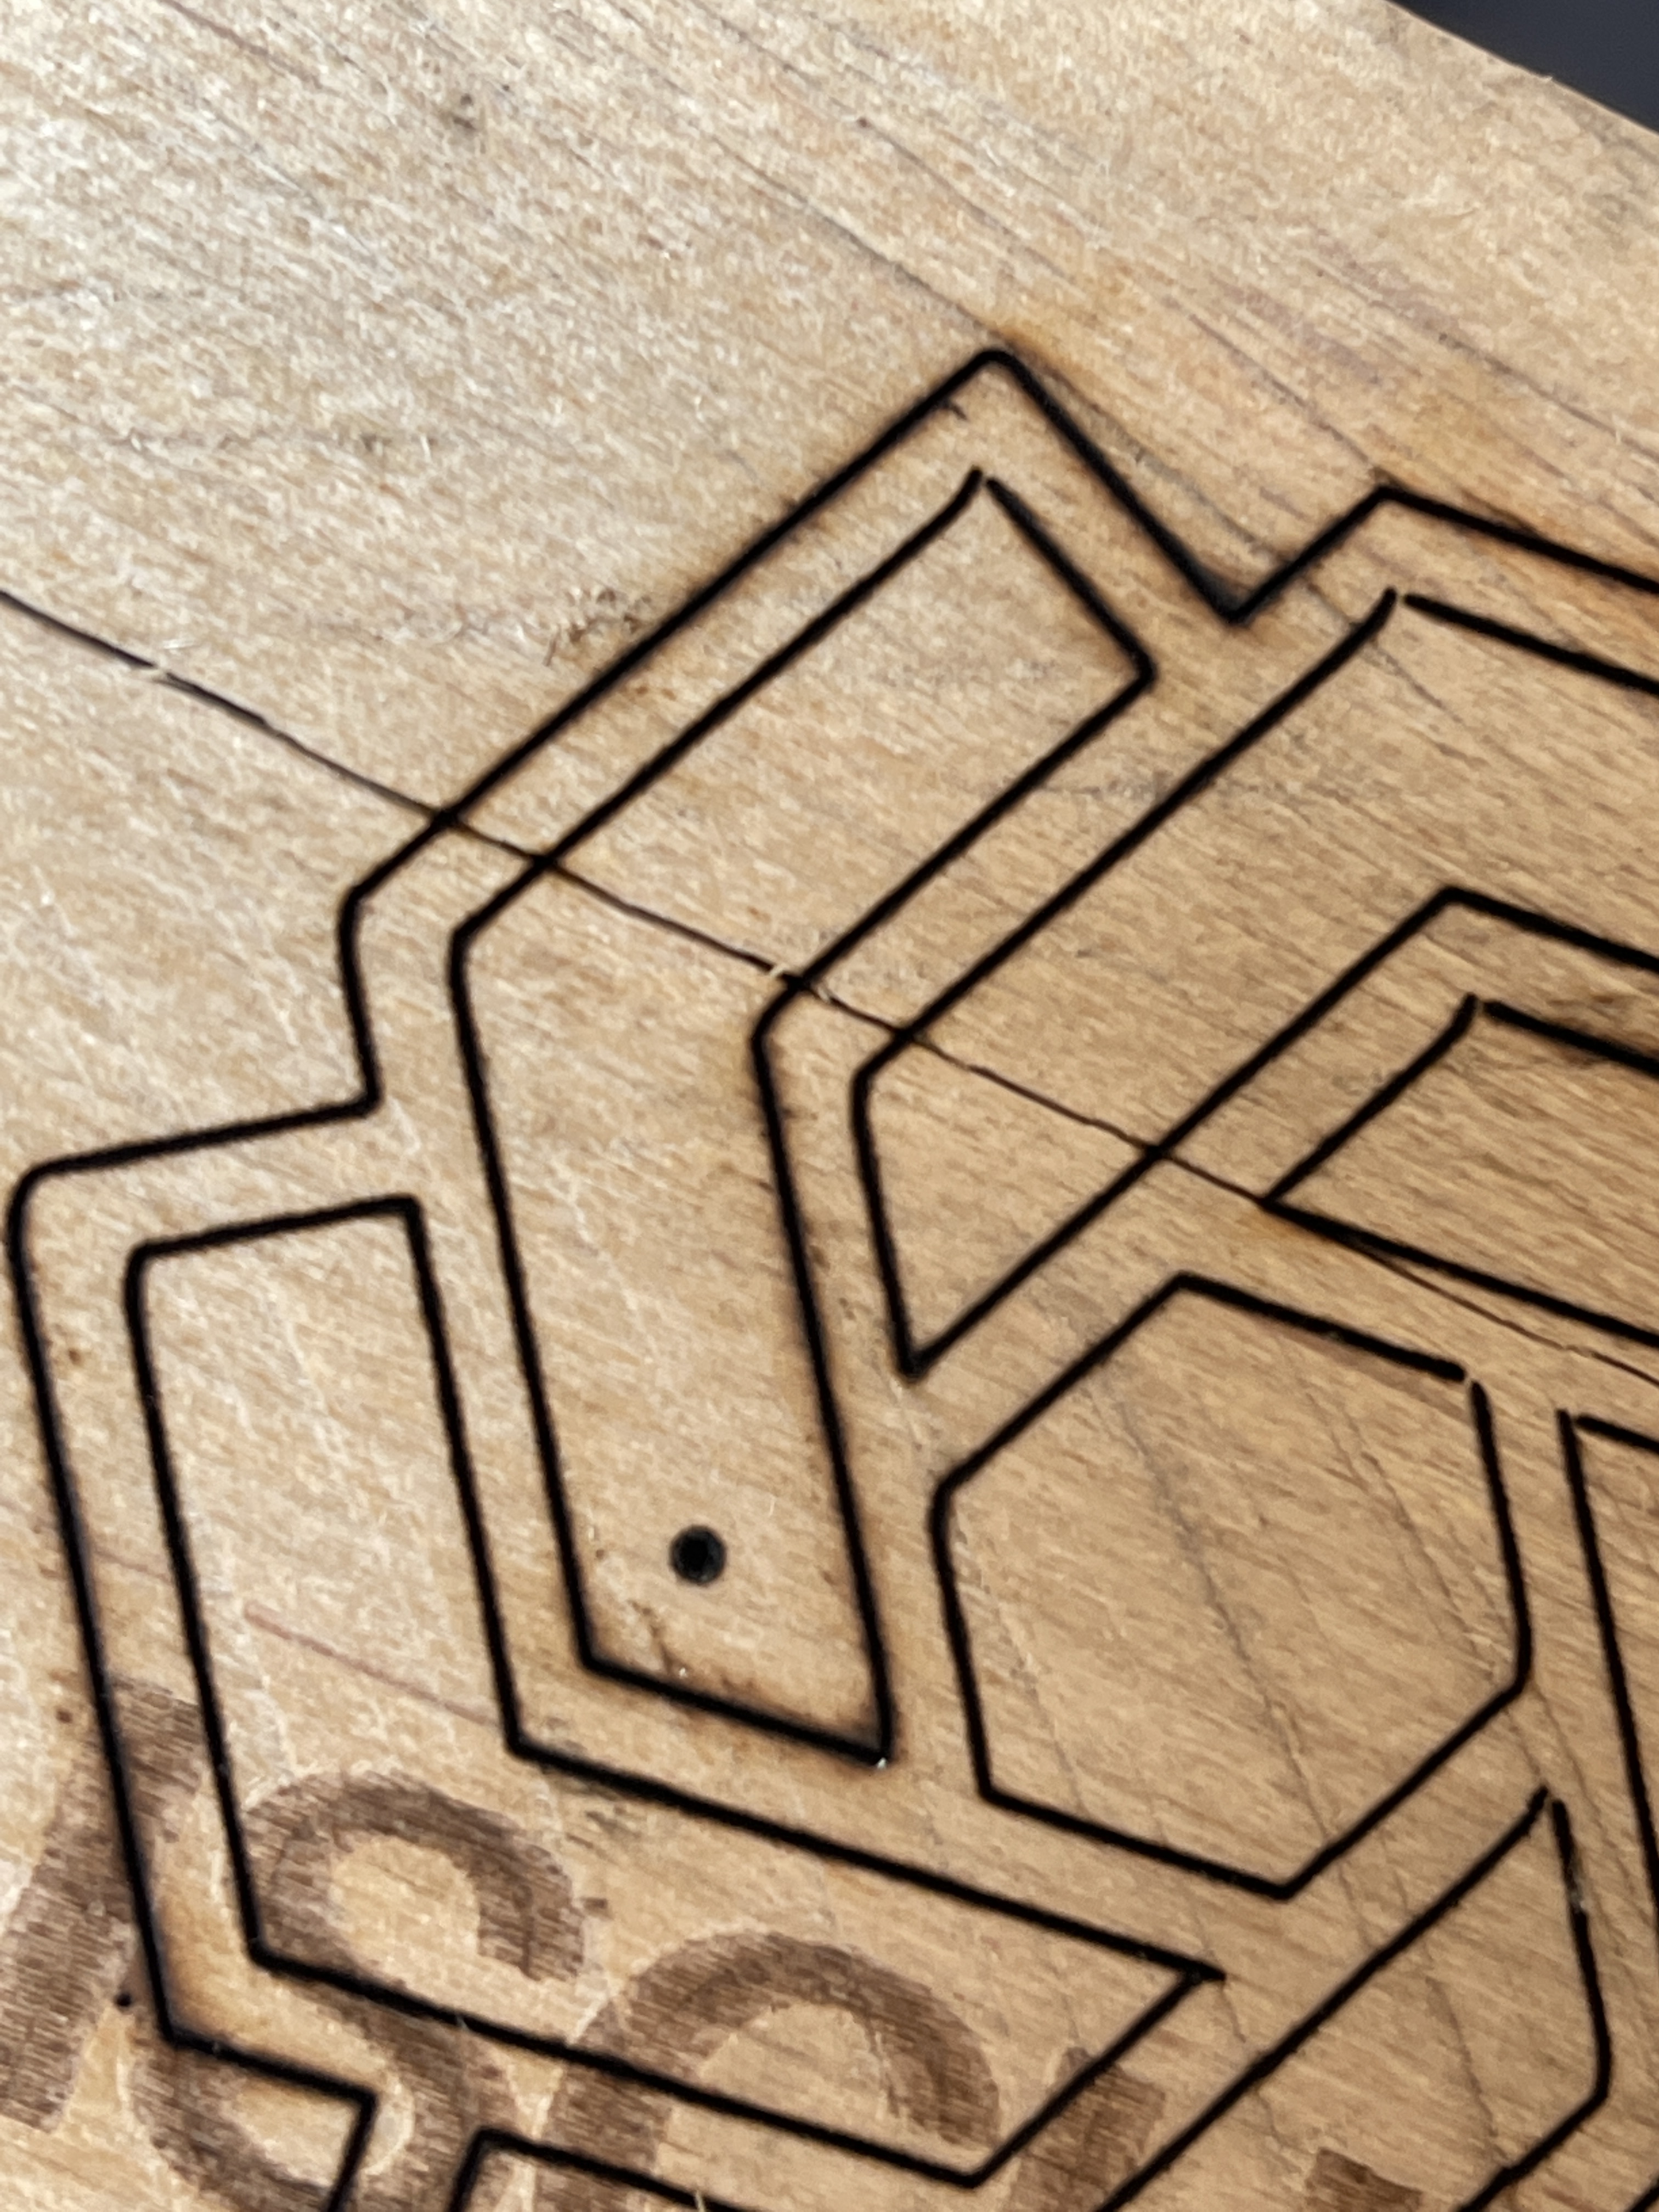
I just finished building my first laser, and while testing I seem to be getting an opening on certain corners. I’ve attached a photo that shows what’s happening. My setup is a RCD6445G with a 60w laser. I’ve tried adjusting the belt tension and playing with the acceleration but haven’t gotten any good results.
Do you have your minimum power set appreciably lower than your max? The program works (I believe) in such a way that it reduces power while it slows for the corners/turns to attempt a consistent power applied per unit traveled, but if it’s too low, the power could be dropping off farther. It really doesn’t make sense to pin that trouble here, as I see not all of your vertices are dropping out, but it is something to be examined.
Thanks for the input, Fred! Unfortunately, I had my min/max power set the same. I’ve been digging through these forums and it looking like it might have something to do with backlash. Appreciate the help!
Oh, yeah, backlash can be a nuisance. What happens when you do bi-directional fill/engraving? Something like that with a larger line spacing will show up pretty easily.
I took the X-Axis apart, cleaned and greased the rail, realigned and tightened everything and I’m getting much better results. Thanks for all the ideas!
I started to play with engraving and it looks absolutely terrible. The whole engraving area looks burnt! Any ideas what would cause this? I ran the fill at 250mm/s and 20% power.