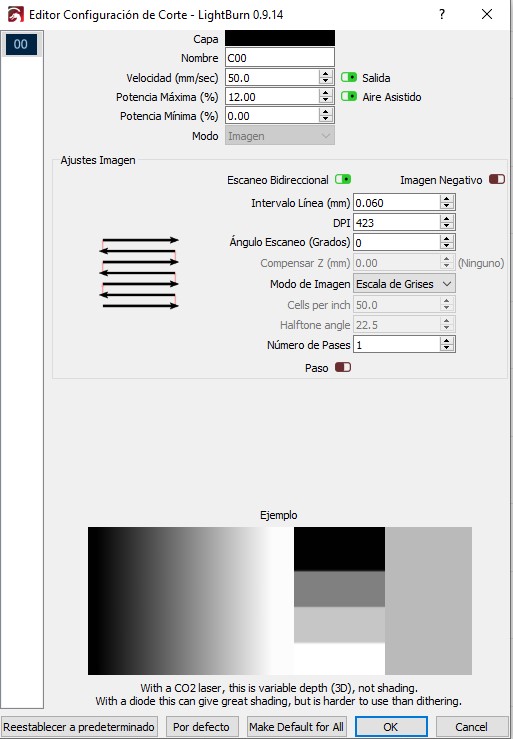
Gray scale with an 80w CO2 laser will give you variable depth, not variable shading. You will be very unlikely to produce a quality photographic result using the grayscale setting with an CO2 laser. This is noted in the description below the preview:
Use one of the dither modes instead, and your DPI is about 2x higher than it should be for an 80w machine.
I don’t quite understand what you mean by: “Use one of the dither modes instead, and your DPI is about 2x higher than it should be for an 80w machine.”
What image mode and DPI do you recommend for my 80W laser, so as a starting point at least, to start doing more tests?
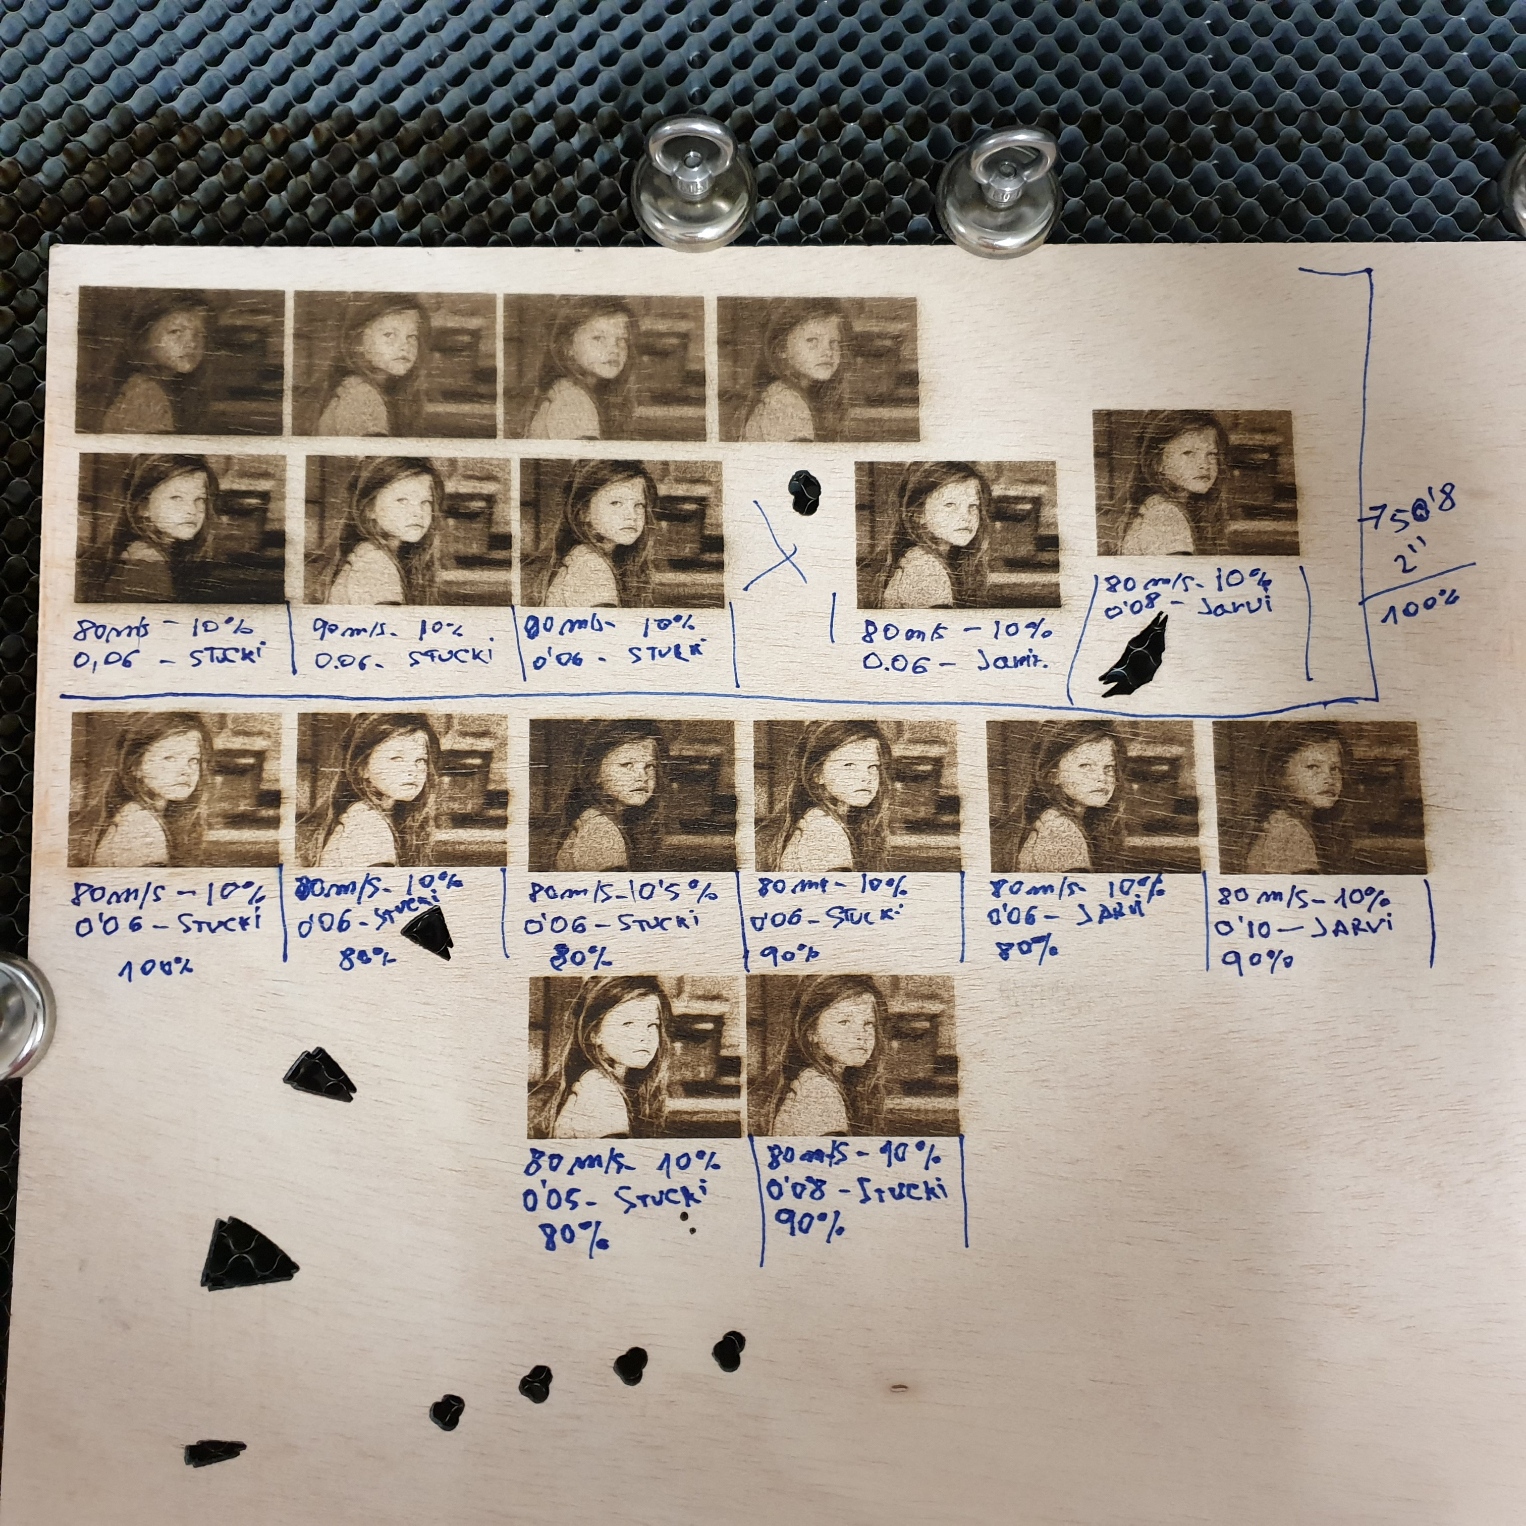
With an 80w laser, somewhere between 200 to 250 DPI, but it really depends on the lenses you have and the material you’re using. Longer focal length lenses have a wider beam than short focal length ones, and different materials will hold a burn differently - anodized aluminum holds a small spot, wood tends to ‘bloom’ outward as it burns.
I would suggest Stucki or Jarvis for the dither mode.
One thing I saw was the max power was set to 12% and min to 0%. You need to find what the minimum power is that you laser will fire at. 12% on my 80W CO2 laser is about the threshold. So part of the problem might be the laser doesn’t even turn on till near full black.
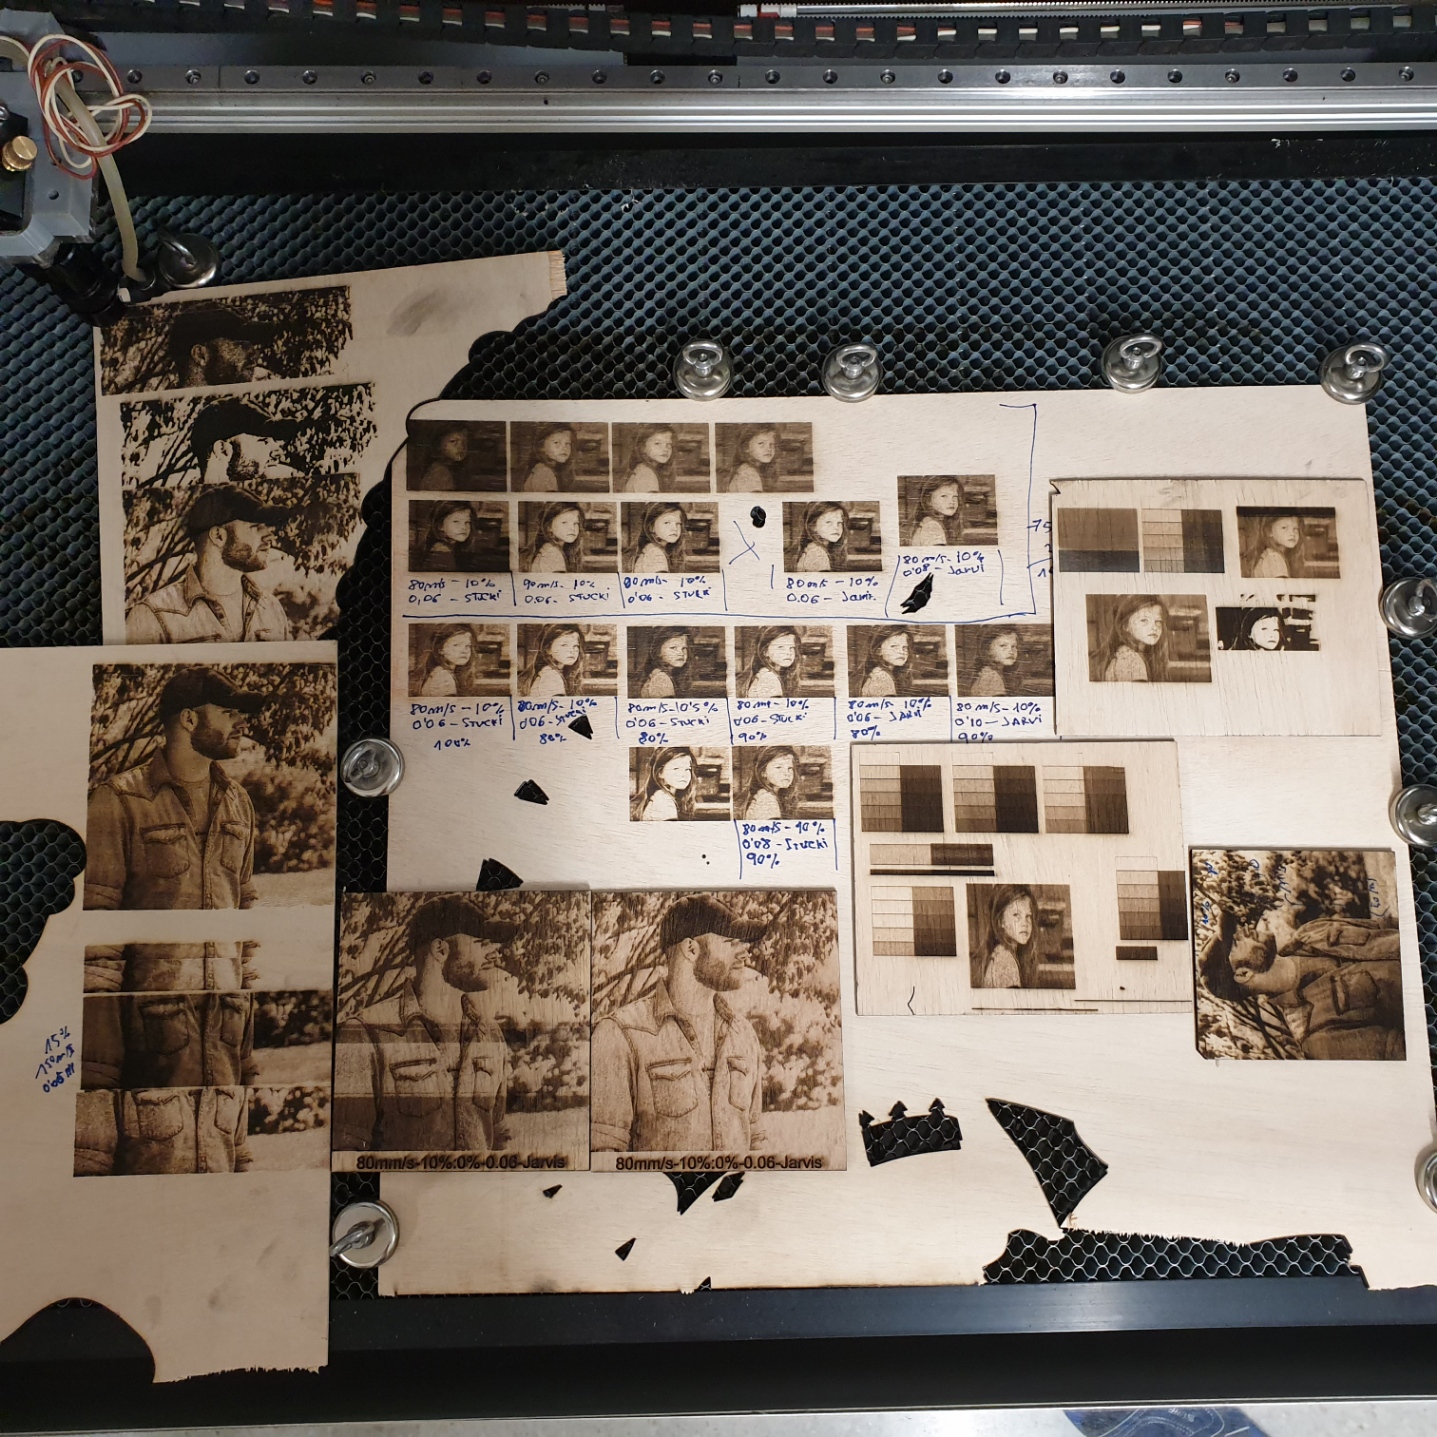
Do some grayscale power tests with the wood you intend to use.
Treating the wood also gives a better result. A wash with watered down matt white acrylic, let it sit a few minutes to soak in, then wiped off and let harden for half an hour, or a few wipes with thin (~1lb cut) of shellac gives a good result. You can re-coat the shellac in about 15 minutes, but leave it ~2-4 hours to harden before engraving. I always give it a rub down with 00 or 000 wire wool, too, before engraving. You give it a final light wipe over with shellac after you’ve engraved and no dark smudges and reduced burn smell. The shellac also makes it easy to clean after engraving. I give it a blast with air to get rid of most off the dust and debris, then a wipe with a cloth with alcohol on it, let dry, then a final light coat of shellac.
Either method tends to normalise the wood fibres to burn more consistently with the laser.
I prefer shellac as it’s so easy to apply, and is ready fast. It doesn’t give much of a colour or gloss and the burn is notably more defined than on raw wood.
Like Oz said, our CO2 lasers don’t grey scale well, I get a very narrow range. One of the dither modes usually works better for engraving things like pictures.
Grey scale works good for 3D relief engraving.
When it comes to the minimum power setting, there is the minimum power you can start at, and the minimum power you can reduce to. What I mean by this is say your laser needs 10% to fire, but once the laser is going, you might be able to reduce to 8%. This has mattered to me only a couple times.
Whether you want to set your minimum for grey scale to 10% or something less will depend on if you want white to burn or not. It your min is set to 10% and that’s where your laser can fire to start, white in the grey scale will be that 10%. If you want white to be non burning, set it just below the starting threshold. This is where understanding where the laser quits once firing is good to understand. You might want to set the min to be where the laser actually goes out.
I have that same controller, I have been happy with it.
I have tried and have discarded grayscale, because the result is totally burned, although I have to do another test, lowering the threshold of 10%, as Joel has told me.
I am going to pass my tests, so you can see that I continue to work hard with it and I hope I can get decent results, I will always try to count on your help and wisdom.
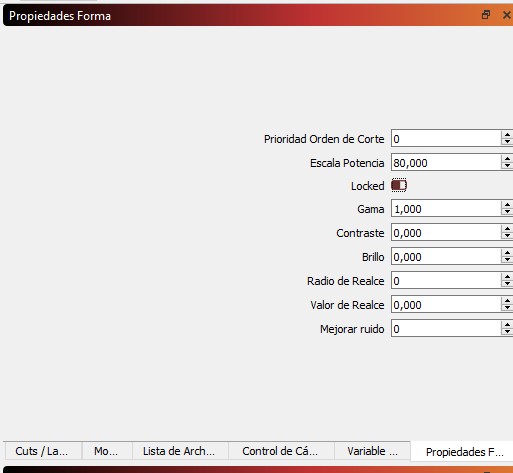
Select any image, then right-click and choose “Show Properties”.
Set Gamma to 0.8
Adjust Contrast and Brightness as appropriate for the image (or just leave them)
Set Enhance Radius to 4
Set Enhance Amount to 200
Try those as a starting point - if the image is relatively high resolution, you might need to make the Enhance Radius larger - you will see the image change in the edit view as you adjust.