GrayScale Engraving

“life is like a box of chocolates”…

Hi, I am trying to tune my K40 cutter for best grayscale engraving (voodoo science, I know…)
Loaded a GrayScale image i downloaded from the net and now trying to reach best outcome using different settings.

  1. I have little experience in this field but it feels like Shape Properties should also be saved as part of the cut settings when the latter mode is “Image” - for what it worth.

  2. it is almost impossible to use preview to predict the outcome and i mean: i never know which settings should i change to correct the outcome to match my image and/or desired outcome.
    Gamma? Contrast? Brightness? Min power? Max Power / etc. i know it is hard to preview the laser output since it is not linear but it is equally hard, if not harder, to know which dial to tweak to fix the outcome. Best would be to use the camera to feedback the outcome for LB to adjust the input to match the output but i don’t know if this exists - for sure this is hard to do.

Long story short:
i am looking for a guidance for how to tweak LB image, and I mean methodology and best procedures for quickest best results.

BTW, it would be awesome to be able to tune Preview window based on the best settings, e.g - once we have good results we should be able to tweak Preview to match the outcome regardless of Preview zoom factor which reflects the scanning lines that makes it impossible to know what goes on.

Thx.


The various image properties are applied to the image because they are affected by the content of the image itself. What works best for one image is not going to work best for another.

The preview can’t possibly know how your laser or your chosen material are going to respond - A 100w CO2 will vaporize material at varying depths, while a 5W diode will darken some materials almost linearly, and others, like white paper, very non-linearly. Focus affects the output as well.

Grayscale is possible with a 40w laser, but it tends not to produce results as good as dithering. CO2 systems tend to vaporize material before they char it much, and the darkening on the material by power varies depending on the material used.

What you’re attempting to do is what everyone attempts to do, and has difficulty with. There’s no magic solution besides trial and error.

I can tell you that the things everyone gets wrong are:

  • Using a DPI far higher than your laser can produce - This causes over-burning, particularly in the mid-tone ranges and wipes out image detail

  • Going too fast - Material darkens more when you apply less heat for longer (this is partly why diodes work so well for images - they’re weak). Power supplies and glass tubes also have a trigger time, so if your dots are tiny and you’re moving quickly, you’ll miss details

  • Using poor / cheap material - If you plan to run your final jobs on alder wood, don’t test on paper - do all your tests on alder as well. Every material responds differently, so tests run on one will have a different outcome on another.

Mine set to 254 DPI.

Speed tests are @ either 100 or 150mm/s

Same material just for tests and tuning.

Grayscale is very hard to tune and I know it is image specific but i thought that if shape properties will be part of the image/cut settings it will be a good start for other b&w images.

I got much better results with grayscale compared to Dithering so that’s why i am trying to stay with grayscale. it will be hard for me to move to dithering but I take your word for it and try to tune Dither for best results.

We’ll see.

You’re in the right range for DPI and speed. You could likely go to 330dpi with a K40 and still get good results, if the controller will keep up.

Dithering is easier to tune because the resulting shading is more linear - Since you’re only using burnt / non-burnt dots and varying the density of them, it isn’t affected by the power transfer of the material or the tube in nearly the same way as grayscale is, but grayscale can hold a little more detail compared to dithering.

Grayscale is possible, and if you’re close already, you could keep going until you get it. Defocusing a little bit can help get more contrast - you’ll char more, and vaporize less.

2 Likes

BTW, it is such a tedious work to tweak&check since you:

  • Can’t change parameters while Preview is running
  • Can’t pause, change parameters, continue - new settings will take place only when stopping and restarting job (LB should not allow changes during pause…)
  • No realtime preview of changes in preview window.

Speaking of Dithering…
Oz, What do you think about adding to preview window a rectangle region selection which when selected tells the user the ratio between black (fire) dots/dashes and background?
White is no dots, Gray is 50%, Black is 100% and all the rest in between.

What do you think?

I’ve done it, and I know this, but I also know what’s involved in making it work as you suggest, and it is incredibly non-trivial.

You can’t pause & change parameters because the job is ‘built’ into a buffer in memory and then streamed to the laser. You can close the current file and open the next one without affecting the current job. This is required because when using a DSP controller, you simply send the entire file to the laser and then it runs, so LightBurn is designed to work this way. With a DSP controller, you can actually change the running job on the controller itself.

I am learning so much today.
Just found the best Dither settings for my gray scale calibration image.
I found out how bad USB cable and/or speeds influance the outcome in such an unpredictable manner. i was so puzzled how come the dark grays are missing while black and lighter grays and whites came out OK. that was a pickle. the closeup on the last image is showing a perfect result. had to replace my USB cable (i am using a very long cable - USB over RJ45 CAT6) and lowering speed to 50mm/s did the trick. I must solve the communication issue or add another PC side by side to my laser, and only then I’ll speed things up and see what is my controller’s limits.

“Why am I missing the dark grays?”…

Looking good (all grays are there - my phone is not showing the darker grays):

I had the feeling you were greatly overthinking this for some reason, so that explains a lot.

Choosing the correct interval, speed, and power values for the material being used make the most difference. With dithering, once you get those, then it’s just balancing the brightness values in the source image to give you the maximum usage of the shading range, and it doesn’t take long to get a feel for it.

What controller are you using? Some just can’t keep up - image engraving produces a lot of gcode, filled with very tiny moves. 8-bit controllers can’t process gcode very fast, and even 32 bit controllers can choke if you try to push too hard. Usually they’ll just cap the speed, but sometimes the resulting motion jitters can cause lost steps.

SKR 1.3 32bit 100mhz Controller. I don’t want to judge it too soon and before i will have a PC 1m away with a good USB cable. so far i am very happy.

This is an image i just downloaded from the internet and without changing any settings from my grayscale calibration image, this is what I’m getting (On a gray 2mm EskaBoard):
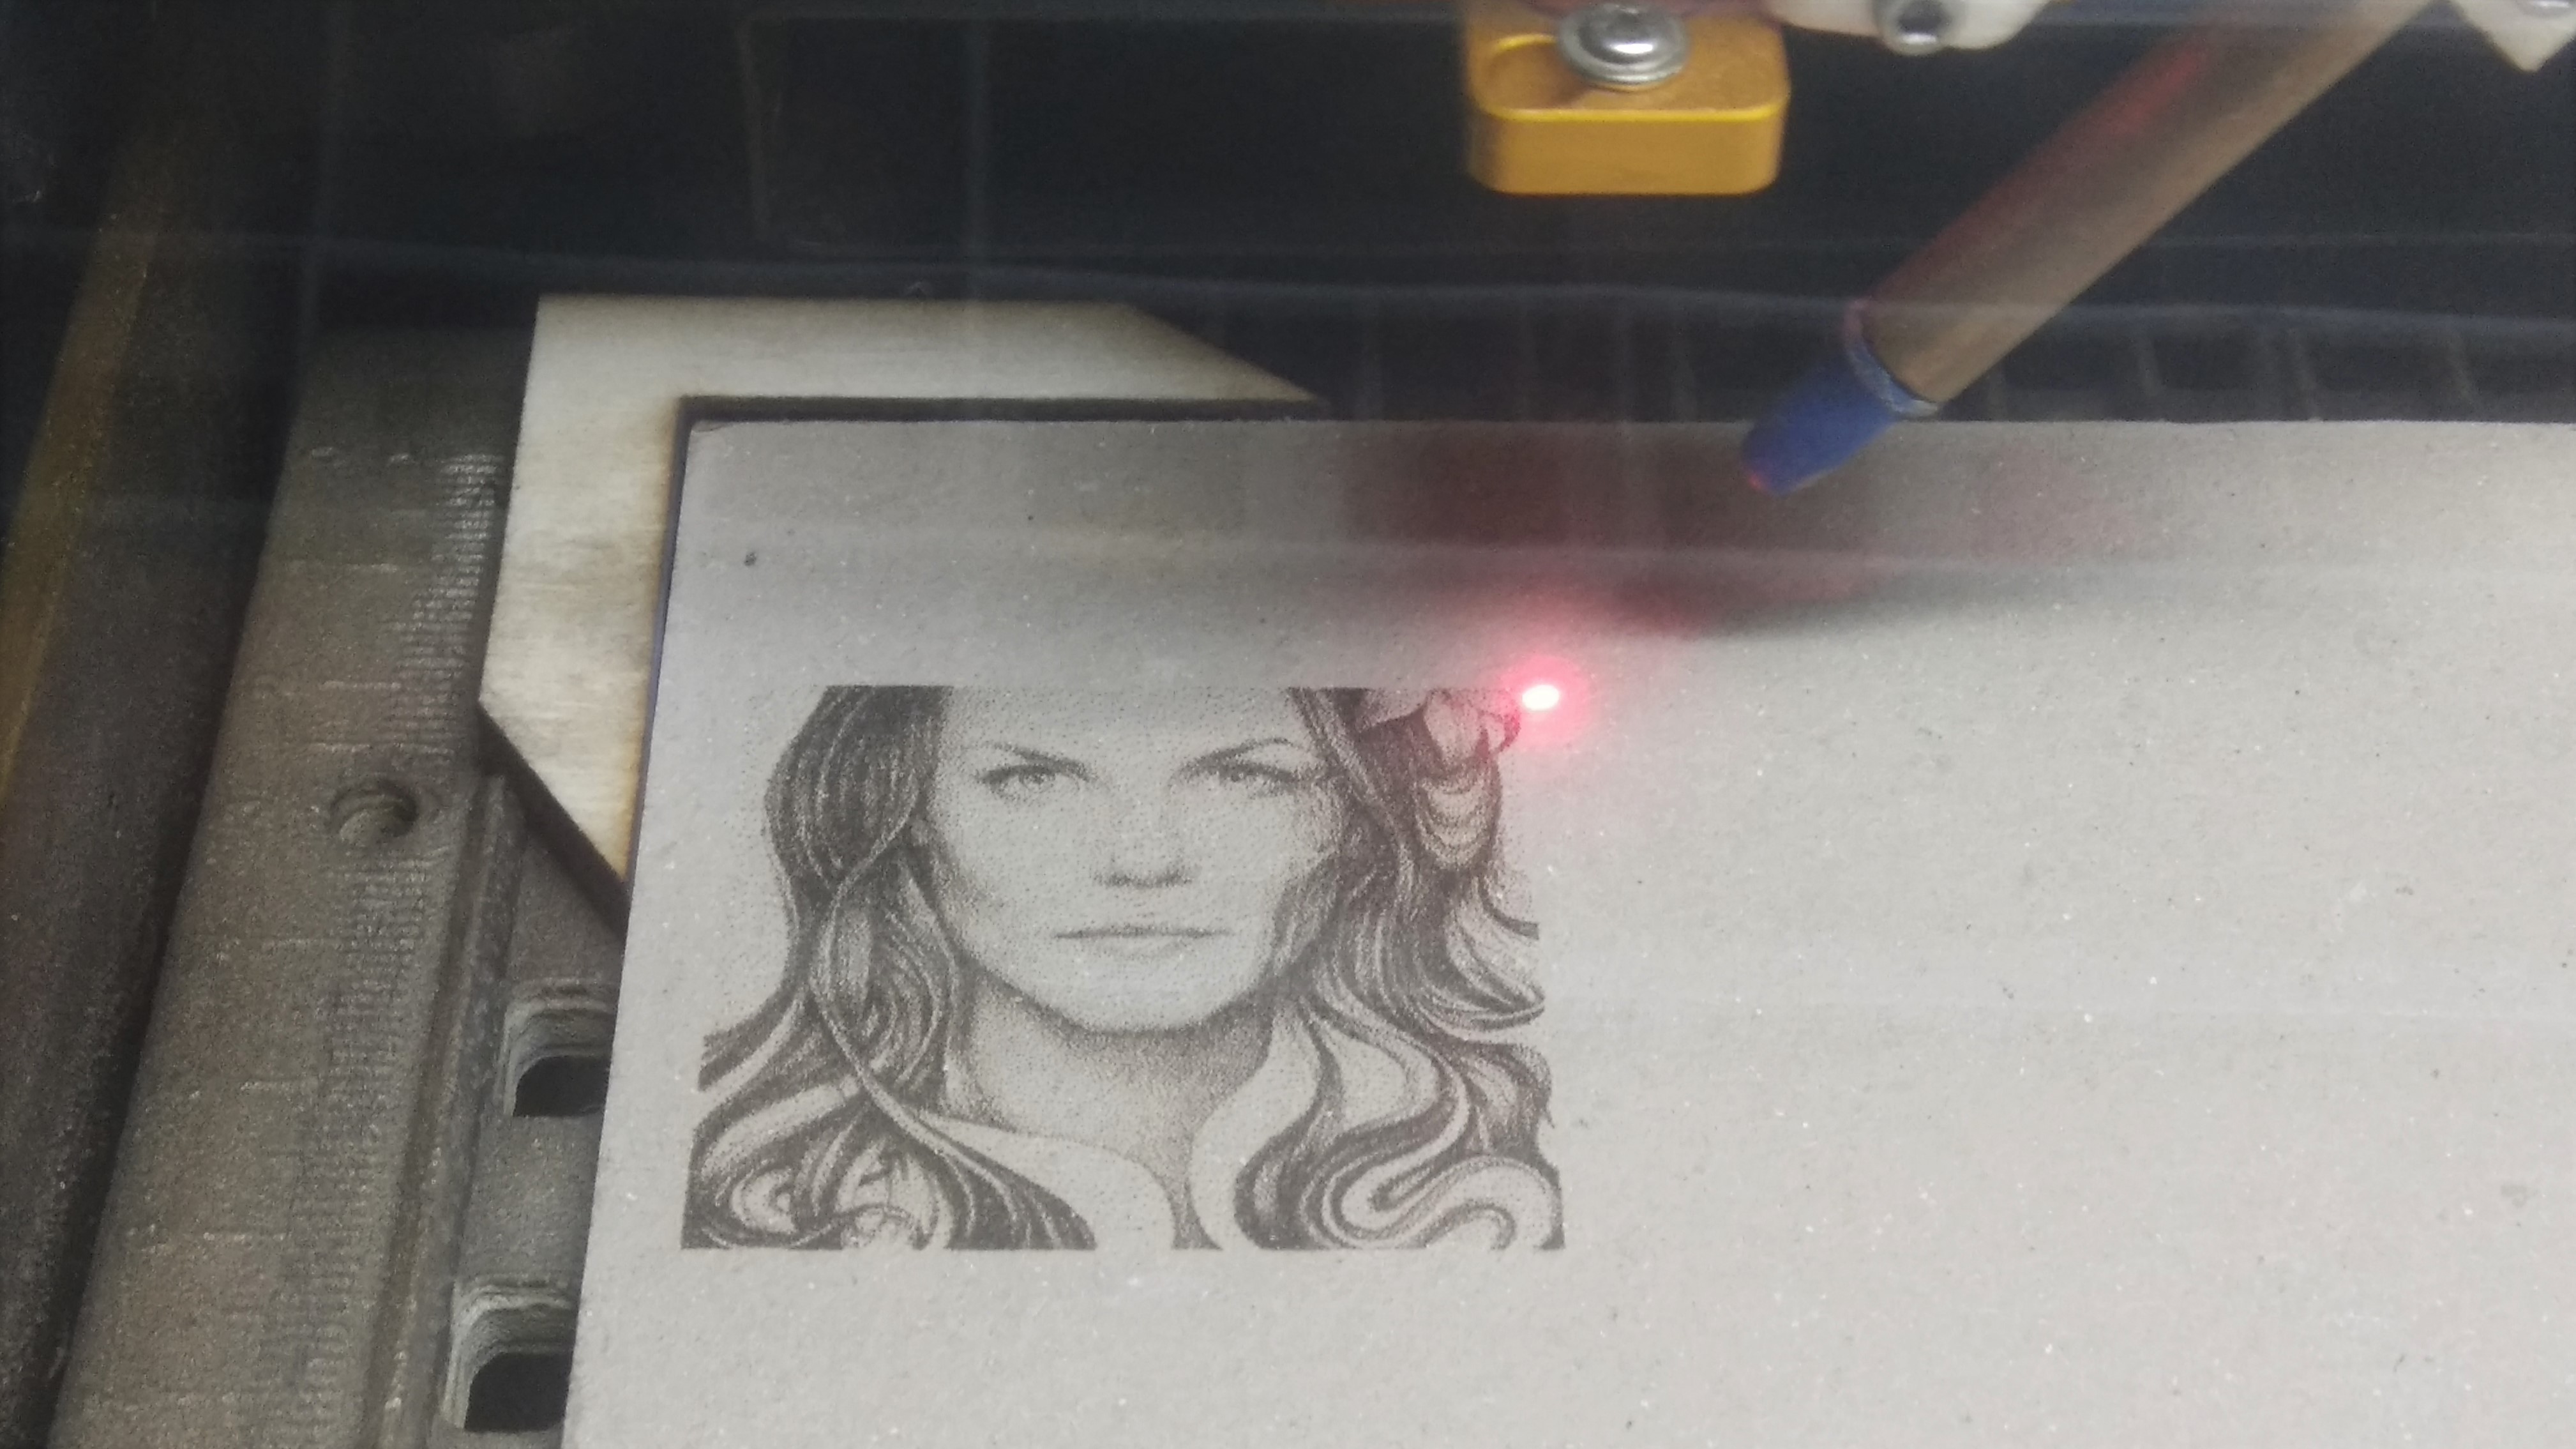
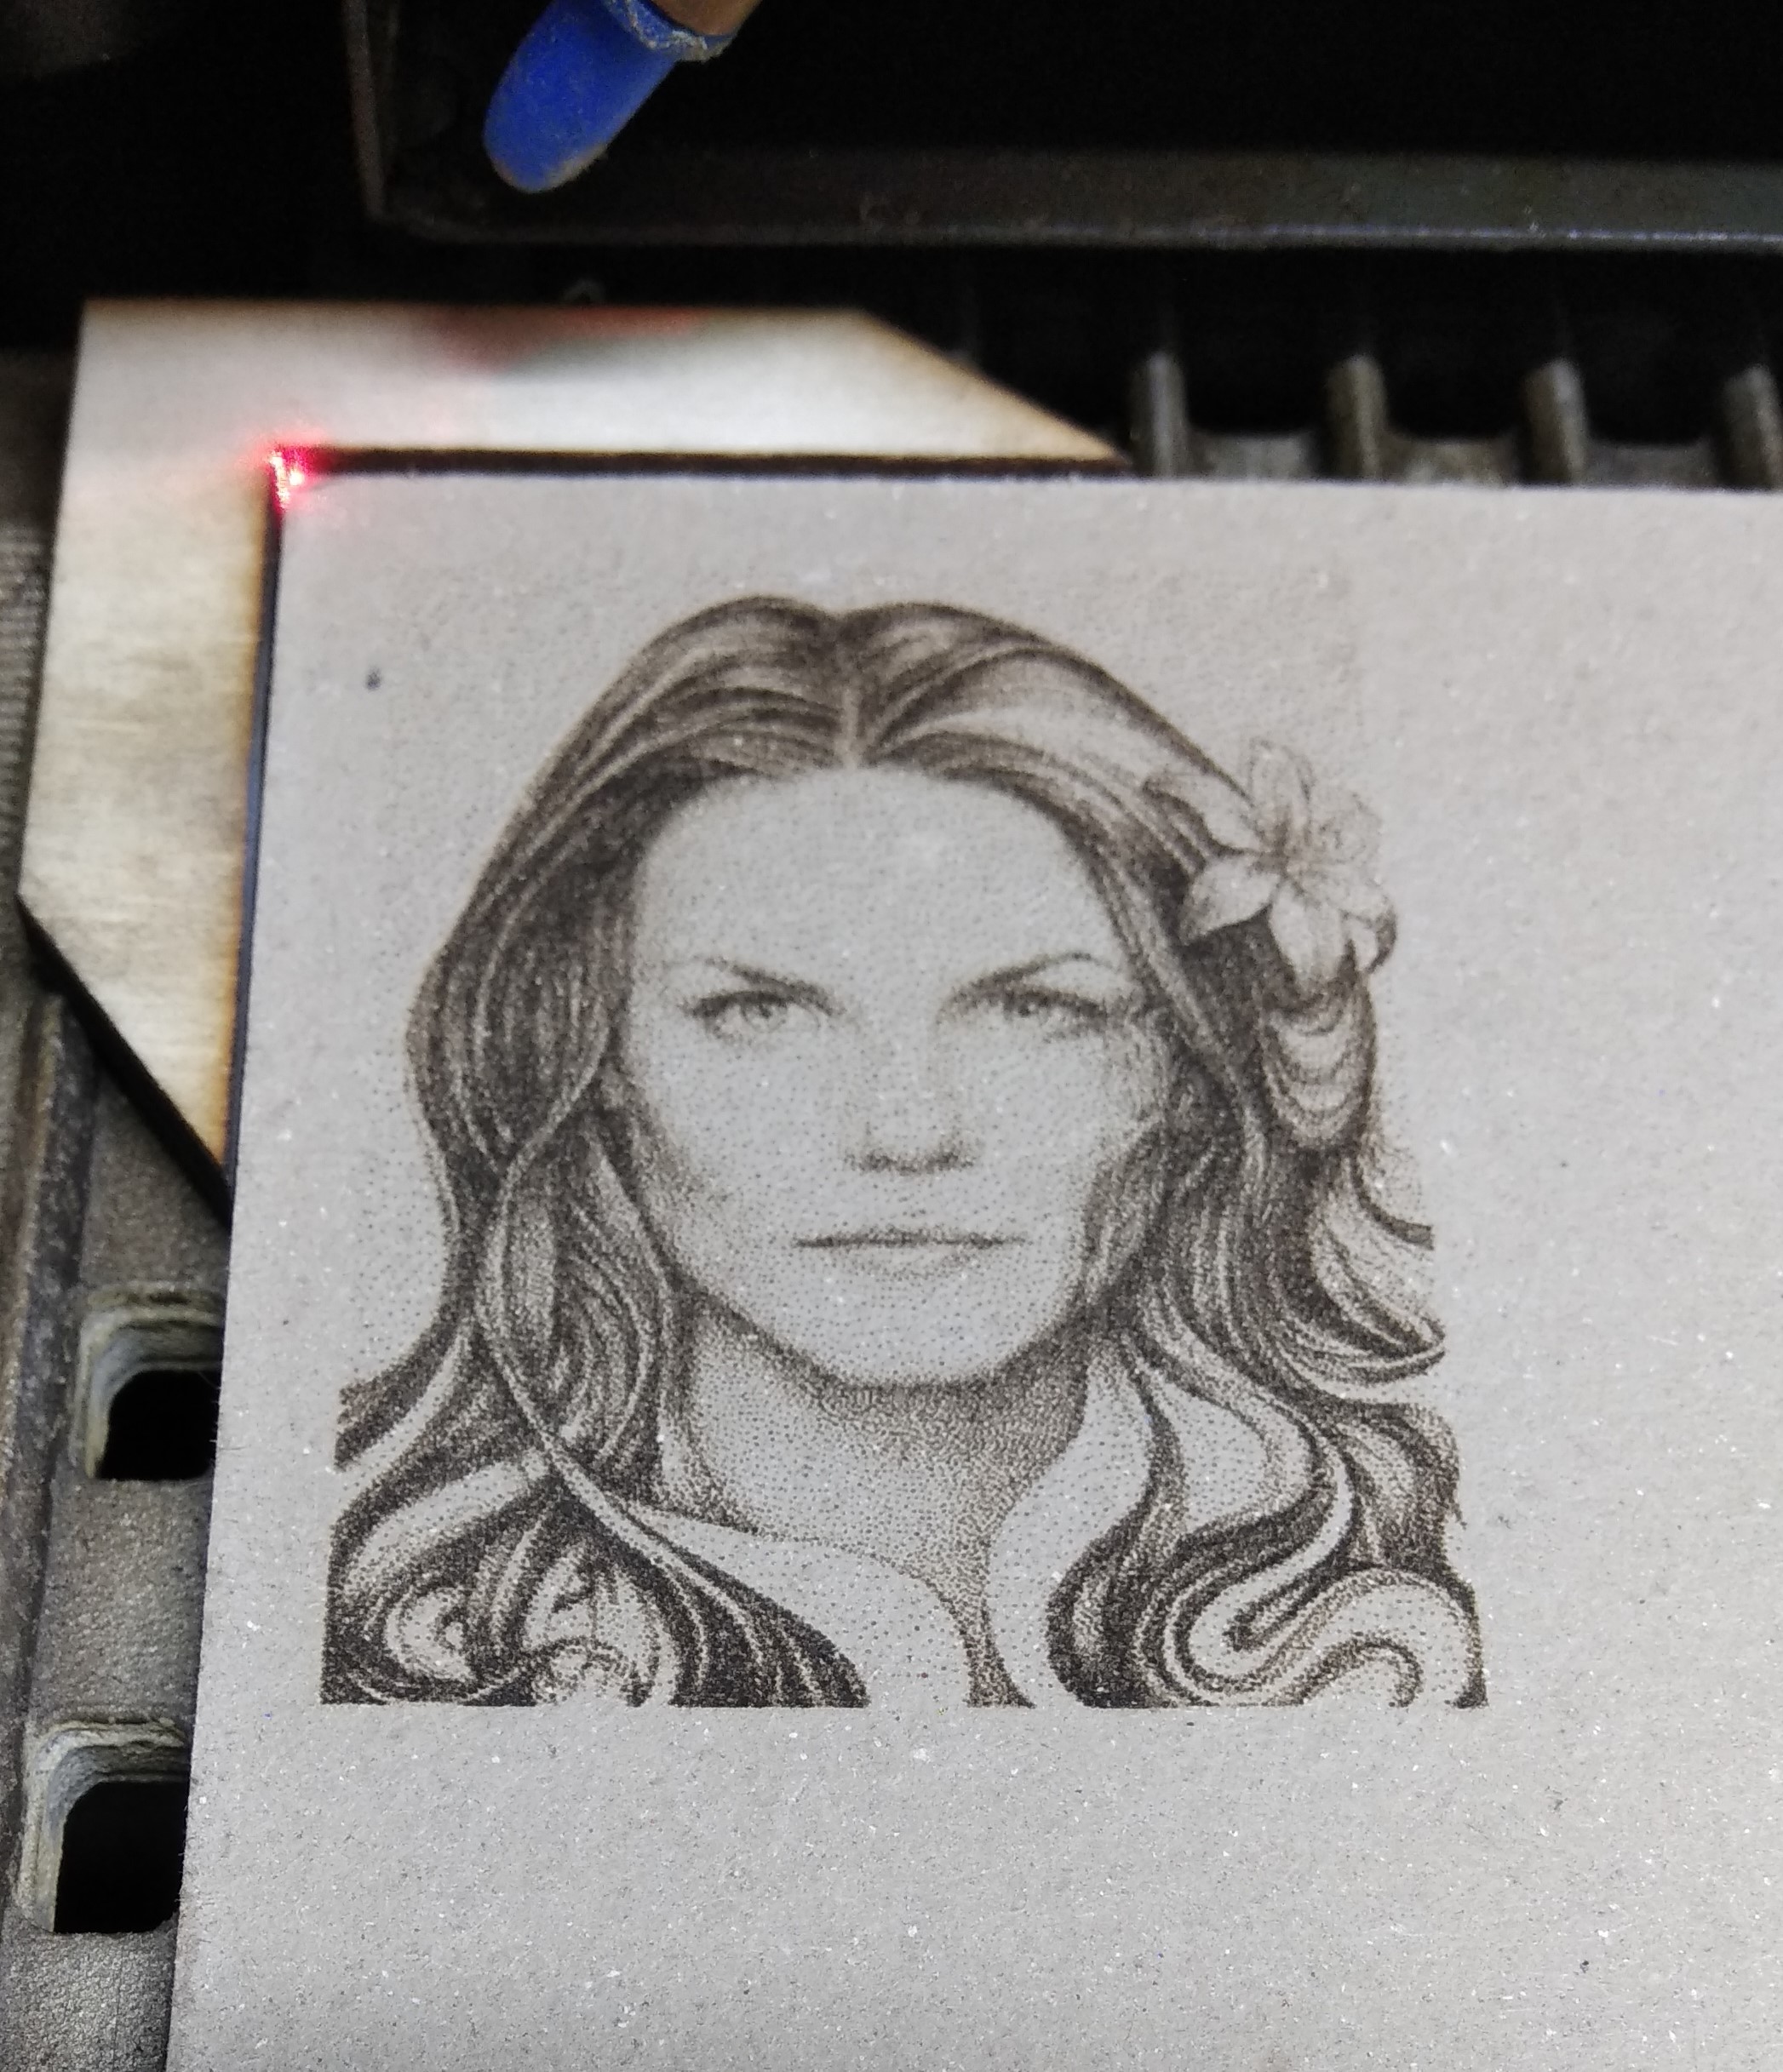

I am very pleased.

1 Like

Lightburn should have an calibration option:

Display on screen and print a 10…20 box gradient with current settings.
Then let user drag a few sliders across the box, and define observed gray levels.
Then adjust the exponential and Max power according to the observed result.

This topic was automatically closed 30 days after the last reply. New replies are no longer allowed.