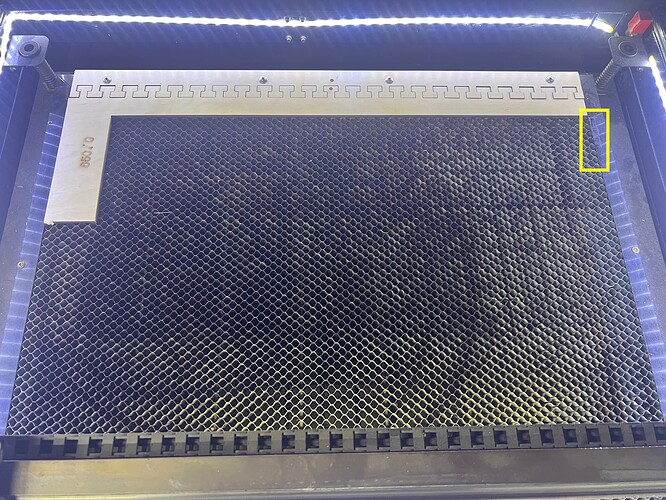
The marks highlighted on the right show where my honeycomb is too small on the right side and I have burned onto the frame. Here you can see the L fence I was describing. The left end is at X-650 and the back is Y-0. My honeycomb extends beyond the fence 20mm or so. This is why I’m suggesting you do something similar with cardboard, so you can see where your actual usable space is.
Wow! So smart. Any chance you would be willing to share that file?
That is really brilliant. I’m impressed.
Here is a video I recently made showing how it’s done. One important thing in my design is that your honeycomb needs to be affixed in a way that it won’t move around. If it can move at all, you lose accuracy. You will need to see if or how it will work in your machine.
Here’s the file. It will need to be adjusted/reworked to fit your machine, but this will save you the time to create the interlocking system if you go that route.
Jig template OM100.lbrn2 (118.2 KB)
1 Like
This topic was automatically closed 30 days after the last reply. New replies are no longer allowed.

