Thanks again Julio for the response, I was looking into putting dual y endstops to combat any issues with my gantry not being square. Could you link me to the transistor you are using in that circuit please I would love to be able to add to at to my machine. Also where do I install this to? (Where does it go on the machine’s power supply?)
Regards,
Zim
S connection to Base
L connection on PSU to collator
G from DLC to Emitter
remember you have to put a resistor on S to base
and reconnect you potentiometer as it was
on the endstop issue i don’t see how two endstop are going to help but if you have your endstop wired as normally open all you have to do wire them in sequence
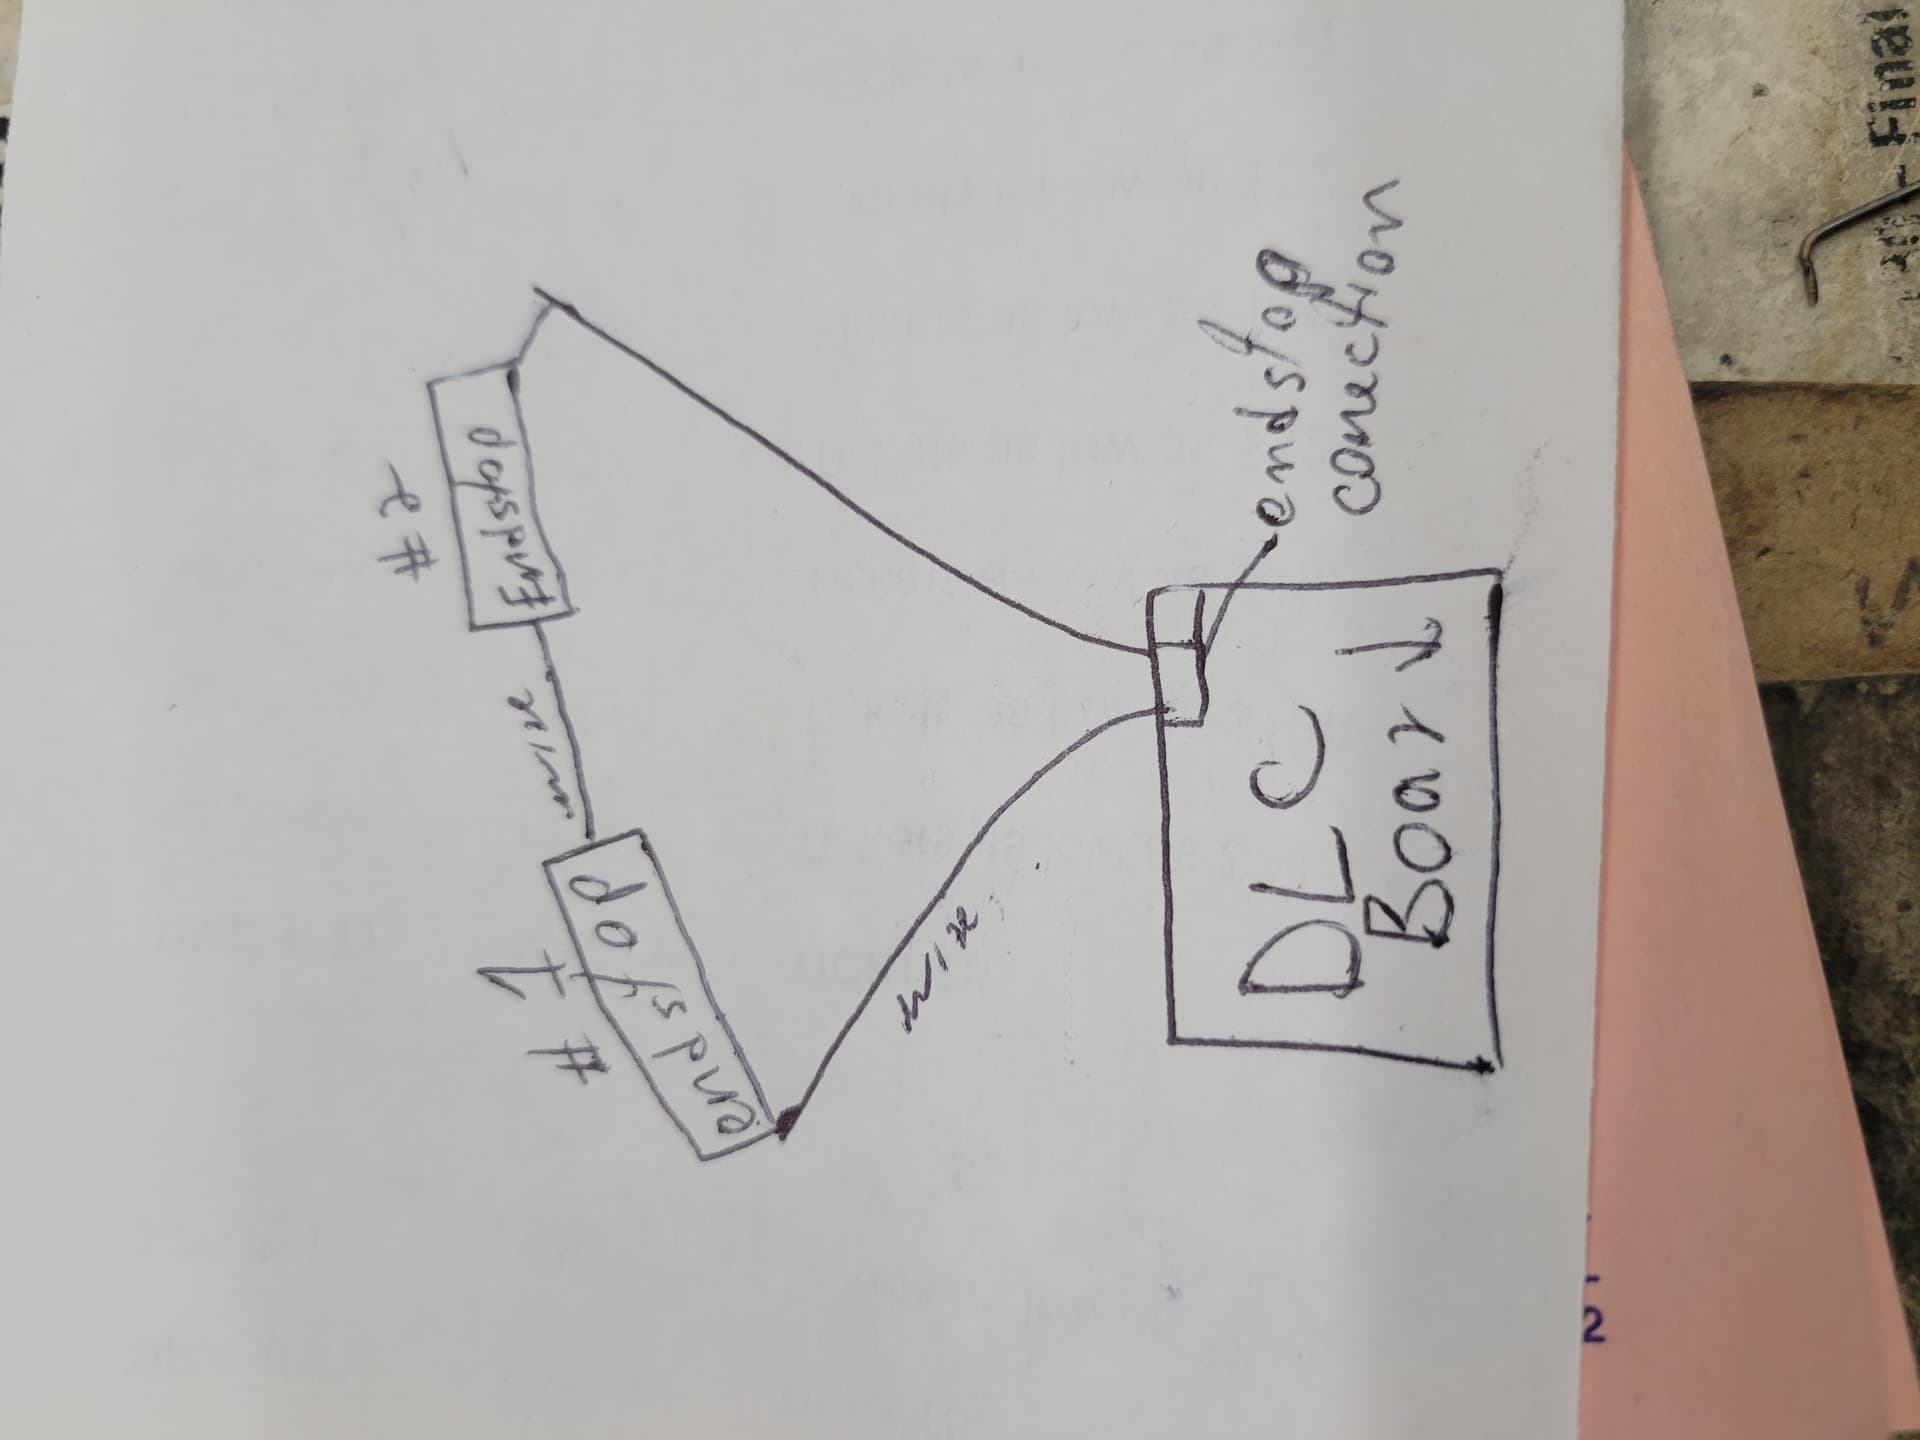
so even one side make contact it has to wait for the other side to make contact to complete the circuit
i don’t know how much is the stepper motor is going to be forced
Thanks again Julio,
I will try this way to get dual y endstops, when it comes to the pnp transistor which one would I use?
Regards,
Zim

i made a mistake its an NPN it doesn’t have to be the same P/N as long as its an NPN
2n2222 or pn2222 this are the 2 most commend
now I think that since you have a PSU that can trigger on HIGH you should do some research an how to achieve that. I think its just a setting in GRBL configure h that you have to enable. this will save you a lot of hassle on trying to invert the signal and having issues with it. in my opinion using the transistor to invert the signal should be your last resort if you want the potentiometer and test button to work
please Uncomment “#define INVERT_SPINDLE_ENABLE_PIN” from config.h
I found this on another post
Would uncommenting that let me use a potentiometer for pwm and a test fire button, or is there something else that needs to be done? If this is what I would need what would the wiring diagram be for this?
Regards,
Zim
well with the PSU that you have in theory if you apply voltage to the H terminal it should trigger the laser so that’s all you needed S pin to H terminal but i am not sure why your PSU is triggering the laser you connect the the S pin without any voltage on it
did you check if your PSU has any jumper that will let you choose between H Or L terminal
There are no jumpers on my supply. I will try to hook up the laser the first way that was recommended. See if that works.
Julio,
I will try the first way you recommended this weekend and see if maybe that will work. I think I may have had the potentiometer in the system causing it to stay on. For the pwm and the test fire button what would I uncomment besides the spindle enable/ how would I add the potentiometer to the machine? I think when I put some connections in before making this post I may have screwed up my tube (only fires at 5 mah now no matter what even without the pot on it). I am looking into upgrading to a 100w system anyway so if possible I will try to iron out the kinks with this tube before putting in the 100w one. I would like to say again thank you very much for all your help so far Julio it has greatly helped me get closer to figuring this out. When I looked into this previously I couldn’t find any sort of documentation on hooking this up to a co2 system.
Thanks again,
Zim
thank you i am not an expert ill try to help you as much as i can.
back to the laser tube you are saying that you are only able to output 5mA max regardless of what % you set on light burn. if so did you check that $30 = 1000 and on light burn on Devise Settings S-value max = 1000 or check this video New K40 Laser Inspection and Problem Solving - YouTube
and i just suggested to uncomment spindle enable as a quick check i dont know if its going to do anything
about the potentiometer you have to make sure you have connect it right if its a digital potentiometer its (G) ( IN) and (5v) terminal its very important that the wire the its connected to the (IN) terminal its the one that has the variable voltage so if you have a multimeter it very 0 to 5 v depending if you go up or down on your potentiometer
Julio good news I got it working!
It turns out I didn’t have a wire in the high line of the psu (total duh moment for me). I got one in there now it working, but I am having a slight issue. It appears when I am trying to cut the tube has a tendency to stay on during movements where I don’t want it to be on and sometimes after it’s done cutting the tube stays on. I think the culprit might be the motherboard, I ordered a new one and will have it here Monday to see if that combats that. I did make sure that laser enable is on but it still appears that the tube stays on during movements/ after cuts, would you happen to know anything on what to do for that?
Regards,
Zim
are you familiar with the grlb $ setting make sure that laser mode is on $32= 1
Yes that was the first to thing I checked and I made sure it was enabled. Either way having on or off keeps the laser on during movements.
Regards,
Zim
Hello again Julio,
I may have solved the riddle the reason my laser stays on during cut is due to the fact that the high voltage line was being strained/moved by vibration caused by my air pump I held it while it cut and there was no issue. I am going to look into getting some rubber washers to help dampen the vibration of said pump and hope that helps. I think after all this back and forth I may have finally gotten to the end of all my wonky issues, and could not have done with out your help thanks again,
Regards,
Zim
I am glad everything is working out for you. Now I was just wondering if you have done any pictures engraving I am curious to know if you don’t have the same problem I have with the random dots all over the pictures
I was trying to engrave something and it did seem like it was popping holes in random spots I’ll look into it and get back you on that
I just checked and it appears that it is based on the quality of image. Some of mine did but I zoomed in on that specific image and saw some pixels. I do have one last strange question for you every time I home or frame the machine thinks it is all the way out of bounds and I have have to reconnect the motherboard to correct this do you happen to know a better solution to this?, it happens every time it is does get to be slightly annoying.
Regards,
Zim