So I start by drawing a square the size of my material that I want to burn an image onto.
I turn this off so it will not burn.
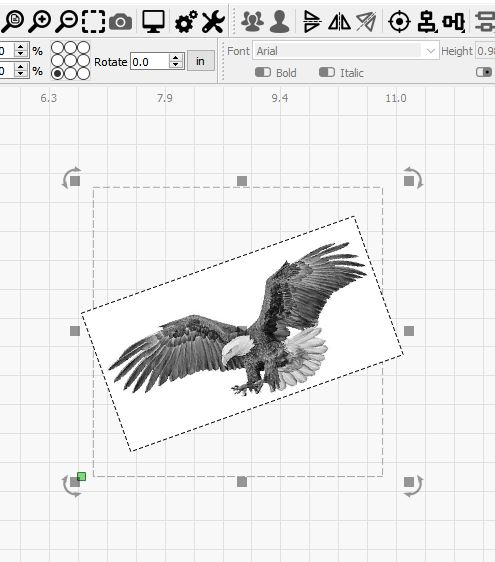
The green start corner is at the lower left, exactly where I want it.
Then I import an image and center it on the square.
However when I try to place the image where I want it, the green start square move with the image.
This is causing the image to not be located where I want it.
How can I lock the green start square to the lower left corner of the material ?

You have these setting?

Jeff,
Im sorry, but I cant find those setting anywhere.
Andreas.
My eyes are 70+ years old.
There is zero chance that I can read a screen shot like that.
But thank you for the attempt.
The image above is from the documentation found here: Coordinates & Origin - LightBurn Software Documentation
I have read that and it is not my question.
Please look at the clips that i posted.
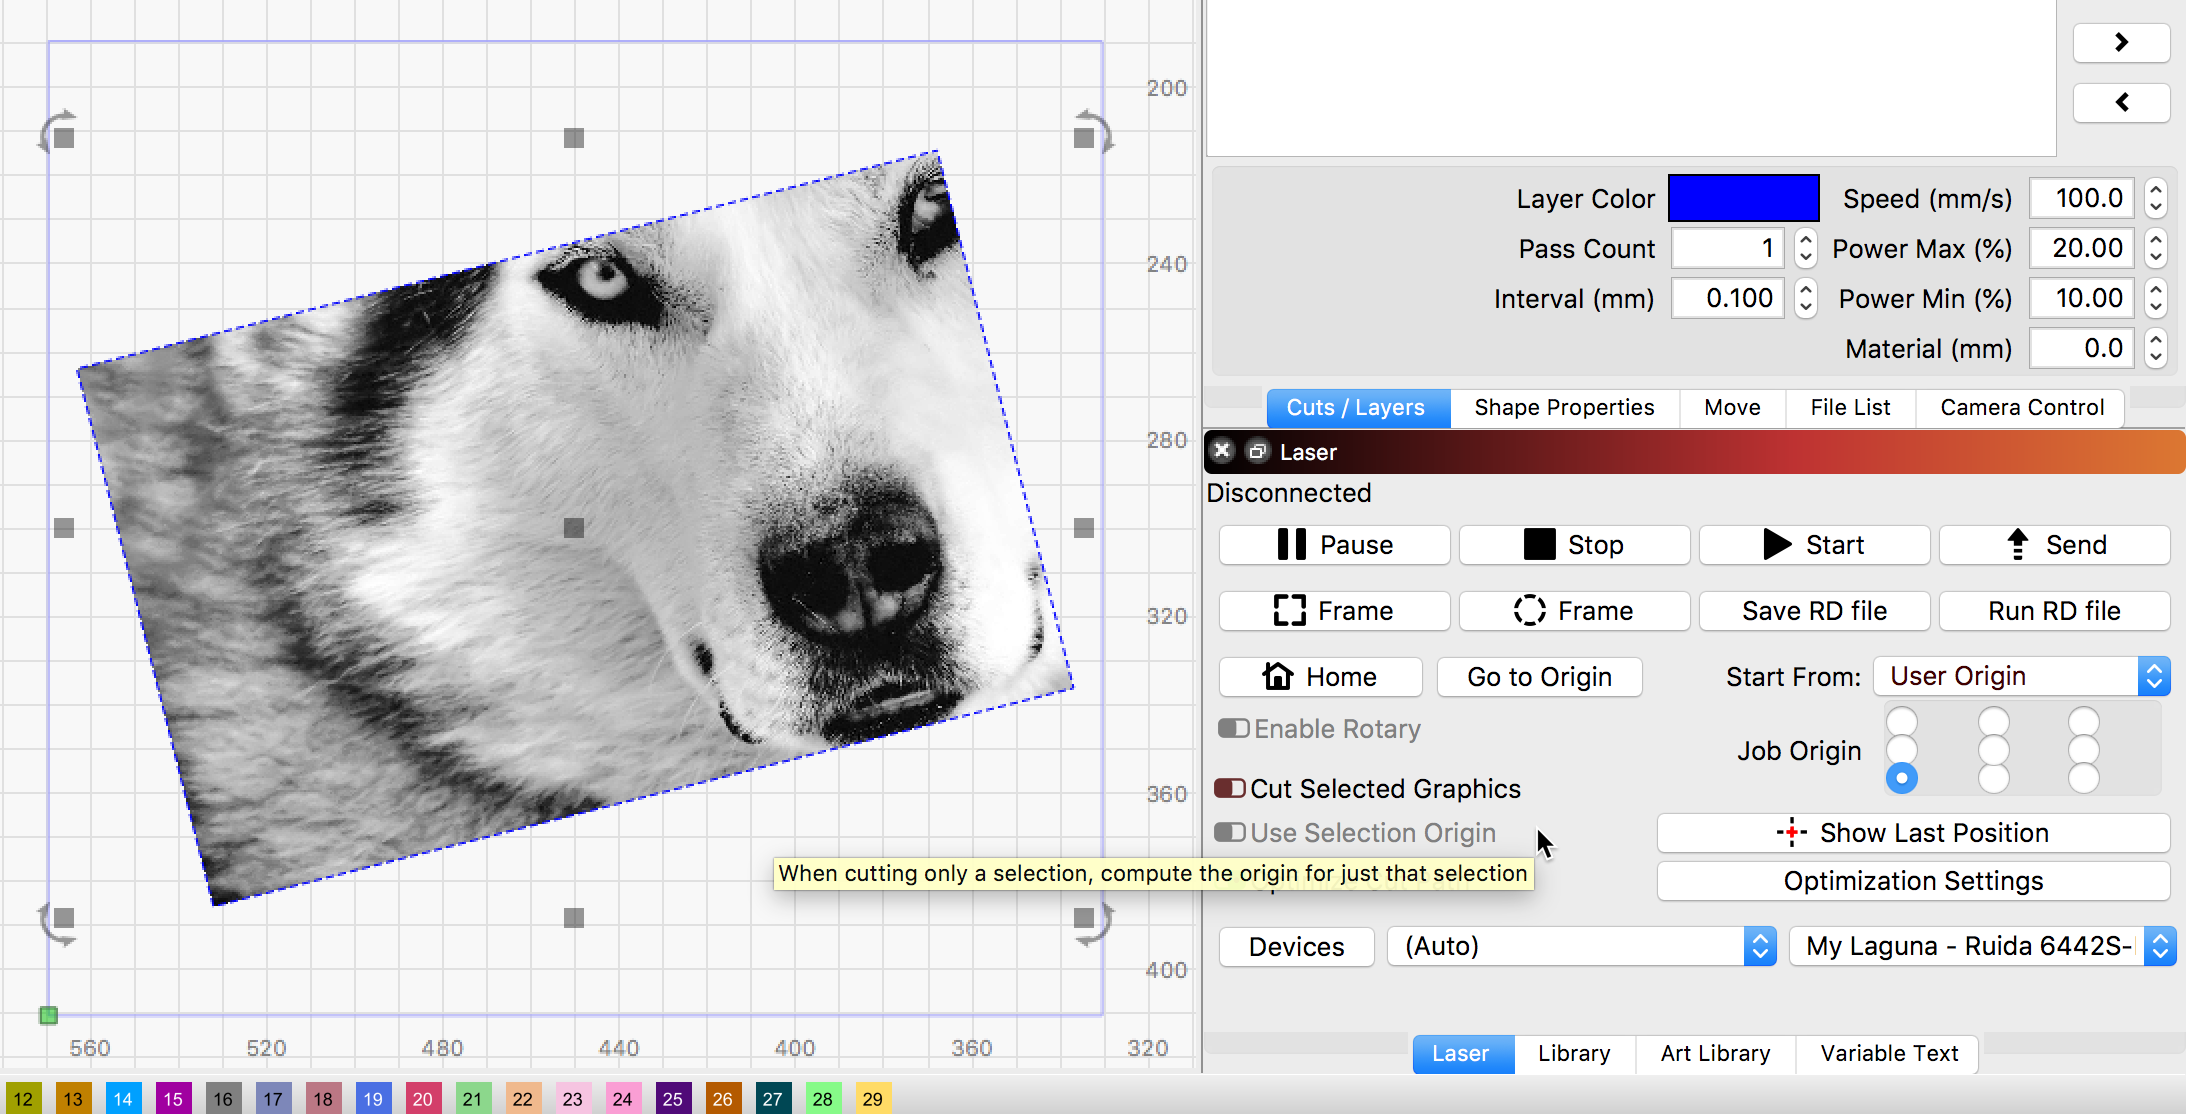
When I set my material parameters, I want the green start indicator to stay with that square and not with the image that I want to put on the material.
This represents my material size, and also my X Y zero.
And I want the green “origin” square to stay attached to “it”.
This will be my X Y zero.
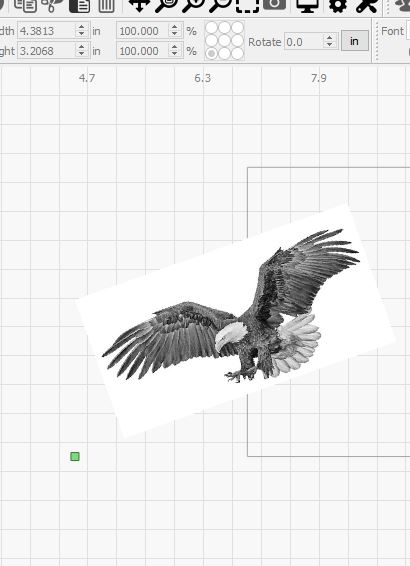
However, when I add in the “image”, the green origin square attaches itself to the image, thereby changing my X Y zero to a new location and the subsequent burn will be off location.
You can see that it has moved, and is now attache to the immage.
I just get the feeling that I’m not explaining myself right.
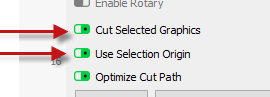
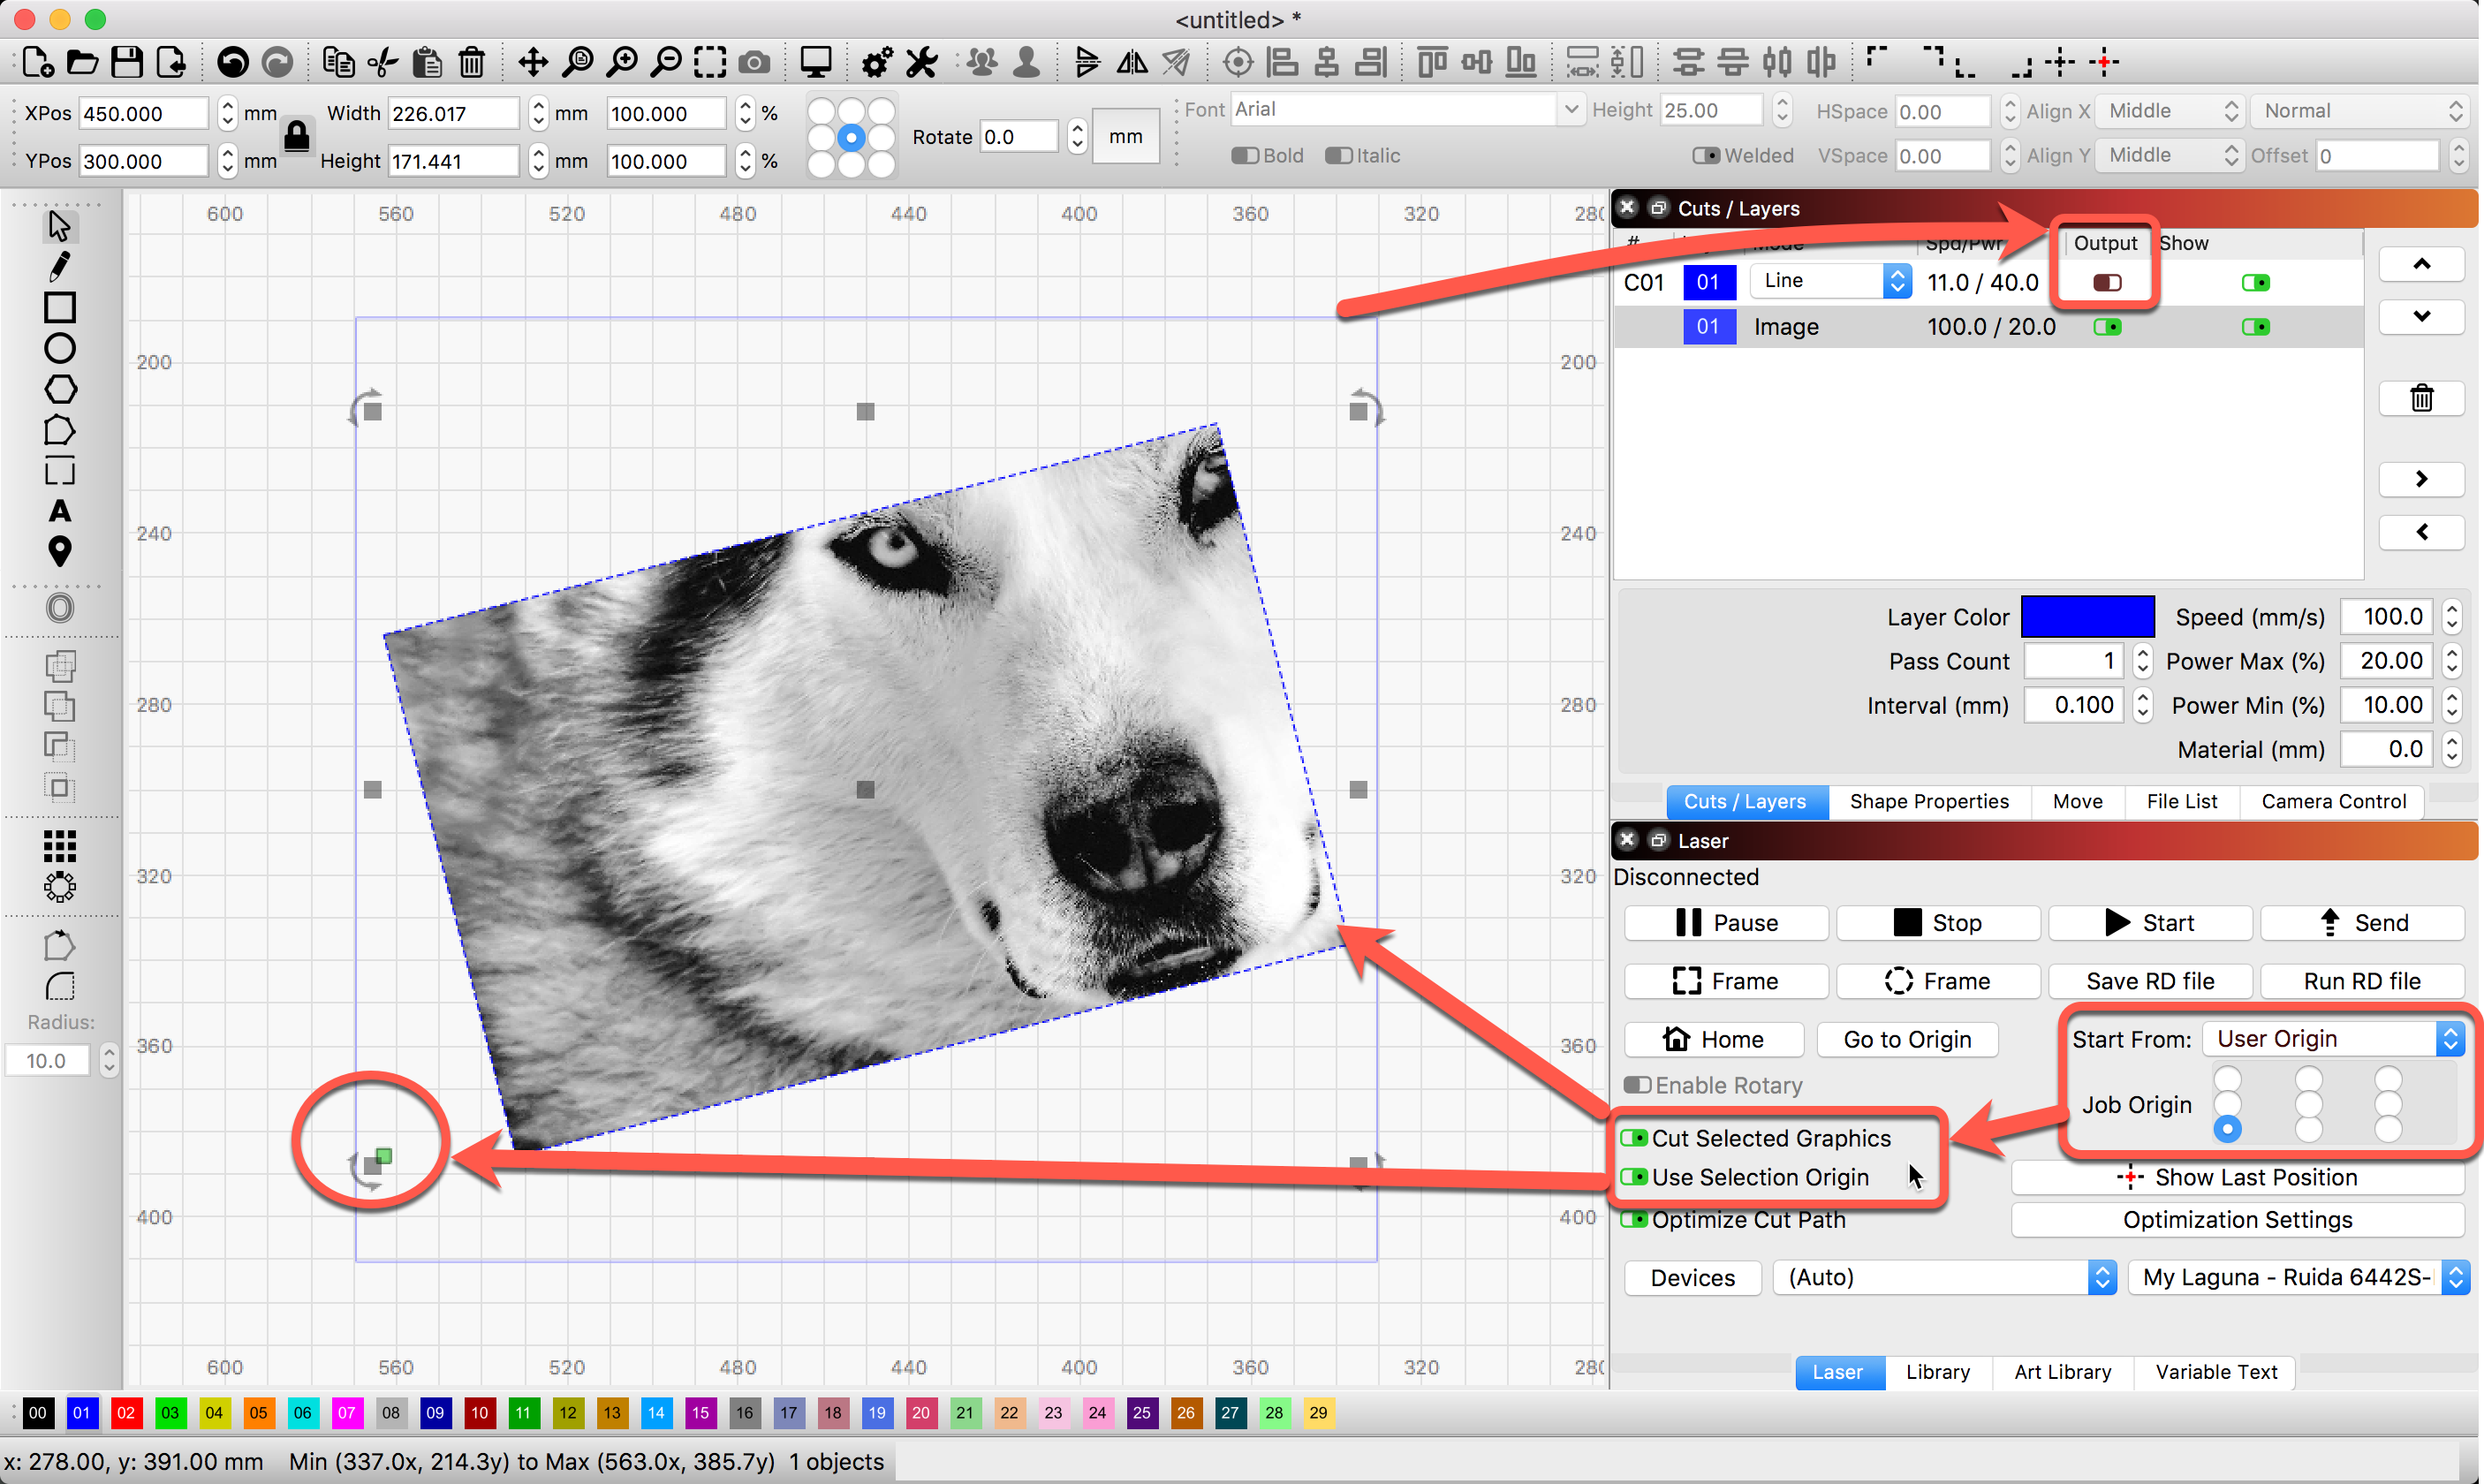
So if you want the ‘Start From’ origin to stay with the rectangle, un-check the ‘Use Selection Origin’ and the ‘Cut Selected Graphics’. Is this what you are wanting?
@ Rick, I think the problem he’s having is that his graphic is bigger than the rectangle, so the origin point is at the corner of a bounding box that’s bigger than the rectangle he wants to reference the origin from.
In your photo your graphic is smaller than the rectangle. His is not. Cropping that photo would help.
Ah, good point @Hank. Yes, crop image or just use ‘Absolute Coordinates’ so the laser will start at an exact known location. Is there a reason you need to reference this non-output rectangle shape after you have used for image sizing/placement?
I think I know where Jan is coming from on this one, because I do something similar.
I have an image I want to put on a 6" square tile… So I draw a 6" square rectangle and put it on a “no output” layer. I center up my image inside this square which has it’s origin at the lower left corner.
I drop a tile anywhere on the laser bed, jog the head to the lower left corner of my tile and hit “origin” on the controller (ruida).
Run the file.
My image ends up correctly aligned on the tile.
The short version is that you can’t lock that point - it is computed on the fly, based on the content of your file. In this case, the rotated version of your image goes outside of the boundary you’ve defined, so the software is moving the origin point to accommodate it.
For this specific case, you’d have better luck with either a center origin, or using ‘Absolute Coords’ to just make the design go where it needs to on the machine.
I appreciate everyone’s efforts.
Maybe I should explain that I do not have a dedicated laser.
So my coordinate system will be different than yours.
I have an X carve CNC with a J-Tech 7 watt laser attached.
In my world, X Y Z is in the lower left corner of the machine (or anywhere I decide to put it on the bed of the machine)
So I always (whether its CNC or laser) place my material on the bed, then jog the machine to my X Y Z location and zero out the machine.
In this case, I have a jig with two bump stops that I made and it is squared up on the bed and clamped in place.
The square that you see represents the material that will be inserted to the jig and burned. (the lower left corner being the X Y zero location).
This way I can run multiple pieces (in a production type mode)
This is the reason I need the green start indicator locked to the lower left location.
This system has worked perfectly until I came across this current image.
FYI, these are ceramic coasters that I am making.
Edit.
Reading Oz’s post got me wondering.
Can I place the absolute coordinate anywhere that I want?
As in placing my fixture on the machine, moving the laser to my X Y location, and then calling it absolute?
It just seems to me that I’m missing something.
I should be able call X Y zero anywhere that I want and have the machine continually start from and go back to that location.
This would not be how LightBurn wants you to work. If you place the zero point at the front left of the machine, then you can put artwork anywhere you like in the workspace in LightBurn, and it will put it exactly there on the machine. If you put zero “somewhere”, and then part of your job ends up going into negative numbers, LightBurn will complain that the job is out of bounds.
This is what ‘User Origin’ mode is for. Honestly where you have your machine origin is completely irrelevant. Zeroing to the workpiece may be how you’re used to working, but it’s not necessary as long as the emitted gcode moves the machine to the right spot and runs the job properly.
If you zero the machine to front-left and then use User Origin to set the “work origin”, you retain the ability to use absolute positioning, jogging, etc. If you move the machine zero point constantly, you lose those things.
1 Like
If you have already scanned you photo and made the adjustments all you need to do is add your outline square as your border for burning or for alignment, then either turn off that layer and let her run . I do it all the time and use a squared outline to center my work. I’ll run a outline for say like 4” coasters at like 2.50 laser power and three passes to get it centered and then toggle that layer off and let run. When you add that layer it will reposition the green square as a starting point. Hope I helped you?
Sorry, I’ve been away on a family emergency.
But I would like to pick up this issue again. ( as its still not clear in my pea brain)
If I zero my X & Y locations, and call that "user origin" and the software moves it on its own, then at this point its no longer a “user origin”
It is now a software generated origin. (that I don’t want)
If I get a message from Lightburn that my image may be out of bounds, Then at that point I have to make a decision.
I get this message quite often, then I tell it to continue, and all is good.
Reading back through this, let me make a clarification.
I mentioned that I use the lower left corner of my machine as X Y zero.
Actually, I use the lower left corner of the material that I place randomly on the bed.
I use this process whether I use the CNC or the laser.
To me it seems so simple.
I just want to set my origin and have it be repeatable.
If you set the machine origin to be the corner of the wood, then the system has no idea if you will attempt to go out of bounds, because now the software can’t check if the coordinates of the job are out of the machine bounds. If you place a user-origin there, not changing the machine origin, then the software can check to see if the user origin location + the job fits within the machine bounds, and can warn appropriately.
You don’t have to work this way if you don’t want to, but you’ll lose any functionality in LightBurn that involves absolute positioning or reading the location of the machine.
This topic was automatically closed 14 days after the last reply. New replies are no longer allowed.