No not with this as the focus. I suggest you just play. Start with one circle set to fill. Look at that in ‘Preview’. Now add another circle around that one, or inside it works the same, and have that also on the same layer set to fill. Now ‘Preview’. You will see the effect. Do again, adding another circle and Preview. You should see what is happening from playing around a bit.
I have played around with the components of my flowers: trace image, ungroup, select one element after the other and attributing the same layer to the elements in one color, but there are some elements that I may not select: if I do so, the whole drawing is selected.
All the elements.lbrn (94.8 KB)
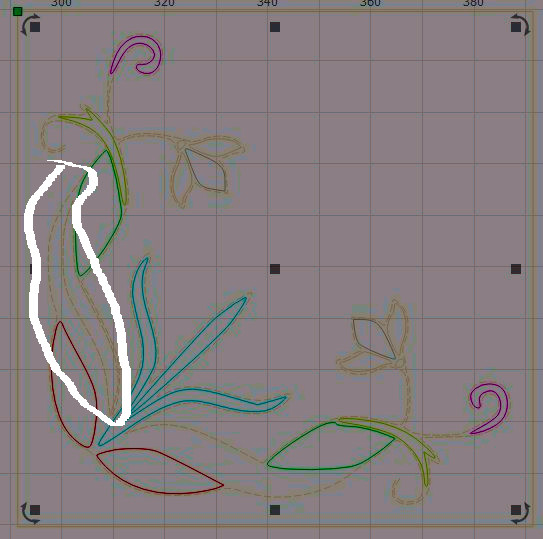
I am not seeing what you describe. Here is your file with all shapes selected (CTRL-A to select All) and you will notice nothing has been grouped. Note the selection marquee (marching ants) to see they show only dash lines. If something is grouped, it would have a dot-dot-dash marquee. You would also see the group reflected in the icons at the top-center of the screen (marked in red square).

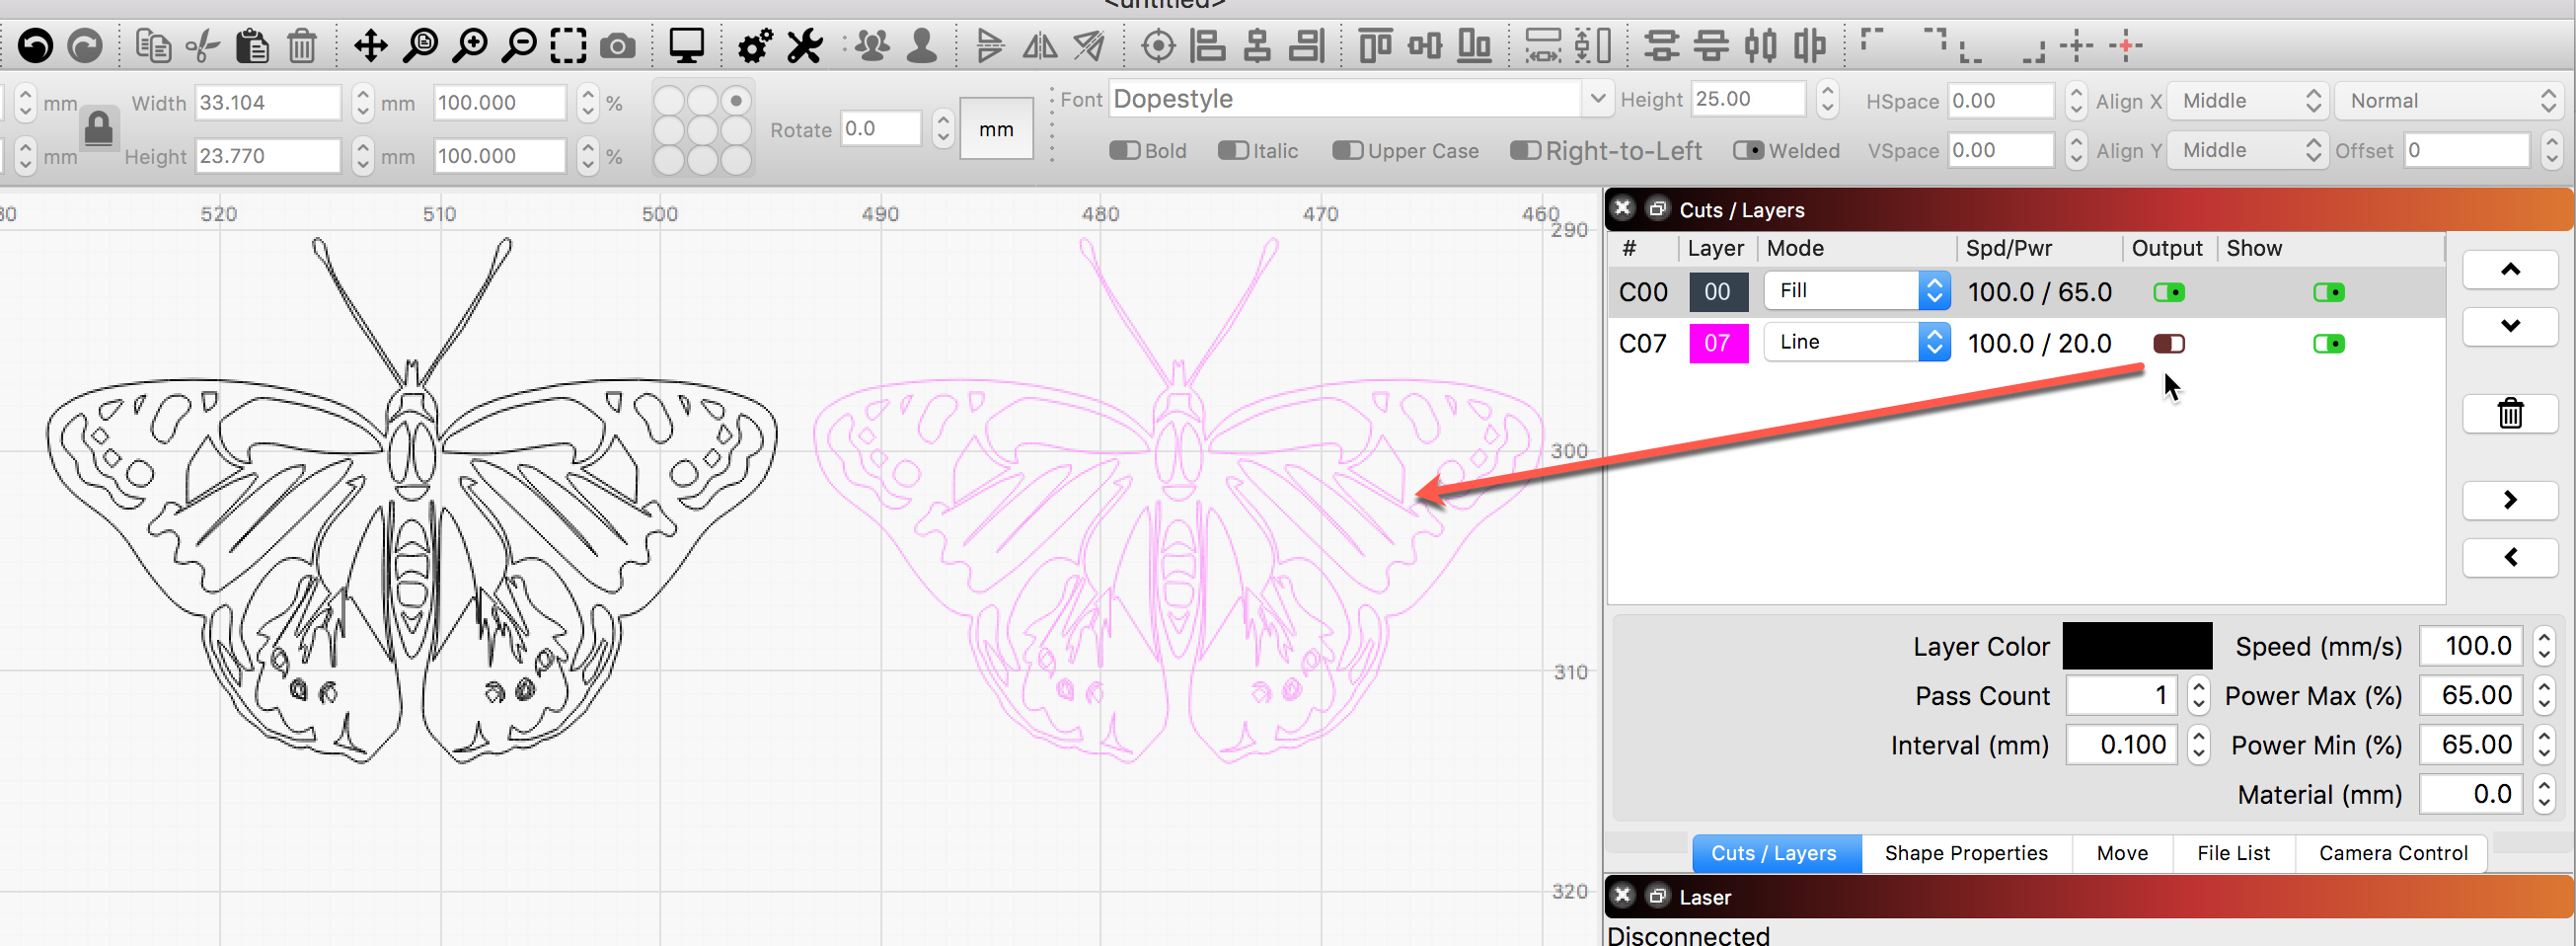
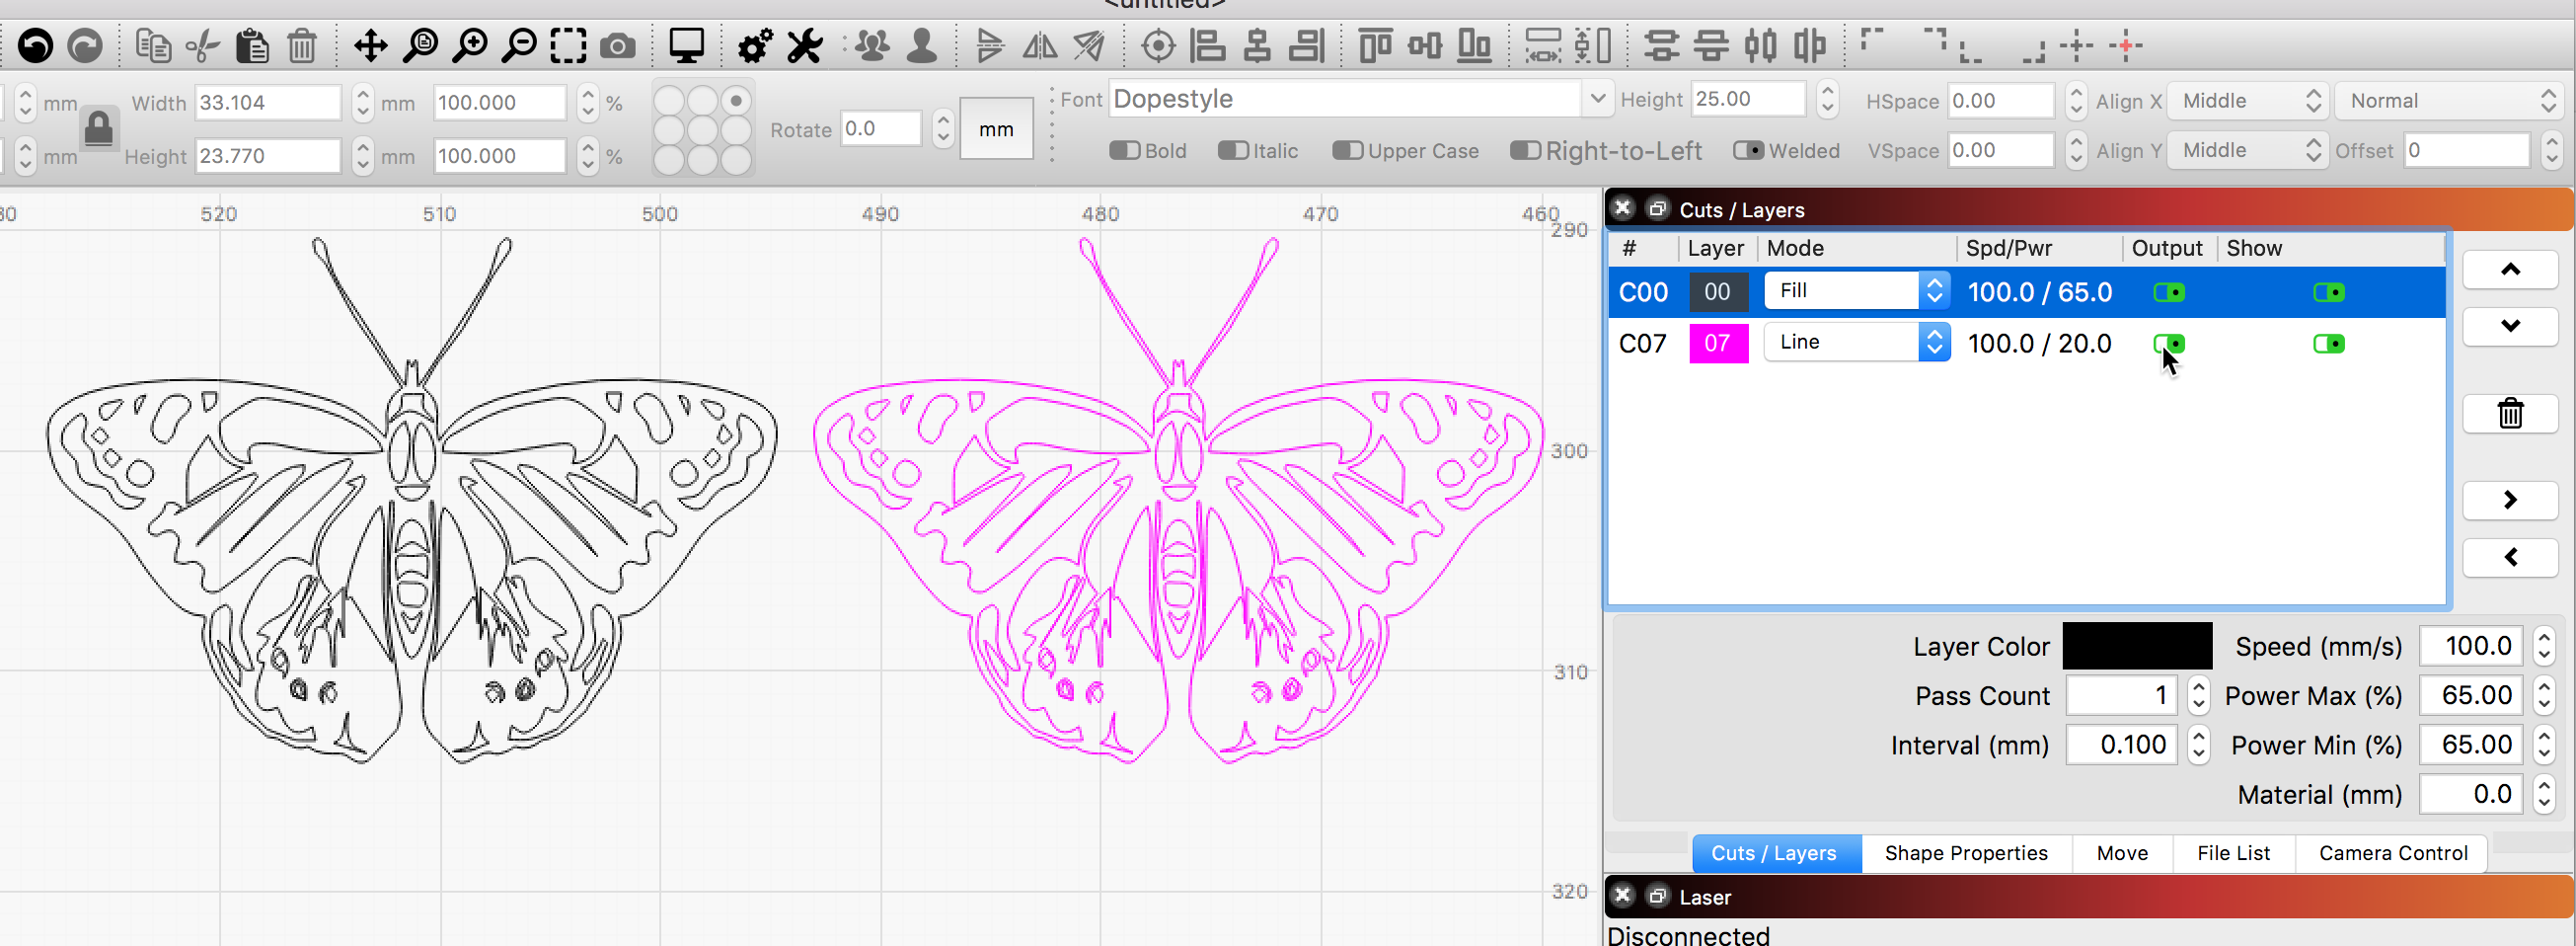
I see you have a layer set to not output and also notice the outermost rectangle is also on a fill layer, so that is going to a fill for the entire rectangle, turning off the fill as it hits the first shape boundary found on that layer, then back on again as it crosses the next shape boundary.
How is this suppose to look / produce? If you mark the areas you want filled and the places you want cuts and I might be able to help you sort this.
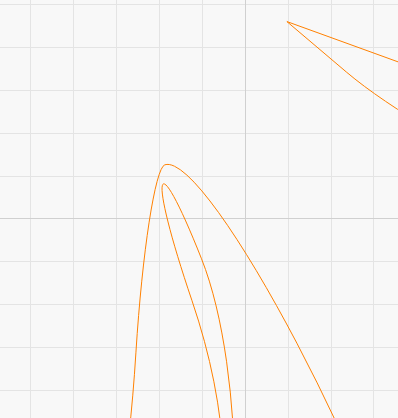
I may not select the element around which I have drawn a frame. If I do so the whole drawing is selected.
I had neglected the mode the layers have to been drawn. I had planned doing that after having isolated all the elements and I was stopped by the element I could not select.
What is rather strange is the fact that on the image below those elements are represented by “ants” but not in Lightburn!
I think it’s right to attribute all the elements that have to been drawn in one color the same layer number!?
I am sorry but your wording is not clear, and I am not understanding what you are saying.
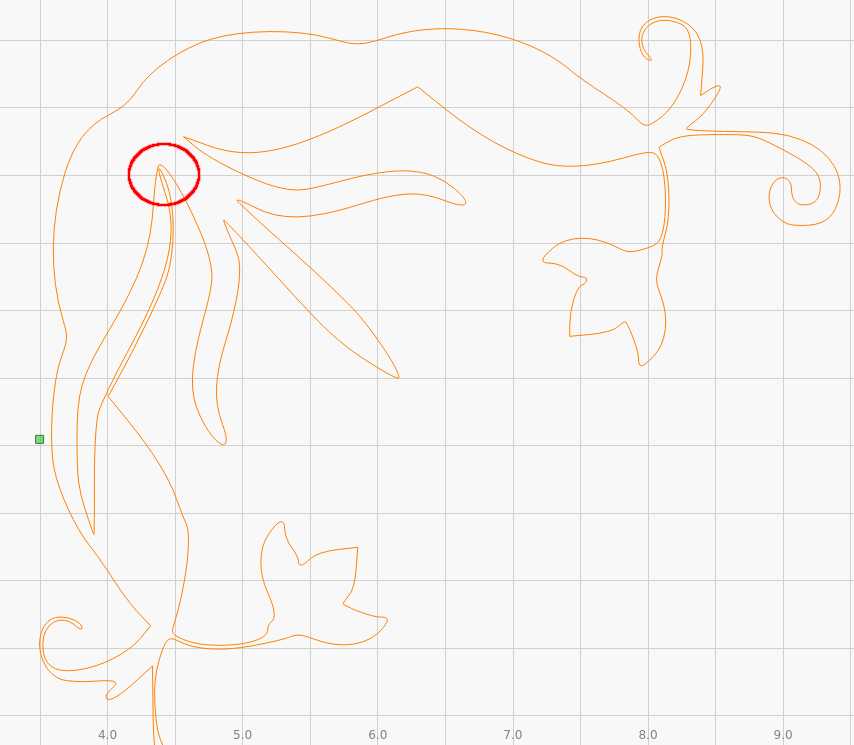
In the image you post, I see a single path / shape selected. I do not see the “whole drawing” selected and am not finding that in the file you sent either.
I am trying to understand how you envision the final output to should look. Here is my stab…

Note: If you want to then cut this out, using the outside rectangle frame, set that shape to its own layer and set that to ‘Line’ cut with appropriate settings for your system.
Hello,
I am well aware that my manner to express myself is not perfect and I apologize for it. That is because my English is not perfect. I am living in Europe, Luxembourg, and here we mainly speak Luxemburgish, German and French. I have learned English at school and I don’t have a lot of practice.
I understand what you mean in your first post; it is obvious, but I don’t understand how to cut that line.
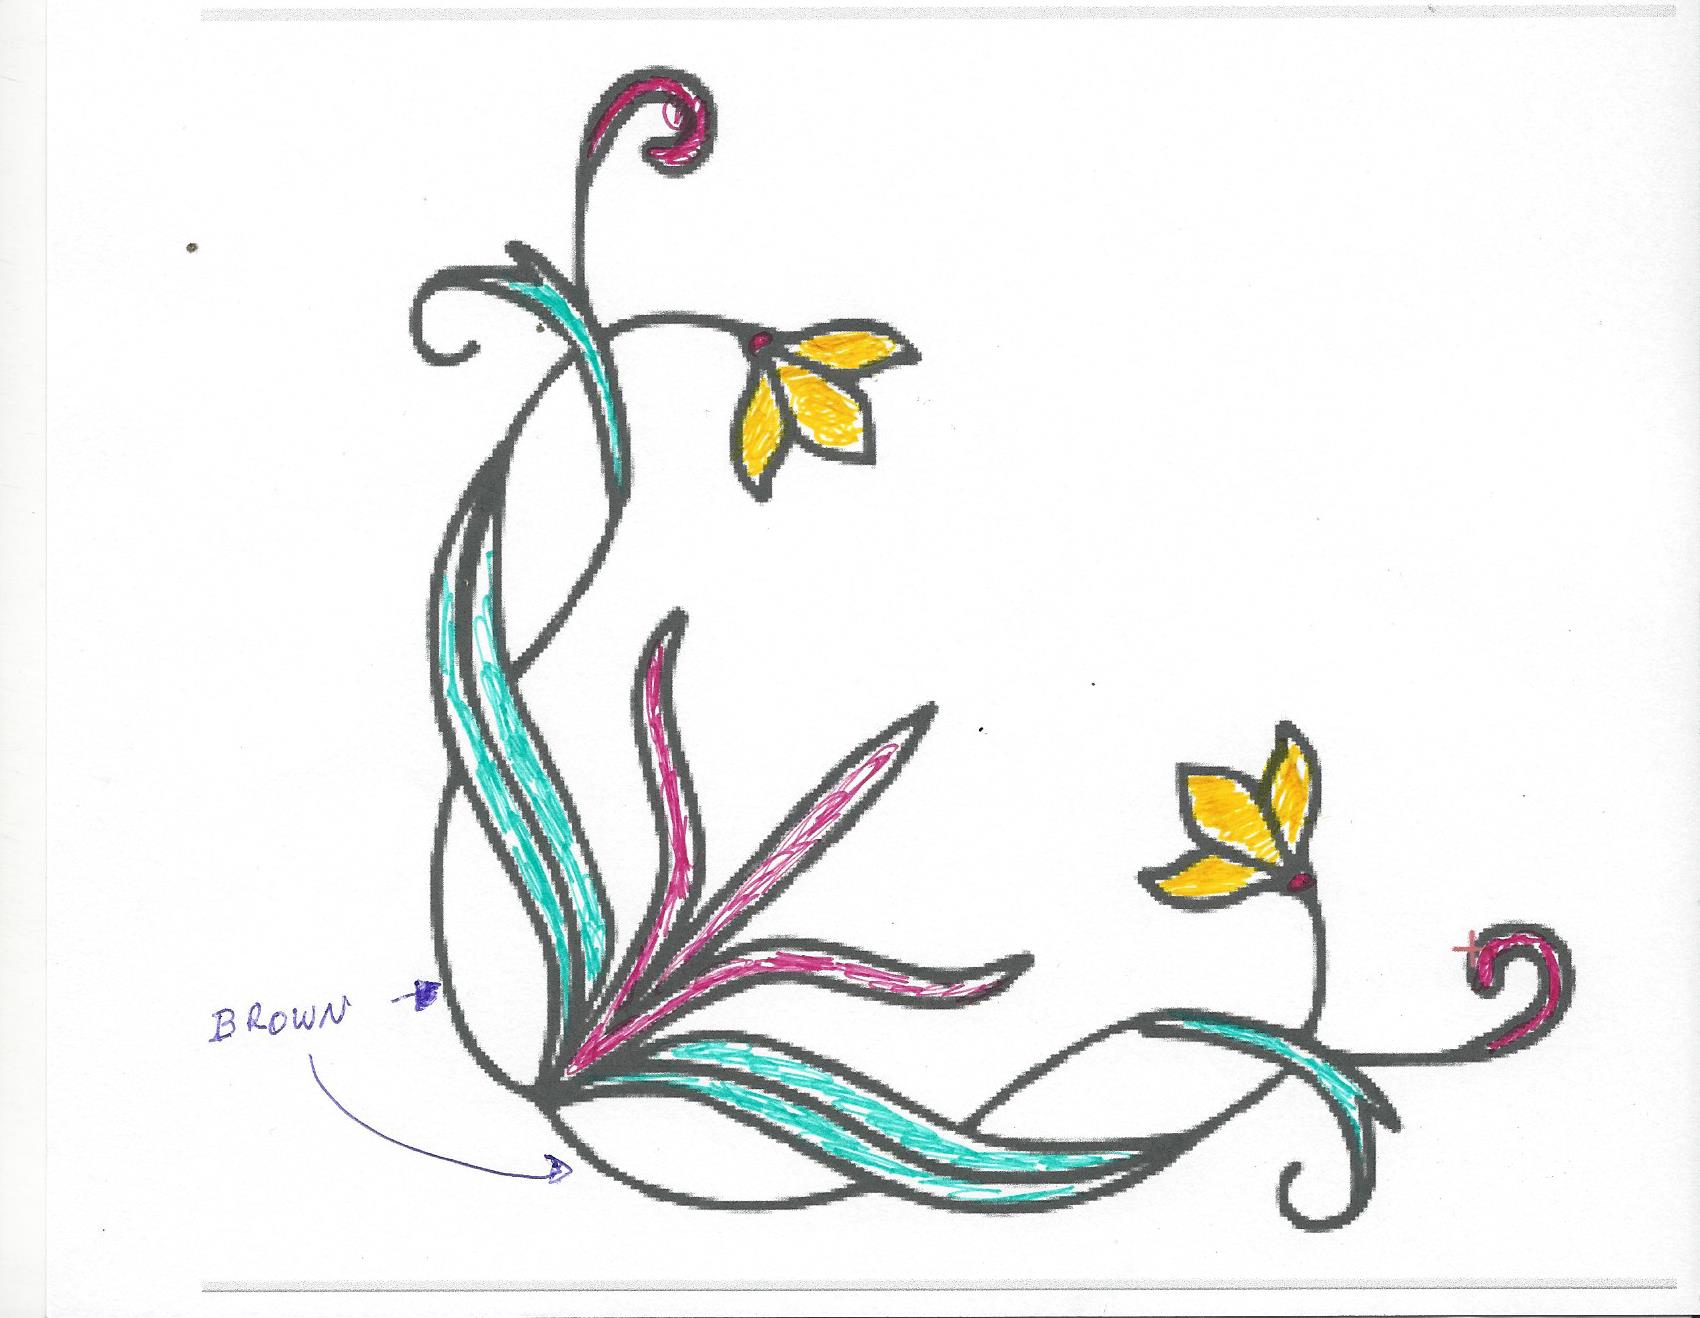
To be more clear I have scanned the original and indicated which elements I want do be drawn in which color.
And while dissecting the elements and distributing them to layers, -elements of the same color on the same layer- I was blocked because I could not select the element framed in my previous post (reason of it explained by Hank). When I select it the whole drawing is selected, although most elements are free and don’t touch other elements.
Update: I have just tried once more: when I select the framed element the whole drawing is selected, whereas I could select all the other elements separately.
An other question:
What can I do to make the elements more visible? Some elements are so pale that one has problems to see them on the screen.
I have to agree that I have some problems understanding that procedure!
Here how I want to colorize the drawing:
You are doing great. ![]() Many Americans have difficulty with the English language, and they too went to school. Feel free to write in your native language to help, and we can translate it here.
Many Americans have difficulty with the English language, and they too went to school. Feel free to write in your native language to help, and we can translate it here.
Oh, my native language is Luxemburgish and I don’t think that you may translate it!
I may write in German, a more “translatable” language when I have problems expressing in English.
Let’s give a try:
Also, wenn ich besagtes Blatt auswählen will, dann wird die ganze Zeichnung ausgewählt, obschon ich die anderen Elemente separat auswählen konnte.
Eine Frage: kann ich alle Operationen, um zu dem Resultat zu kommen wie auf meiner Zeichnung sichtbar, in Lightburn ausführen oder ist es vorzuziehen, ein Programm wie Inkscape zu Hilfe zu nehmen, um die Zeichnung zu präparieren?
So, if I want to select the said sheet, then the whole drawing is selected, although I could select the other elements separately.
A question: can I perform all the operations to get the result as shown on my drawing in Lightburn or is it preferable to use a program like Inkscape to help prepare the drawing?
The problem isn’t going to be better in InkScape or other software - the problem is that your vectors are a single, continuous line, not several independent shapes. You can use the Edit Nodes tool (or other tools) in LightBurn to break those into different parts that you could then edit or change independently.
Okay, I have learned something about editing nodes.
Back to a question in a former post: how may I make the elements more visible, with more color, or by changing the color.? There are some elements that are so pale that I have difficulties to see them.
Select an item and click one of the color entries on the bottom palette bar to change to that color.
But by doing that, I put the element on another layer no?
And even if I choose a more visible color, the lines are so fine that it is still difficult to see the elements and to work on them.
Can you show a screen shot of your LightBurn window?
Ok, I have understood the manner it works. If I select f.i. the black color then it is more visible, but what I find strange in that program is the fact that, in order to change the color of an element because it is to pale, I may not do it without attributing a new layer to it, so I may not only change the color! Am I right?
I have watched a tutorial on editing nodes but I still don’t understand how to cut the relation (line) between to elements that are connected but have to be drawn in different colors.
LightBurn is for laser cutting and engraving production where there is no concept of colors in the way you are thinking. Additionally, you are trying to produce something that will require usage of some of the more advanced features within LightBurn. You are starting out with a tall order. I am going to suggest a different approach.
I think you could really benefit from taking a pause, and starting over, while leaving the previous concepts aside for a moment. You are learning something new, but trying to have it fit in your thinking, which is making it harder than it might otherwise have to be. 
Try this project as a learning lesson to help in understanding how LightBurn uses these different ‘colored layers’ to separate the different cuts (Line=Cut, Fill=Engrave, Image=Raster Engrave) you want the laser to preform.
https://lightburnsoftware.github.io/NewDocs/BeginnerWalkthrough.html
Start reading here, hitting ‘Next’ at the bottom-right of each page until you complete the “Making a Simple Project” section. This should provide a comprehensive overview of using LightBurn.
Once completed, post back with further questions, and we can go from there.
Thank you for your wise words!
You are right, I am -for the moment, because I have also a laser with this machine (3,5W) and, what more is, an other laser engraver (Ortur Laser Master 2 Pro) that is still, non assembled, in the package as I got it; I will assemble it soon; I bought this one because the working area is rather big : 62cm * 62 cm, and because one may fix a pen holder to it, for the Ortur there is no pen holder- fixed on drawing, whereas Lightburn is an engraving software.
I will follow your council!
Thank you once more for your assistance and for your patience!
…but before doing that I have encountered the problem that, having imported an image of the same kind as that of my previous messages, I am not able to convert it to path.
I may trace the image, and afterwards only the option of converting to bitmap is active. And Edit nodes doesn’t find any nodes, so that obviously there are no paths.
What might be the reason for that?
Is the result of the image trace grouped? Shapes need to be ungrouped to allow node editing.
Image trace should produce vector artwork, not requiring convert to paths, as they are already paths.