I don’t know the first thing about the laser yet, but I’m hoping there is a standard camera setup that people use with that laser. What camera will I need to order? Is one FOV better than another for that model? I’ve seen a couple of videos of people installing cameras…is it typical for people to leave the top door open on the laser while cutting, or is it open only for alignment of the material?
Hi Jody. Getting ready to add a camera to our LS1416. Came here looking for previous experience, but I don’t see any for this model.
The stock LS1416 won’t fire the laser with the door open. Not to mention proper smoke venting. Based on what I know so far from reading and watching videos about adding the camera, you only have the door open for material alignment.
Great machine, by the way. We’ve been running in for 2.5 years, and it’s been an absolute workhorse.
1 Like
The common choice for the 1416 is the 60 degree camera. You leave the lid up for capture and placement, then close it for cutting.
1 Like
Thanks for the input. I love the laser so far and have successfully launched my small business. $1500 in sales in the first week!
The camera setup is the only aspect of my experience that hasn’t been positive. I ordered the 5mp 90 degree camera and am pretty disappointed. It looks horrible…the picture quality is absurdly bad. It’s essentially useless for anything more than getting a ROUGH location of where my material is on the bed. I’ve gone through the alignment and calibration procedures many times. I get good readings on the dotted card (.12, .16., 14 in that range) but when it comes time to cut anything, the camera is way out of alignment (even if I account for the bed height and re-align. I can’t get a good visual of the registration points, etc.
I think I will build a mount for my Logitech webcam and try that…it couldn’t be any worse.
1 Like
Jody, great job on getting your biz rolling. Very cool!
1 Like
A couple things to check:
-
This one is silly, but make sure you took the sticker off the lens
-
Make sure the camera is as well focused as possible. I recommend using the Windows Camera app running in full-screen for this. The lens has a notched ring around it that can be turned to focus it.
-
Make sure the top of the material is at the focus height of the laser (and that you don’t change that focus length by swapping lenses, extending the lens tube, etc). The camera calibration is for a specific material distance from the camera, so as long as that doesn’t change it should be stable.
-
Make sure the lid opens to the same place every time - any variation in the position of the camera will directly cause variation in the accuracy.
-
If you un-check the ‘Fade’ button on the camera window the picture should be much clearer.
-
Good even lighting helps too, and not super bright. If you have a black honeycomb area behind a small white chunk of wood, it can make the auto-balance in the camera struggle, so putting some scrap on the bed around it can help.
1 Like
EDIT: I think I might have received a defective camera. As soon as I tried to adjust the focus the lens dropped right into the bed of the laser. That might explain the bad picture, if the lens wasn’t attached properly at the factory.
Kudos to Lightburn for shipping out a replacement at no cost! Great service guys!
Yeah. I tried to turn the little ring and the lens popped off right into the bed of my laser! I barely touched it.
Then I tried to open the 3d printed camera mount and the snap popped off. Great day for me.
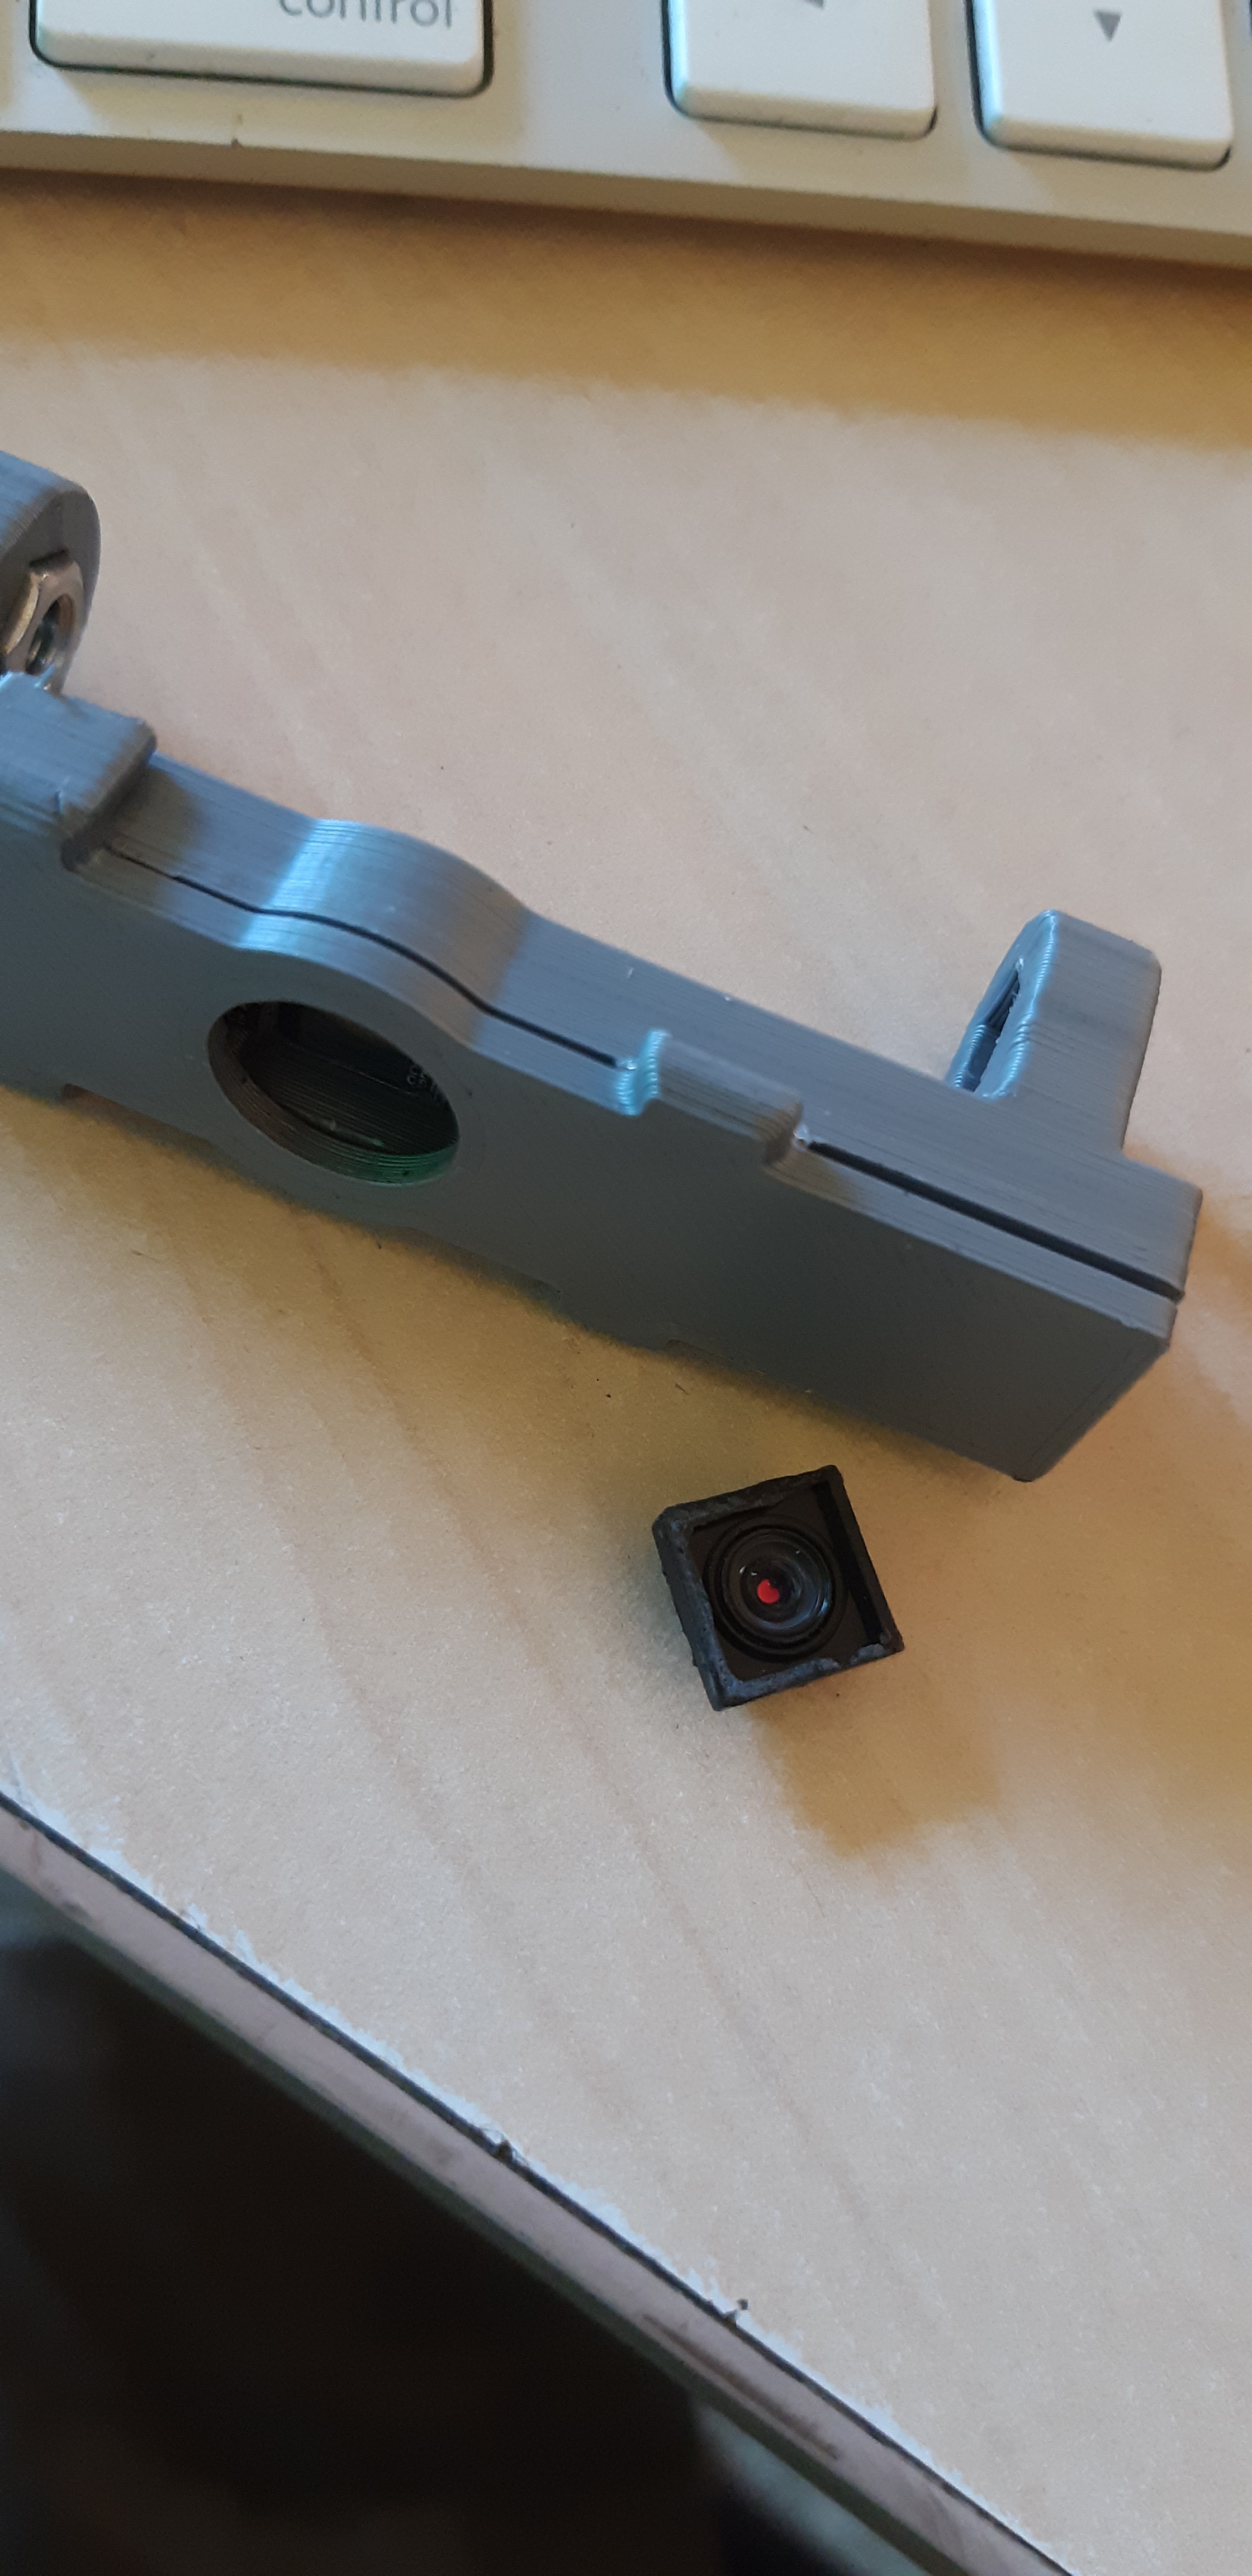
That sucks - We’ll send you another one. To remove the faceplate I usually just push on them from the bottom, not flex them sideways.
1 Like
This topic was automatically closed 30 days after the last reply. New replies are no longer allowed.