Image Control Settings

Hey Mate, its me again.

I was looking for some Image Control Settings inside of LB and found a post of 2019 on Facebook.

But you did not explain where the tool is located.

And another question is, do you have any recommendations for Lasering PNG Images?

I tried a 900dpi PNG, but it was colored. The result wasnt really clear at all.

Should i greyscale Images before?

Could you give me an advise which settings should been made in LB for PNG for a even better result?

And for the Image Settings Window:
What are the differences in the Image Mode?
Like threshold, ordered, jarvis and so on?

And one last question: on the Tab Cuts/ Layers you find a option named Interval (mm) mine is set to 0.100

What is this setting for?

Thanks :slight_smile:

Your laser, when finely focused, will make a much larger dot size. You will never achieve this level of detail with this laser. Max might be around 200 to 250 DPI and that is pushing it.

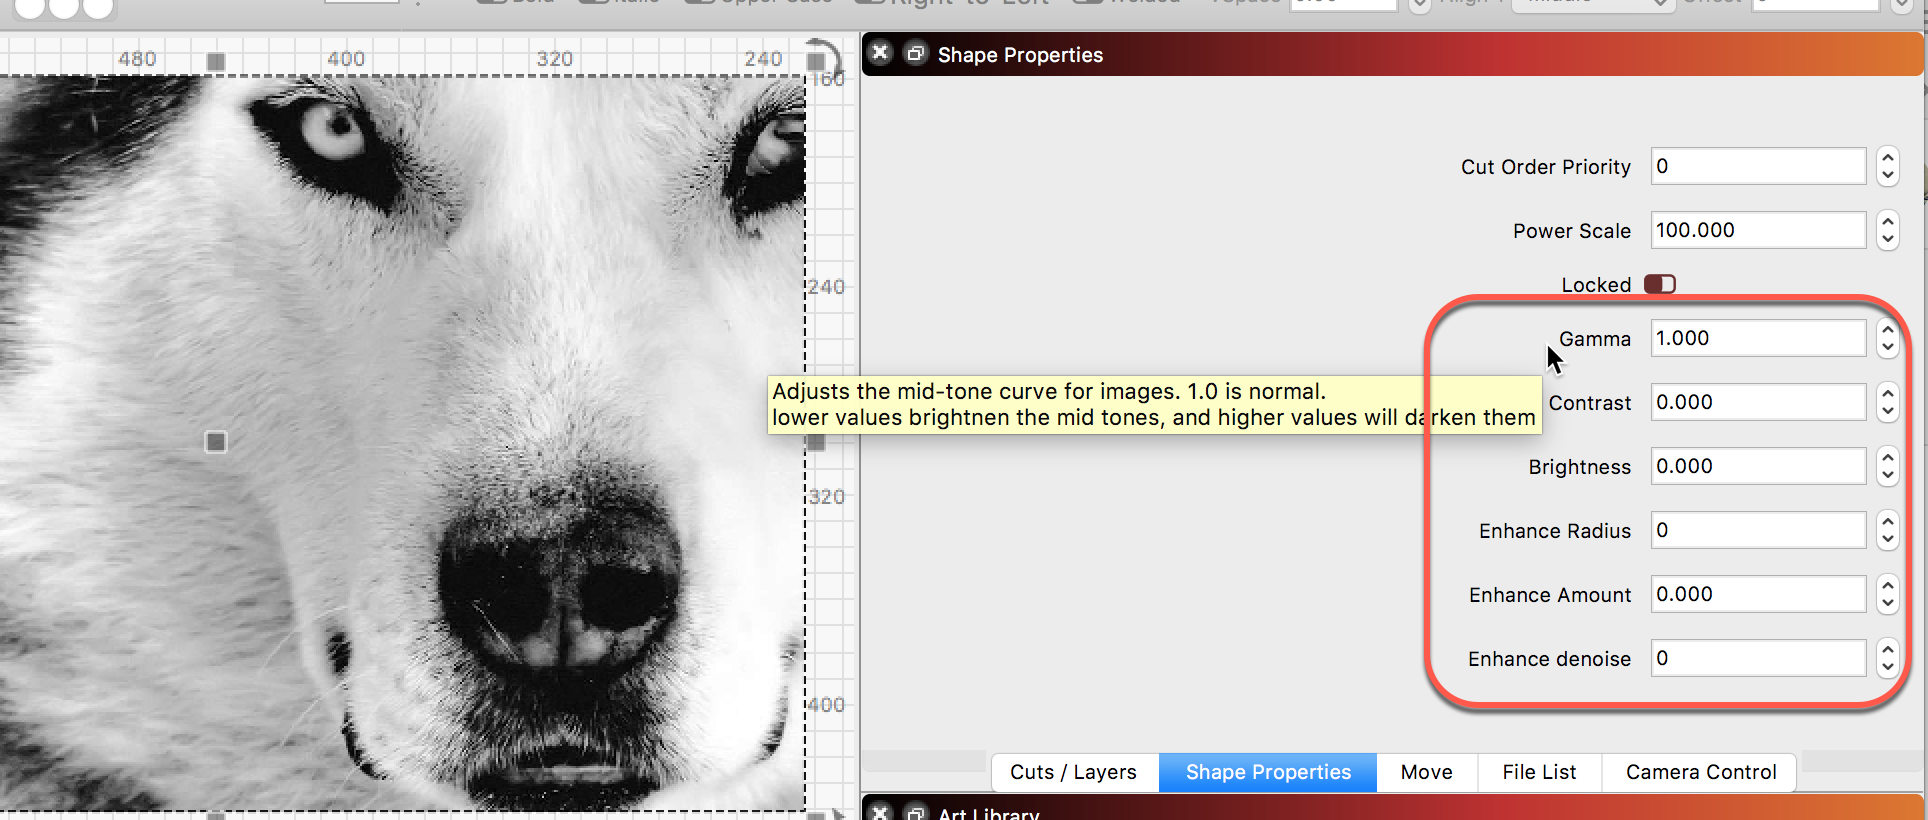
  • Import an image, and select it
  • In the Shape Properties window, set the “Gamma” value to 0.65
  • You may also wish to adjust Brightness and Contrast, depending on the image, but leave that for now
  • Set the DPI to 254, speed to 120mm/sec match your hardware, and choose Jarvis dither

Run that, and compare the output with what you are currently seeing.

Hover your mouse over most everything in LightBurn to see a ‘Tool Tip’ bubble up.

1 Like

Hey Rick, thank you for your answer.

I’ve still got some questions:

You said, choose Jarvis Dither, but its only possible to choose one of them, or am I missing something?

What is your best practice? A brighter image gives a better result or a darker one?

Have a look at this result, its not good in my opinion.

And one big question mark in my head.

I’ve got some images as svg, is it needed to export them to png to laser them or is it possible to laser a svg (because of quality)? If yes, what needs to be set to laser the whole svg (even filled objects)?

Sorry to be confusing. Jarvis is a dither style, but maybe I should not have included as it can be confusing. From Dither - Wikipedia

“A common use of dither is converting a greyscale image to black and white, such that the density of black dots in the new image approximates the average grey level in the original.”

No, LightBurn supports SVG file format natively. Just import the SVG. Have you tried that?

I just posted a white paper this morning that discusses how to optimize your laser for the smallest “dot” and convert to DPI. I did this for a 7W Diode laser, but the same method could be used regardless of the type of laser you have.
I found that matching the DPI interval to your max DPI of your laser will produce the best results because it will not skip image information if your DPI is too low, and won’t duplicate image information if it is set too high. I agree with other posters - your laser will never achieve 900 DPI no matter which laser you have.

The source image (your PNG) can be higher than you need, and that’s fine - it’s actually good to have about a 500 DPI source image or better, if you can, as it gives LightBurn more information to work with, and can help.

The output DPI is the more important one - that controls the dot spacing of what LightBurn sends to the laser. In LightBurn, DPI and Interval are just two ways to control the same property - IE, the spacing of the dots / lines that it sends to the laser. If you use too high a DPI value (or too low an interval) the lines end up overlapping, and it turns the shading into mush. This is really important for things like photographs with smooth shading, but much less of an issue for simpler stuff like the logo you posted.

This might give you a better idea of what Interval / DPI do: Image engraving guidelines

Hey @LightBurn, check my post above, where I posted that image result. For me its not good engraved, what would you suggest to optimize?

As I said, its a 900dpi png, colored.

That’s good clarification - Image DPI vs output DPI. The output DPI won’t come close to 900. I agree image resolution can and should be higher. Otherwise you start to deal with pixelation.

Your link to image engraving guidelines complements the results I posted in my focal point and DPI setting paper. I didn’t know that existed, even though I searched for such a post :).

1 Like

@JEvans Jeff. Not to take this off topic, but can you please tell me where I can find your white paper?

thank you

Yes, I posted a forum topic called “7W diode laser settings whitepaper”(7W diode laser settings whitepaper).
There is a link in that forum string.

“A 900 DPI png” tells me effectively nothing about the image content unfortunately. If that image is really light, it won’t work well.

You’re also engraving on bamboo, which is really inconsistent, but in general, going slower, or using more power, or both, will give you a darker burn with a diode laser.

This topic was automatically closed 30 days after the last reply. New replies are no longer allowed.