In your suggestions below, how do you “Adjust Brightness and Contrast if necessary to get full brightness range from the image” ? I am working on my system now and I see that as a key knob but don’t know the procedure. Yes, I know the controls, but how do I determine when I am “done”?
Try this as a starting point:
Import an unprocessed image
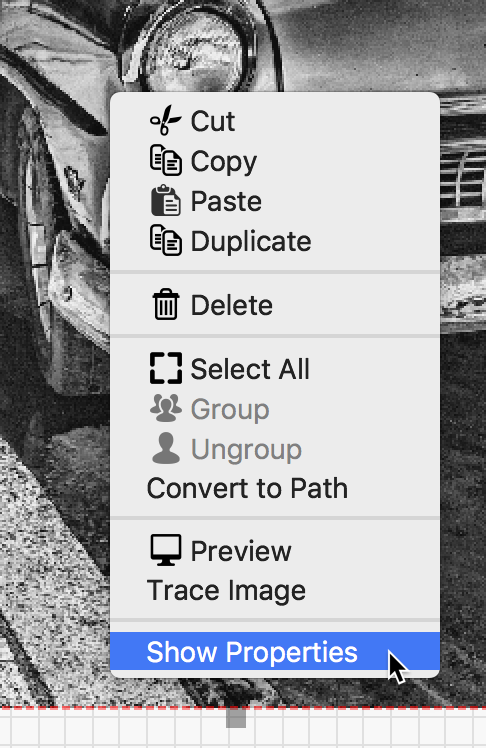
Select it, then right-click and choose ‘Show Properties’
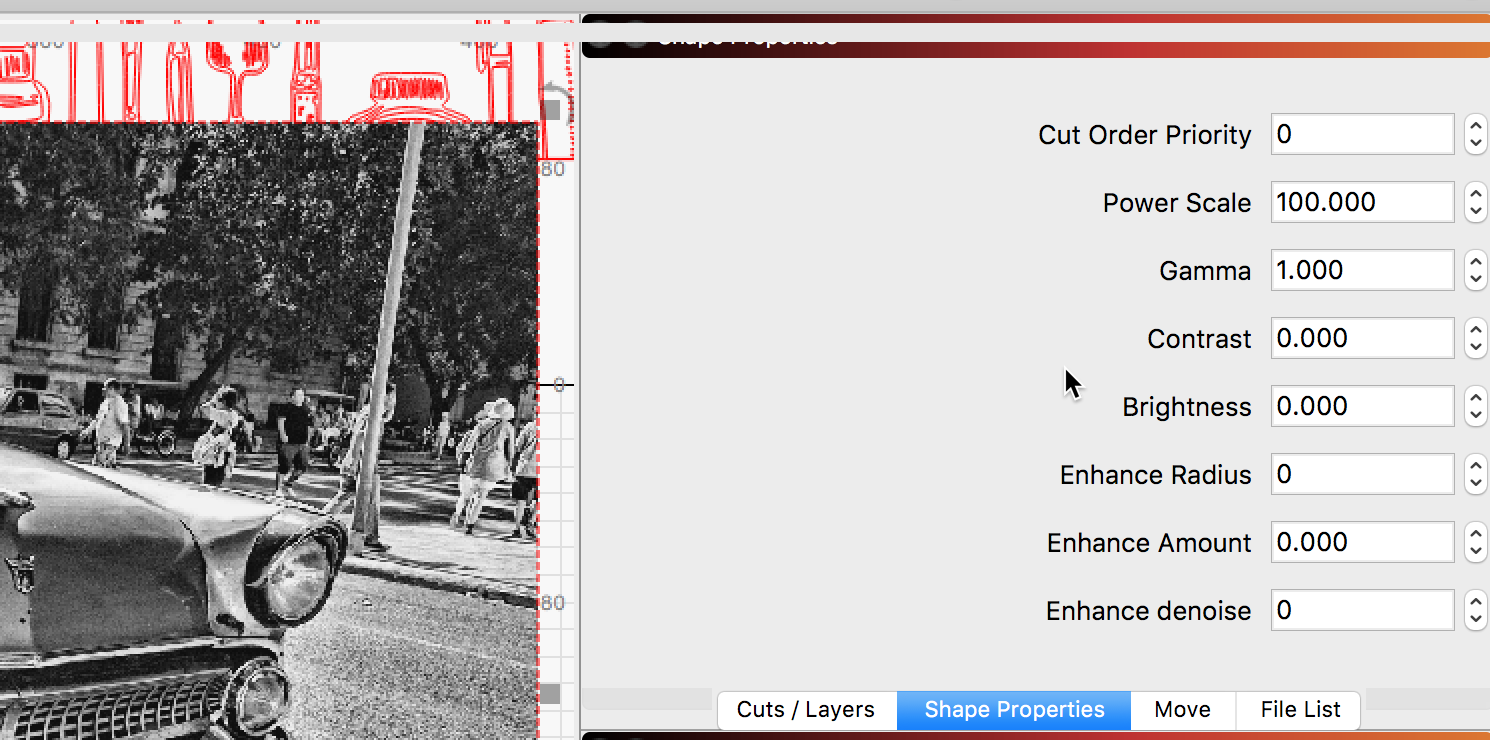
Set the Gamma value to 0.8
Set the Enhance Radius to 4
Set the Enhance Amount to 200
Adjust Brightness and Contrast if necessary to get full brightness range from the image
In the cut settings, use Jarvis or Stucki dither, and set 130 DPI
Set Min & Max power the same, and the lowest value that you can reliably fire the laser at
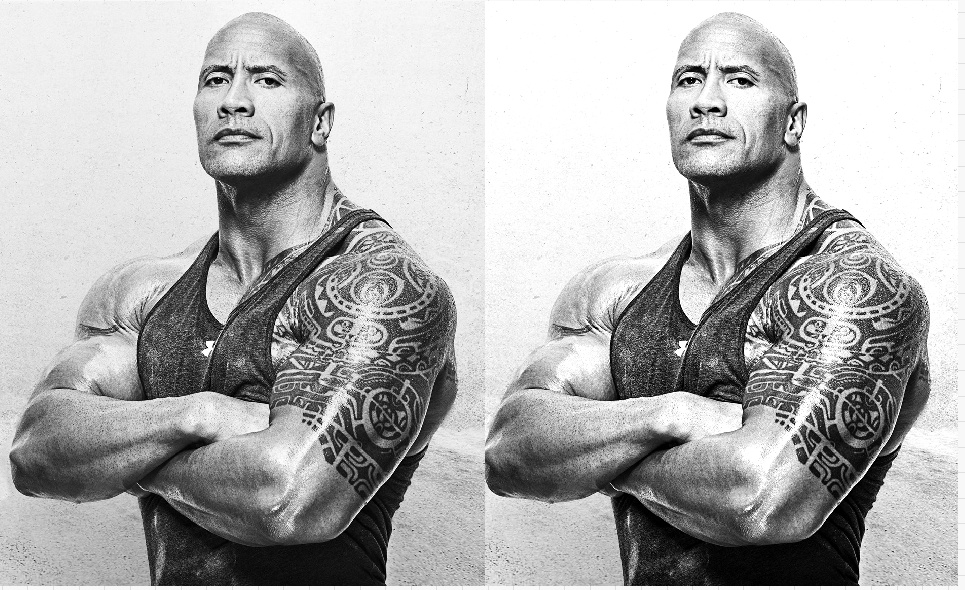
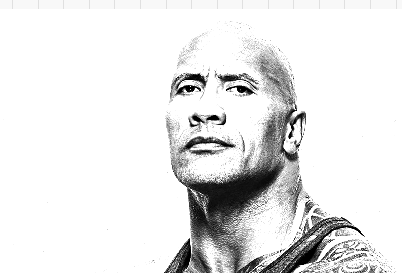
It’s certainly a bit subjective, but I’ll try to illustrate what I mean. The image on the left is a direct download, untouched. The image on the right is the same image after adjusting the brightness and contrast to get the greatest range of brightness from the image:
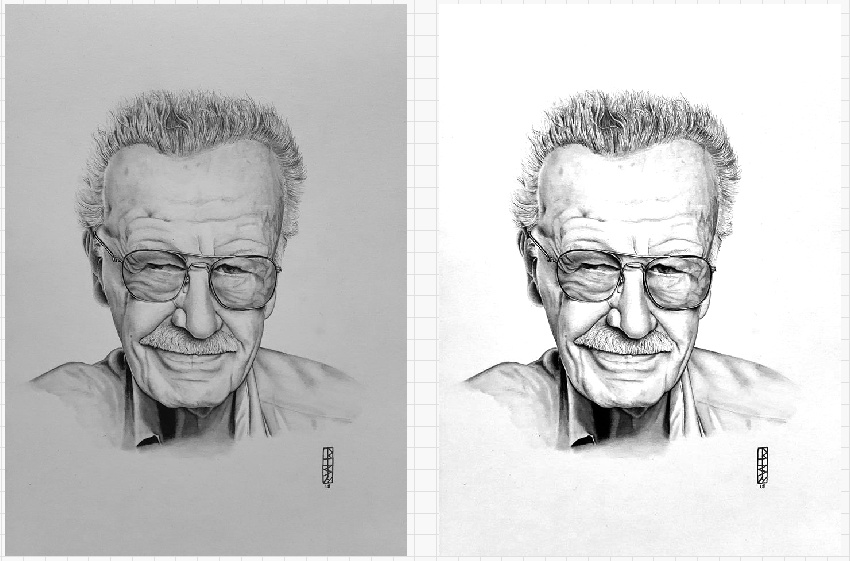
Either version would work, but you’re more likely to get good results from the image on the right. This is a slightly more subtle example, but the same idea:
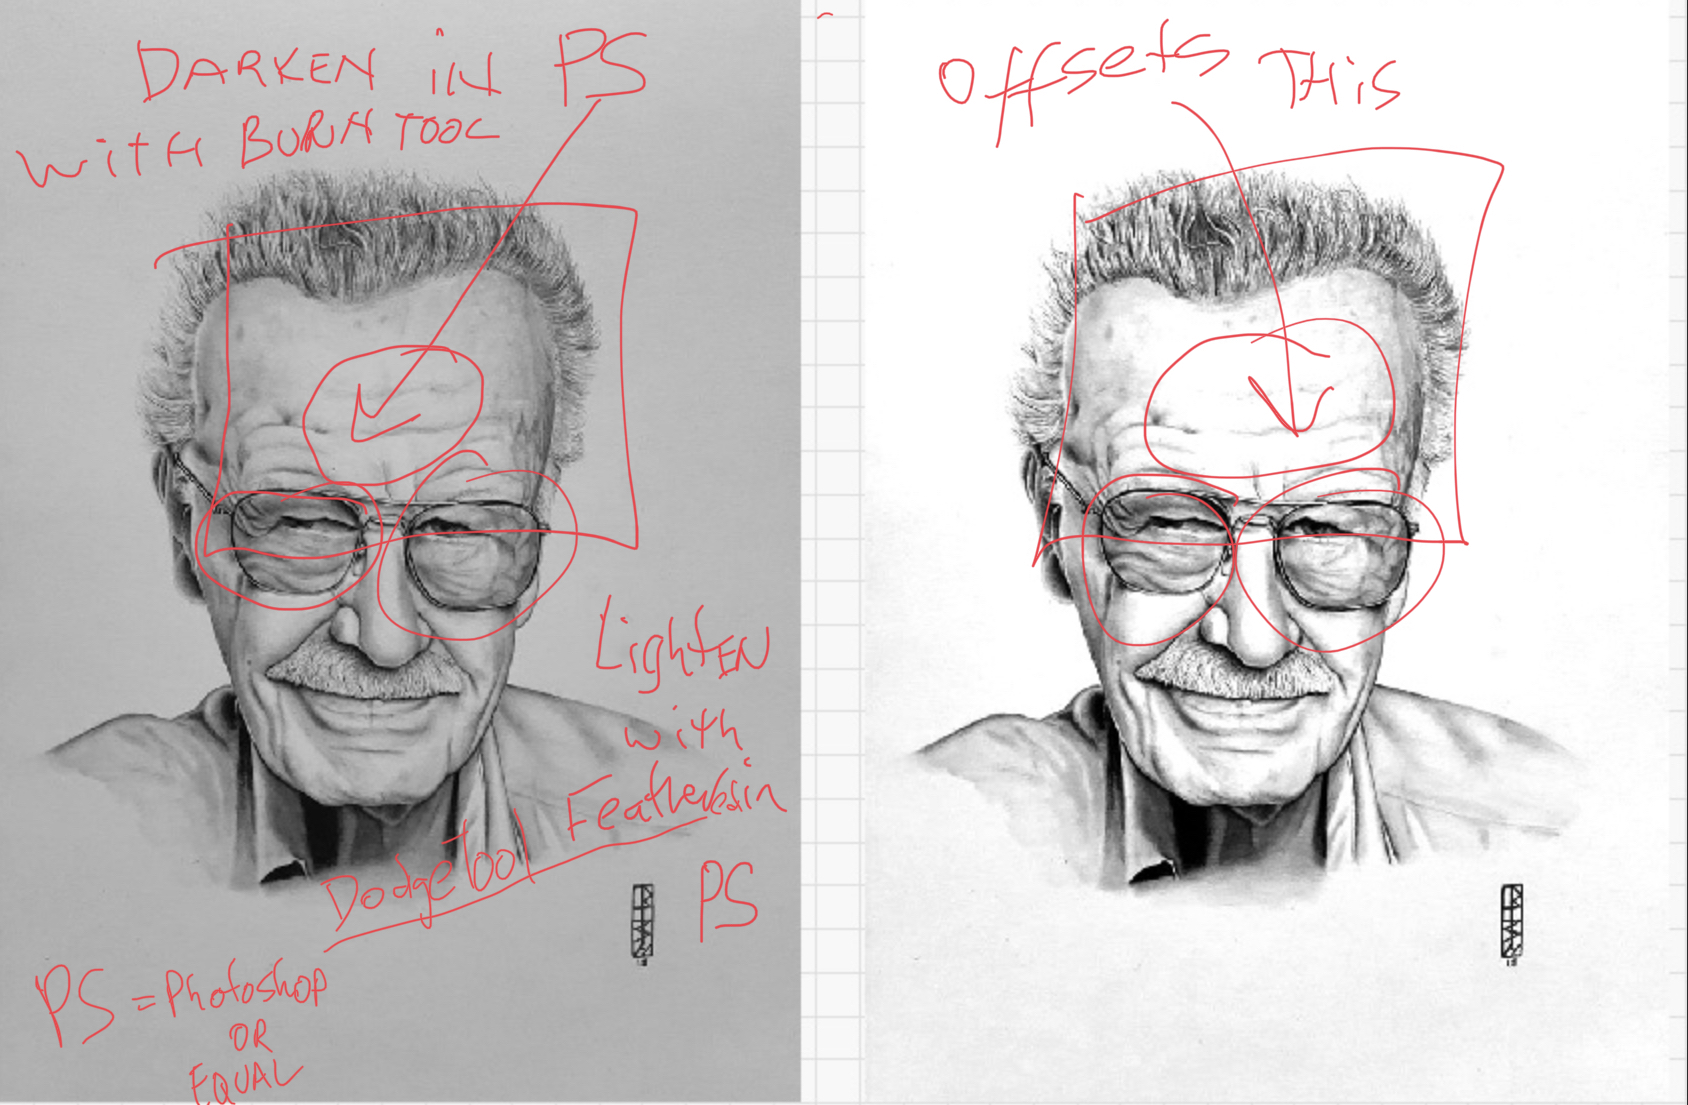
I’ve taken the image on the left and adjusted the contrast, brightness, and gamma to get the image on the right. It’s the same image, but the blacks are darker and the whites are brighter, but not to the point where anything is washed out. If I go too far, you lose subtlety and things just start to look “stark”:
I believe it is $150. You can download a 30 day trial to try it out. I have edited photos on photoshop for laser engraving but getting it right is a matter of trying it out and tweaking it after which wastes materials. You still have to know the general contrast you are going to need to get a good result, however this software does a lot of it for you. Please note though i have not tried to process a photo on lightburn it may work just as well.
One can just as eaily make a photoshop action and with the press of a button let Photoshop do a lot of the work.
But I got good with Lightburn as well!
Oz & Rick, are those settings
Gamma .8
Enhance radius 4
Enhance amount 200
Good for all photos and then I just need to set brightness & contrast based on the photo?
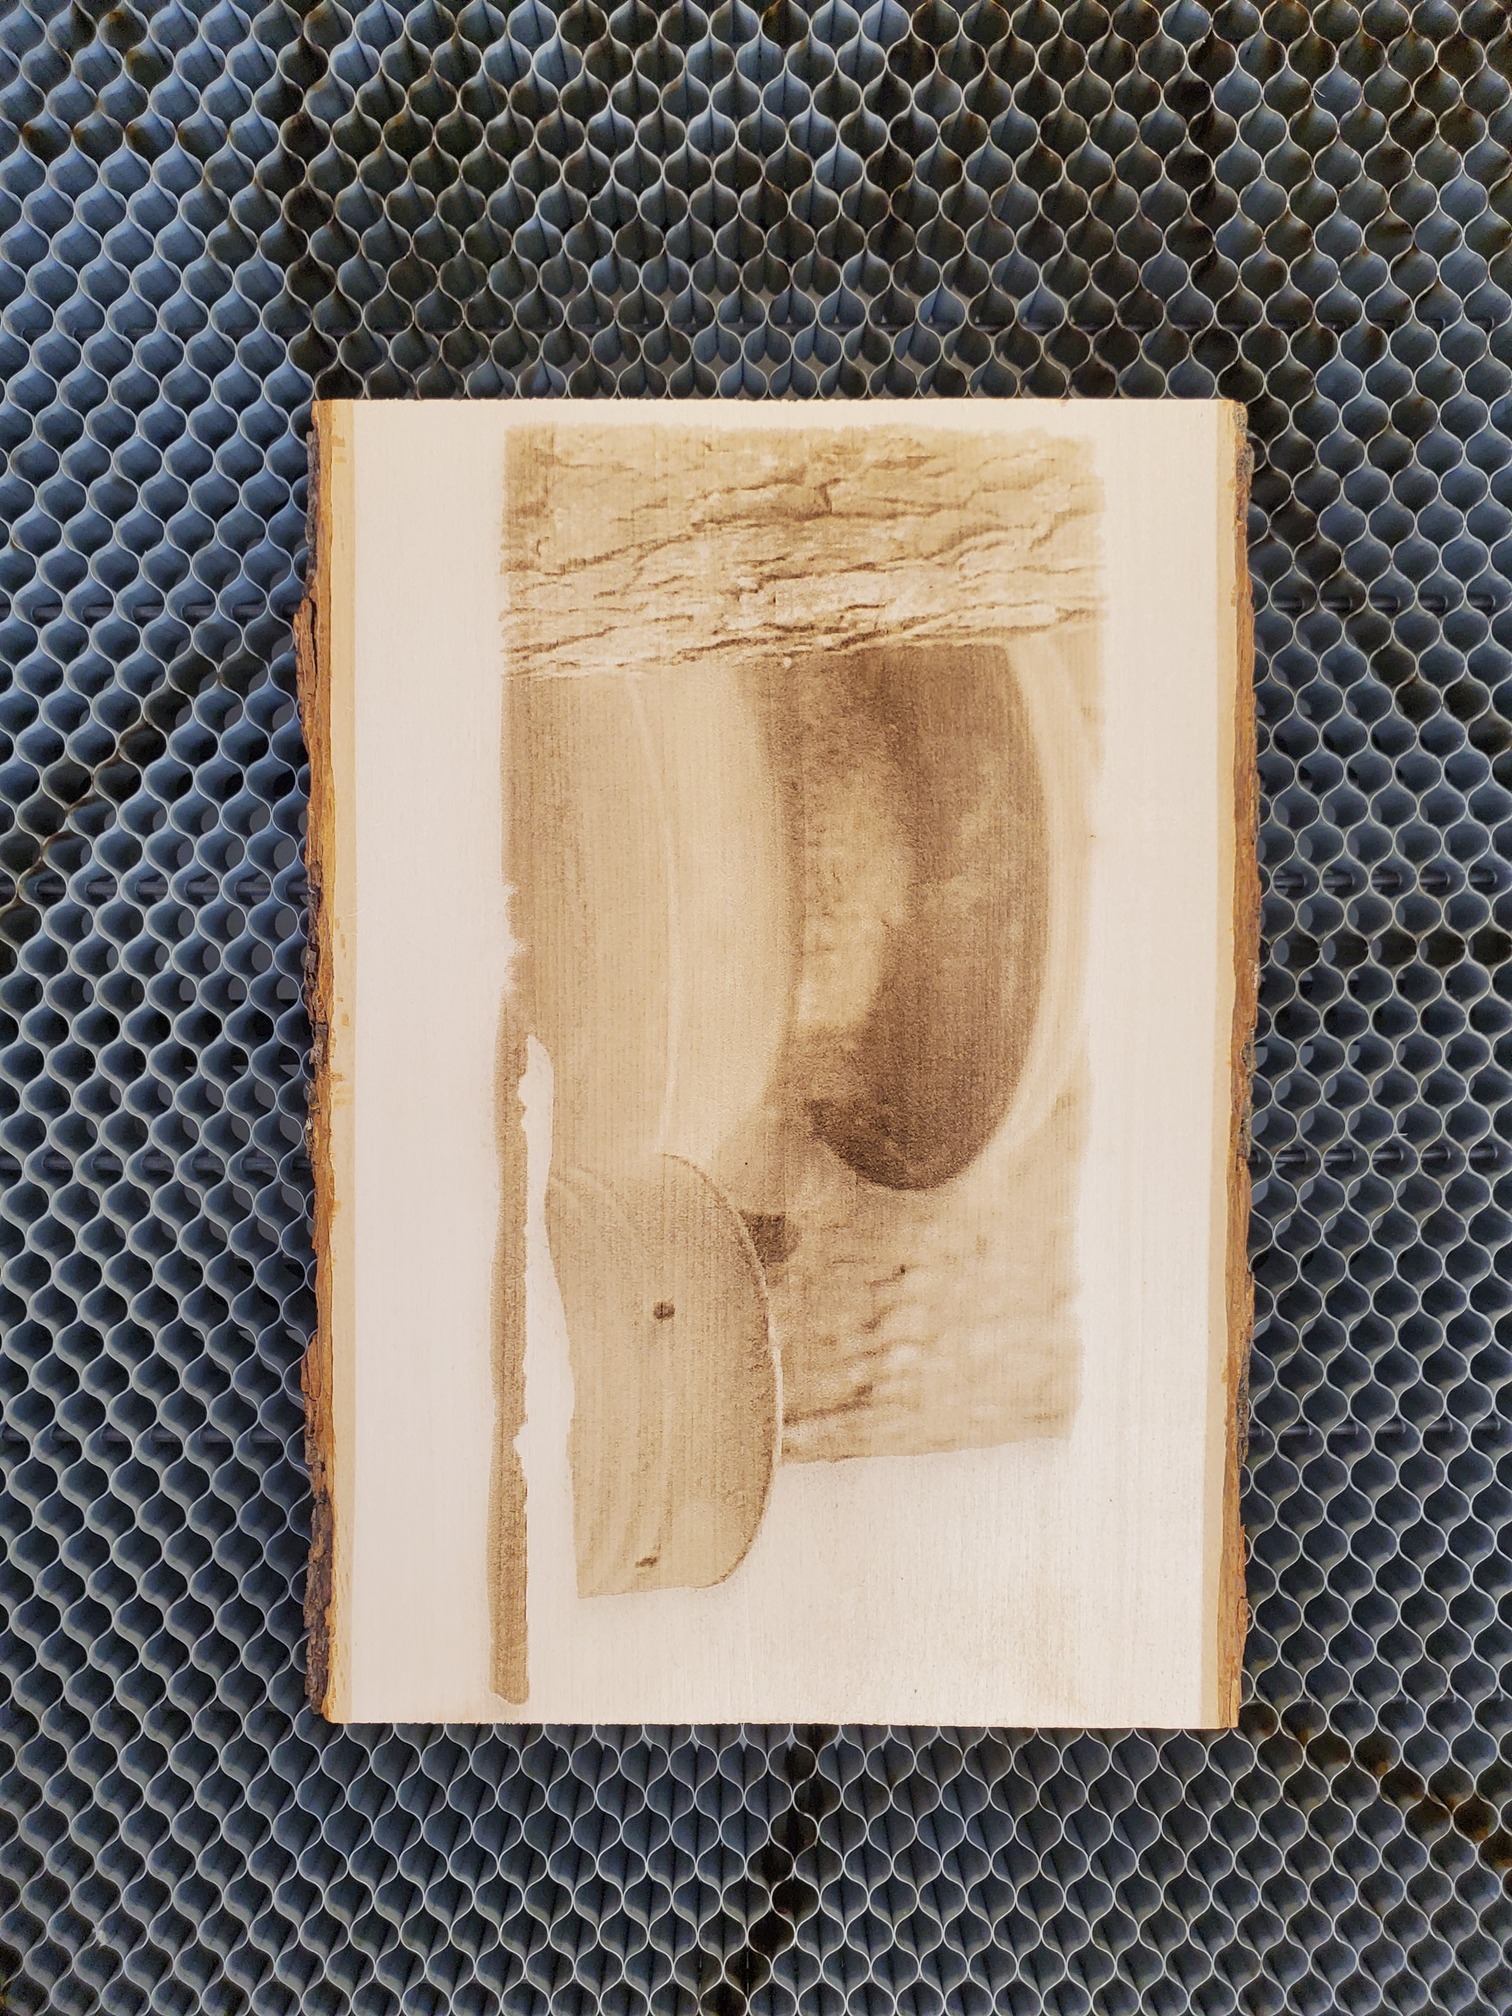
 good result!
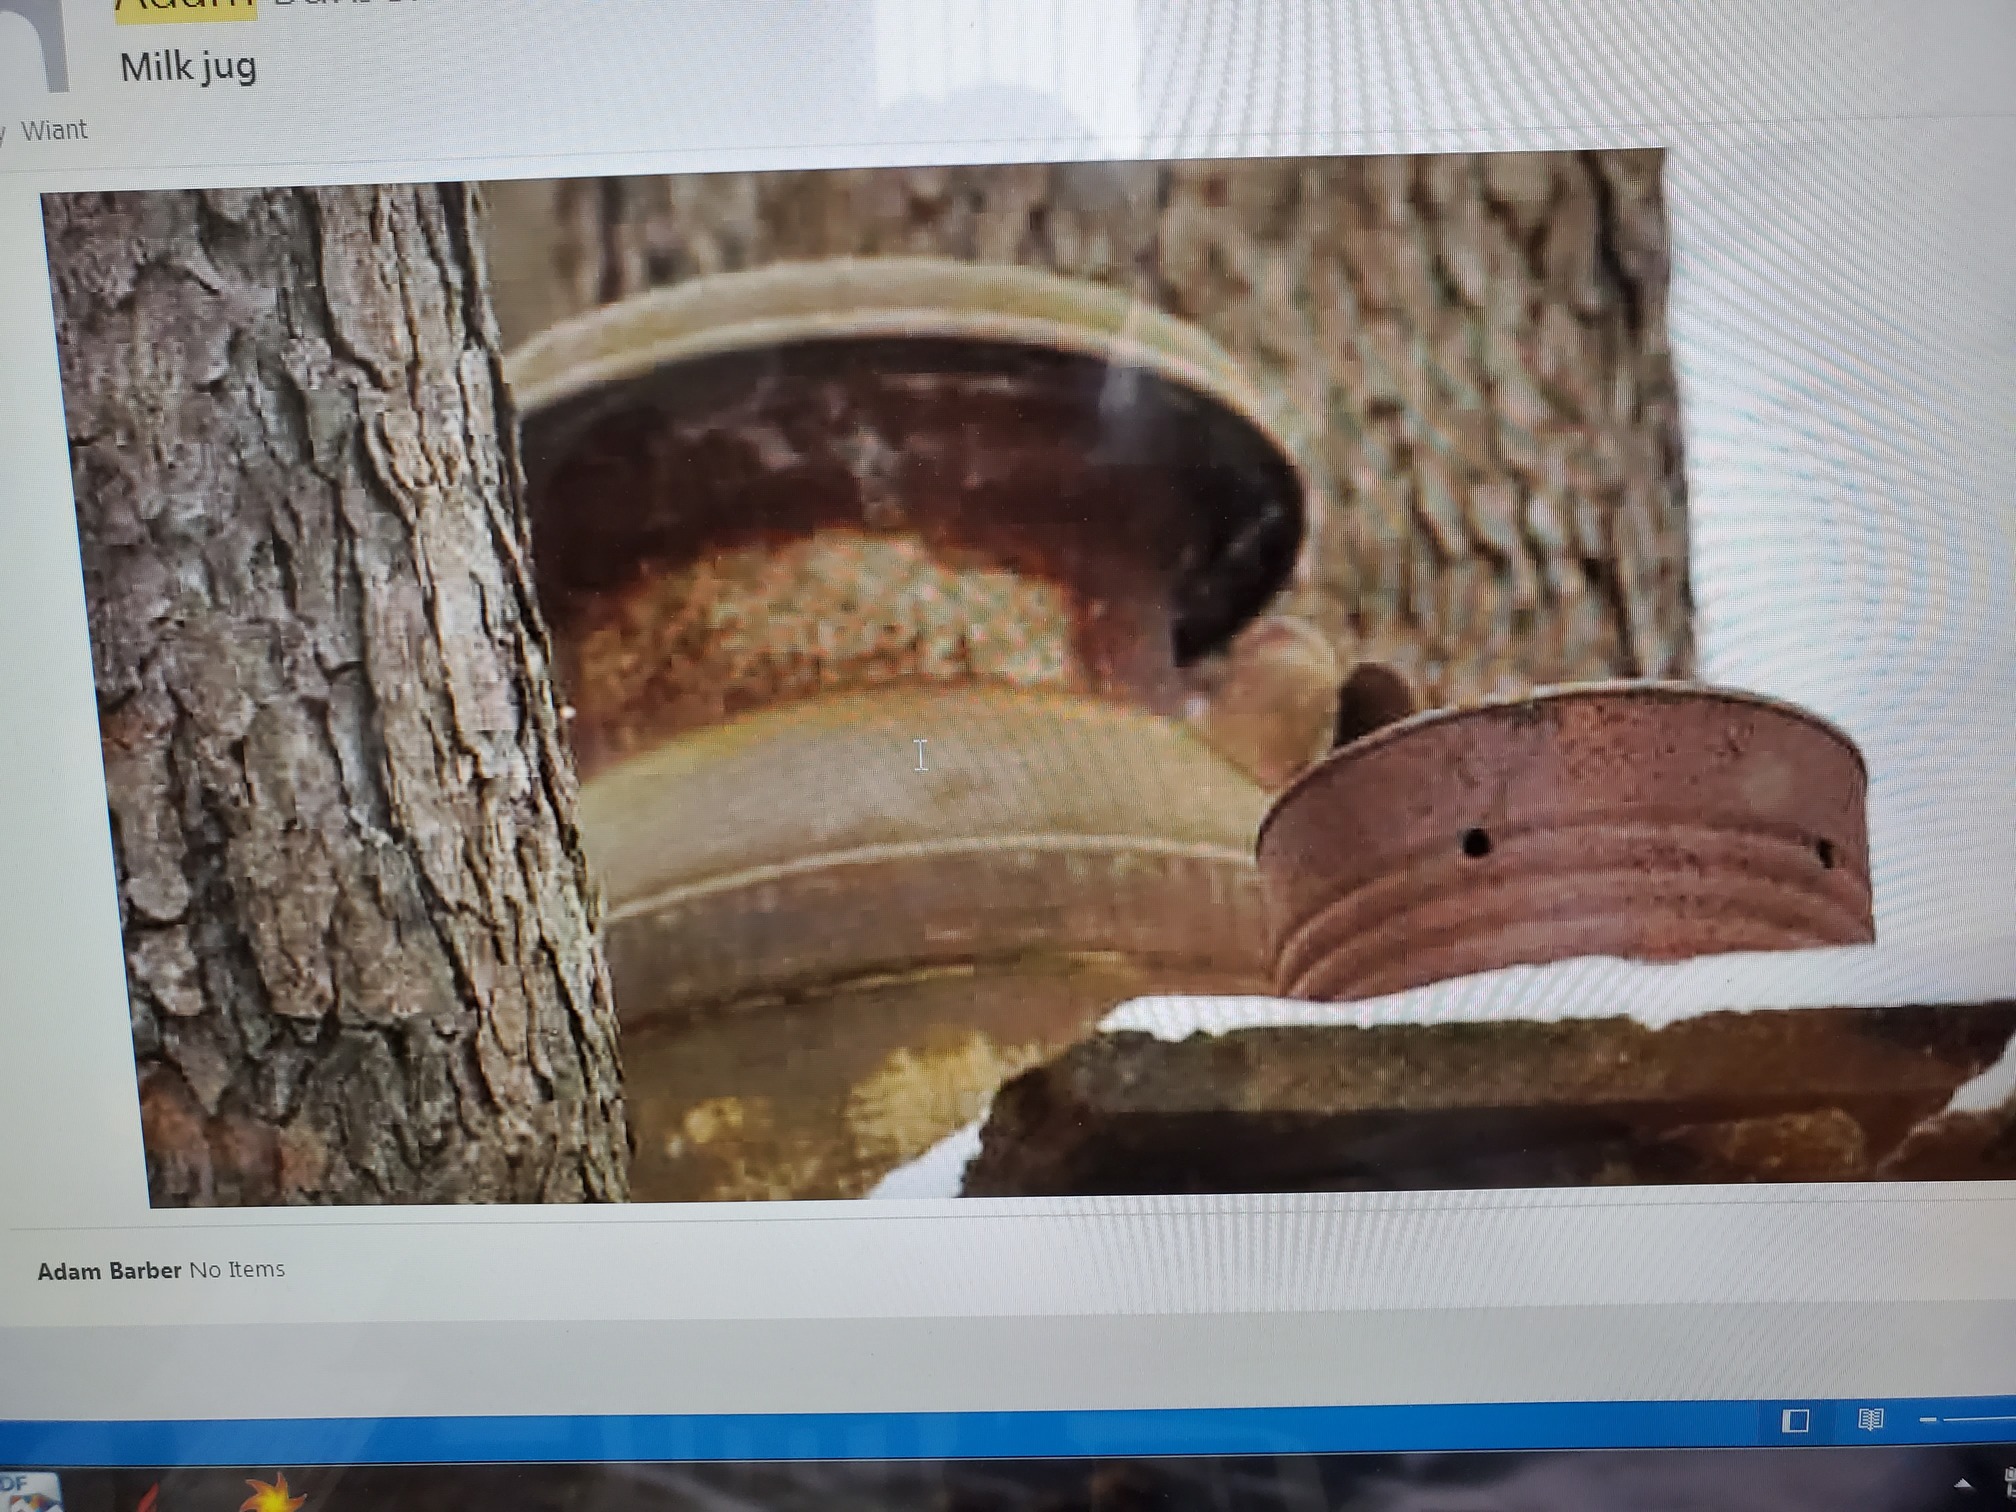