Inconsistent engraved parts

Hello, I want to know how have this engraved consistently. If you notice, below the “p” and above the “t”, they are not consistently engraved like the rest of the piece. I’m hoping someone has a solution to this problem, thank you!

I am seeing this through your engrave. Please share more details about the settings for this job. What material are you using? Any prep done to the material? Masked or not, wet paper cover? Tell us about how you processed this to get the results you show. Do you see similar results when produces on another test material?

I believe I have seen this before. Reuben, you have a Ruida controller?

For me it’s Ruida 6442.
Lightburn version doesn’t matter. It’s happened with many versions over the last ~2 years. (I don’t think it’s LB related at all)

Problem seems rather random. Sometimes works fine, once in a while not.

When it happens it ALWAYS happens in an area where a relatively wide area is being scanned and then it makes a sudden step to an area that is narrower or splits in to 2 or more narrower areas and those narrower areas seem to suddenly be engraved with greatly reduced power.

Seen the red arrows in my photo and corresponding areas in the graphic.

Would be delighted to know what causes it.

image

Yes we have a Ruida, the laser settings were Power = 15, and Speed = 350. I think it’s the negative space to the left and right of the p too.

And maybe just above this red line. Are you seeing that as well or just in the image shared?

image

How do you have this set up? All on a single layer? What settings for this Fill? Show this for the Layers used for review when you can.

Sorry, we’ve been busy. This is cut from a piece of Cast Acrylic .25" no paper, no prep, focused correctly. never used to show up, but its no prevalent now, clean mirrors, leveled table.

Chatting with the team, consensus is this looks like a power / tube / temperature issue. A couple of thoughts that might be worth review :slight_smile::

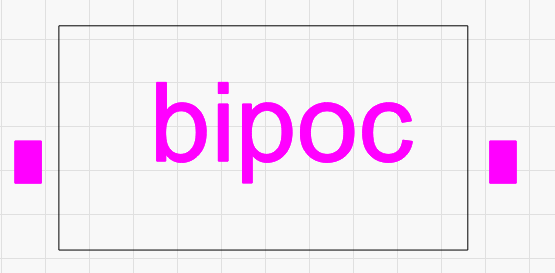
Another potential workaround, providing additional shapes outside the intended output used to get the tube energized and firing sooner:
image

Thanks Rick (and team),
That has always been my thought is that it’s some kind of tube/power supply oddness rather than a software problem.
I’ve never tried “special mode”, the warning about reduced tube life always kind of turned me off. Maybe I’ll give it a try a few times to see what it does.
The “workaround” using added shapes outside the design is an interesting thought. Might be a tad difficult to implement on a cylindrical shape like a beer glass…

I am really curious about special mode. I recently moved from a 90w to a 130w and I am refiguring all my settings and trying to get sharp engraves so Im planning to play with special mode a bit but need to do a bit of research on the tube degradation as well.

Hey Rick, We had that idea as well. I think that’ll solve the issue. Although, i’ve yet to try it. thanks!

1 Like

Let us know how you get on. Could be helpful for others that stumble across this post, if this works for your needs. :slight_smile:

It seems like this is the issue:

1 Like

Huh. That fanning at the anode is very interesting and I’ll bet that’s exactly what’s going on.
I might have to set up a camera on my tube and see if that’s happening at my trouble spots.

Long ago a I ran a small neon shop, bent & processed glass tubing, made signs, etc. I know that the arc discharge can do some odd things when the electrodes are run at very low currents but it made no difference on an “eats” sign at the local roadside diner…

Thanks much for sharing that link.

Note that the article says: “UPDATE: According to SPT, the fanning of the arc is not necessarily going to affect the output.” so that might not be relevant, but they have seen issues with lower current and temperature fluctuation causing inconsistent outputs.