I don’t have photos of progress now, will try to get some later.
Have tried every manner of cutting jigsaw puzzles that I could find and what came into my mind. Had decided no matter of difficulty was going to stop me from making a nearly perfect puzzle.
Omtech 60W/50W - Speed 12mm/sec - Power Max & Min 55% - 16mA - 63.8mm lens with nozzle to substrate distance at 10mm - Air Assist 25psi - Use a tub with distilled water, Temperature controlled with frozen bottles of water. Digital thermometer in water tub. Chiller is on the list if I ever make any money at this. Lol
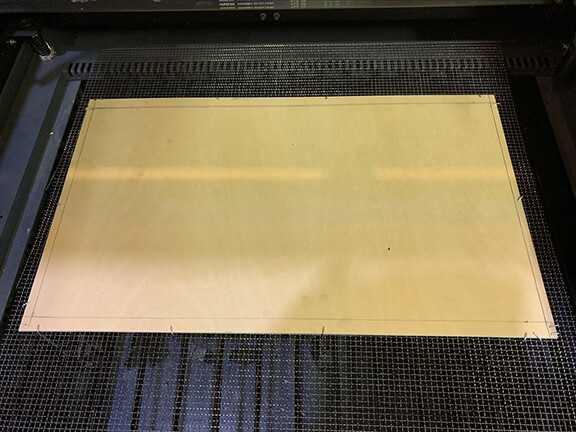
Aircraft Plywood 3mm/1/8". (Sticker shock but worth it. Nice material.) Shouldn’t be concerned we bought as much as $150,000 value in wooden material every year for our family business) No voids and no noticeable flashes from the laser beam hitting bad glue.
Cut with photo side down. Have tried sealing the ply with sanding sealer to help with bowing/warpage. Wasn’t necessary with this material. Have found that warming the raw side with a steamer actually makes the material cut with less smoke residue. Intend to make puzzles 8" x 10" , 10" x 16" , and 16" x 20".
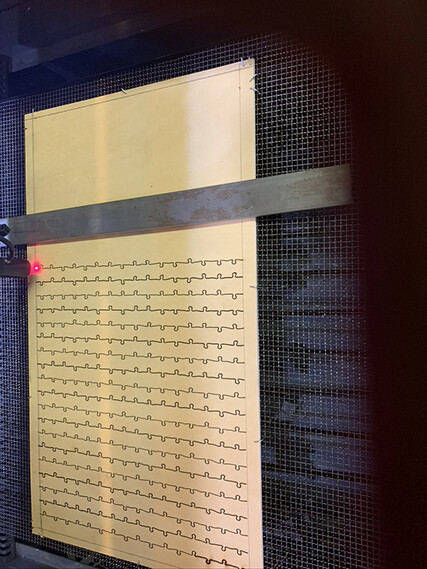
Anyone trying to make puzzles that need to fit rather close is well aware of keeping the material flat.
Use a stainless steel mesh screen on top of the aluminum bars in my laser. I read somewhere about a gentleman using weights to hold the material flat. Used 17 weights around the edges of a 16 x 20 inch puzzle. The weights are connected to the mesh and ply with wire shaped at an angle slightly over ninety degrees. The center of the ply will rise as much as a fat 1mm after all the other weights are in place. A piece of steel 1/4" x 2" laying across the ply holds it to the aluminum bars. I move it as the laser works across the puzzle. Yes, I do pause the laser when doing that.
My final prototype has no smoke residue on either side. Cleaned it with apple cider vinegar. Sure makes it smell good.
Disconnect the weights when the puzzle is finished, slide the mesh with the puzzle intact and the frame that cuts on the perimeter, through the pass through door onto a large piece of cardboard.
I spray the photos with clear coating to protect.
I wish to thank everyone on the forum for the unselfish help you have given me with this endeavor.
I almost forgot to say, cleaning the nozzle yesterday got rid of my ghosts.
Jack,
This company is the cheapest I found. Minimum is one 4 x 8 foot sheet cut into four pieces, 24" x 48"
I got mine for less than $150 including shipping. Had my order in less than a week.
I mentioned steaming the backside of ply before. I am still working on the best amount of steam, how close to hold the steamer to the wood, and if it will actually helps straighten the panel. No doubt the panel will need to be sandwiched between two pieces of 3/4" MDF Melamine if the warp isn’t too bad. More warp, the panel needs to be supported with some ply scrap at two of the very end so whatever weight you lay on top will force the steamed ply to push down about the thickness of your scrap pieces of ply. I like to leave the “pile” at least overnight. Only place one piece of your ply in the pile at a time.
You can see the wires that are connected to weights over the edges of my panel.
The weight I used are steel clamps that I used to use with the CNC router.
Quarter inch x two inches steel bar to flatten the inner portion of the panel. I place the steel wherever needed to hold the panel to the aluminum bars in the laser bed.
The screen in the photos is stainless steel. I have two pieces 24" x 24". Put one in cleaning solution while the other is being used.
I won’t go into the equipment and my settings since they are in my original post.
Some folks may not wish to “fiddle” with the apparatus as I have laid it out. That is fine, I find this rendition is working if you follow all the steps and check everything 3 or 4 times before cutting. The time necessary to set it up and take care of it while it is cutting is time well spent to get a nearly perfect product.