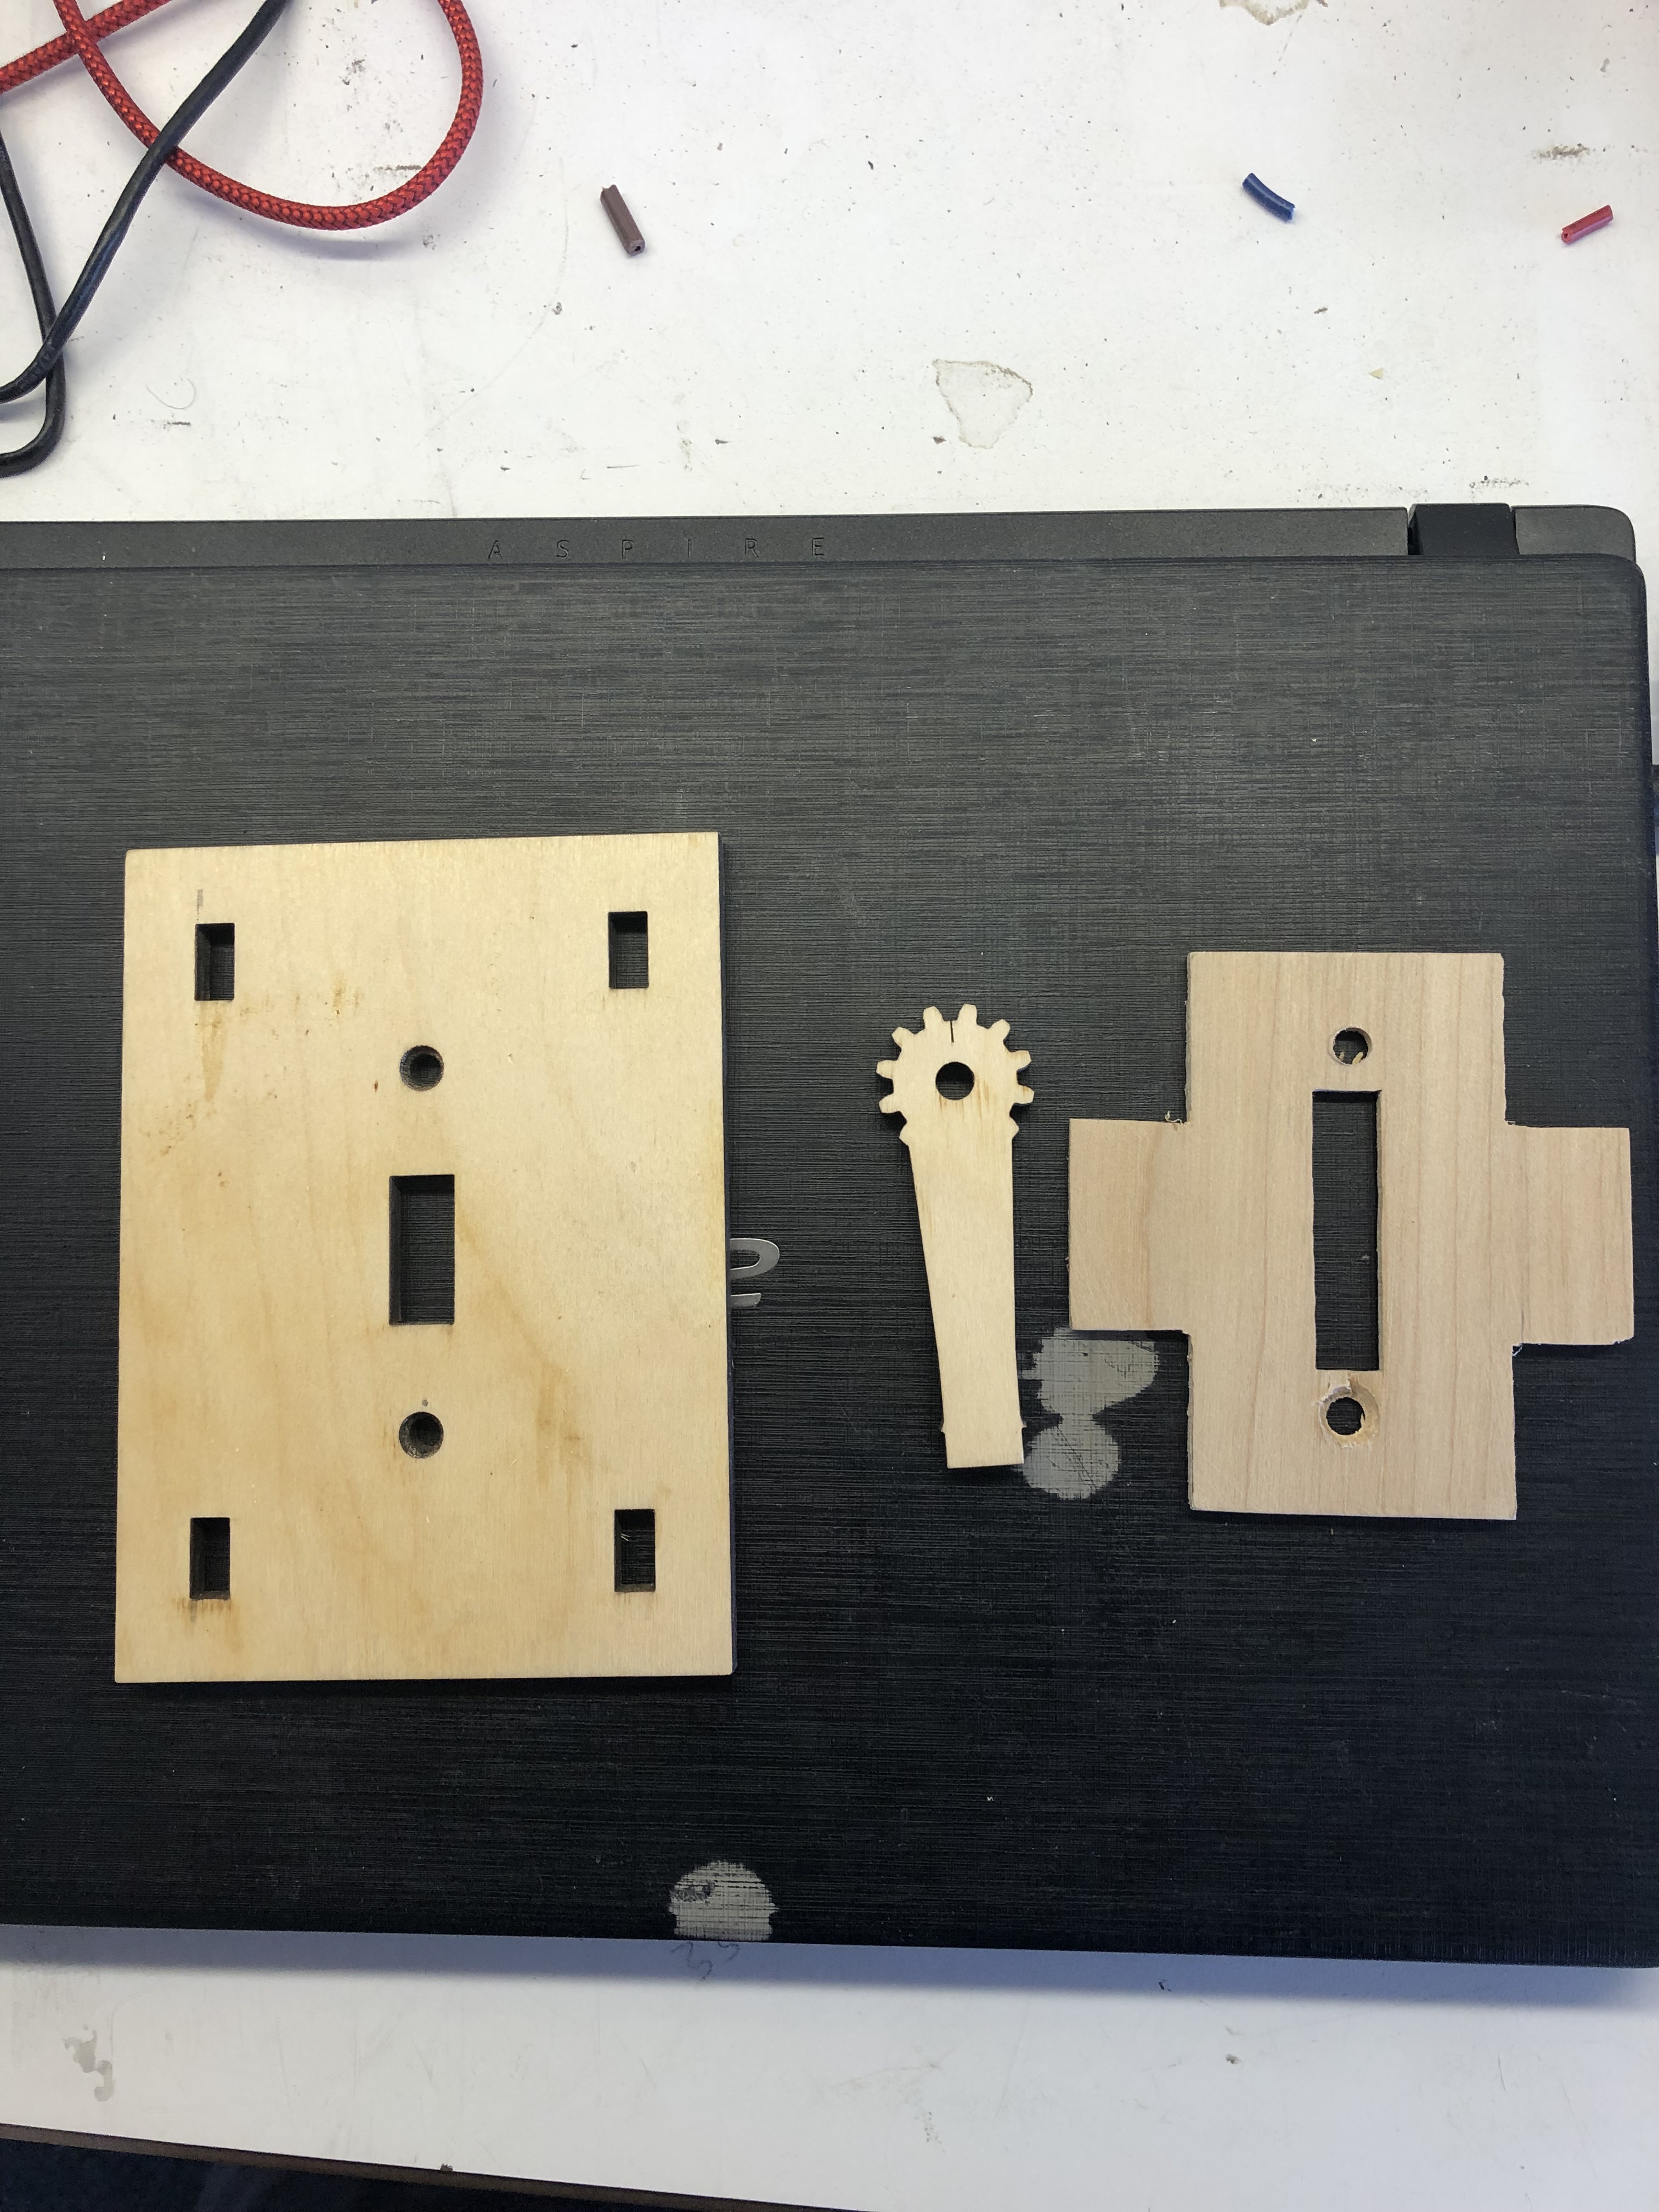
I finally got my lightburn camera working…built a camera mount ,ran set-up, calibrated and adjusted via the tools lightburn provides. I’am not to sure if everybody is happy with there camera but I’am majorly disappointed. I can’t speak for everybody only my experience. I purchased a small laser cut toy to try it out and it performed vary poorly for me. These are the pieces I wanted to replicate.
/var/folders/2q/jltlh4ds5qz4z5dppfgxv72h0000gn/T/com.apple.iChat/Messages/Transfers/IMG_3292.jpeg
The trace option didn’t even come close to where I could even try to cut one out. Am I doing something wrong?
The camera isn’t meant for copying existing pieces, but for aligning cuts on material. It does have a trace feature, and it works for simple things, but for anything requiring dimensional tolerances, like gears, it’s not going to be well suited - you’d need a scanner for that.
If you could show us some steps on how you went through the process, and what it looked like during those steps, maybe there’s something we can identify.
While the camera is accurate, it’s not necessarily a “copy & paste” kind of operation. It’s good for tracing things, as well as aligning, but will never be as accurate as something that’s been drawn up and modeled in a CAD design. If you’ve got critical dimensions you need to hit within tolerances, tracing is perhaps not the best option. Don’t get me wrong, the camera is useful in many situations, so long as you recognize its strengths and weaknesses. Making duplicates of accurate mechanical drawings is not it per se
I personally have struggled so badly with trying to get the camera wizard to align properly enough to use it that I gave up and haven’t tried to use it in a long time. I found that on this Boss Laser LS-1420 it was difficult to get the alignment pattern into position where the camera could see it and give a “good” score in the various positions. When I got fed up and accepted a less than stellar score, it ended up not being aligned very well so I too am interested in any tips just to get it working enough to use to align things on the material, not necessarily replicate like the OP is trying to do.
I had a tough time with the alignment and calibration part as well. I ended up taping white typing paper everywhere the camera could see By doing that it aligned and calibrated perfectly.
Something that people seem to miss is that the lens calibration card doesn’t need to be (and in fact shouldn’t be) sitting on the bed of the laser. It needs to fill roughly 1/3rd of the view of the camera, horizontally and vertically, like a single square in a tic-tac-toe board. The walkthrough video highlights this, and the documentation says it too.
From the documentation for the lens calibration:
Note: This process is dependent only on the camera and lens, not on its placement in your machine - as long as the camera and calibration pattern are perfectly still, you do not need to mount the camera in the machine to perform the lens calibration. If the calibration image cannot be held at the appropriate distance to match the shown image in the display, you may shrink or enlarge the printed pattern.
If your machine has a honeycomb bed, covering it with paper or a bed sheet will help - the pattern gets confused for more circles.
Thanks for the reply, I think I followed the instructions exactly and also didn’t have the pattern laying on the bed, but holding it steady perfectly was challenging. I’ll have to try again because I really want to use the camera.
You can print the circle pattern larger if needed. The simplest method I’ve found is to just put a cardboard box on the laser bed and place the calibration image on that - closer to the camera and perfectly still.
It’s hard to get dimensional reproductions from a photograph. I’ve tried to do this on my CNC plasma, using cameras (photo, DSLR, etc) for a while. In the end, the parallax error usually gets you. Dimensions will be most accurate at the center of the photo, and diverge at the edges.
With a camera, you can mitigate this somewhat by putting a lot of distance between the camera and the part, and using a zoom to get the image. Essentially, the image is being taken through more of the “center” of the lens, so it has a bit less distortion. Not really an issue with the LB setup, though, as the camera is a fixed distance from the part.
Ultimately, for dimensional parts, I’ve found it’s best to 1) scan them on a flatbed scanner, then trace, or 2) use a specialized tracing setup. I use Scananything on my table (6’ x 12’) if I need to get big parts. It replaces my torch head with a camera, and then traces the part. It’s finicky, a bit of a PITA, and still requires cleanup (it’s essentially a collection of points/paths), but it’s a good way to get sufficient accuracy.
LightBurn corrects for all of the dimensional distortions you’re referring to, which is a big reason the camera setup is a pain in the butt.
The lens calibration system knows the physical arrangement of the circles pattern used, and by finding the circles in several camera images, can calculate the distortion of the lens and compute the inverse of it - this is why, as you get to the end of the lens calibration process, the images aren’t fisheye anymore, but perfectly straight.
The alignment calibration process uses your machine to place marks in known locations on the bed, and then has you tag them, so the code can compute the mapping between pixels in the image and locations in the real world.
The two things taken together produce a surprisingly accurate result, even when given fairly extreme mounting position and lens distortion.
That said, the result is still just a picture, and producing an accurate vector trace from an image is quite difficult, so that’s a big part of where the problem is. It’s great for placement, and good enough for capturing bold lines drawn in marker, but as you say, for reproduction of dimensional parts you really do need a scanner, or a re-creation done by hand from measurements.