Would it be possible to enhance the software to allow users to control the trace of the laser by user entered speed and steps? The reason being the following. Many lasers have the front access door that allows your workpiece to hang out the front. If you are daring, you can flip the piece around and attempt to align it to laser a bigger piece. Ie doing half first and second half next. The issue is that through Ruida onboard, you can’t control the trace enough to align the first half with the next half. If Lightburn could allow for this, it would be a game changer and allow maximization of that open access panel to do bigger work on smaller and medium sized lasers.
I have no idea what you’re asking for here. The frame functions already use the speed value entered in the ‘Move’ window. I’m not sure what “user entered steps” means.
For breaking up large projects, we have a much better way of aligning the sections that I’ll be showing in a video before too long, along with a new tool for cutting up large jobs.
This post describes using the Print & Cut feature to align multiple sections of the same job:
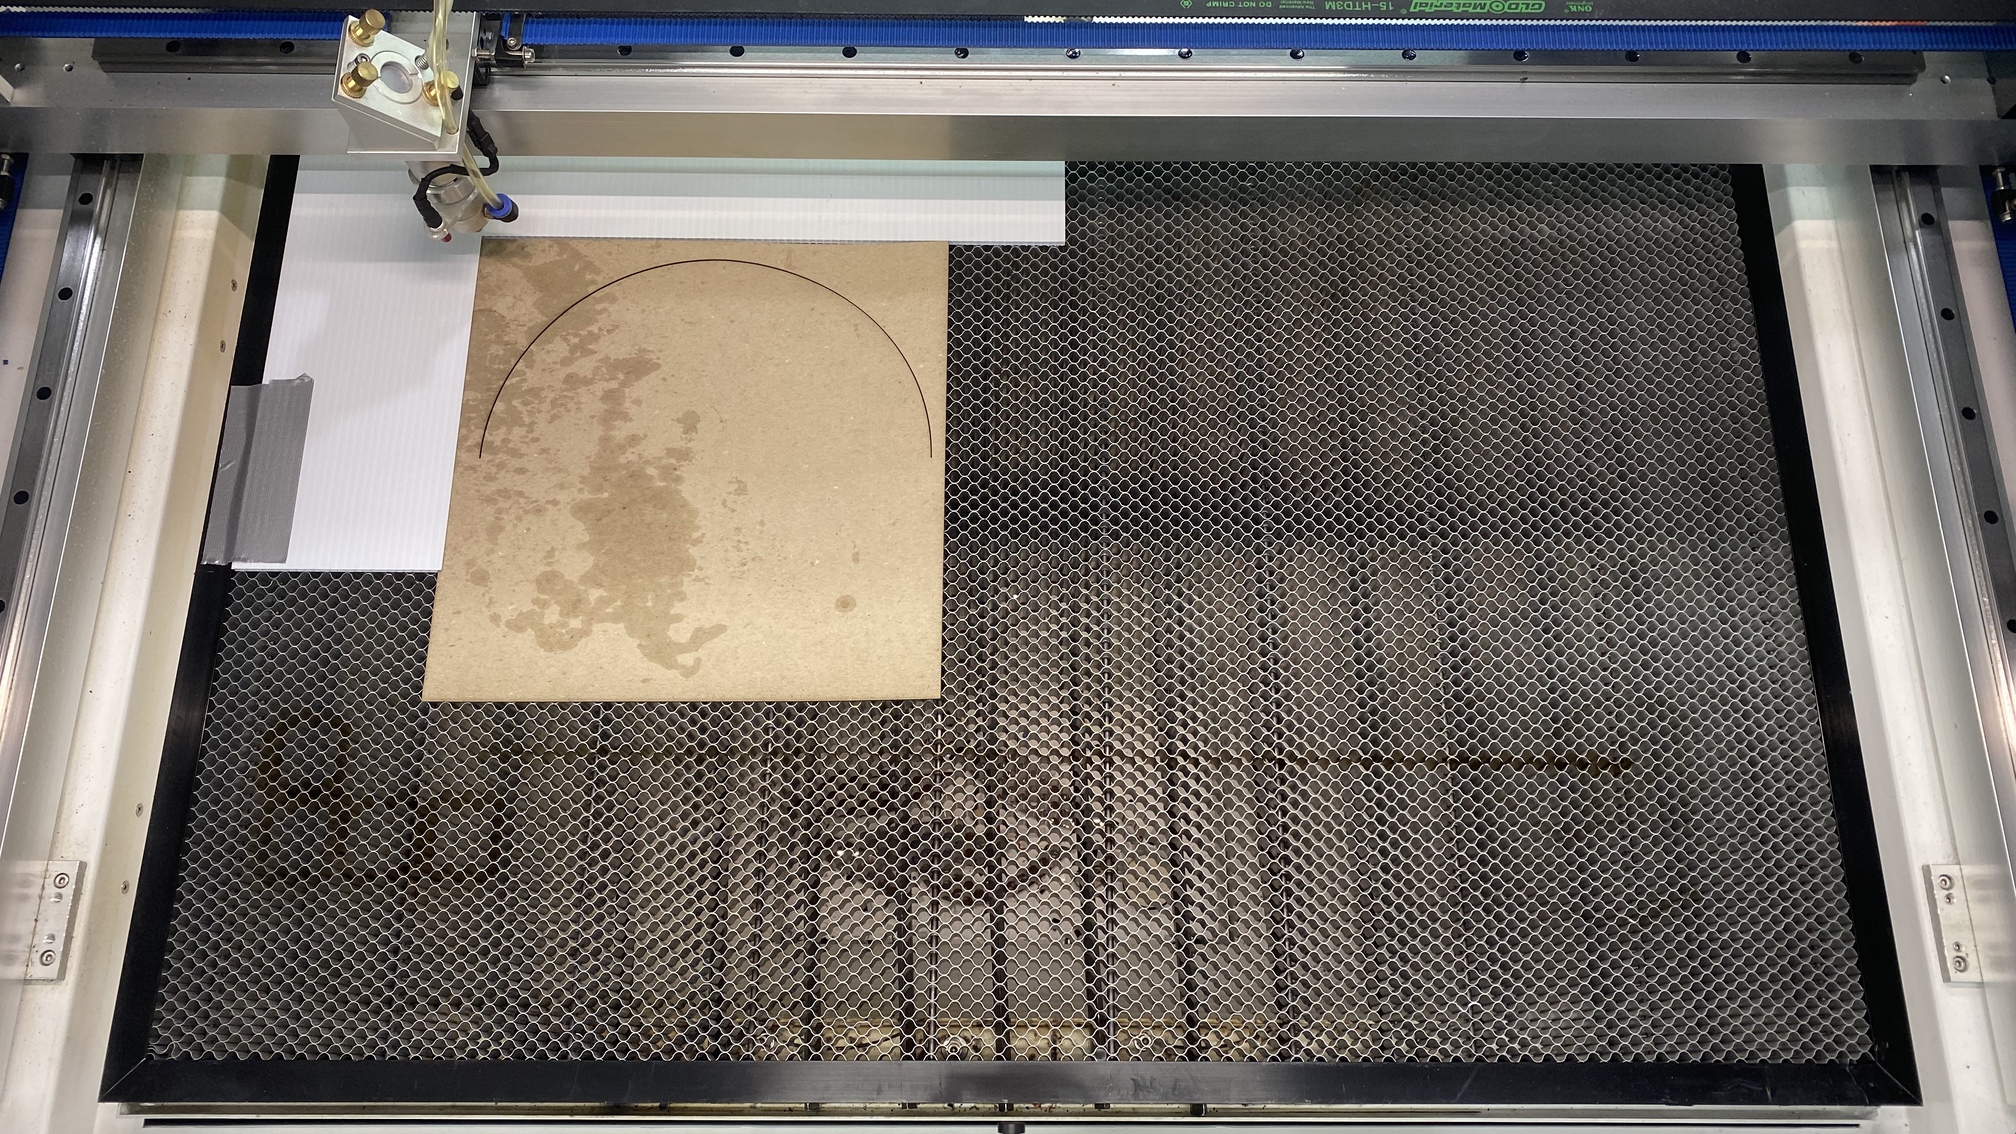
What I’m saying is let’s say that the laser max area is 27 x 19 and you want to make a one piece circle that is 36 inch diameter. You would cut half, trun the board around and cut the other half. But you need to align it visually and that’s hard now due to a trace that isn’t stepped.
I understand exactly what you’re trying do do, but I don’t understand what you mean by “a trace that isn’t stepped” - What is “a trace” and what is “stepped” ?
OK sorry for the lack of clarity. Here is what I mean. Right now when you do a trace with the onboard ruida it’s one unstoppable motion. So if you want to attempt to align let’s say half a cut circle to the other half to get a fluid cut you have to watch as the trace flys by to see if the beam is aligned. By stepping the trace one movement at a time you could better visually align the cut when doing a two part cut.
Eyeballing the placement, no matter how well your red dot pointer or even a lightburn camera is aligned, will never be perfect / exact. There are, however, alternatives to making larger than bed cuts such as:
-
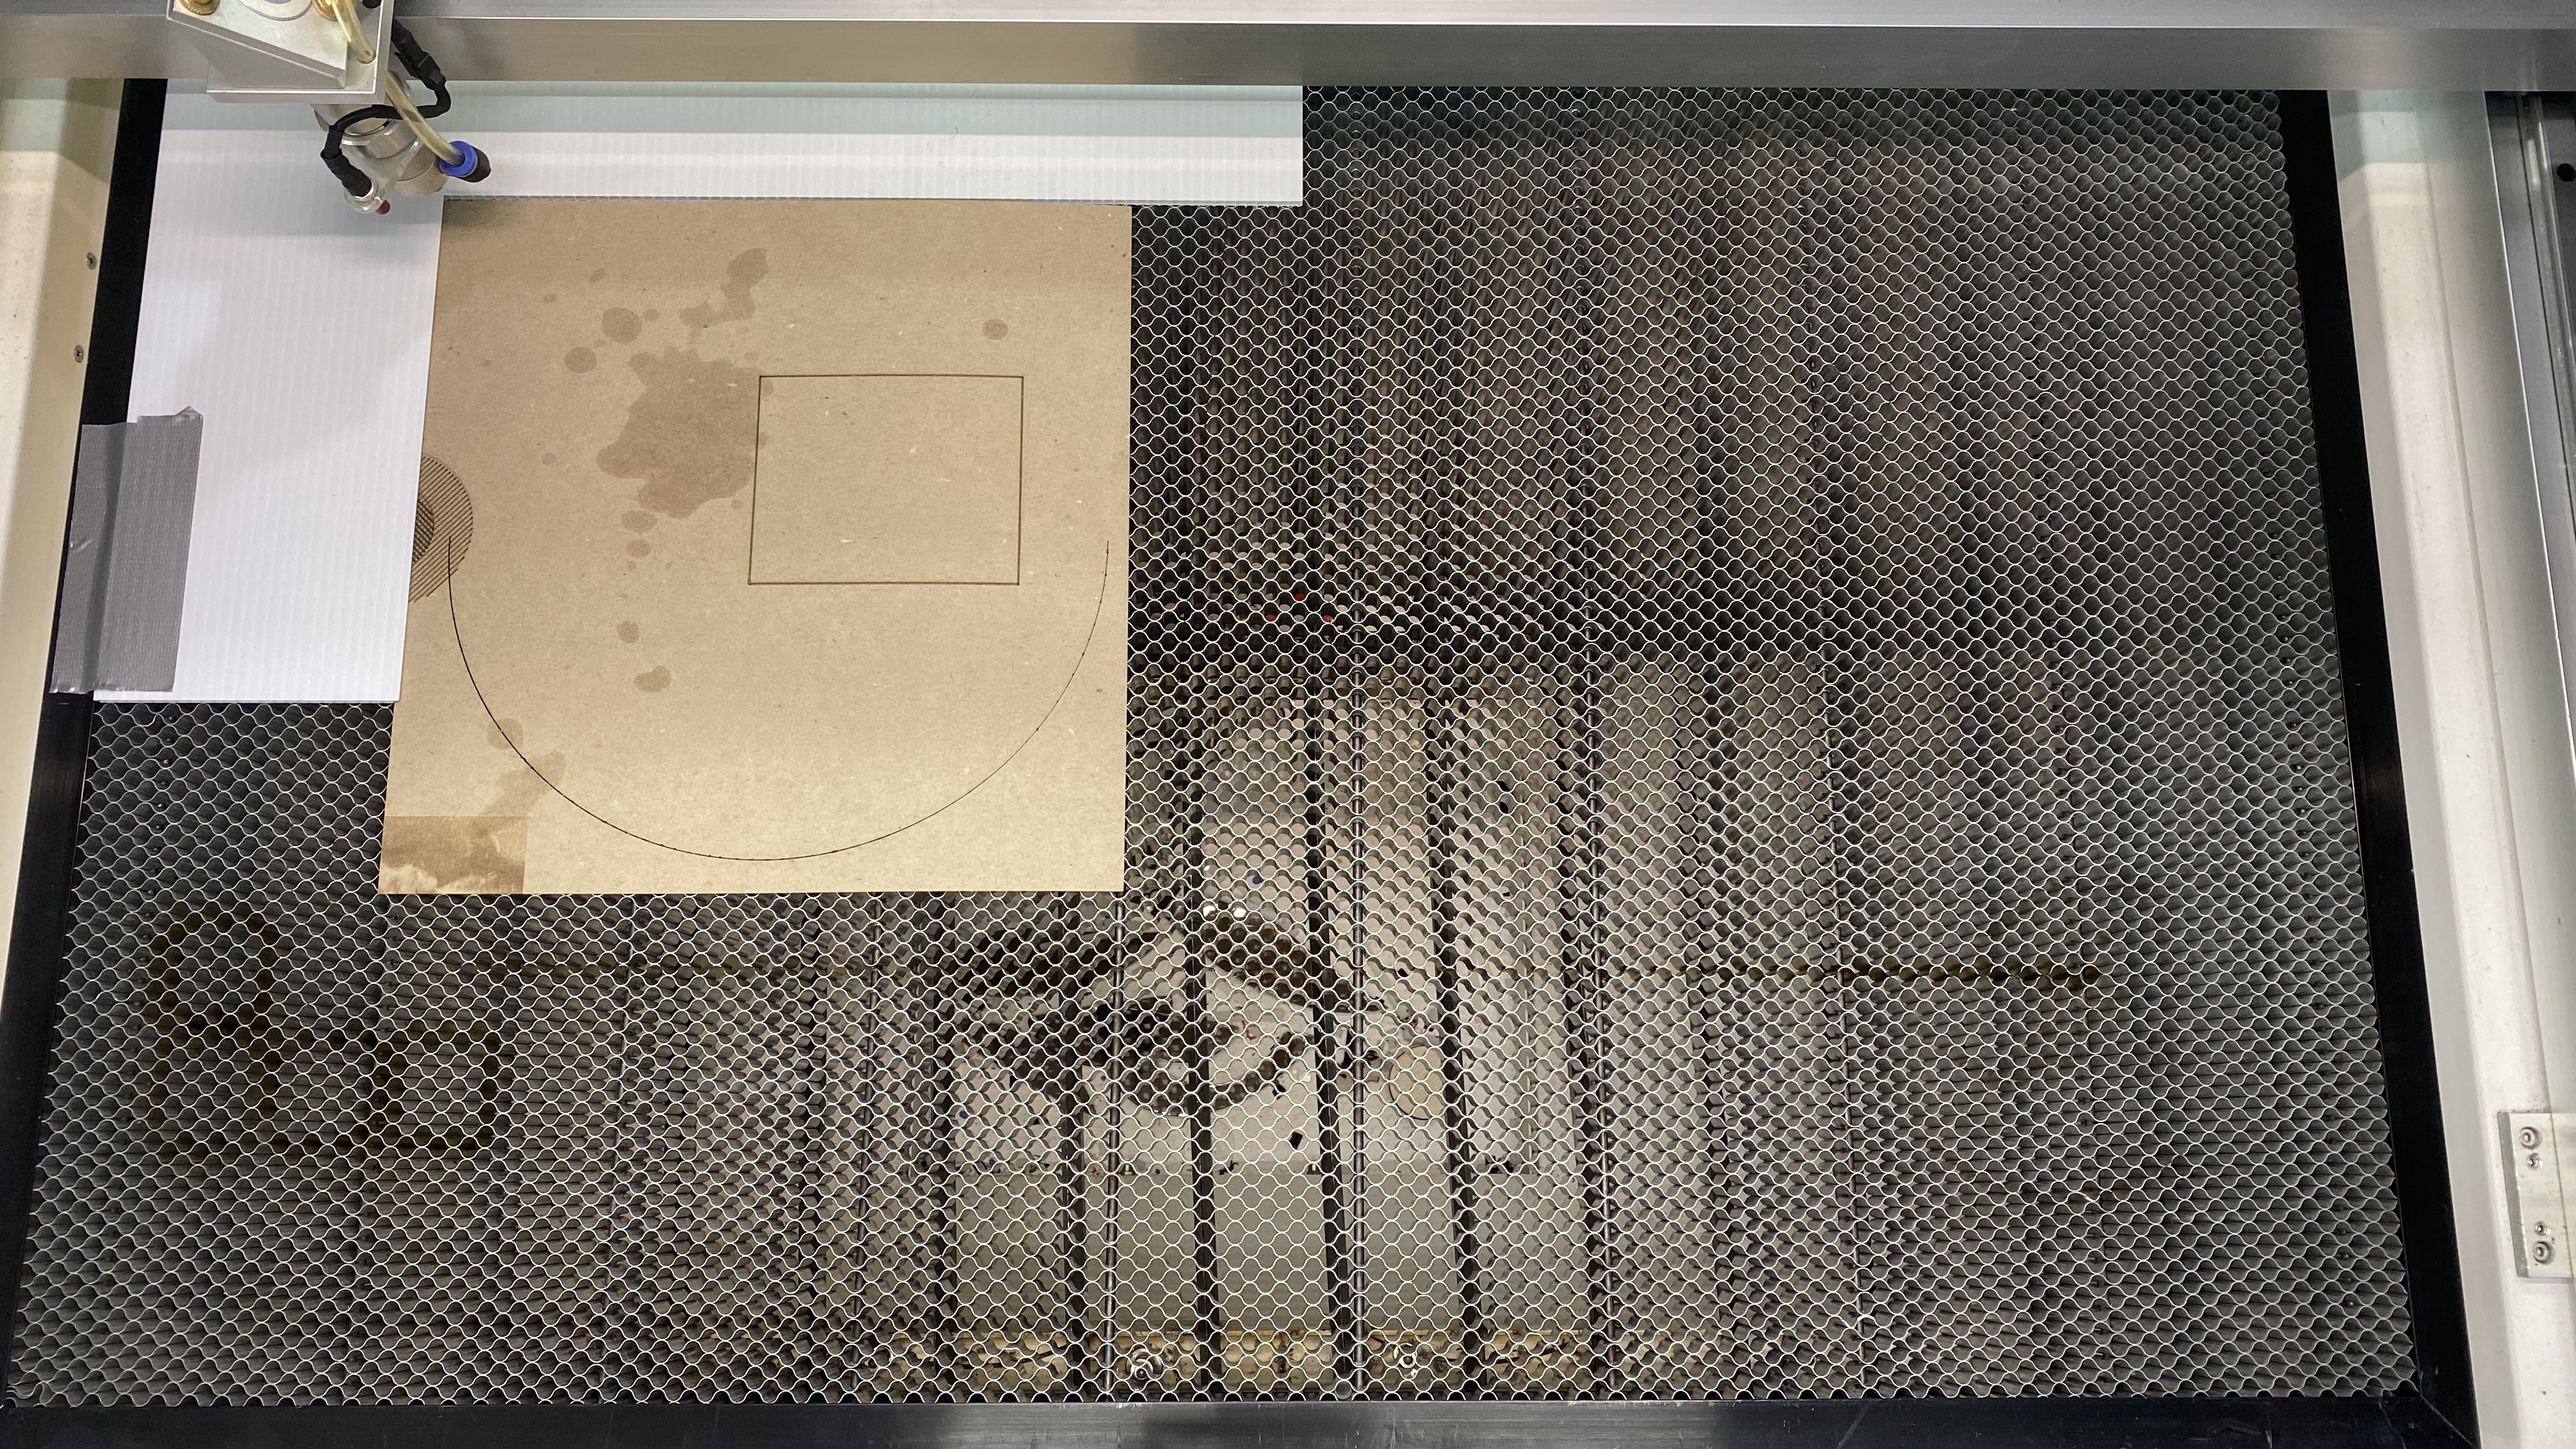
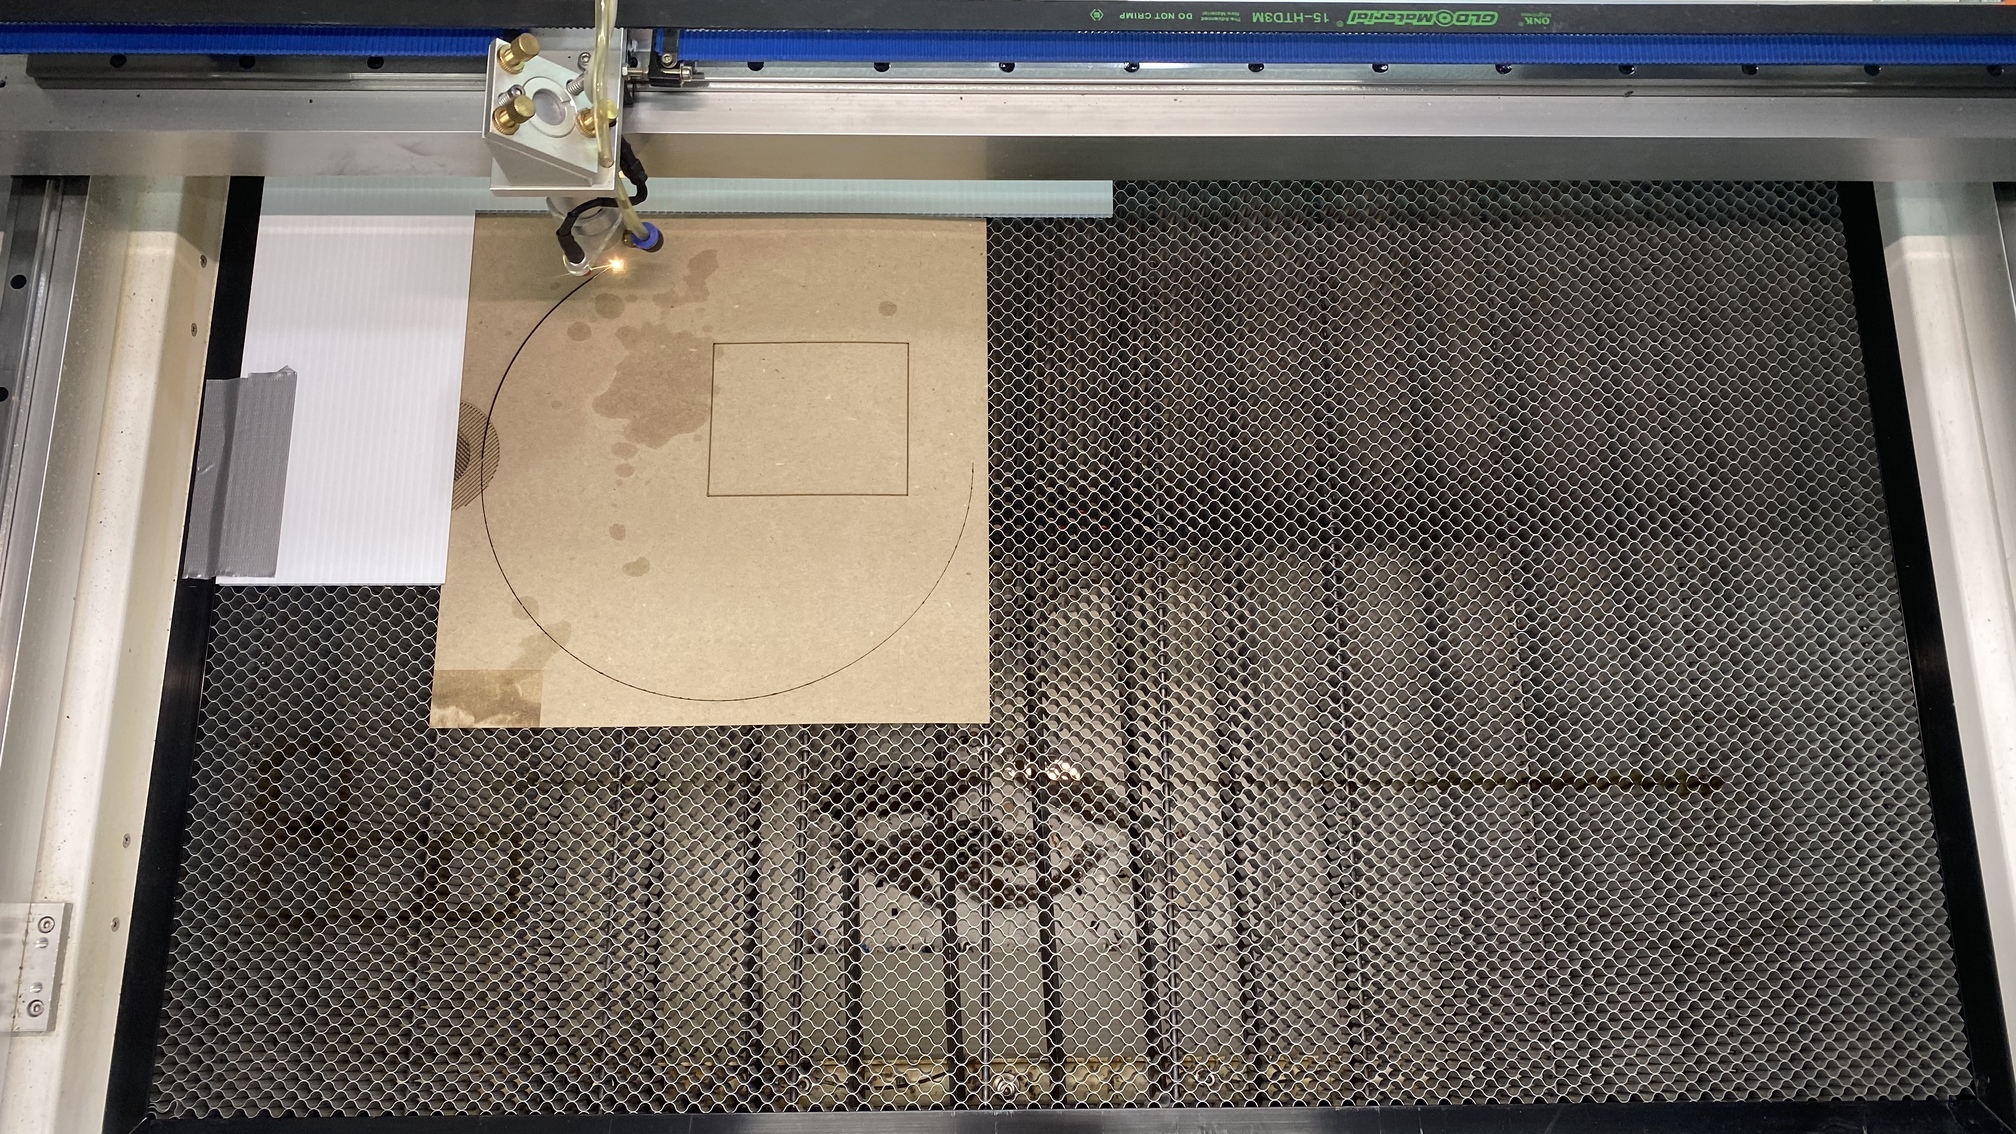
Joinery - create two halves of the circle and join them such as this:
-
Indexing the machine with positive stops and using absolute coordinates (or the move controls / preset coordinates). This is a very long explanation, but here is an example of the general idea:


I would do it a different way. If you use the “Move laser to” functions, or the ‘Click to Jog’ button, you can jog the laser to the exact location of anything in your design.
Taking Stroonzo’s image above as an example, say you had cut the left side already. You could jog the laser to the ‘corner’ of the half-circle at the top, then shift the wood with the existing cut to line up with that point. Then jog the laser to the lower ‘corner’ on the half circle and do the same. Repeat the process until you’re lined up.
Or, much, much simpler, use the Print & Cut feature to align it for you.
To demonstrate an index example that I just put together:
First I created an index on the machine:
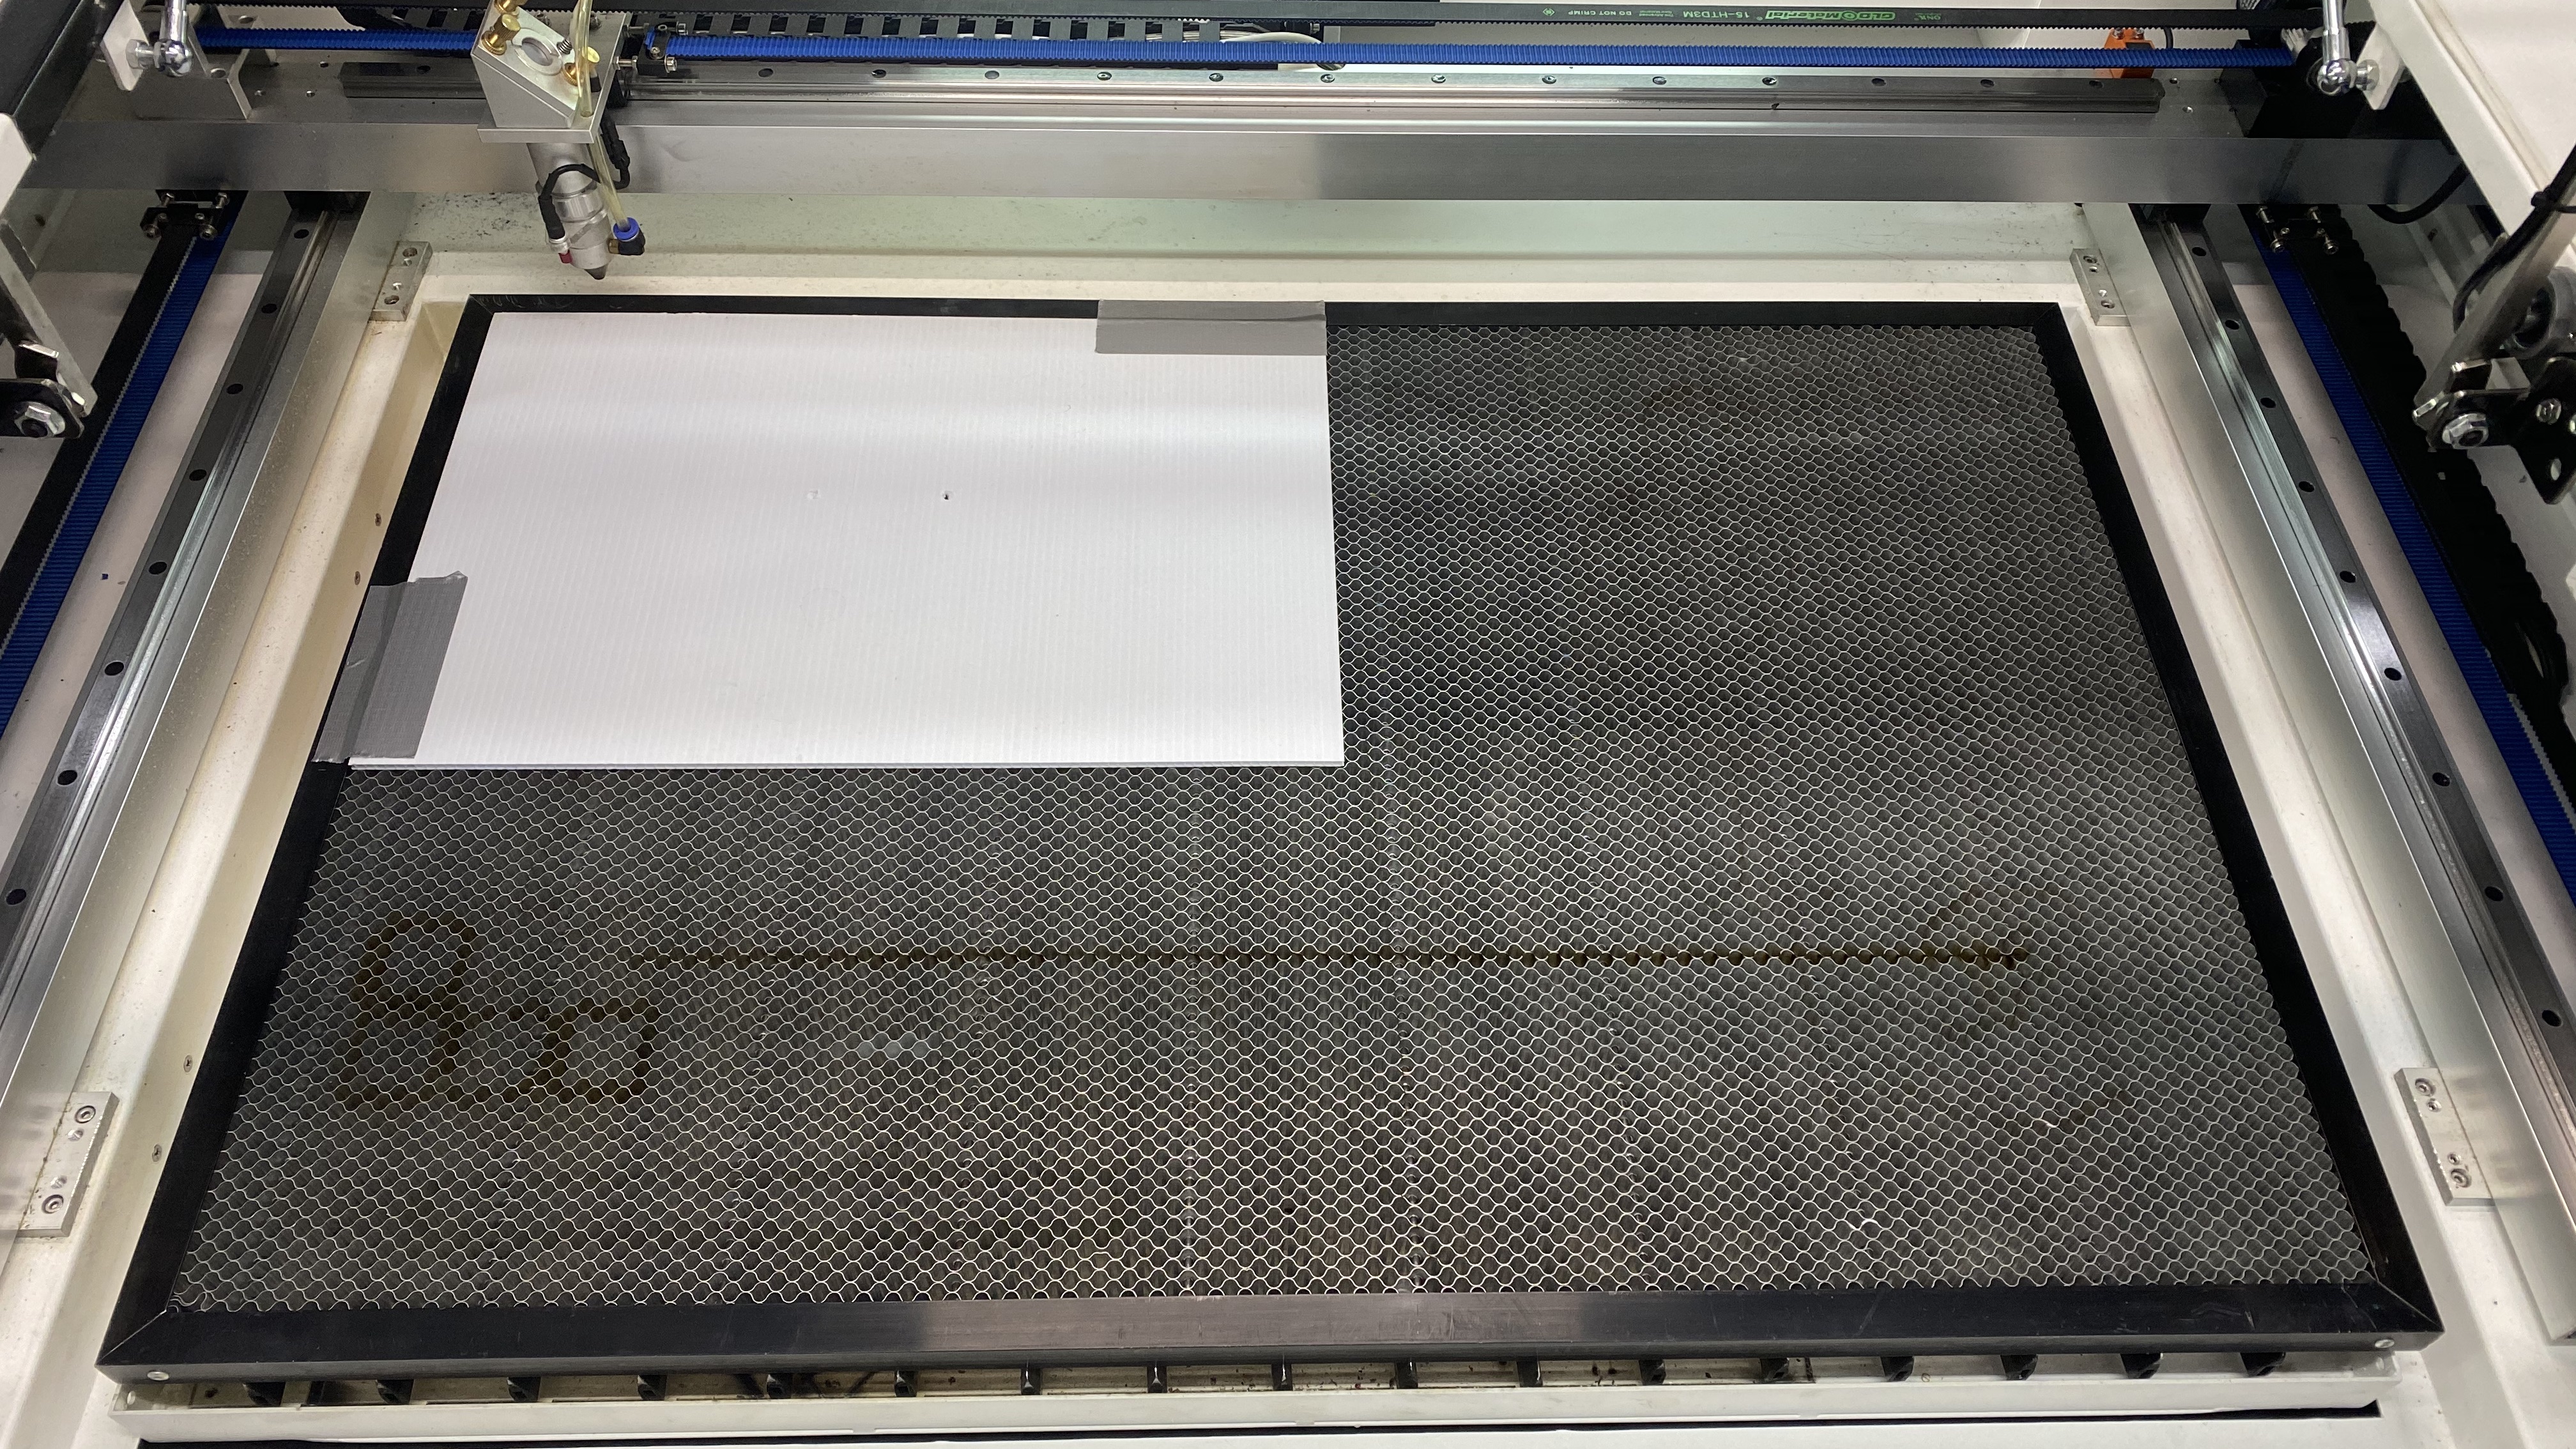
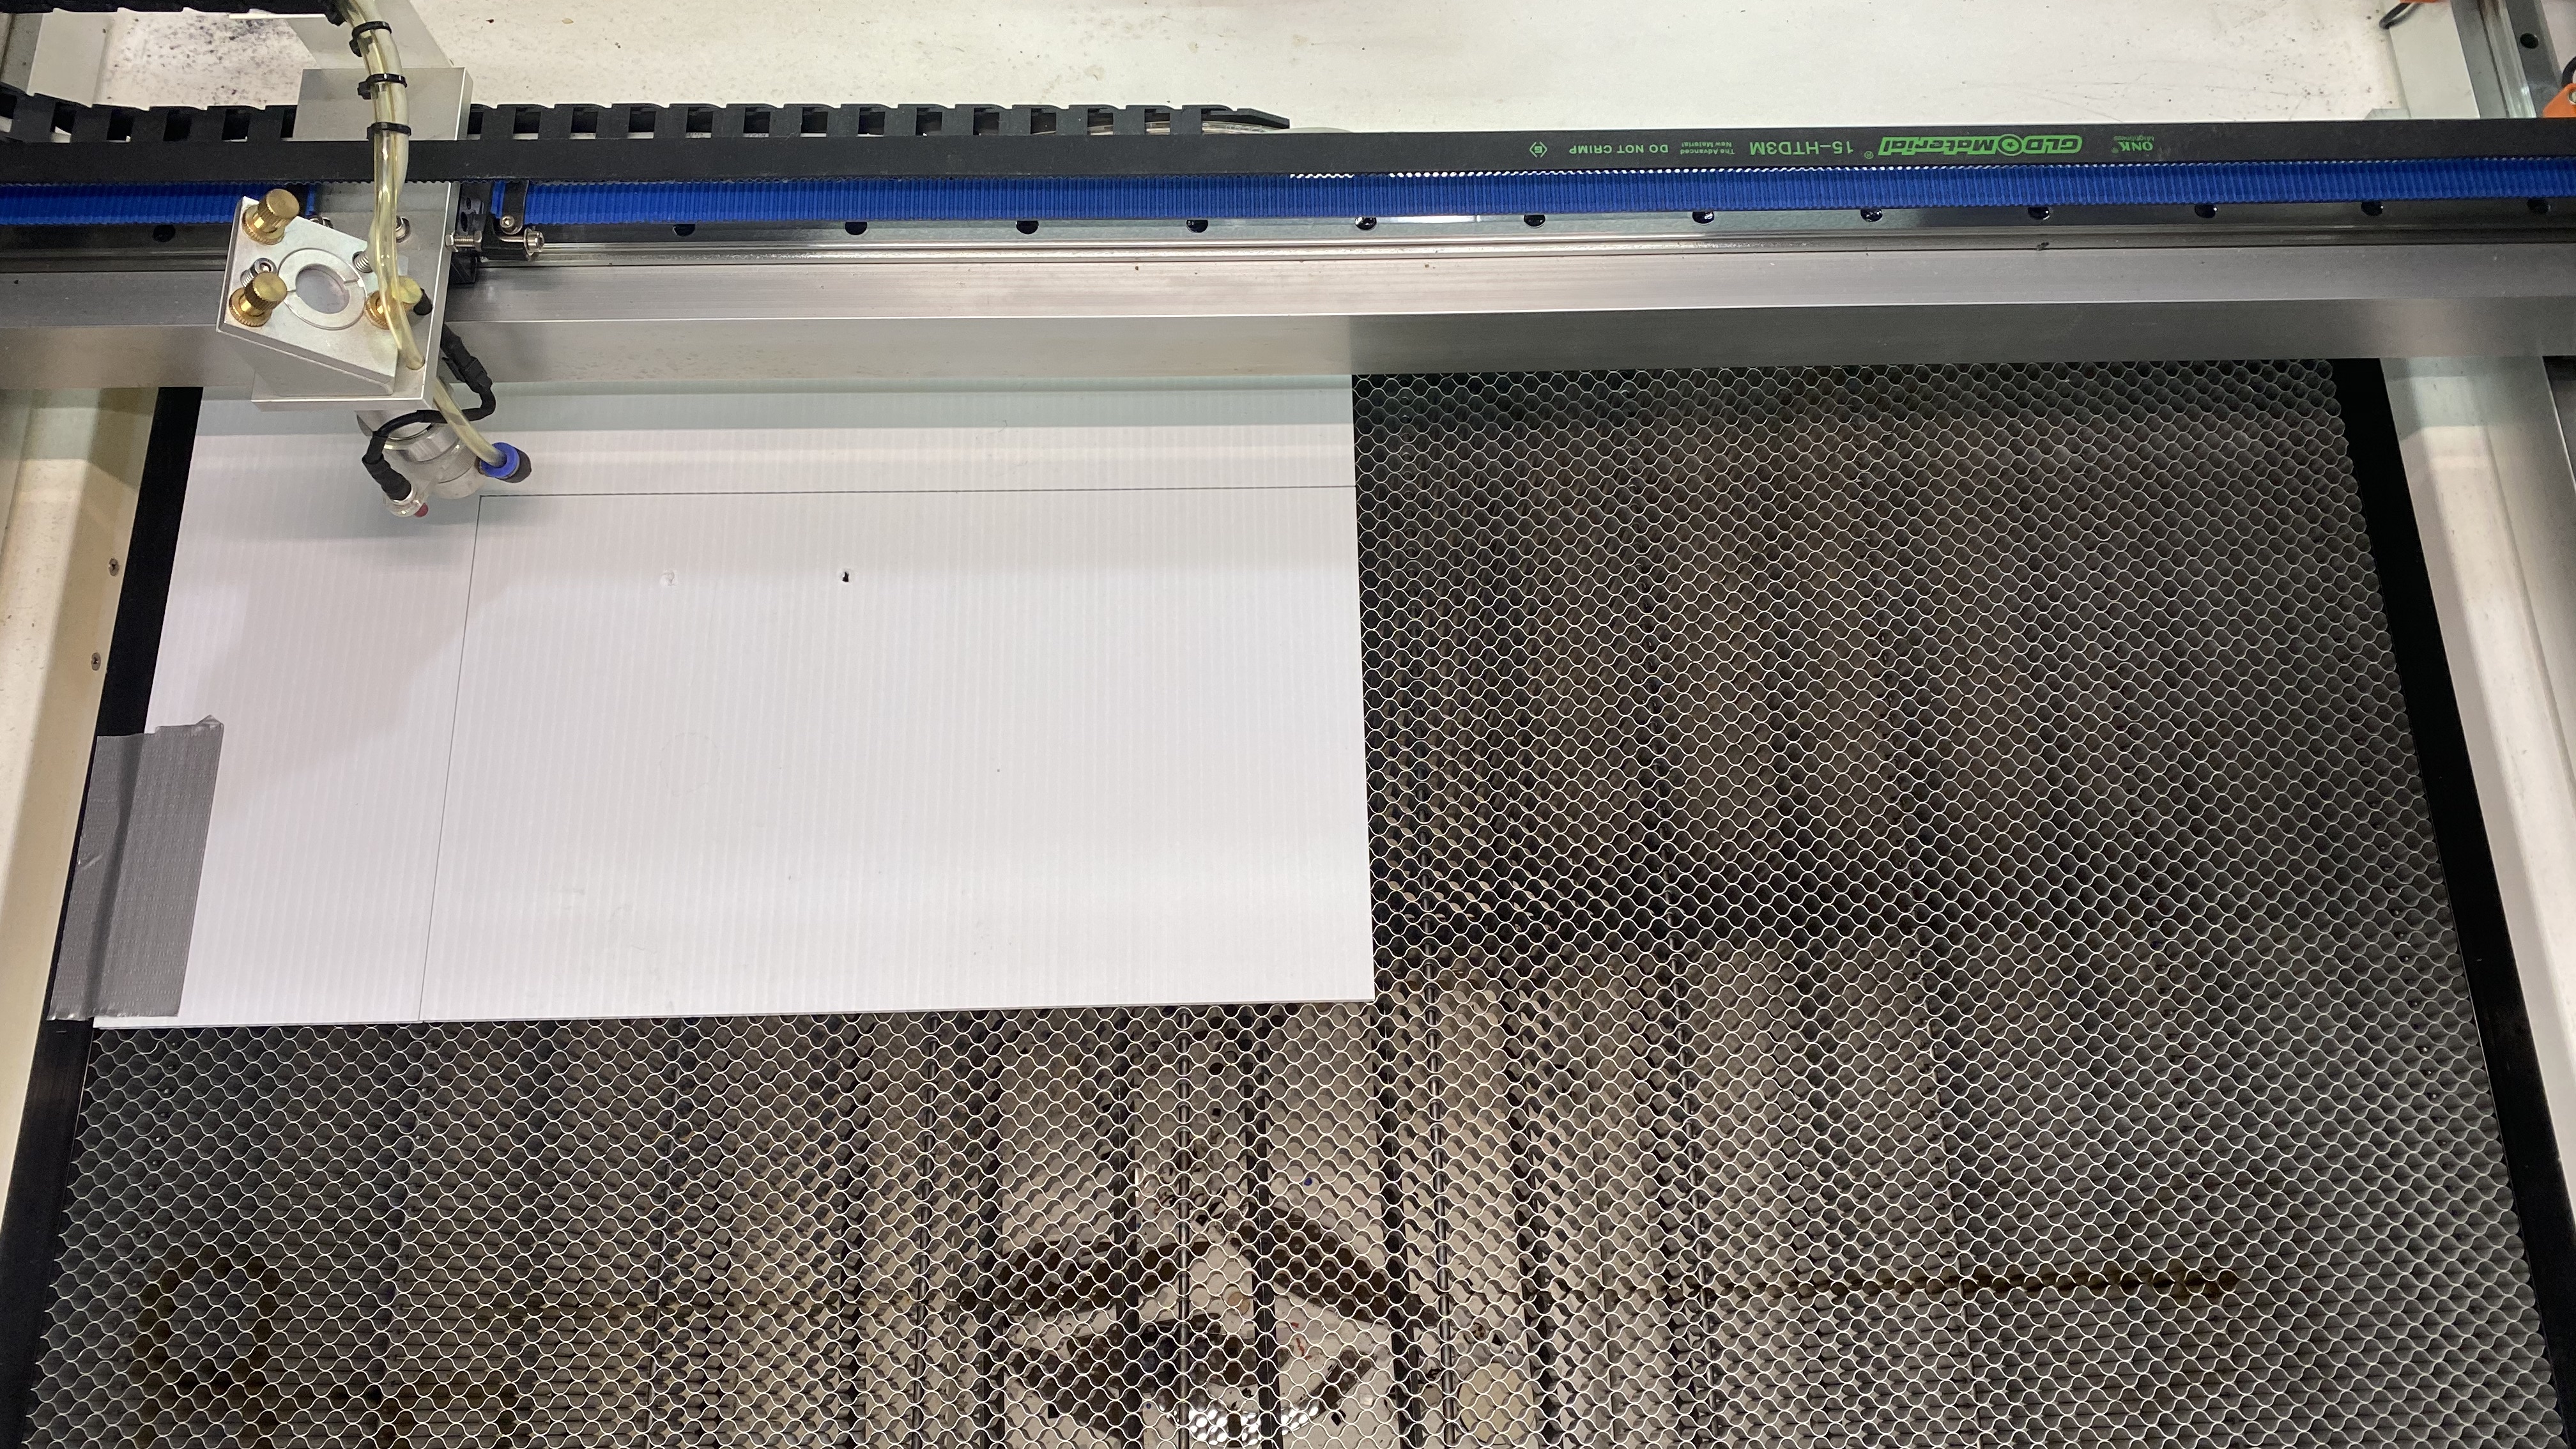
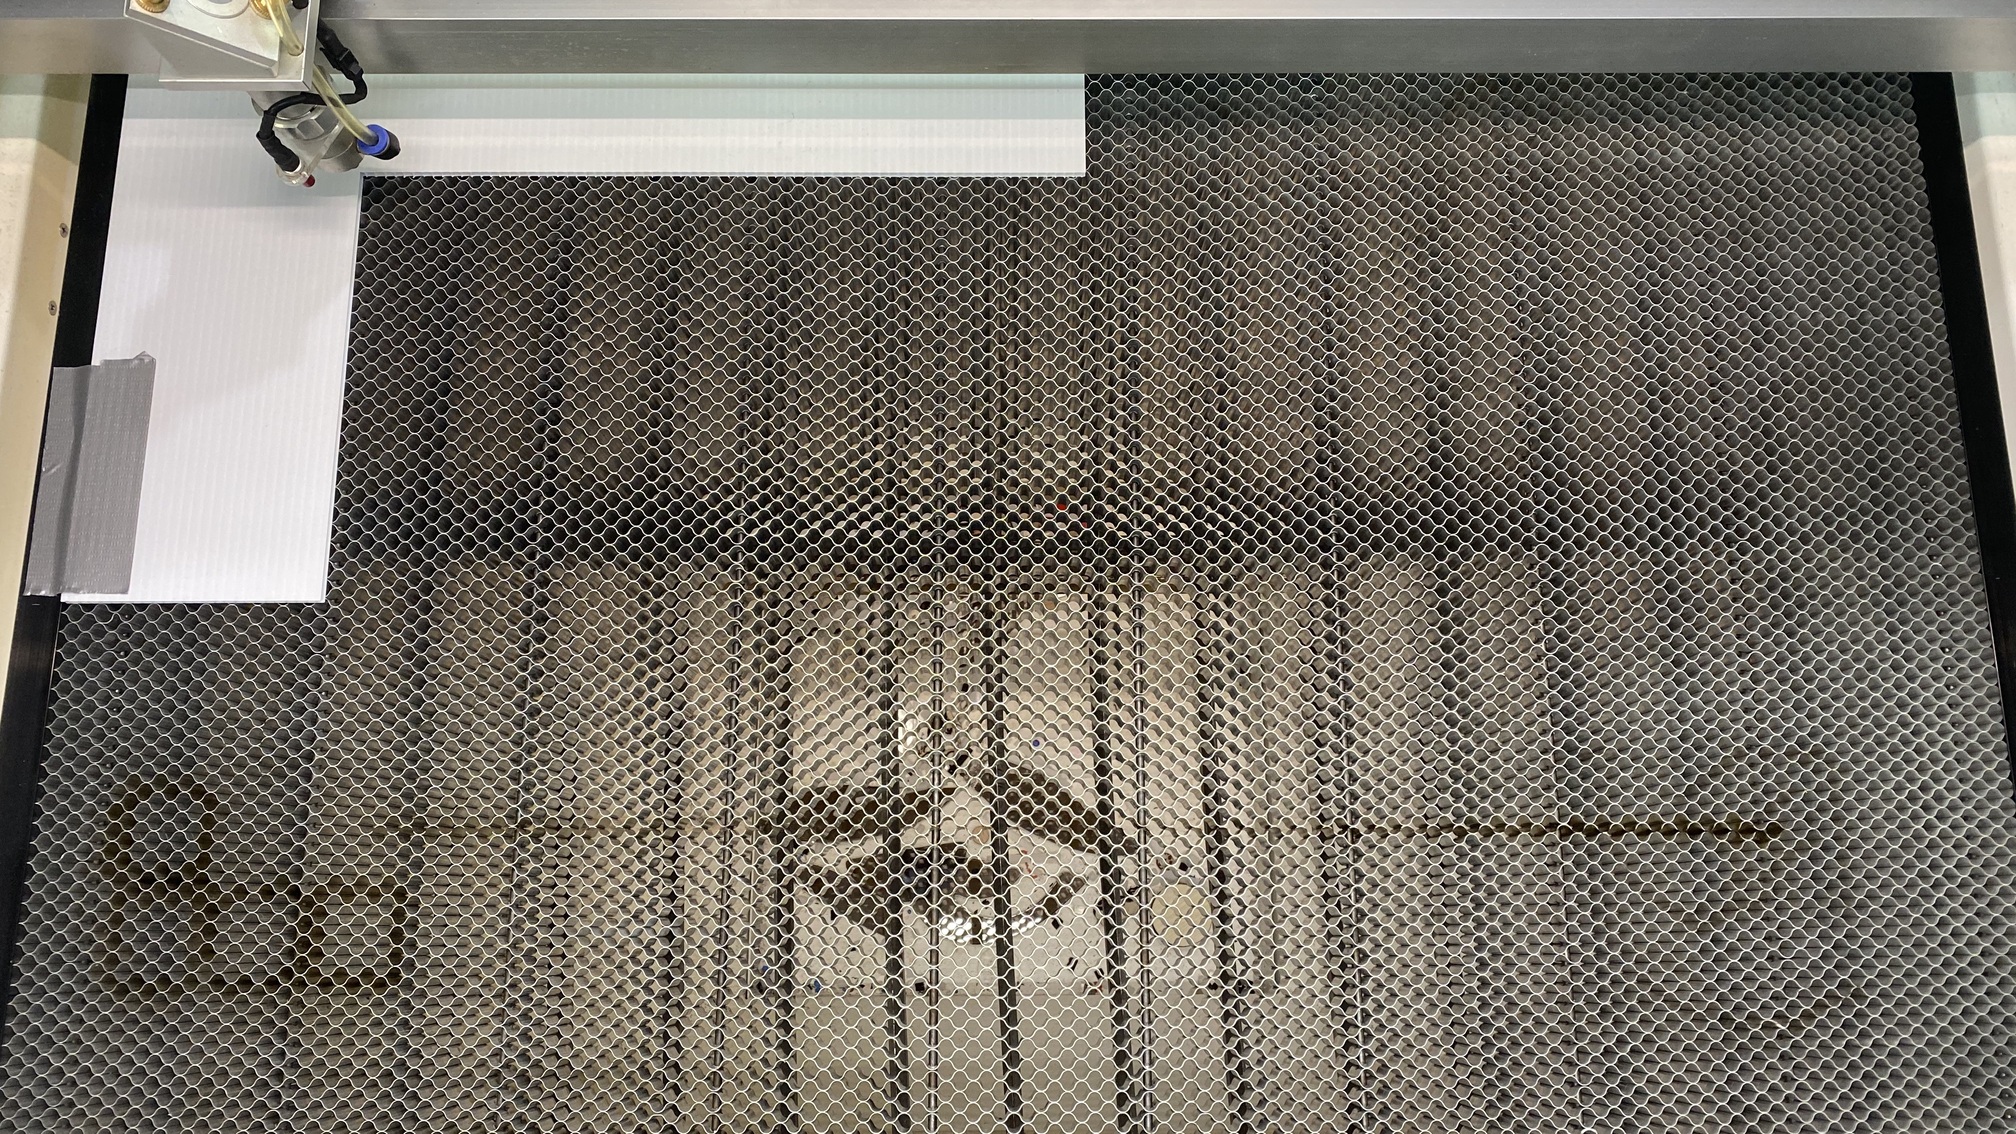
I just used a spoil board (some bandit sign Coro found on the road side).
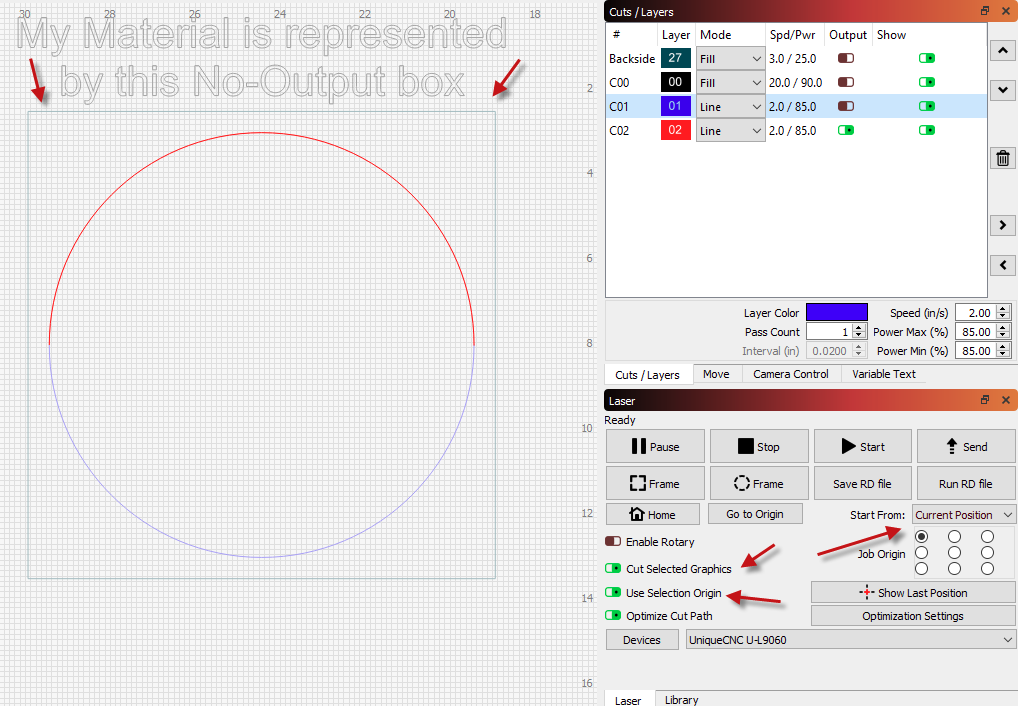
Then I made a representation of my material in lightburn, set that layer to no output, made a half circle, cut, flip, cut:


1 Like
Do you have a link that you can share for the print and cut feature because I don’t really understand it.
https://lightburnsoftware.github.io/NewDocs/PrintAndCut.html
This and the link I shared above (here: Cutting larger your bed size )
This topic was automatically closed 30 days after the last reply. New replies are no longer allowed.