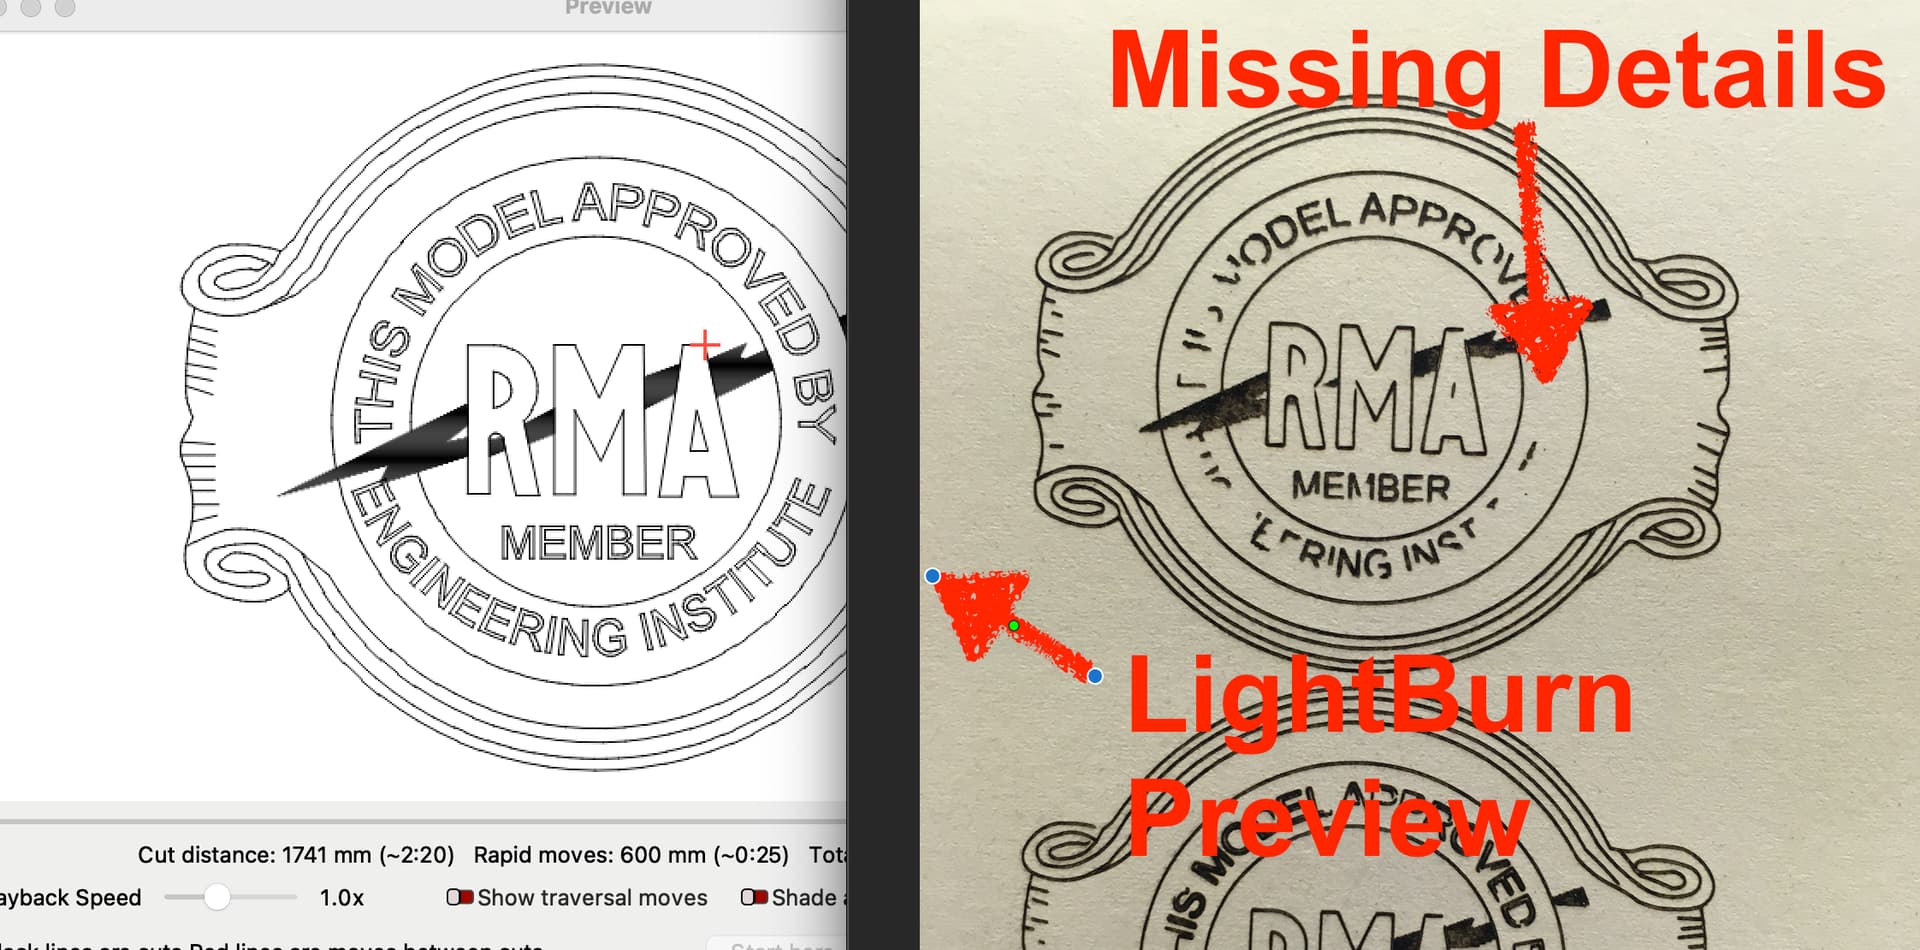
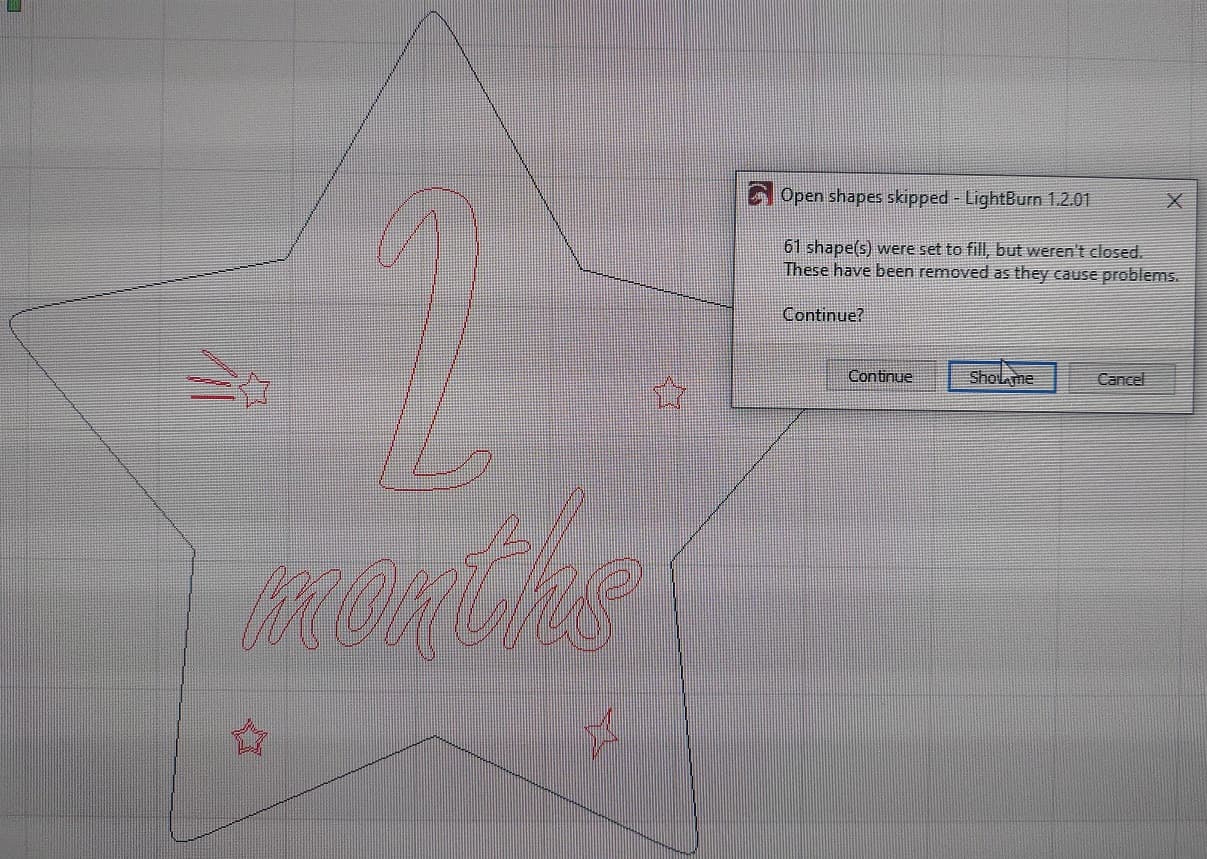
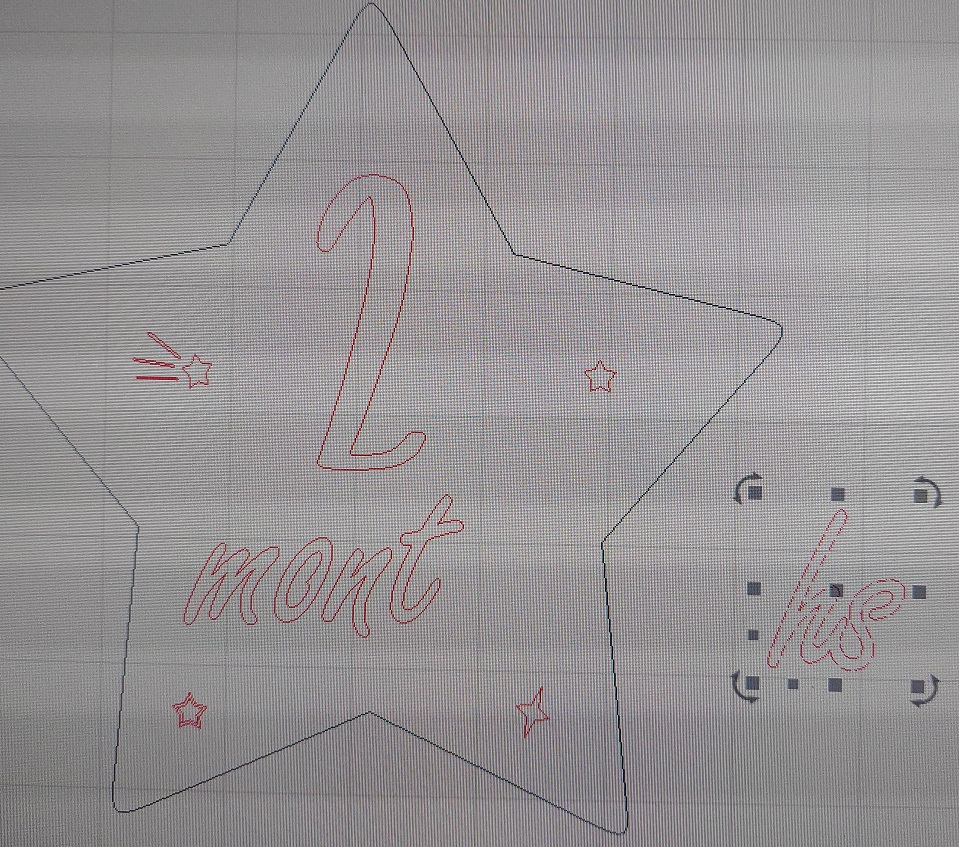
Sorry, I have a feeling this is another newbie question but did not find an answer in the search. I added this arched text in LightBurn and set it to “fill”. But for some reason, lots of it is missing.
I’ve tried:
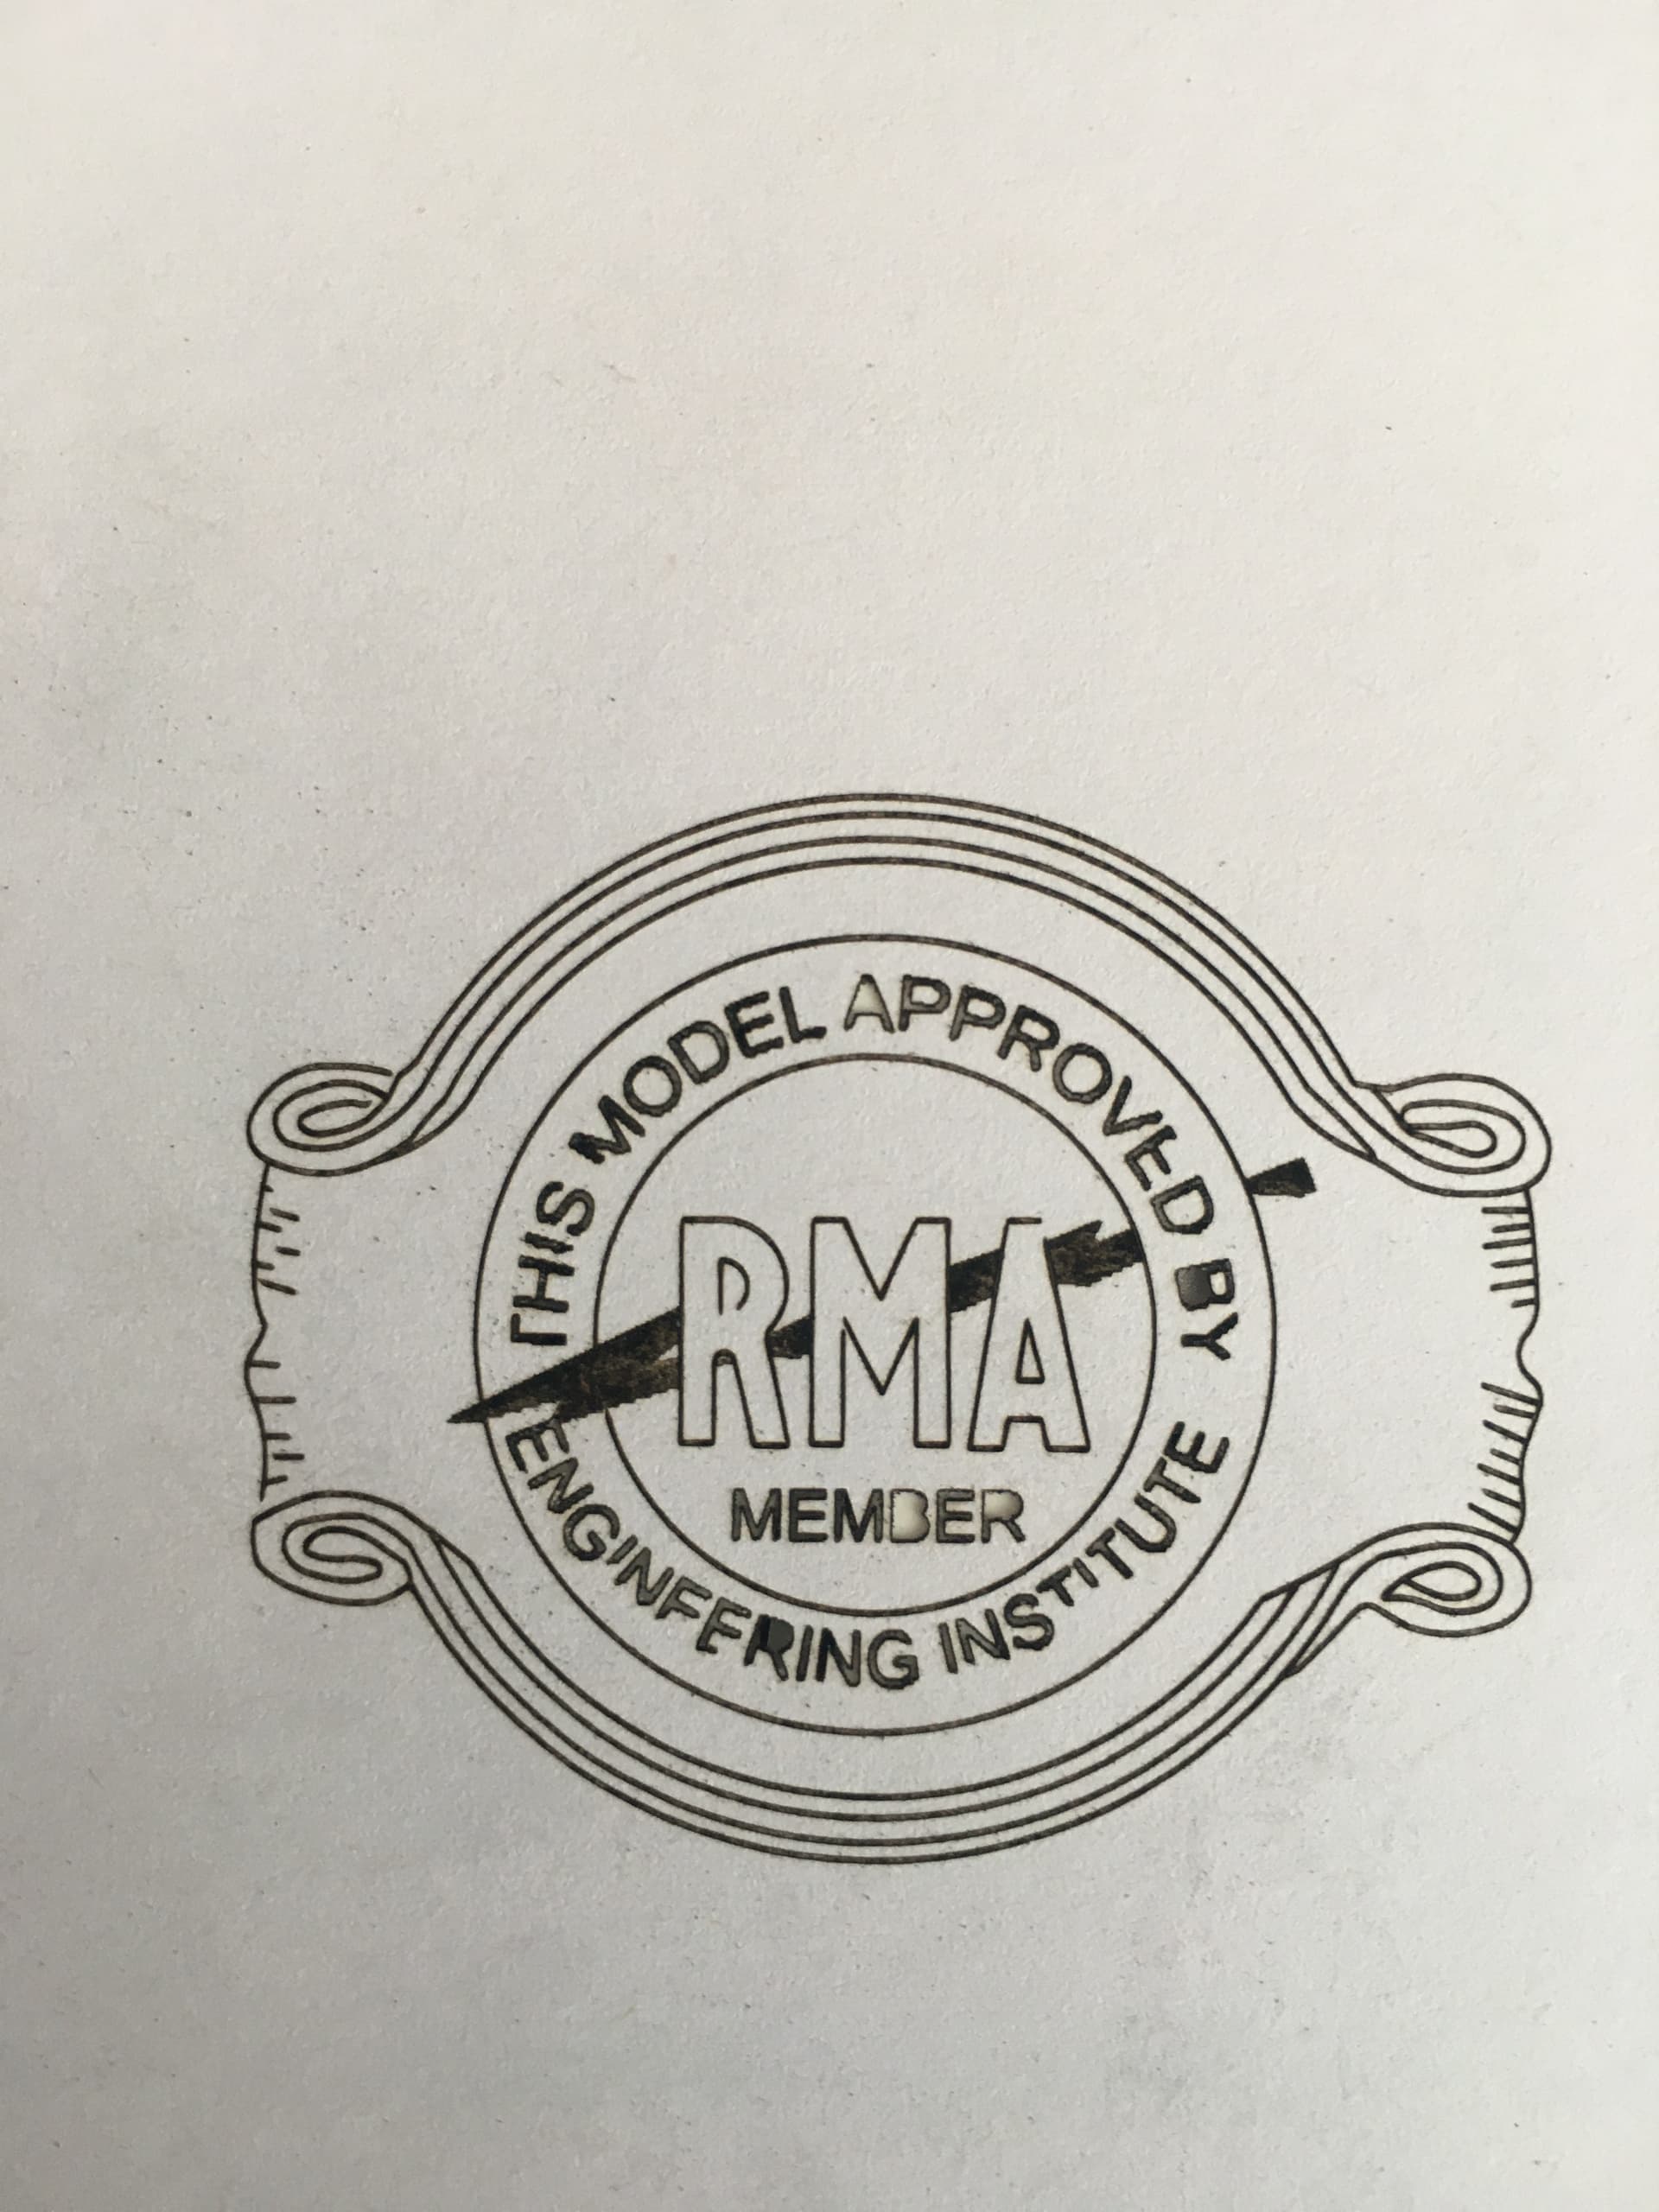
cranking the laser so high that it burns through in lost of parts, but details are still missing
Setting passes to 3 but still does not get all detail.
The rest I drew and imported as DXF. The line detail of the rest is mostly good, although there is also some missing detail.
(just noticed I mismatched the images I was trying line to see the differences when I wrote the issue). But either was is missing detail although line is better.
It’s hard to tell because you haven’t posted a pic of the design with any settings.
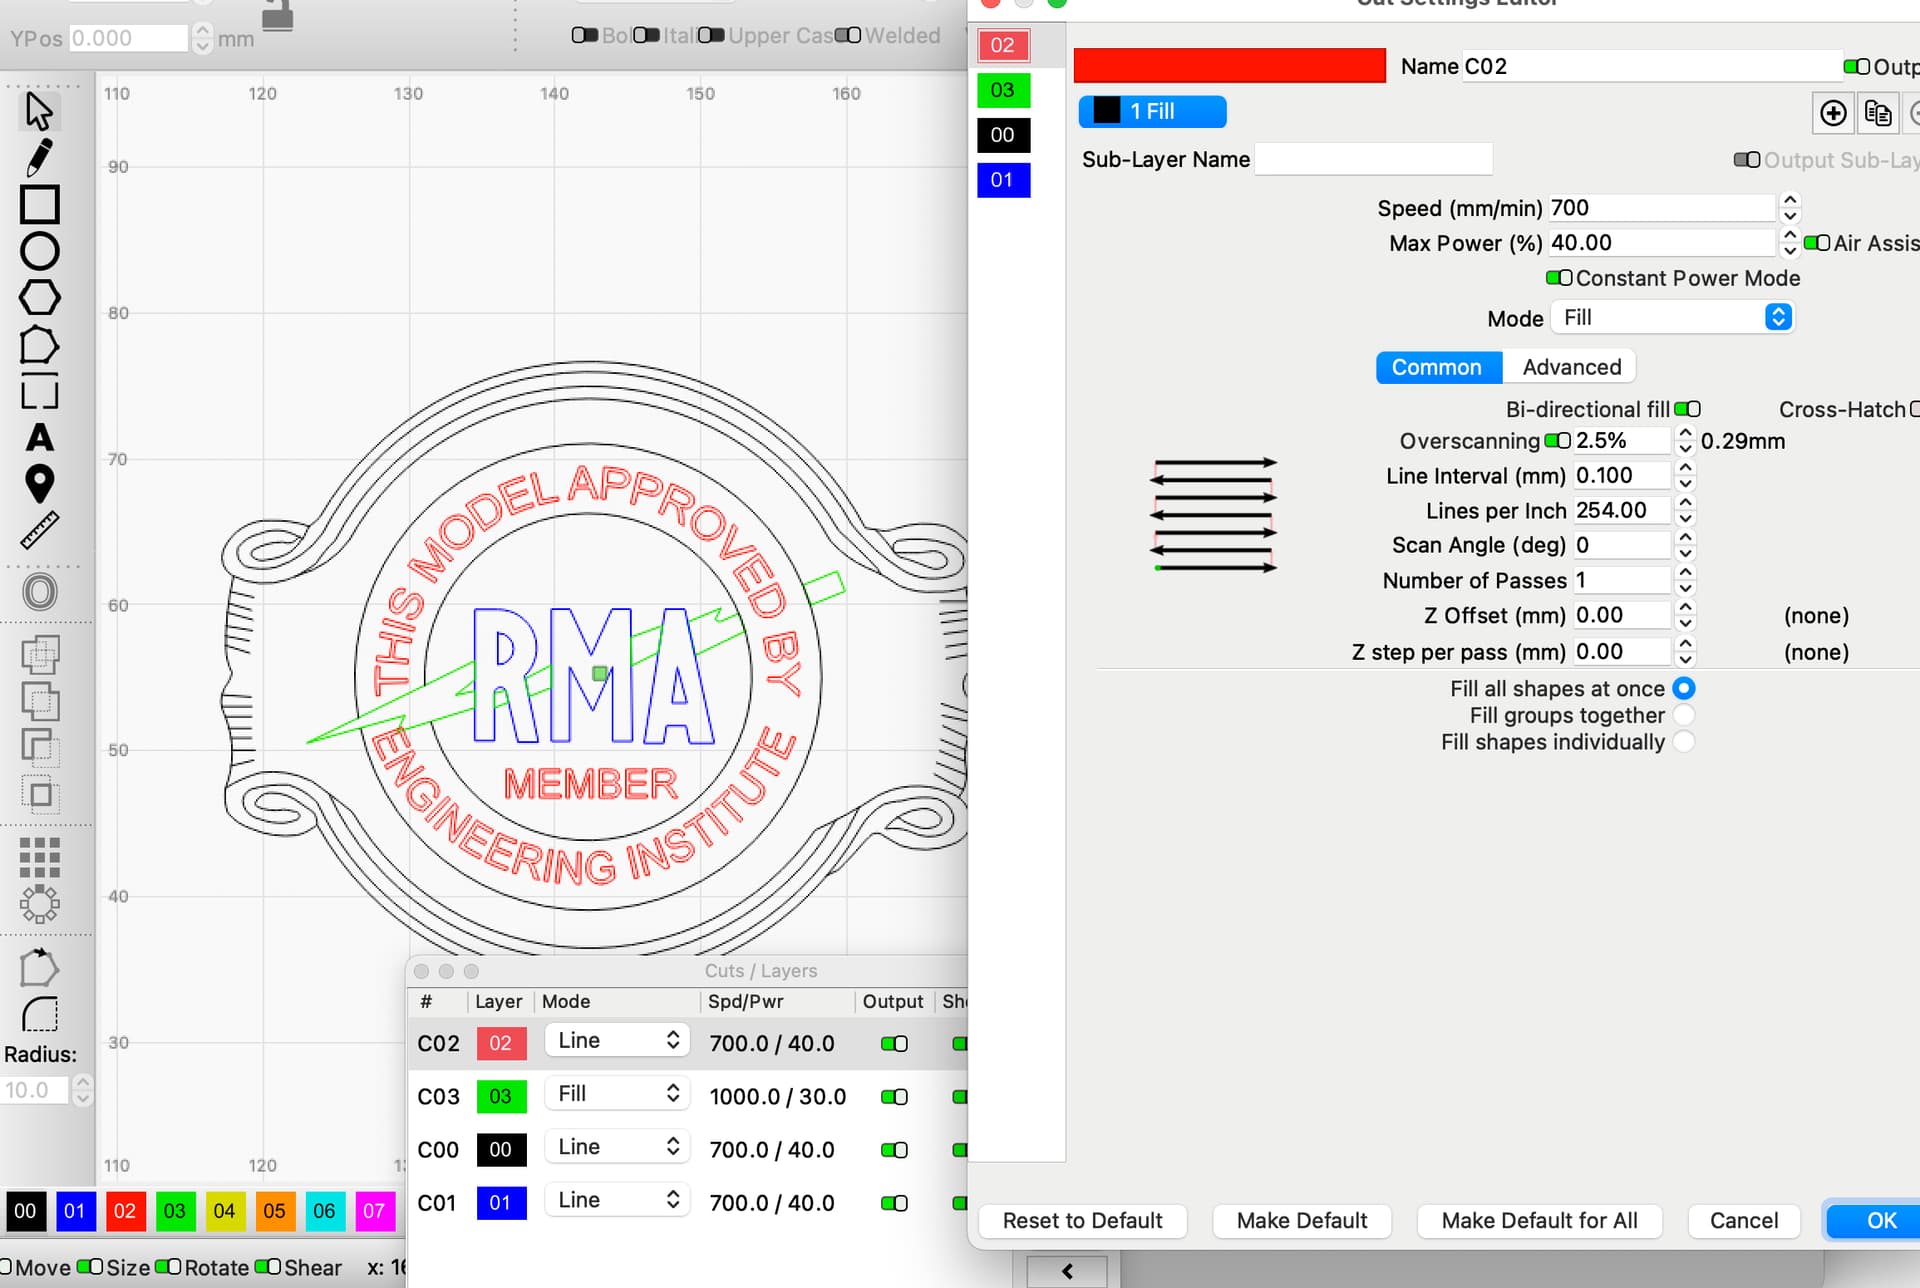
Is this using ‘Fill’ mode everywhere, or Line mode? Do you have ‘Overscanning’ enabled if it’s a fill? Do you have ‘Constant Power’ mode enabled if it isn’t?
3018 CNC’s generally have their acceleration set really low, because they’re normally used for CNC work. If you increase the acceleration, the head will get up to speed a bit quicker, and the laser will reach full power faster as a result. (or constant power mode will make it full power, period).
Also, anything white (or close to white) can be harder to burn with a diode because it reflects a lot of the energy.
Would you be willing to post your file (or PM it to me) so we could take a look? I suspect that your laser is not getting up to power on the starts of the line layers. Adjusting your start/end pauses may do the trick, see this page in our docs: Line Mode - LightBurn Software Documentation
Sorry, I to be a bother… I only see the start/end pause time if I set the layer to line. Can’t seem to find it when set to fill (which is what I want to do). Will try with line anyway.
If enabling overscan doesn’t change anything, make the overscan amount larger. The default is 2.5% of your speed, but if your acceleration is really slow you’ll need to use more. Try 10%.
Have you enabled laser mode in the controller? (IE, setting $32=1 in the console)
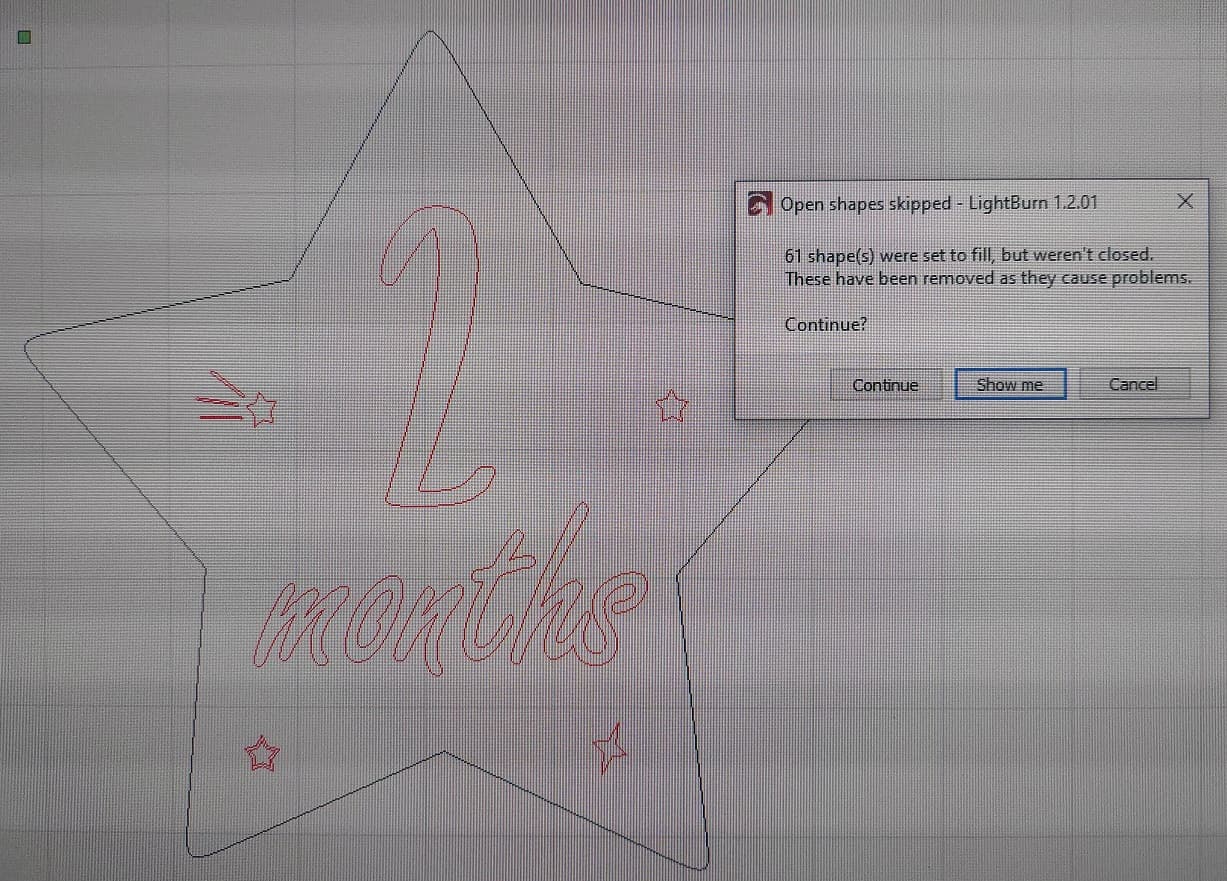
I think your issue is a little different. I think the error above is saying the lines are not closed. Which means there is a small gap somewhere. Zoom way in and look around the missing spline. You should find a gap. Once you find it use the line took to connect and you should be fine.