Hello
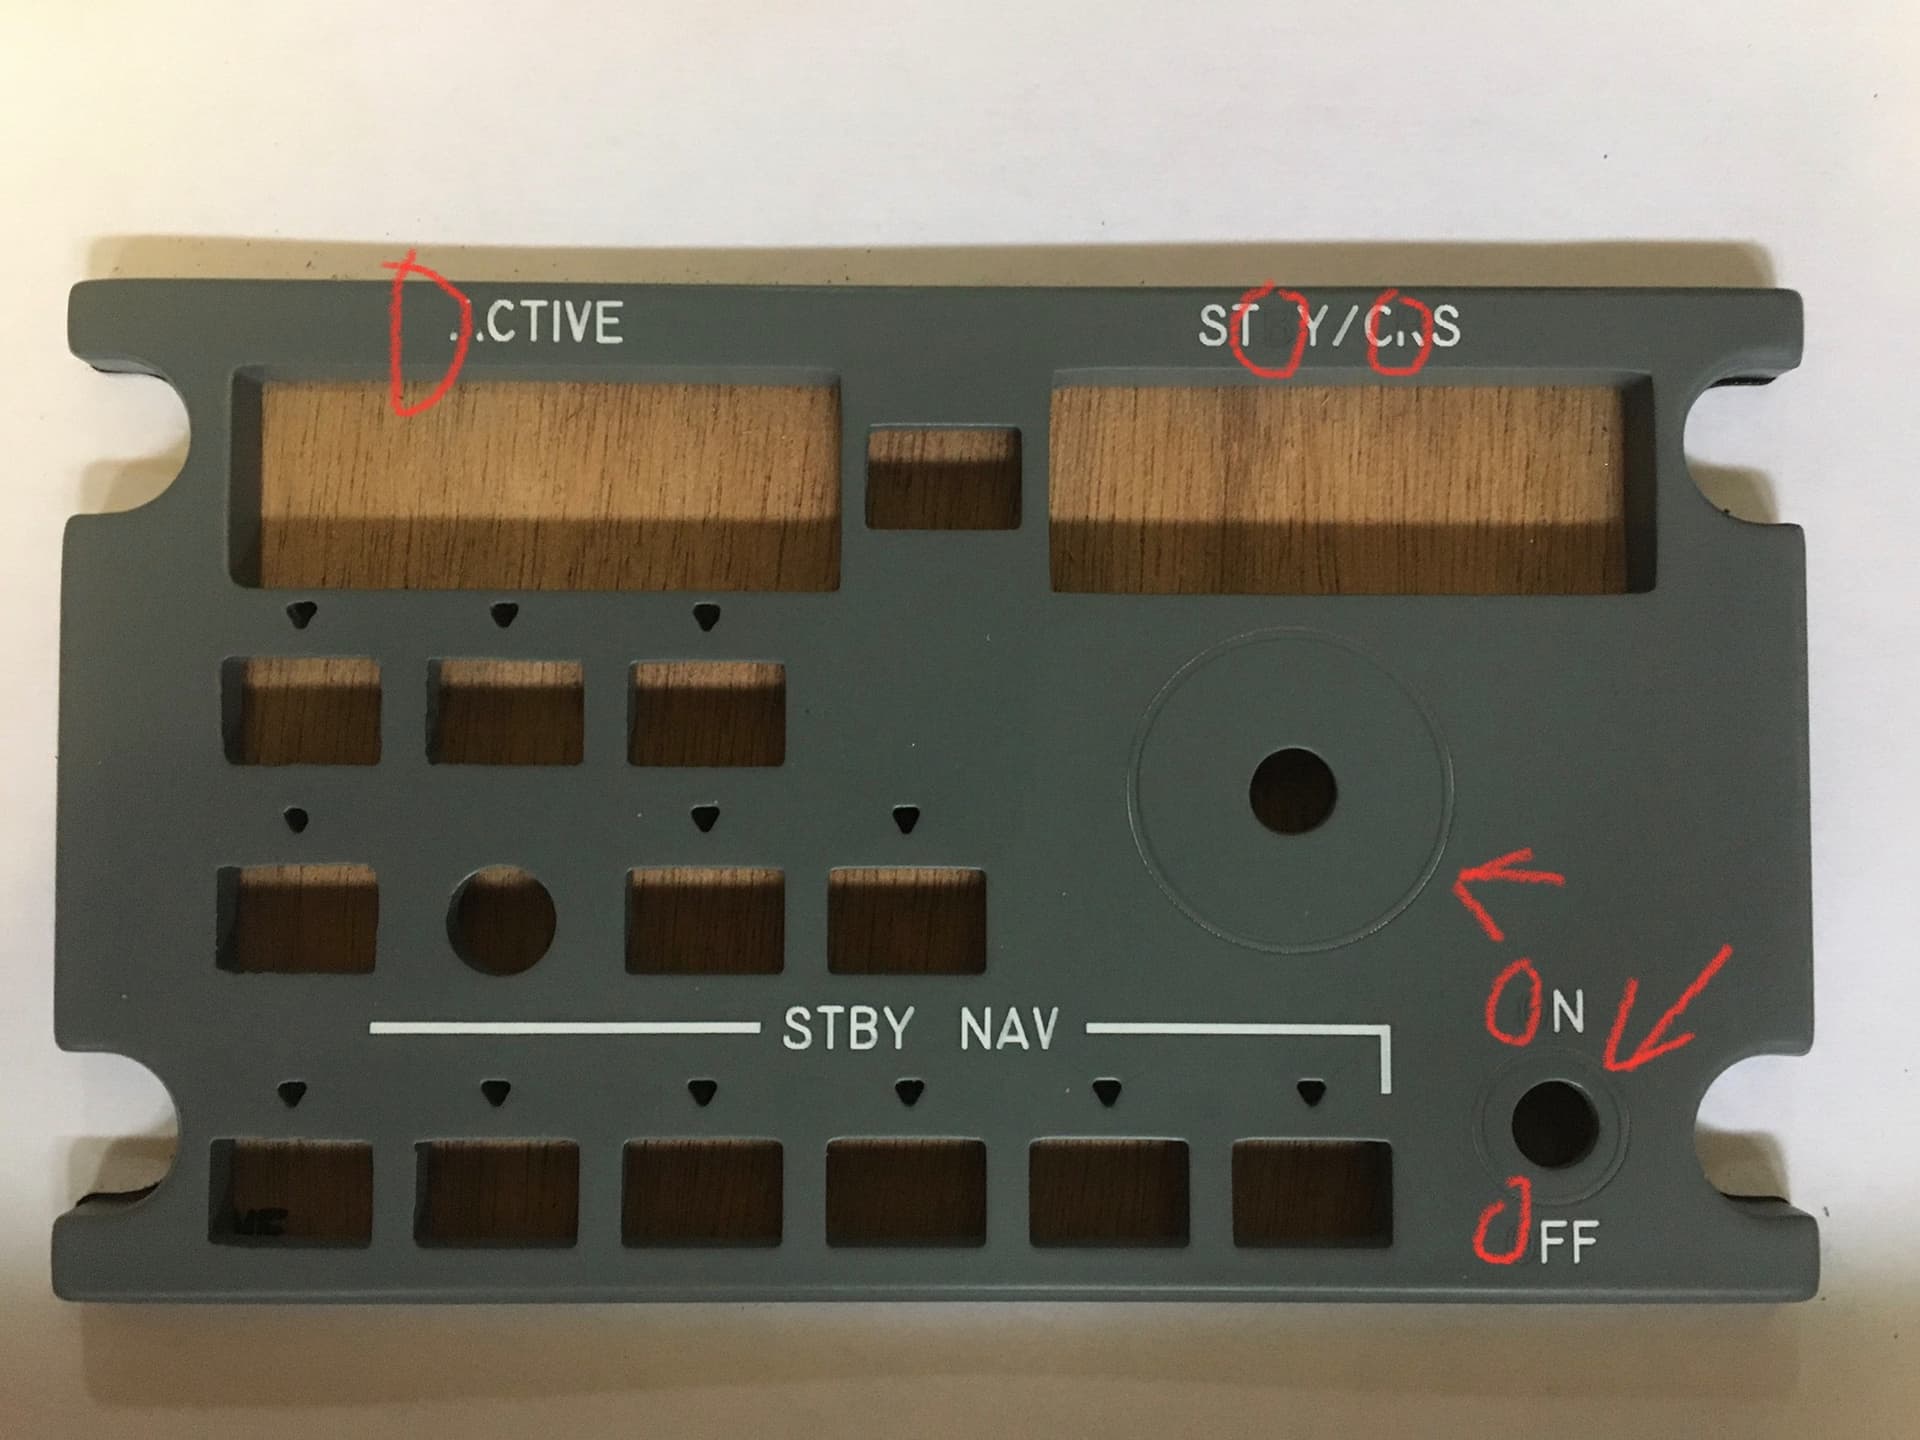
I’m having trouble engraving . Either the letters are missing, or the shapes are invisible or too thin (while circles and lines are 0.8 mm thick). the engraving parameters are the same for all Layers. Any ideas would be welcome…
thanks in advance
Nicolas
This is really interesting.
What material are you engraving? Does it turn white with the laser or are you filling it with paint? Are you engraving white paint off the workpiece?
Can you see the letters when you preview in Lightburn? (Alt+P)
Hi
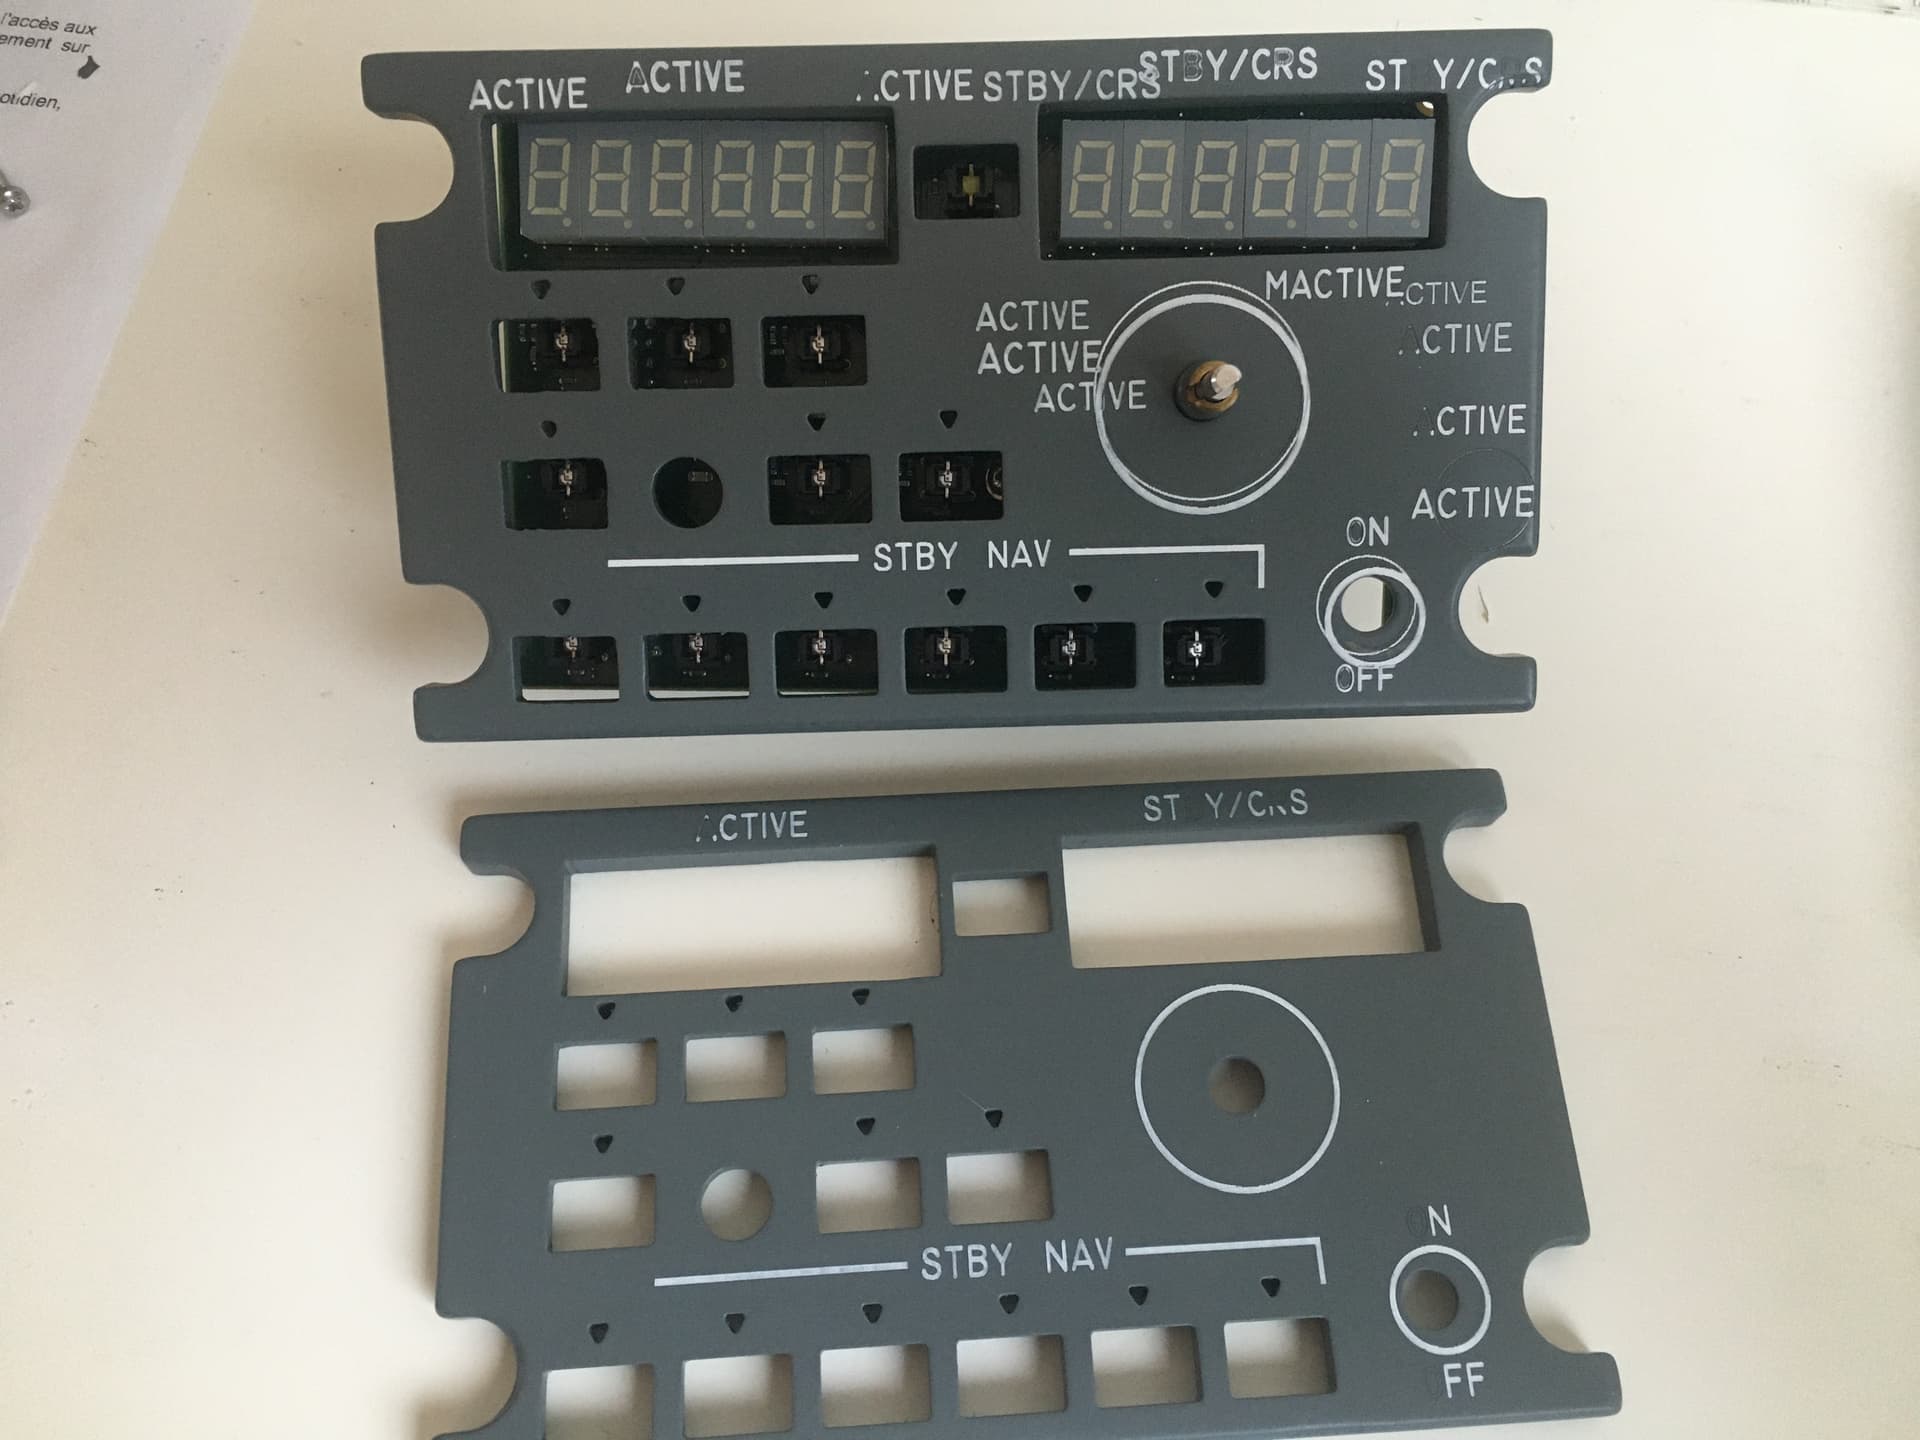
This is white pmma painted with 2 layer of white painting + 2 layers of grey. The laser is burning the gray and makes the white appear…but not everywhere hence my message
Yes everything is fine on the preview
Looking closely at the images it appears that there is some marking in the locations you annoted - seems like perhaps a laser issue. Are you at the lower range of your power? What are your cut settings?
Engraving parameters are 500mm/min 10% power 2 pass. I tried several combinations it is always more or less the same thing.
I tried to increase the power (12,5%)just for the missing shapes, it’s better but lines and text are thinner and the global result is not satisfying.
I can’t understand why the A is ugly while the C which is right next to it is perfect.
I would take a look at this article - Scanning Offset Adjustment - LightBurn Software Documentation.
And maybe consider slowing down your speed, I have a feeling the laser isn’t triggering ON for long enough to reach full output.
1 Like
Many thanks Colin
I’ll try tomorrow and keep you posted.
after several tries, the final result is not better. I tried slower, with another font, one-way engraving, set the offset…
it seems that on some letters, the engraving does not trigger (I do not hear the sound of the pwm).
I will keep looking until I get the job done with the CNC and trash the ortur ![]()
Perhaps the laser’s mirrors need cleaning? If your laser has mirrors, that is.
Unfortunately it’s a led laser so no mirror. Thanks anyway
I think there are only 2 possible causes for this:
- paint depth is uneven so same power/speed is unable to penetrate the gray. How are you applying paint?
- something is affecting the amount of light hitting the material at those spots. Possibly variable power is dropping power due to slow down or the laser path is forcing a slow down. What settings are you using for Shape Fill?
Can you share the .lbrn file for review or show a screenshot of the Preview window with traversal moves on?
Consider using “Constant Power Mode” to remove the possibility of variable power being at play.
1 Like
Hi,
1- I thought about the thickness (spray painting) of the paint that could actually be uneven and causing this. but it would be surprising if on three samples the paint was thicker just under the letter A. But I will try again.
2- I also assume that the problem is electronic since it reproduces under the same conditions on different media. here’s the .lbrn file used to engrave the panel in case I would have missed something.
I used the “Constant Power Mode”
Thanks for your help
marquages panel radio.lbrn2 (49.4 KB)
and the test samples with many attempts …
It’s interesting because you can actually see the problem areas in the preview if you enable “Shade according to power”. There is reduced power at those spots.
This basically rules out the paint thickness issue at this point.
Just need to sort out why power is reduced there. Constant power doesn’t make a difference so that’s odd.

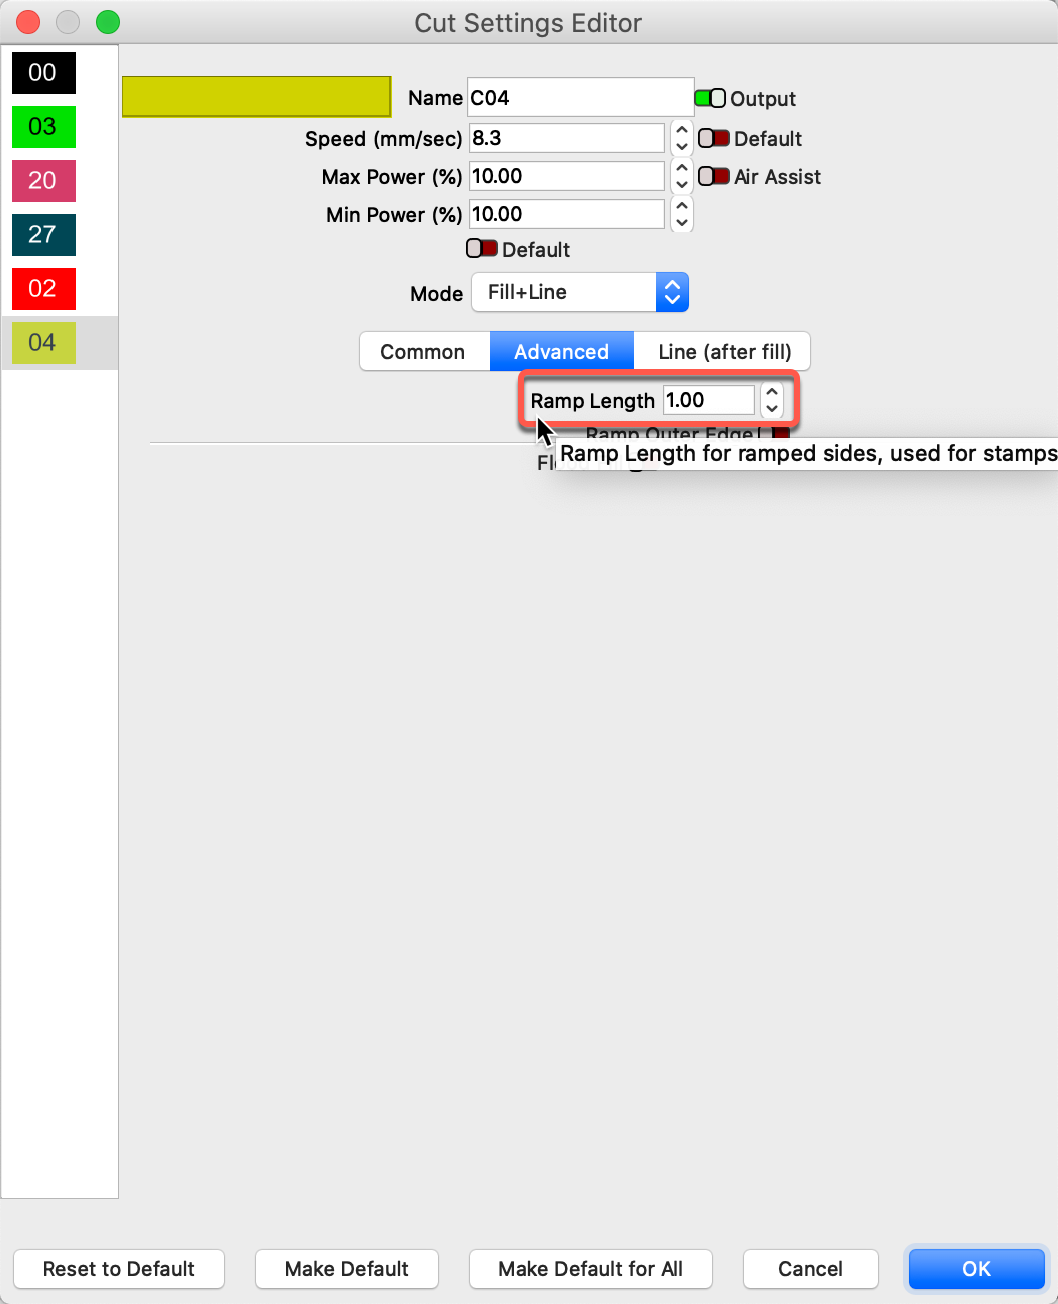
[EDIT] - I think I found it. You have a ramp length of 1 setup in Advanced tab of cut settings. Disable this and I think it will work correctly.
1 Like
Good catch @berainlb. @Goukouni, check all layers and remove the ‘Ramp’ setting, which is used for stamp making.
Ramp Length
This setting can be used to slope the sides of an engraving by varying the laser power, and is useful if you create rubber stamps, particularly if the designs have thin regions that need extra support. The ramp length controls how far from the design the slope will extend. - https://lightburnsoftware.github.io/NewDocs/CutSettings-Fill.html#ramp-length
1 Like
AAAAhhhh thank you so much. I forgot to remove it on the two layers that are problematic.
I’ll give (another) try tomorrow.
thanks again
1 Like
hello,
Everything is fine now. Thanks again for your help.
Nicolas