I have done a lot of reading about laser tiles and the technique.
My understanding is to use low power < 1 watt, slow speed, and a relatively high DPI.
My first attempt was as following. (using a 7 watt laser)
Jarvis, 350 DPI 40 IPM 10% power.
It just barley turned the paint a light grey that washed off with acetone.
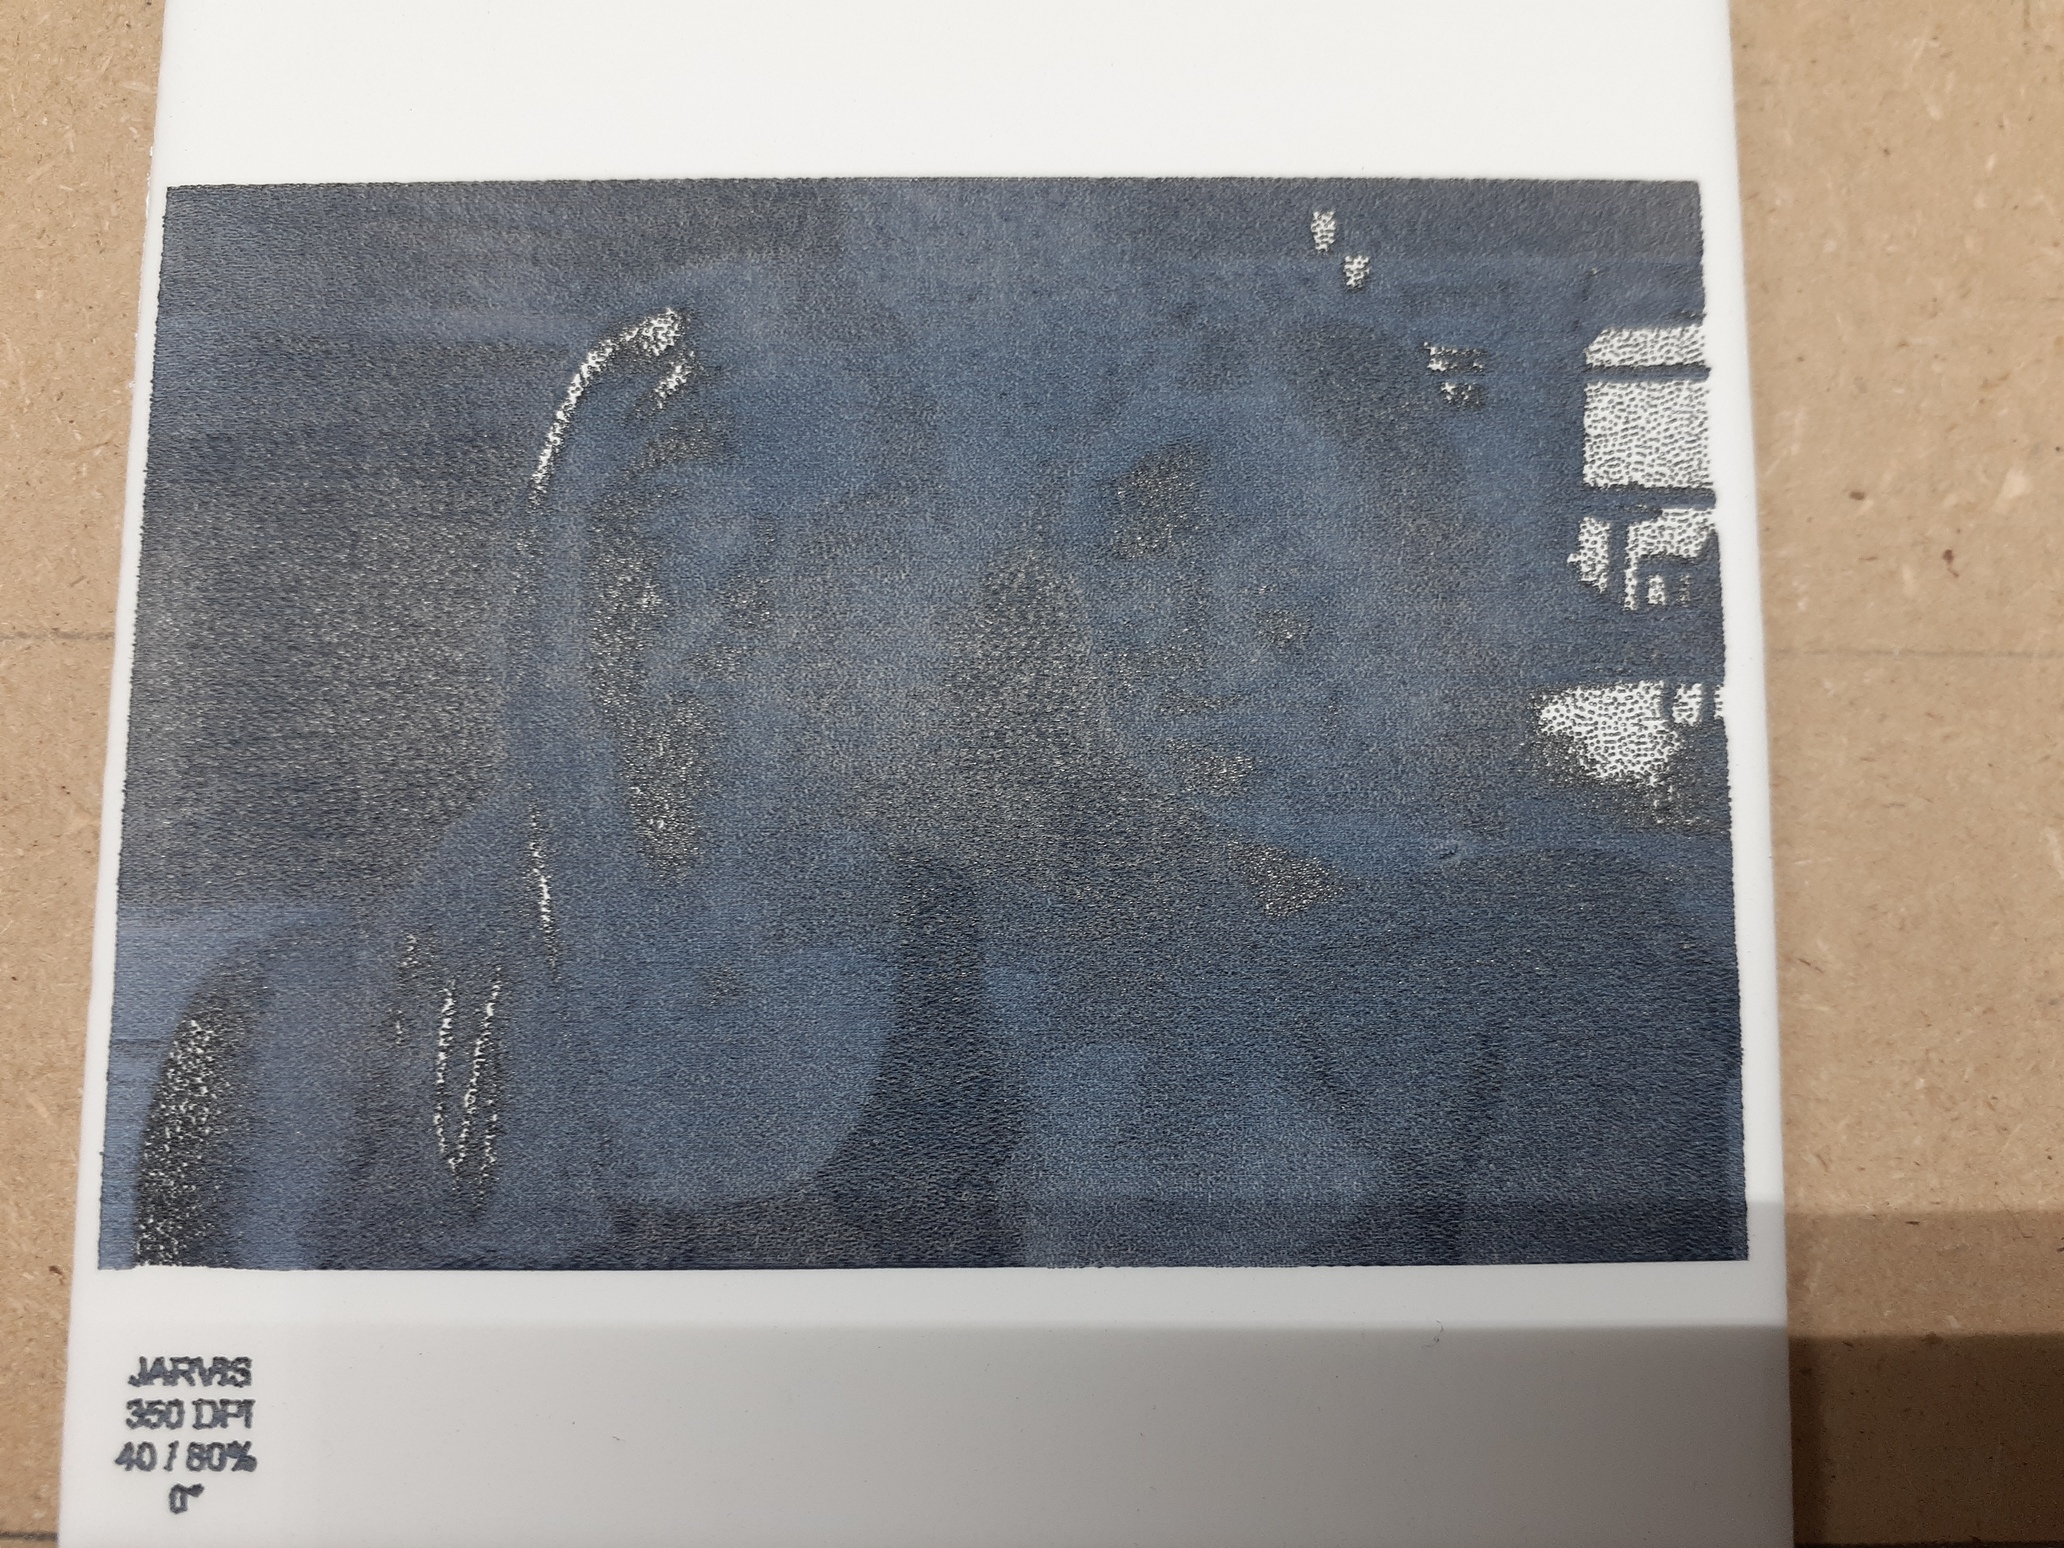
My second attempt was again with Jarvis, 350 DPI, 40 IPM and 80% power.
This is the result. (as you can see, its horrible)
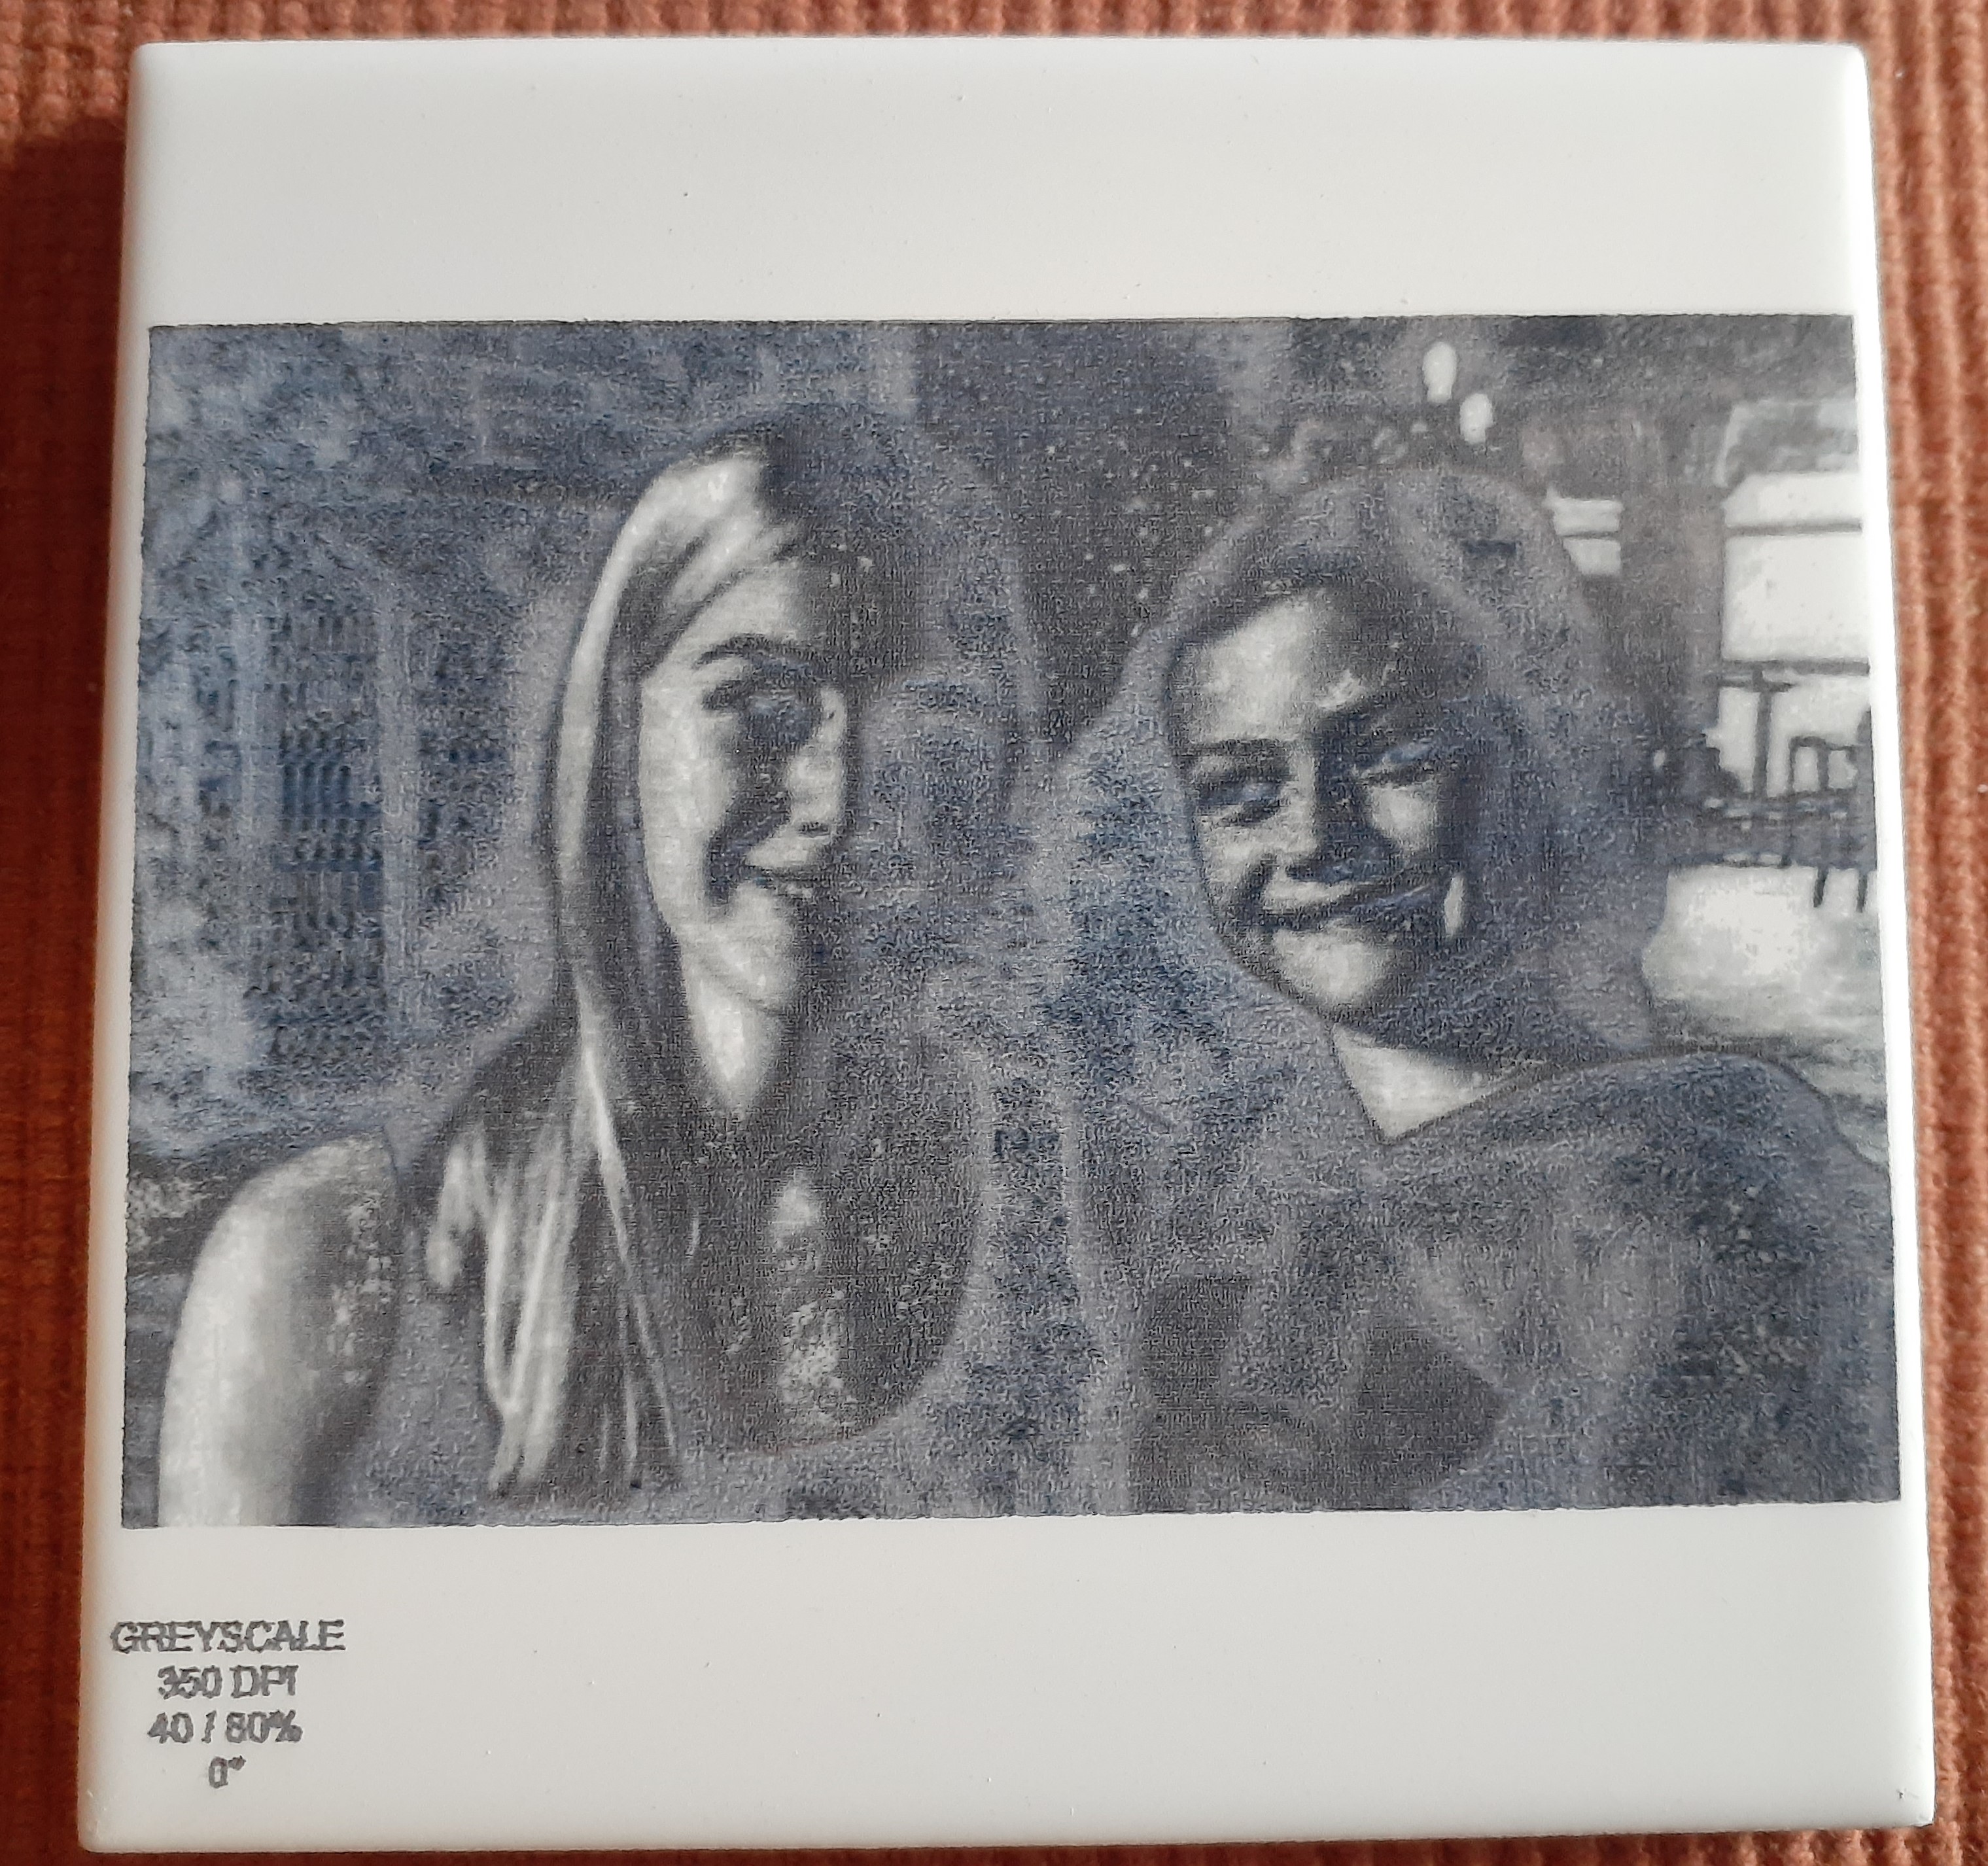
So then, I changed to Greyscale (because, well the the preview looked very good) with the other setting remaining the same.
This is the result, (better but still not good)
7…pick Image Mode to use ( I prefer Jarvis Dither and have had some success with Stucki Dither…Available with LightBurn software…this preference takes some trial runs and documentation …if preDithered use LightBurn “Passthrough”
8…for my 2.5 watt diode…speed 1200 mm/min…power 85% (my S-value in LightBurn =255) Line Interval = 0.085
9 takes approximately 50-70 minutes to complete
10…clean off all paint with Lacquer Thinner…
11…place felt pads on bottom to prevent scratching
Dithering is done when converting to 1-bit black and white from either greyscale (8 bit black and white) or color. Dithering is one of the last steps. Here’s a typical flow
usually resize for your DPI and finished engraving dimensions. DPI is based on your beam size and burn radius (upgraded optics usually as small as 0.08mm, stock optics more like 0.10mm) anything more you will be overlapping lines and quality will actually get worse
convert from color to greyscale
Unsharp mask (to give it pop)
Adjust tonal curve (because mid-tones do not process well in engravings
Brightness/Contrast
Convert to 1 bit (dither)
Process in Lightburn as passthrough
These are the basic steps, and each photo is different, you need to develop the laser “eye” and know what looks good when finished. It takes time and practice. Some photos just won’t engrave well, due to limited quality.
Sasquatch,
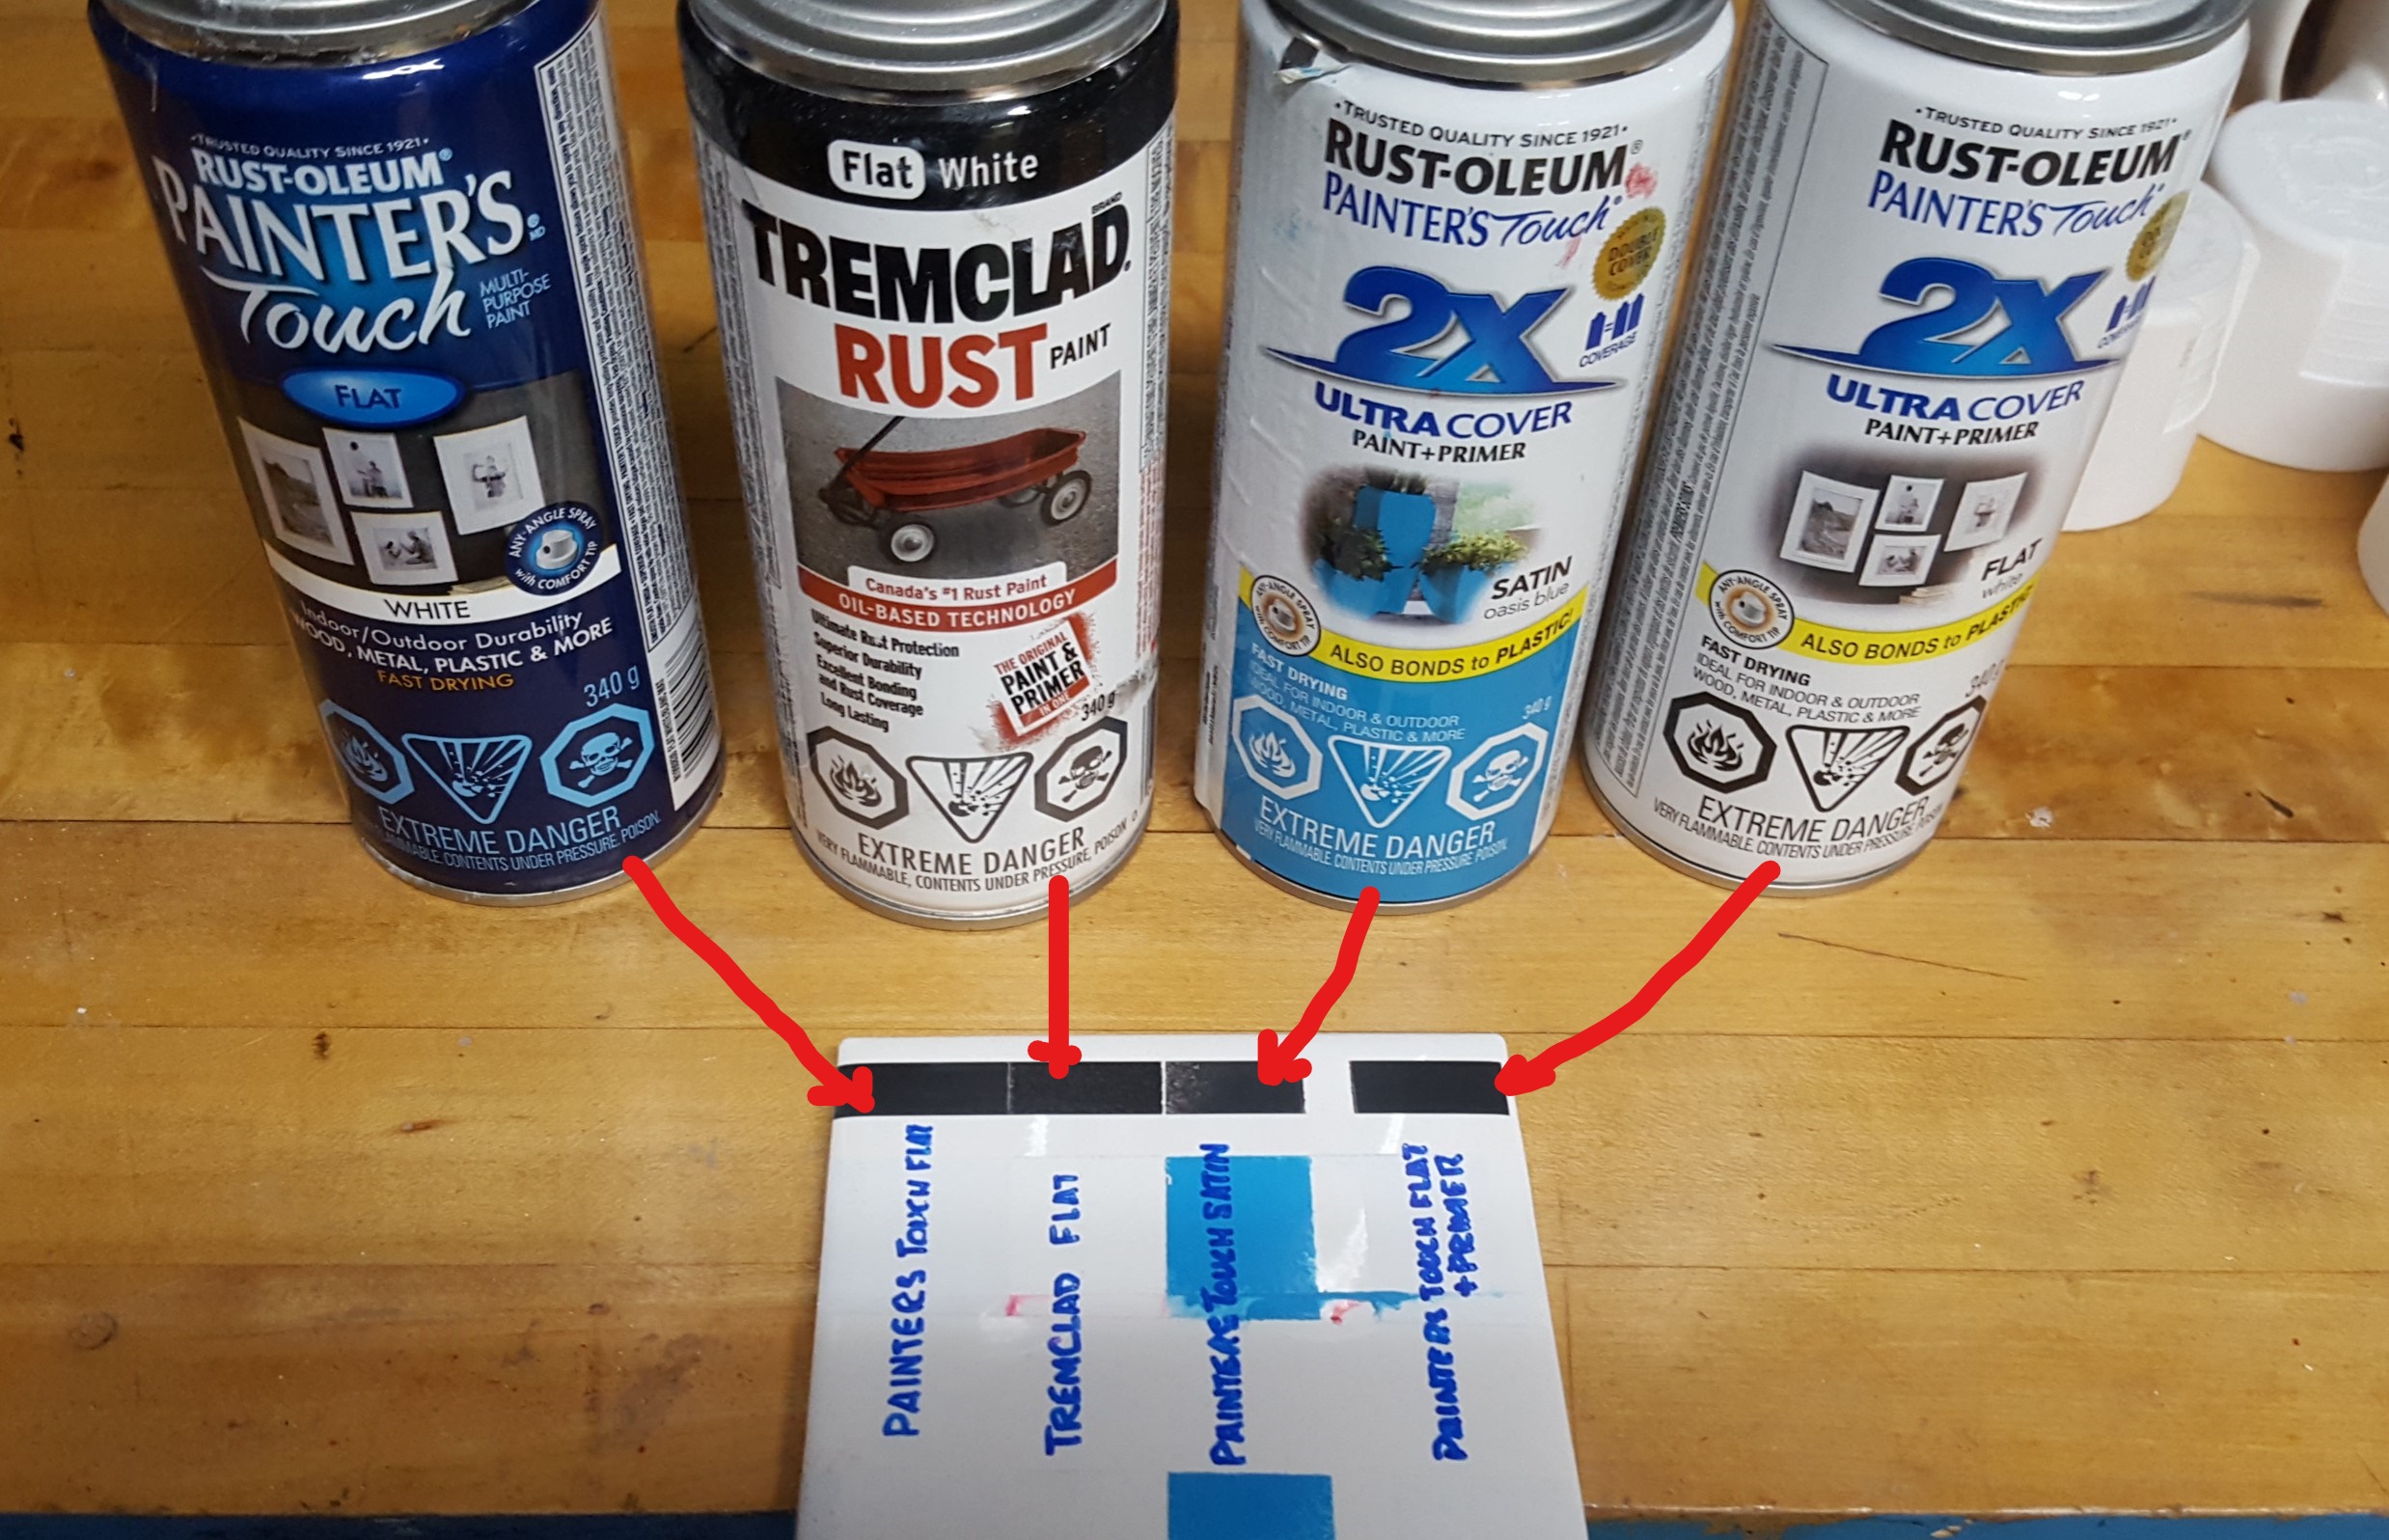
Yes I did use the the Rustoleum flat white paint.
As far as focusing, my J tech is pre focused for 1.5 inches and I don’t have access to the lens.
It comes with a .125" spacer to set the correct Z height.
I’m guessing that I may be able to change it by adjusting the Z ??
Bulldog,
Congratulations on the new grandchild.
Their great fun aren’t they?
I think I’m going to take a step back and see if I can play with the focus using the Z height adjustment.
One question though.
Why not use greyscale?
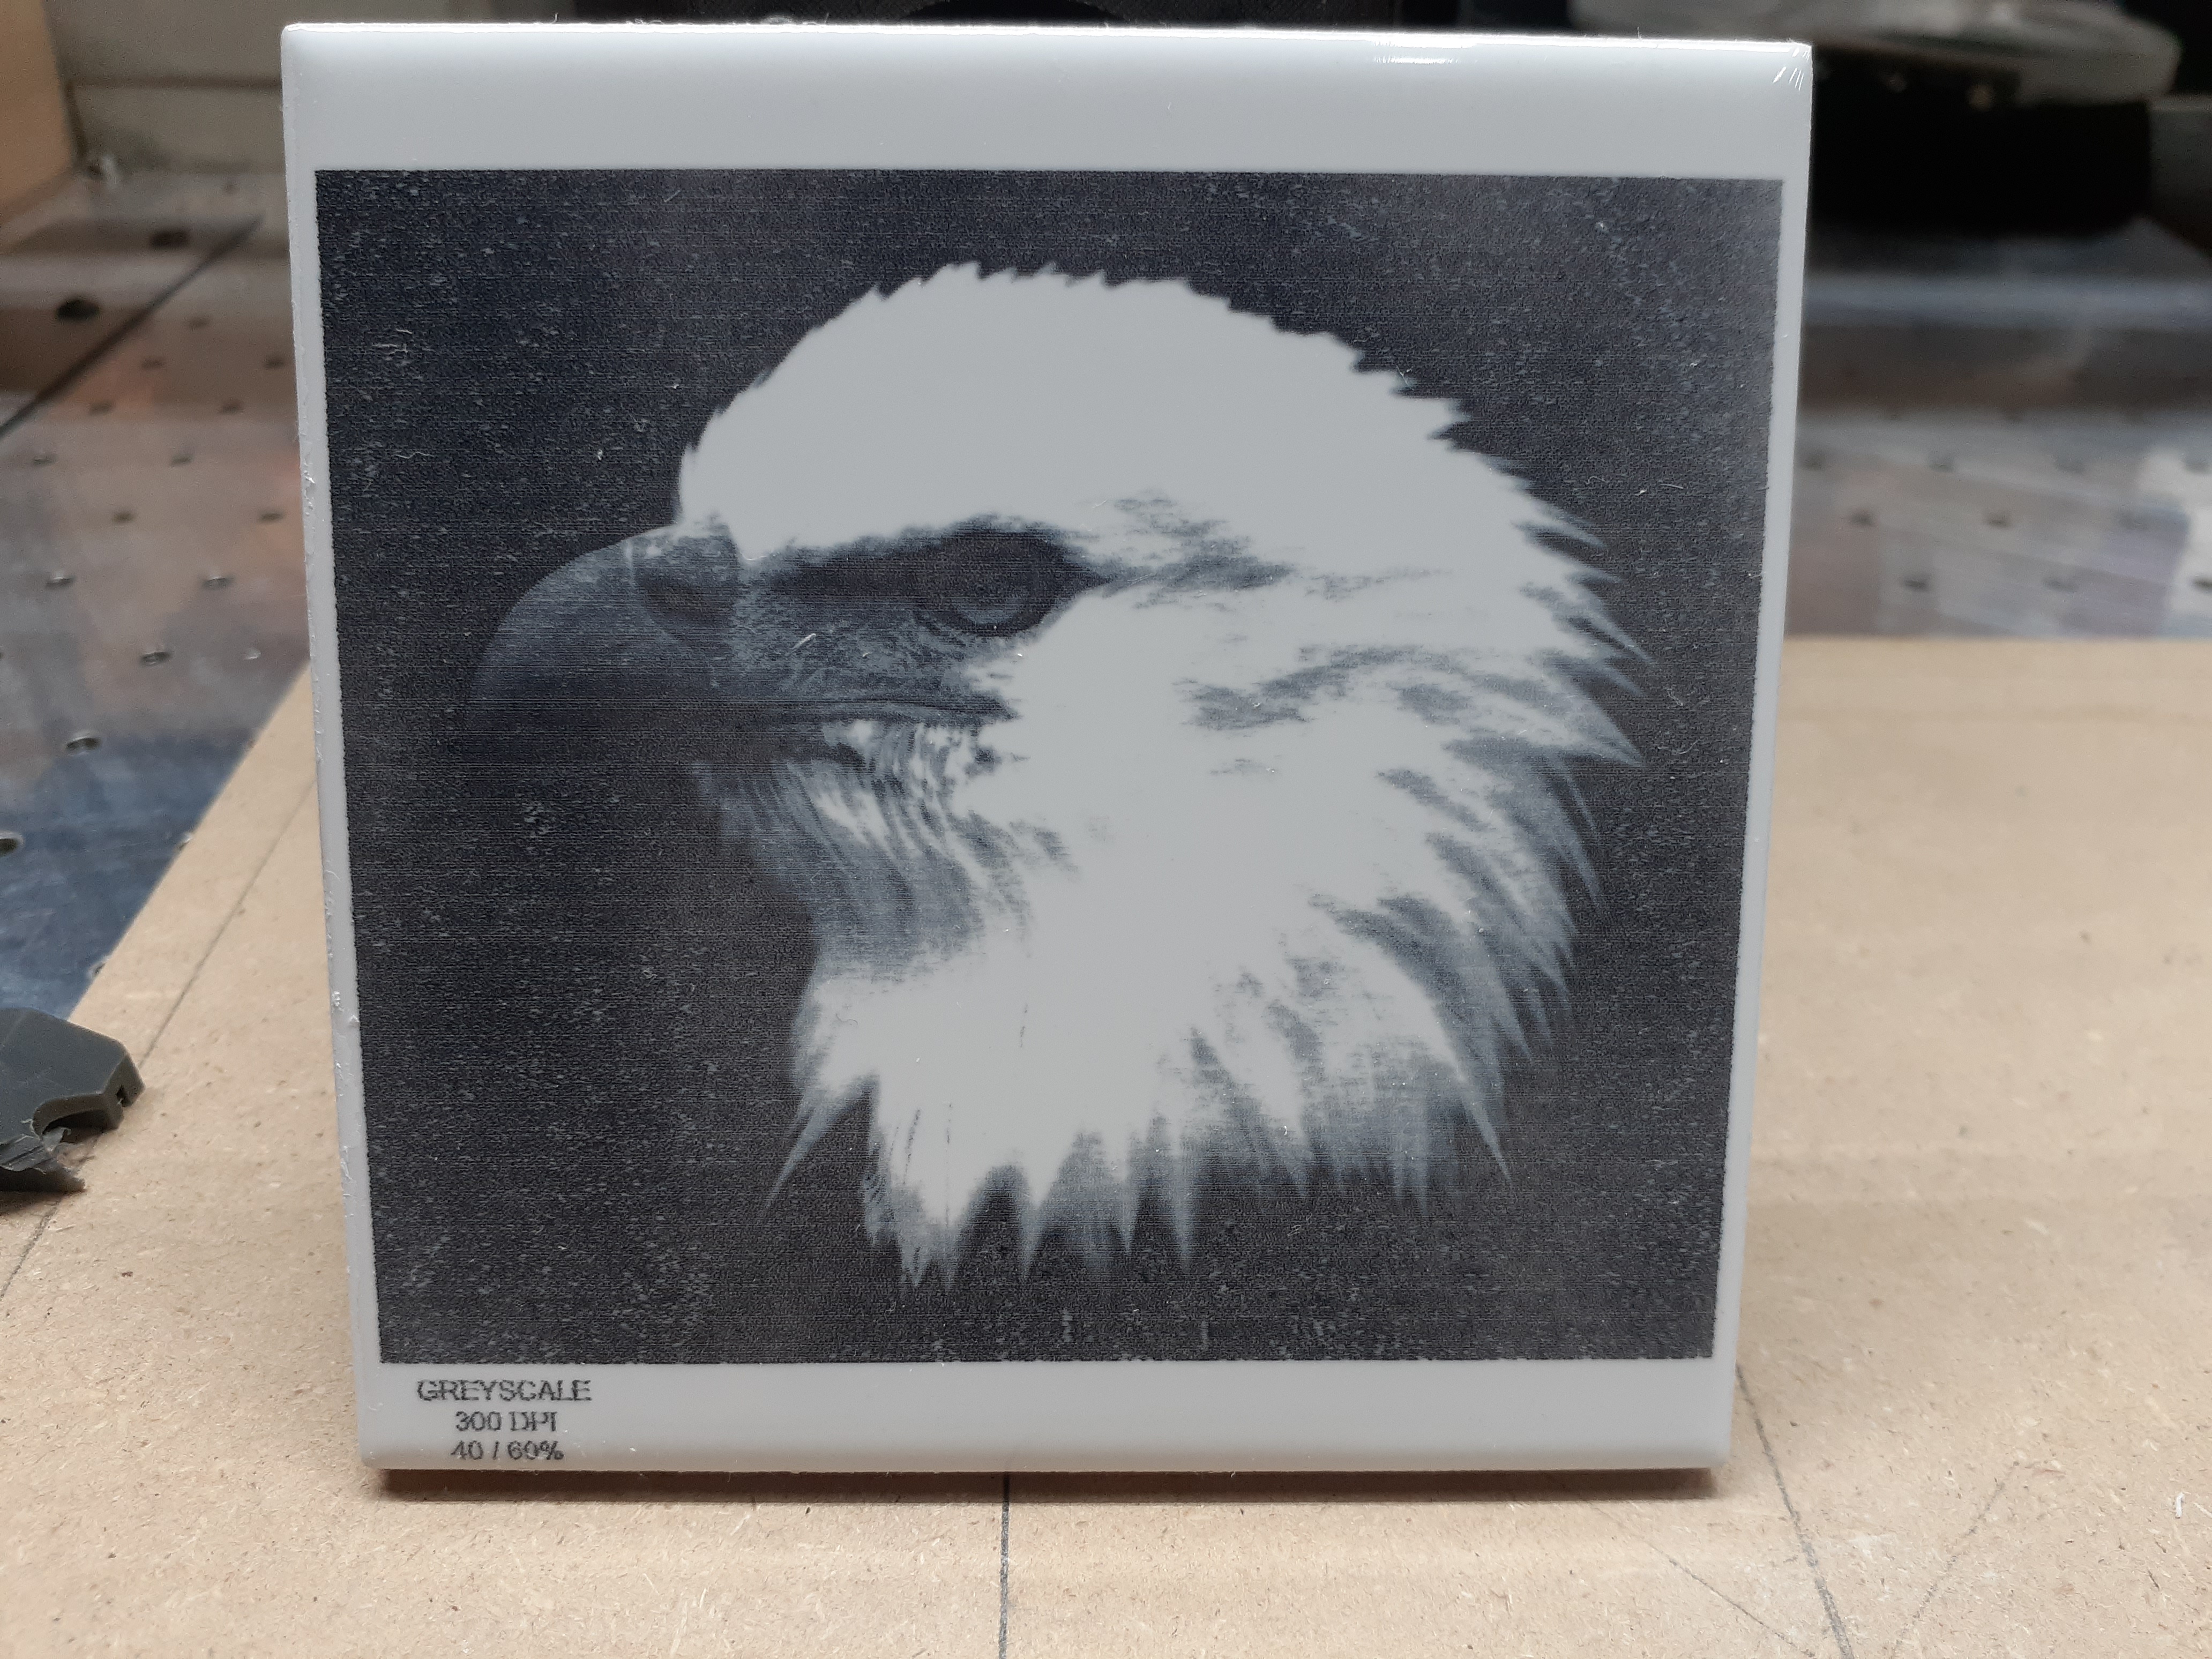
I did this one the other day, and it appears to be the best that I’ve done so far.
(although still not as good as what you are producing)
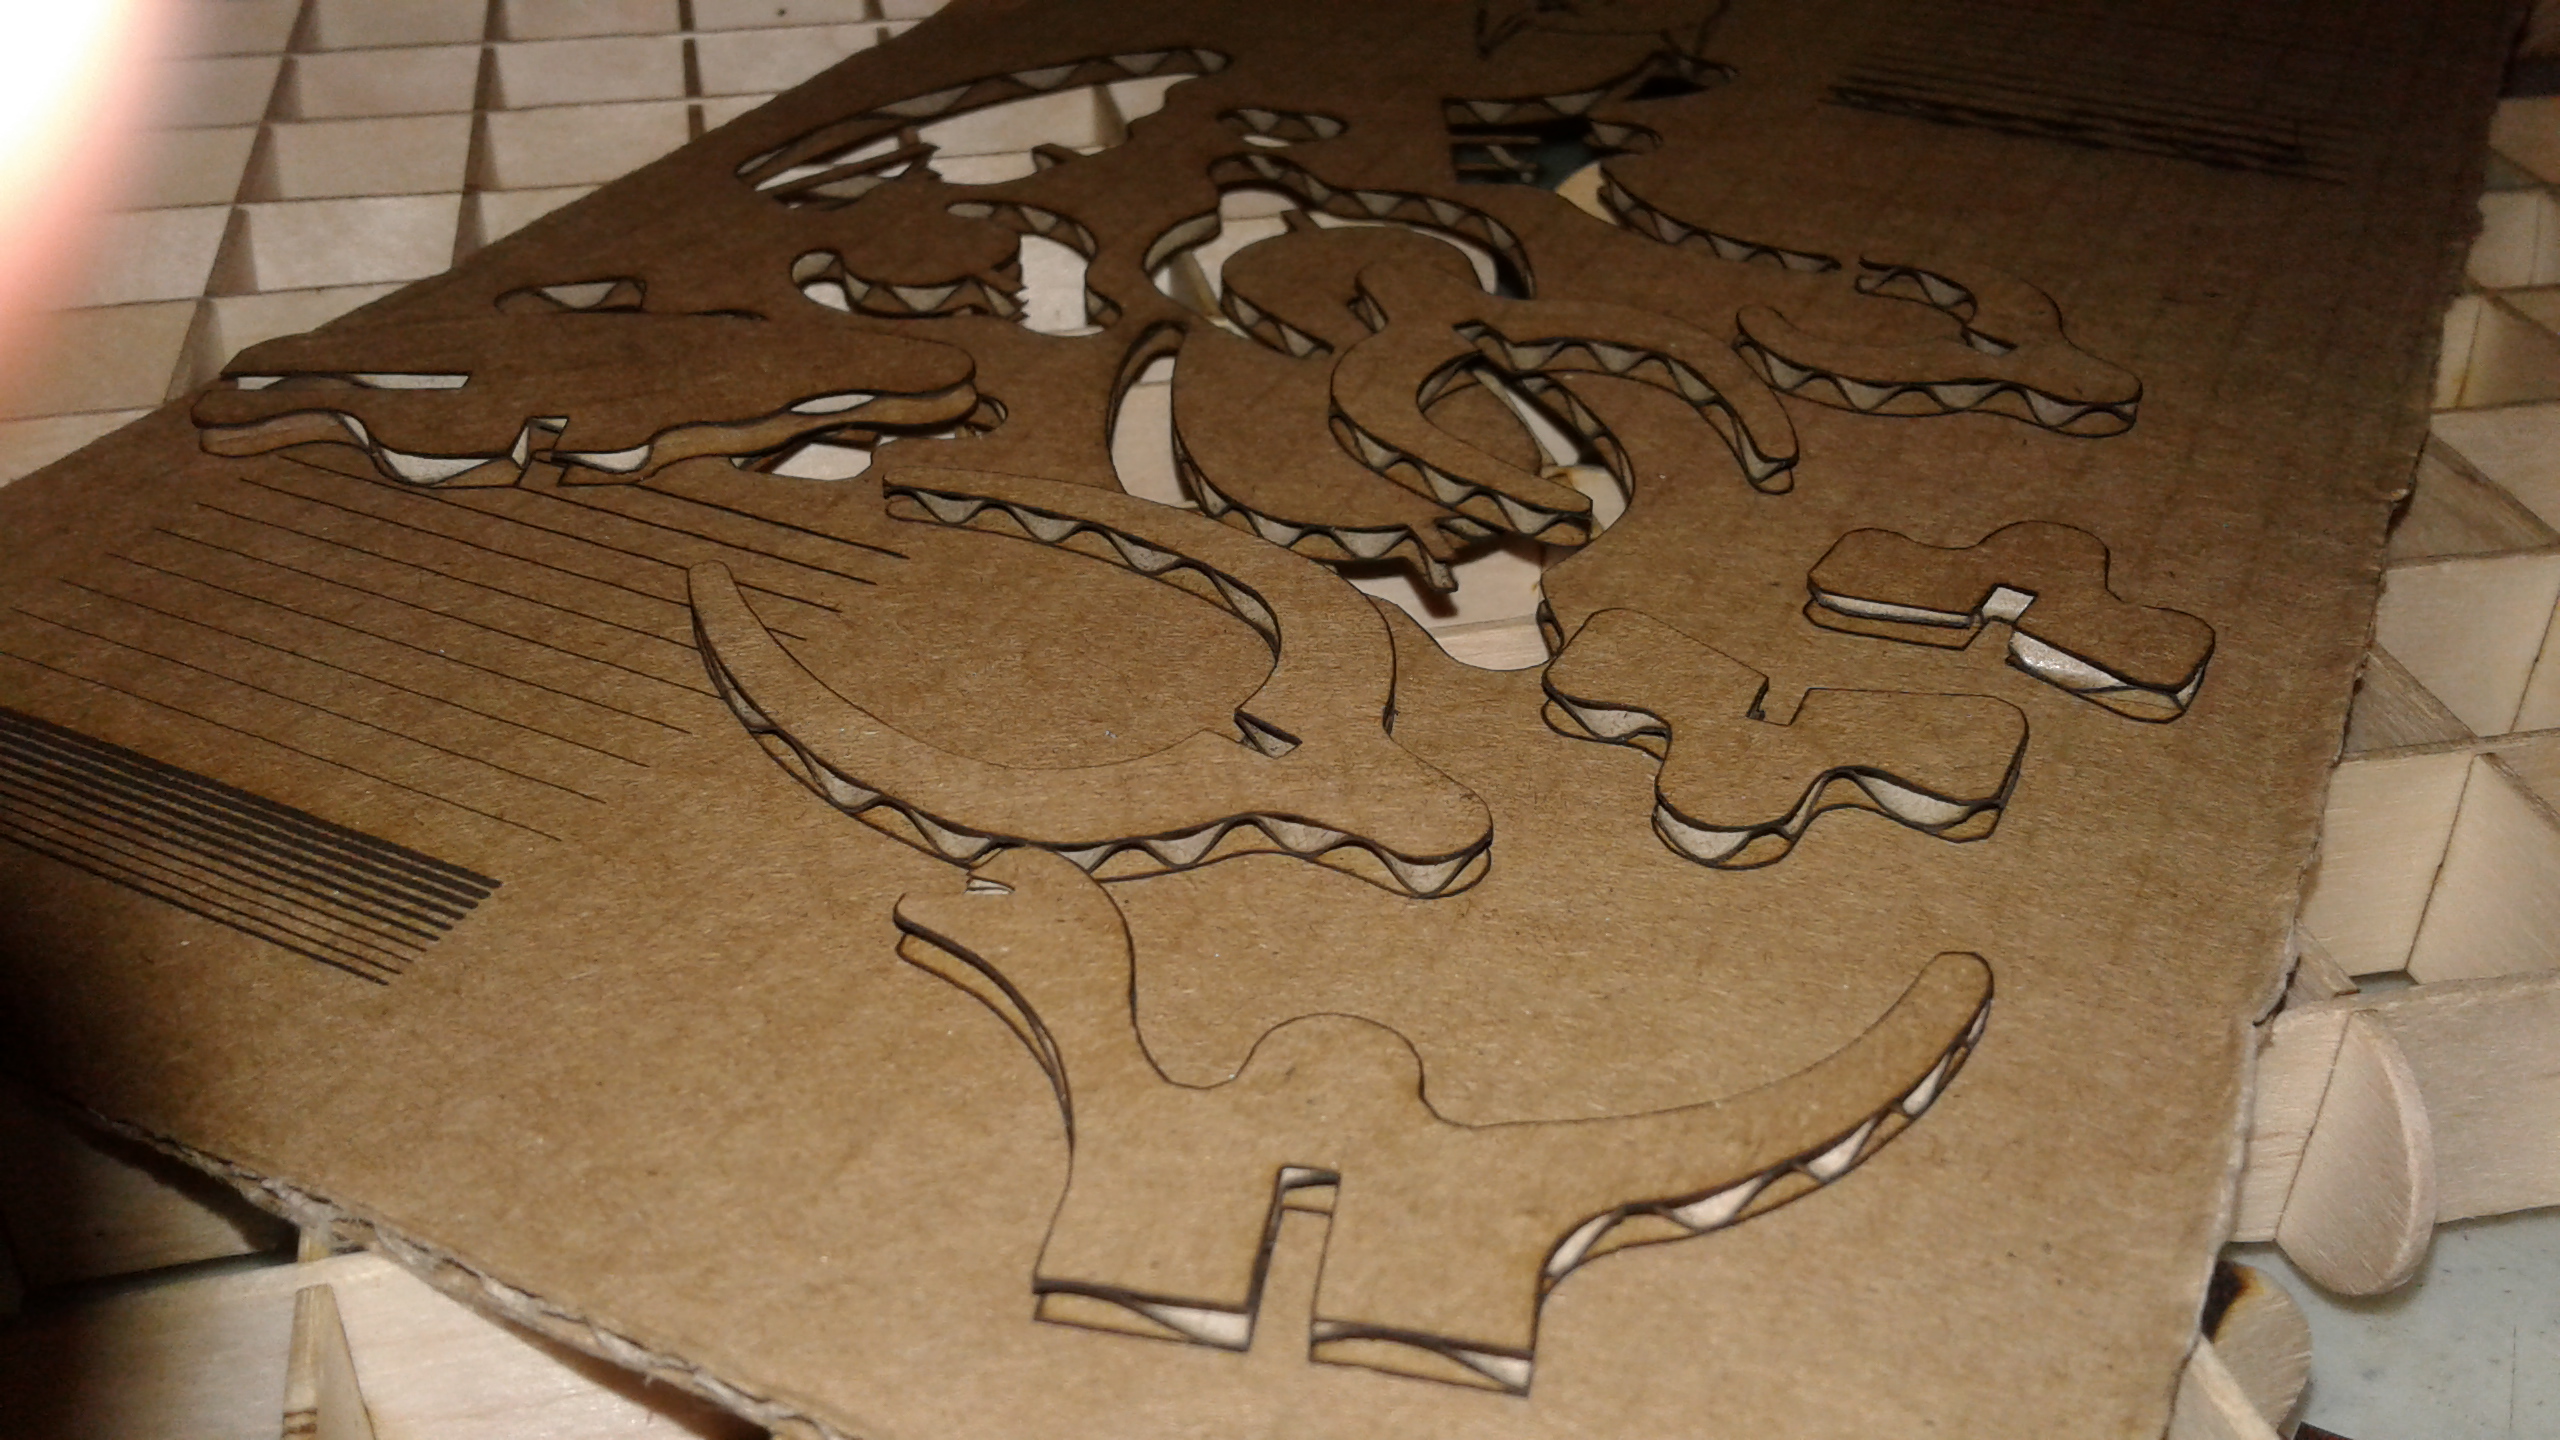
Since it appears you have a fully-implemented Z-axis, best focus can be easily determined with a simple script… engraving 10 lines, 1mm apart, and each 2mm higher than the previous. Start “too close” in Z and run the script. The final Z height will be 20mm above the starting Z. Count the number of lines back to “best focus” and multiply by 2mm… then lower Z from its final position by that amount. You are now focused on the surface of the material.
In the following photo, the thinnest/finest line (lower-left of material) is about 8 lines back… so I lowered Z by 16mm for best focus and set Z=0 at surface of material. IIRC I cut this 3mm corrugated cardboard in a single pass with a 2.5 watt (might have been 3.5watt… I have both) Banggood/Eleksmaker diode laser at 100 mm/min feed…
I use this focus script any time I switch material and/or thickness. Here, after finding best focus, I used a second script (10 lines at different feedrate) to determine the fastest feedrate which fully through-cut the cardboard… this gives clean, uncharred cut edges.
My thanks to Ryan Zellars (creator of MPCNC/LowRider/etc) at V1Engineering for demonstrating the focus method and some initial scripts.
Grey scale use variable power,depending on photo…some of the “greys” don’t produce enough power for the paint fusion to tile to fully “take”…as for focusing pin point is a must…https://www.youtube.com/watch?v=AuhHsIySGlo
What power setting do you use when you run the test?
I currently have my 7 watt set at 50% and cant see the difference no matter where I set my Z height.
Dropped my power down to 25%
It appears that the focal point is within .005" - .010" of the stated focal point. (the Z height)
I am measuring using gage blocks.
What is the acceptable tolerance of the focal point?
Doug,
8 tenths of one percent???
Or do you mean 8 percent?
My JTech 7 Watt wont even come on until 5%
If in fact you are correct with .8%, then I’m starting to wonder if I have an issue with my laser.
Jan, it is a different laser and different laser driver so the point should be understood as, you focus your laser point with the least power possible for your laser setup. This is because it’s hard to see the dot of a very bright light.
I will play with the focus some more today and use a magnifying glass to check the quality.
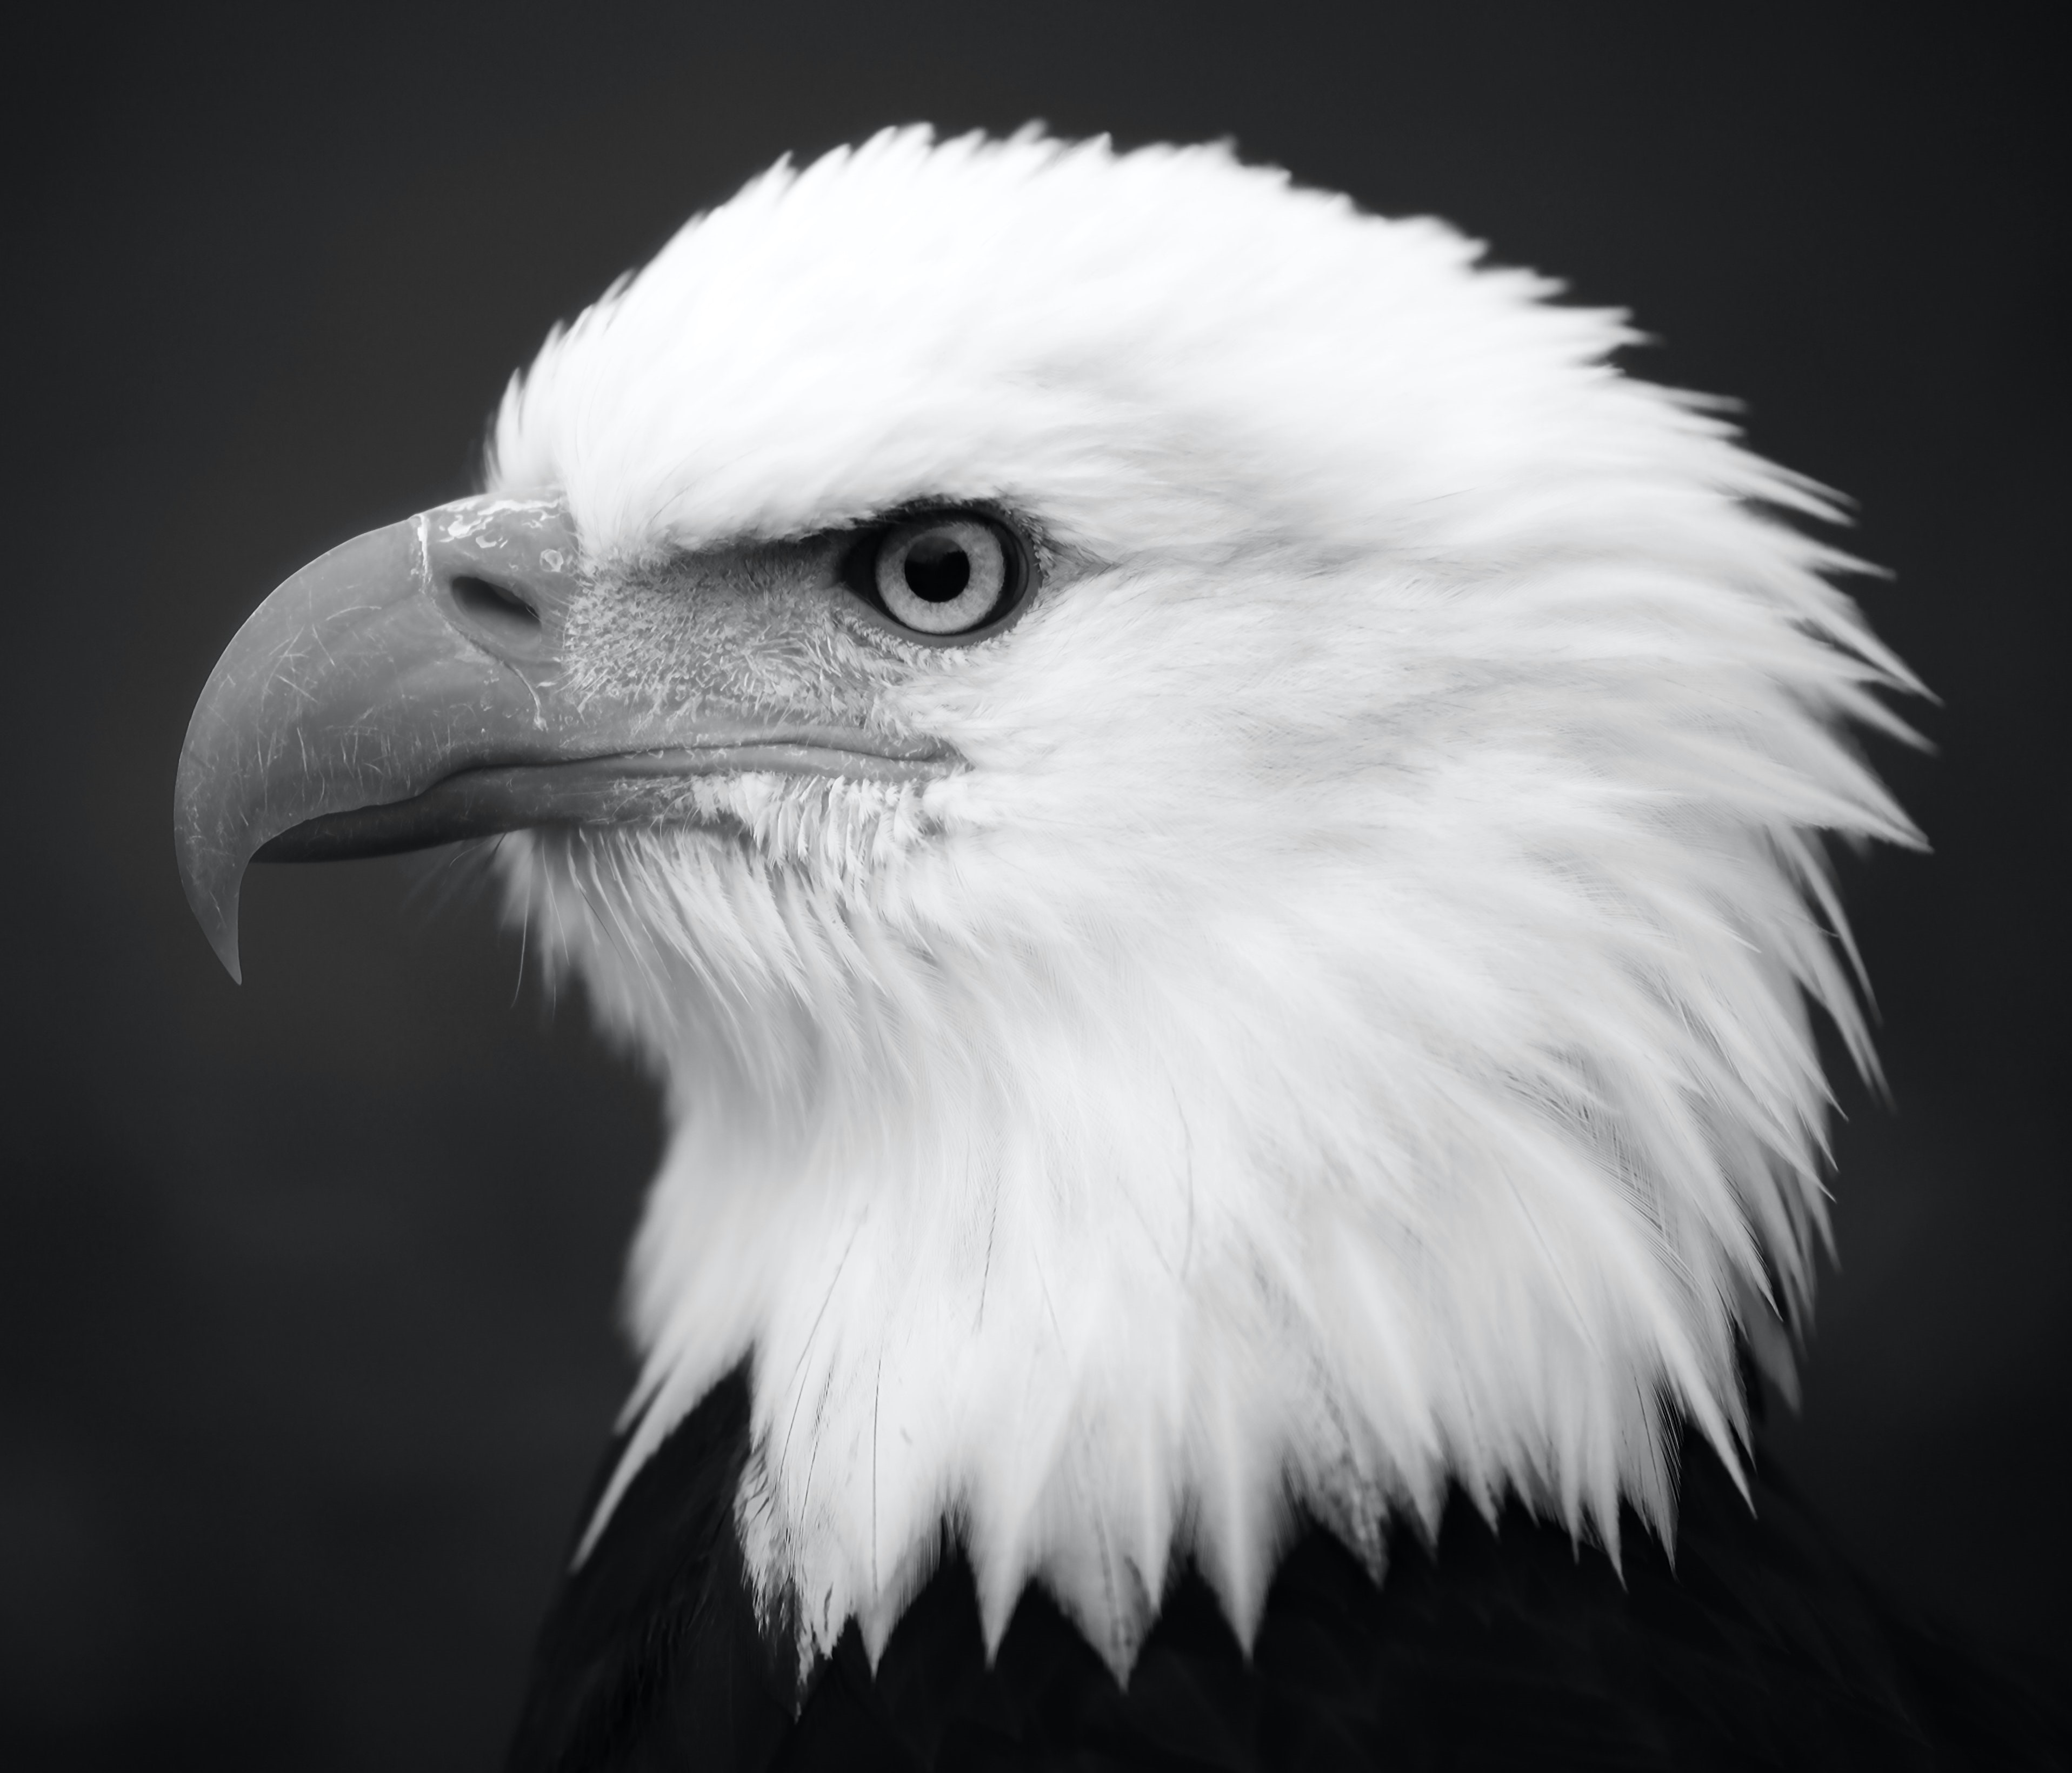
Here is a coaster I made for my wife yesterday. (Its ok to spend your anniversary in the shop isn’t it?)
7 watt laser.
Jarvis
200 DPI
60 IPM
50% power
So far, this is the best I have done.
Critique welcome.