$22 is the homing enable setting, and yours is off, which is why when you click the Home button you get an error.
You also have $13 set to 1, which is “report machine coordinates in inches”. You will also need to change that, as LightBurn expects mm from the machine, so that would be another reason why things are wonky for you.
For using the laser, you also need to enable laser mode ($32=1) so the machine doesn’t pause with every power level change, and will automatically turn off the beam for travel moves. When you want to use the CNC again, just set $32=0 again.
OZ,
I made the changes you suggested.
When I hit the home button on the move tab, the only thing that happens is the Z axis goes all the way to the top ans bottoms out.
(at least something is happening)
$$
For that, you might be out of luck, at least if the Z axis doesn’t have limit switches on it. Z homes first, then X/Y. The only way to turn off the homing for the Z as far as I know is to disable it when compiling GRBL from the source code.
I don’t think you can do it otherwise, so you might not be able to use homing with your hardware unless you can find a pre-built version of GRBL that has Z homing disabled, or install a switch for the Z limit.
You are correct in that I do not have a homing switch for the Z axis.
It got broken very early on and I never replaced it because I realized that I would never use homing anyway.
So maybe I have to install a Z homing switch for the laser only. (not a big deal)
Thank you for the learning lesson today.
I will pick this up again when I get a homing switch installed.
But for now, I have to get on the John Deere and mow the grass here in sunny Ohio.
Sorry for all the dumb questions but I really want to get this software to work for me.
Thank you again
OZ,
I have an aftermarket (CNC4newbies) Z axis.
Right now I don’t see a simple way of mounting a homing switch to it. (doesn’t mean it cant be done though)
I was reading the other thread (lovesnapped) and saw this response.
Could this be a work around in my case?
To fix it, move the laser head to the front-left corner (or wherever you have your origin set), before you power it up, so that’s where zero goes, OR, jog the laser to that corner, and issue this command:
Cant easily install a limit switch on my Z
So I made the changes and now my laser works exactly the way that I want it to.
Thank you for all your help.
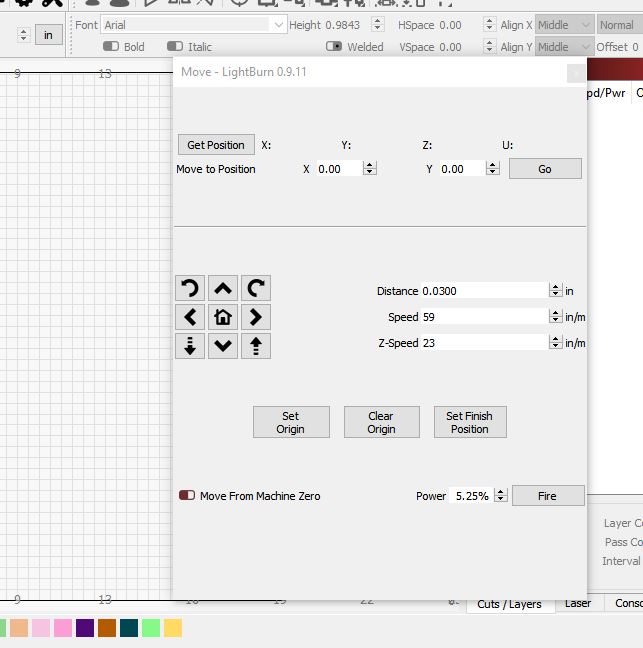
So currently when I click the “fire” button and then jog the laser, the beam turns off and then I have to click it twice to make it fire again.
Is there a way to fire the laser (obviously in low power) and have it stay on while jogging the machine to the target and then click it off?
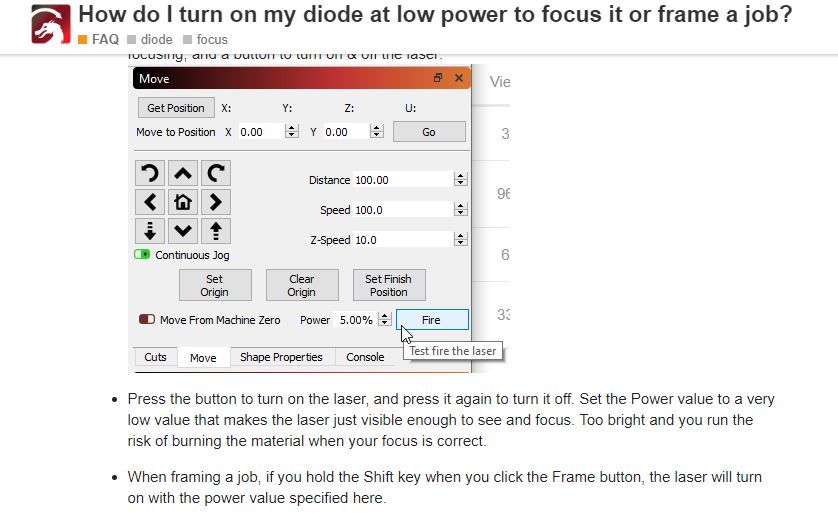
There is no way to jog the laser with the low power beam enabled in LightBurn. It is explicitly turned off when you move the laser. You can frame at low power though:
I’m not sure what I’m supposed to see here. That looks as it should.
With the power set there next to the ‘Fire’ button, if you click one of the ‘Frame’ buttons while holding the shift key it will frame with the laser on at low power.
Completely unrelated to framing with the low light beam on
Available only for firmware that supports it
Enabled by turning on the $J jogging setting in the device settings window
LightBurn presents the options in the UI that are enabled / supported by your controller, so there are lots of ways that your UI might look different than mine. Don’t get hung up on that.
So I notice that your screen in the instructions has the "enable $J jogging " button enabled.
So I did that and the laser does exactly what I want it to do. (jog to a target)
However, it doesn’t make any difference what I set the jog distance to, and then jog, the machine always move ~1/8 of an inch
Continuous jogging means exactly that - It jogs while you have the button held, and stops when you release it. Non-continuous jogging, moves the distance you specify each time you click the button.
Yup, I see what you mean.
Now if you would make it so we can put in a specific distance it would be perfect.
I simply struggle to get to a defined start point.
I don’t understand. If you have continuous jogging off, the “Distance” box controls how far it goes with each button click.
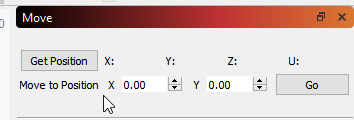
You also have this:
… where you can enter an exact coordinate and click the Go button to send it there.
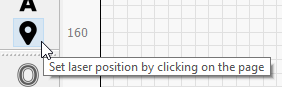
Or you can use this:
So when you say that you’re struggling to go to a defined point, I’m having trouble understanding why, unless there’s still something wrong with your machine configuration that’s not allowing you to use these tools.
Sorry, buy struggling I mean that when I visually want to go to an X0 Y0 start point (either a couple of layout lines, or the edge of a piece of wood) I want to be able to see the dot.
But now I have to fire the dot, see where it is, then move the laser.
In doing so the laser turns off.
Then I have to click the fire button not once, but two times to get it to come back on again.
Then I have to start the procedure all over again (however many times necessary) to get to my start position.
Whereas, when I clicked the continuous jog button and clicked the fire button the laser came on and stayed on while I was jogging.
This is perfect other than the fact that I cannot set a given distance for the machine to jog.
As an example, when I get close to my target I only want to move he dot say .010" at a time. (or maybe even less)