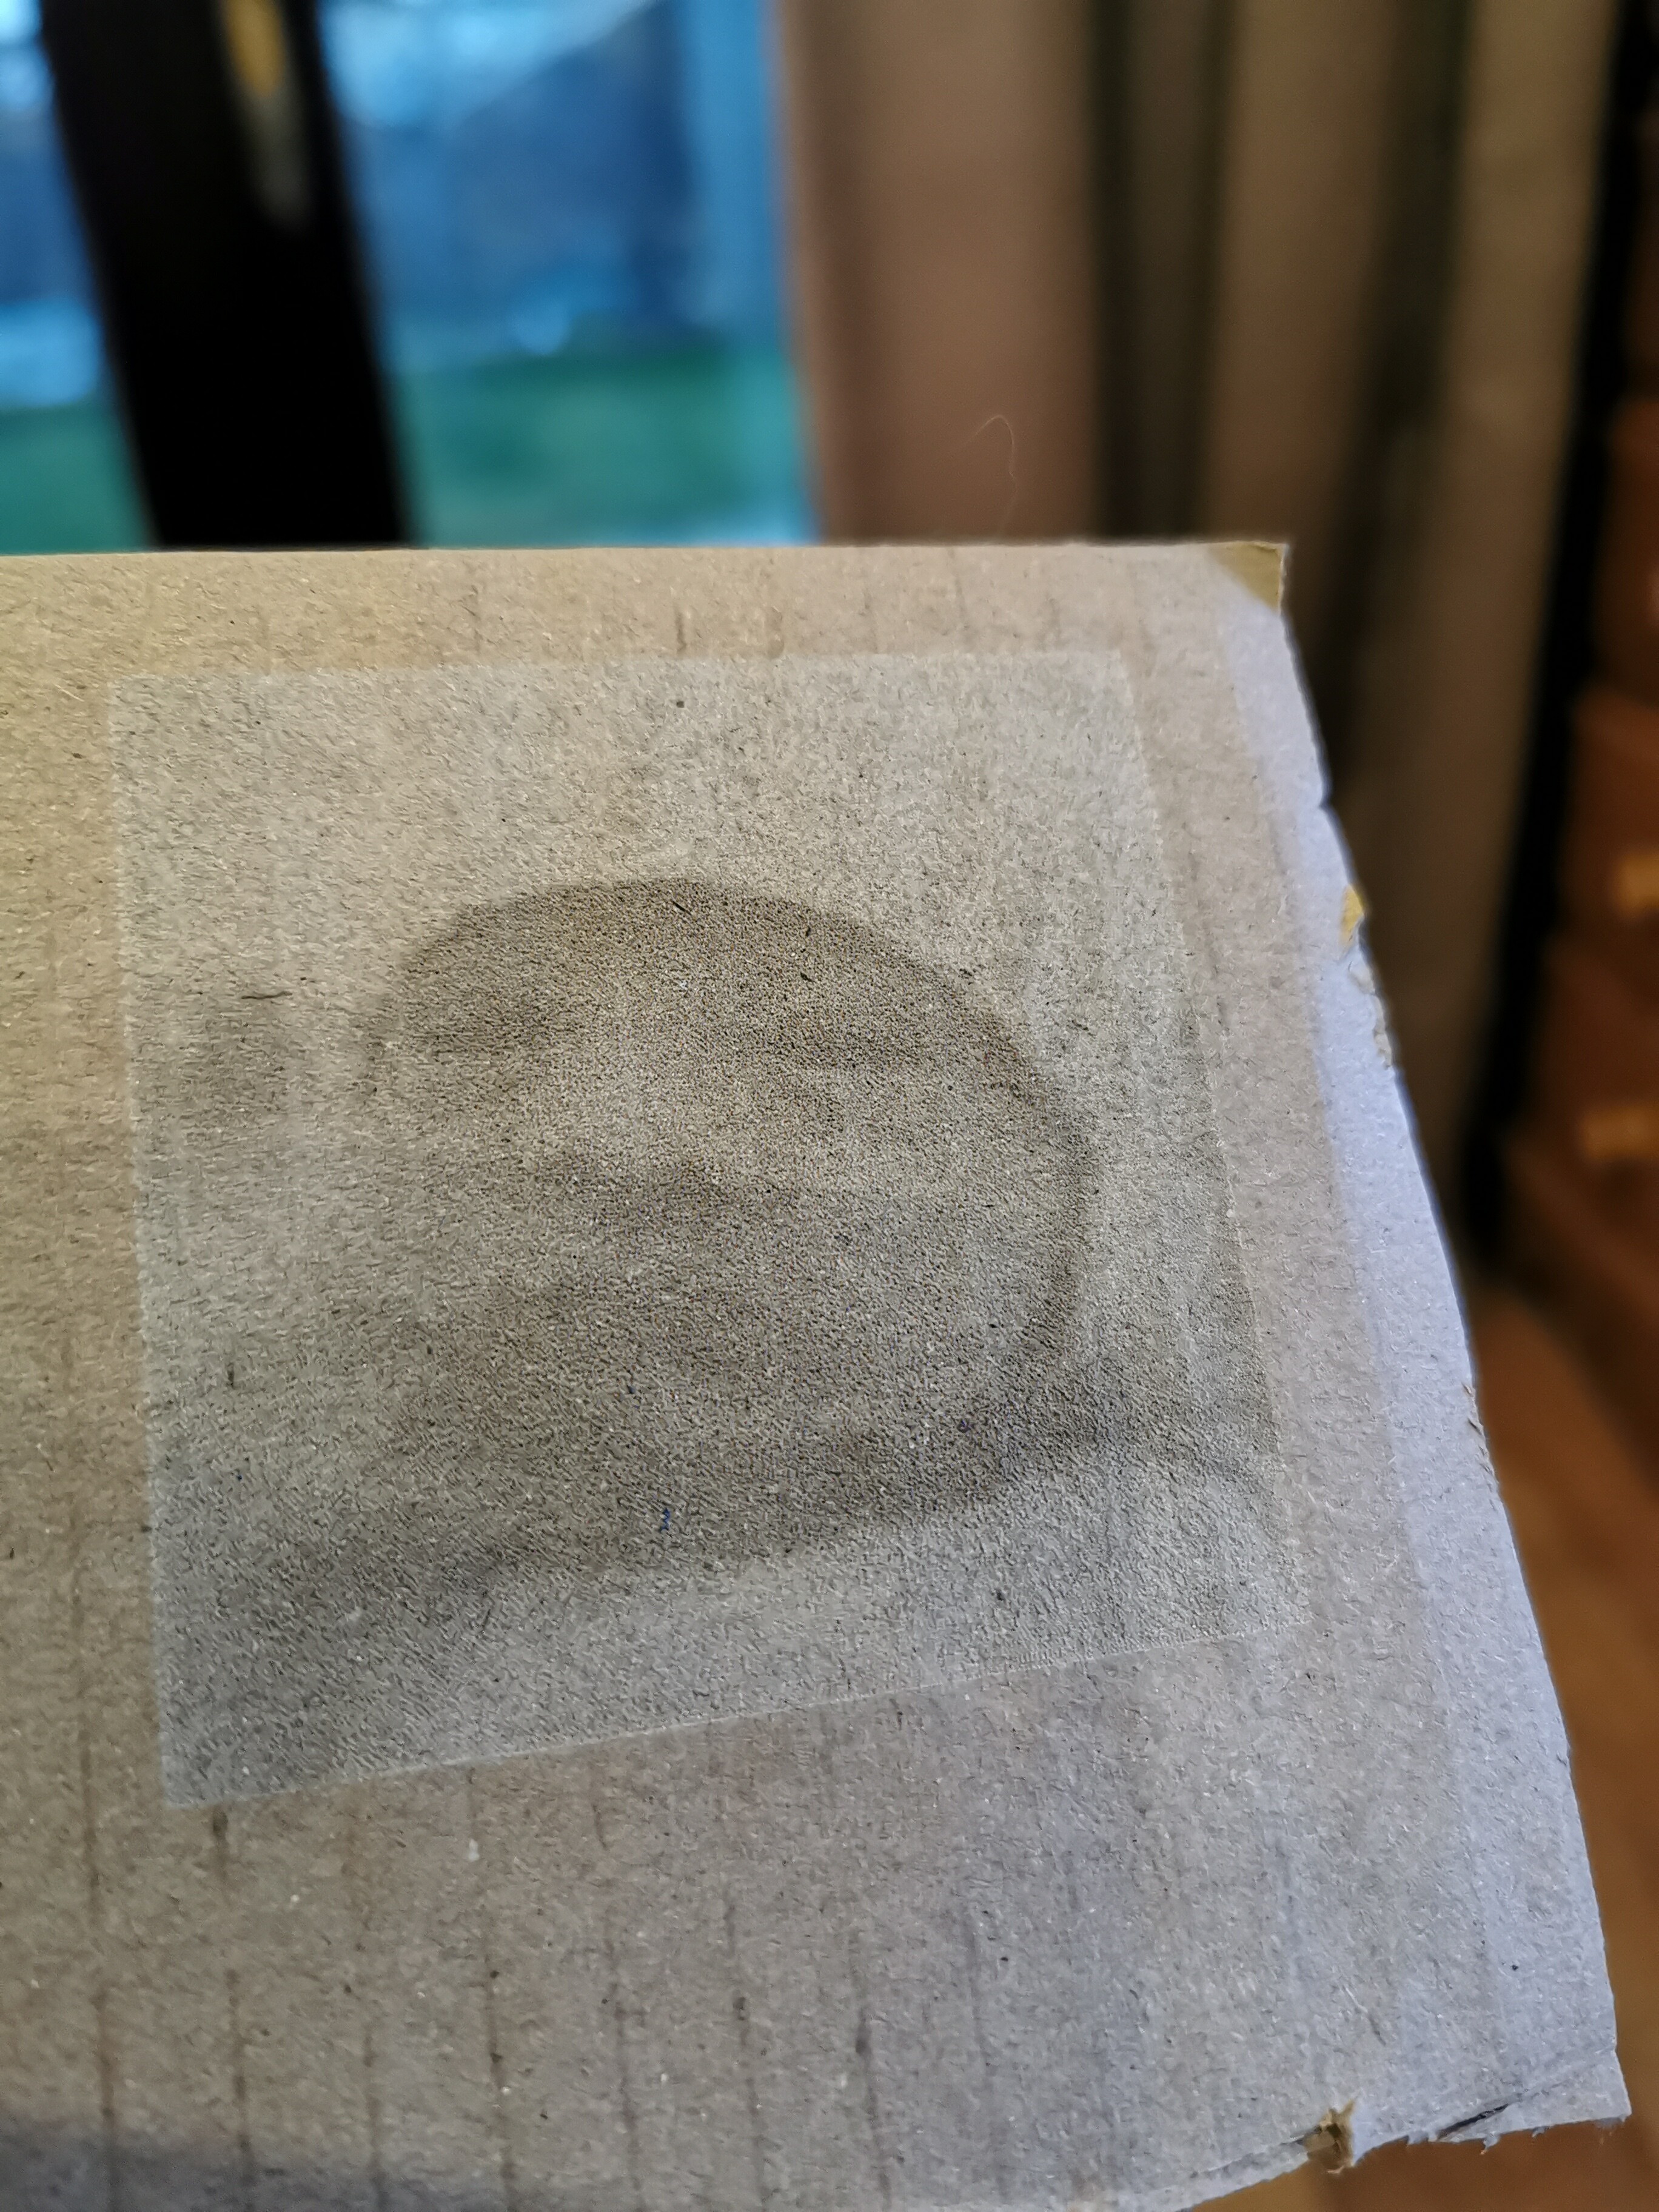
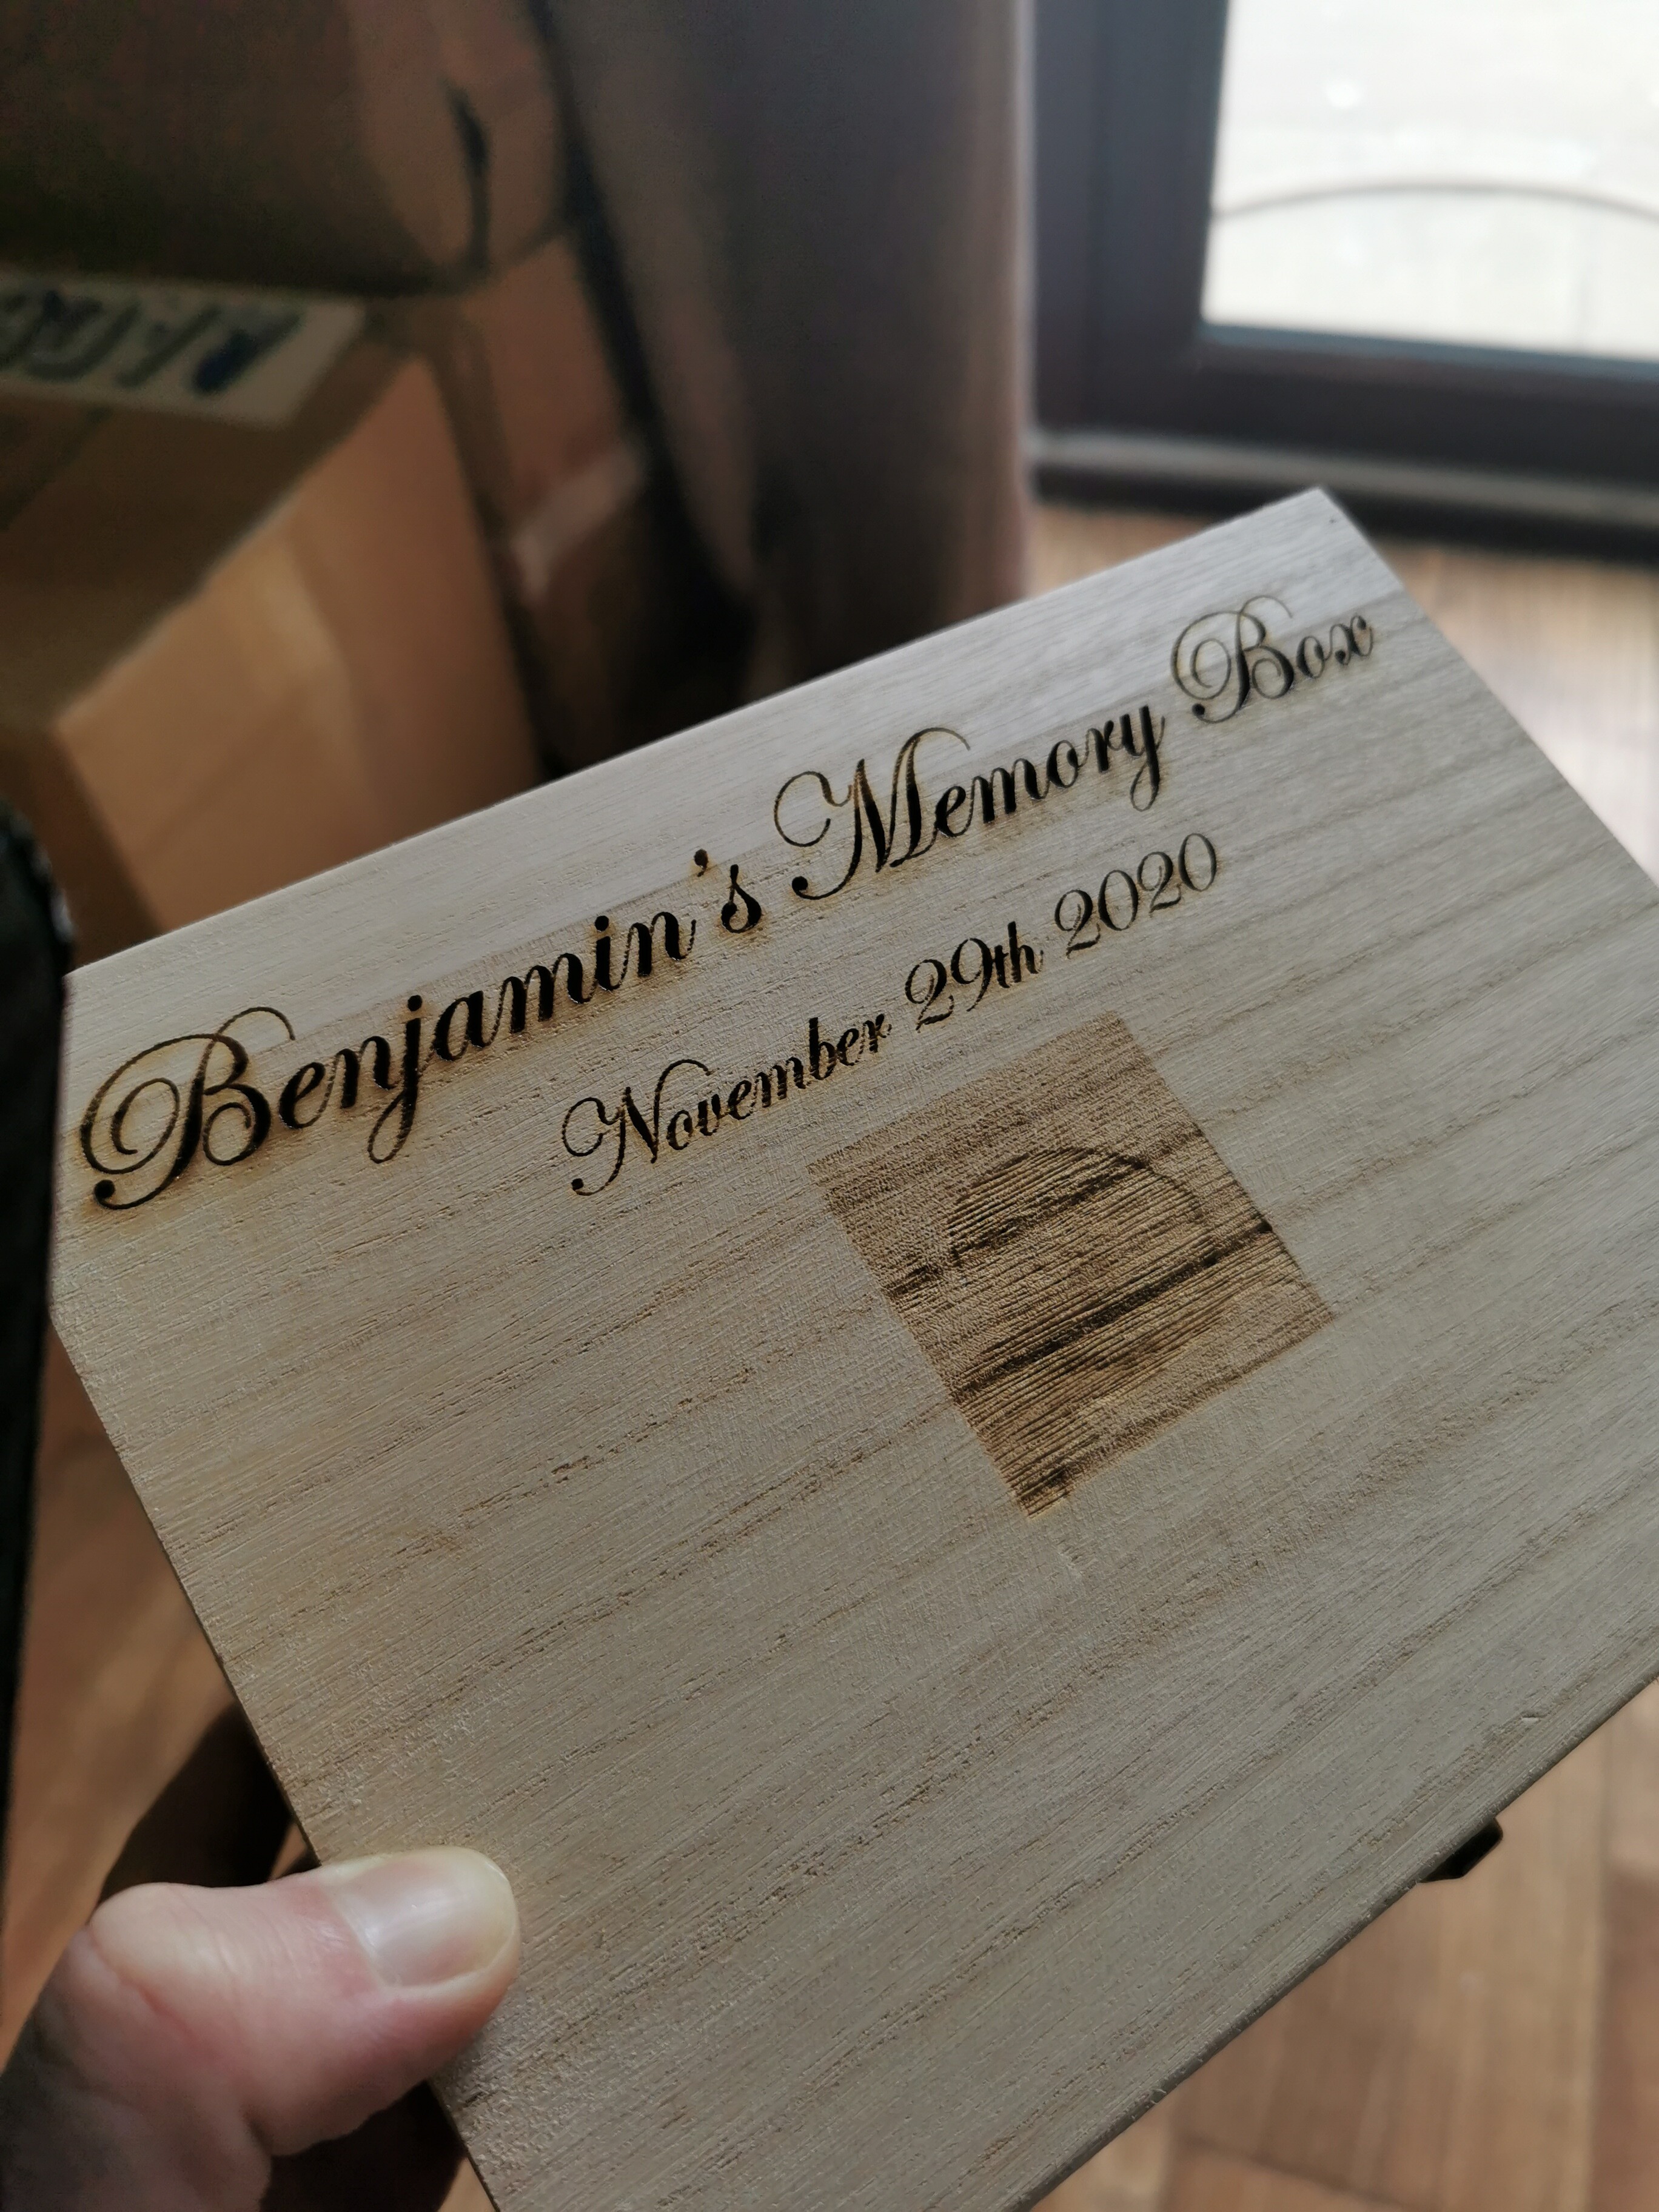
I’ve just signed up to the forums and currently trailing the software before I purchase it. I have been using RD works for cutting and general scanning and I tried to scan an image onto a test piece of wood which didn’t really look anything like the photo…
However, I have recently tried to scan an image onto the same piece of test wood and again, doesn’t look anything like the photo.
I have a Ruida RD6442s controller with an 80W tube.
I am trying to engrave a black and white photo but unsure on what the best settings would be; does anyone have a set of initial settings i could try and to then maybe optimise for different materials? Any help would be greatly appreciated!
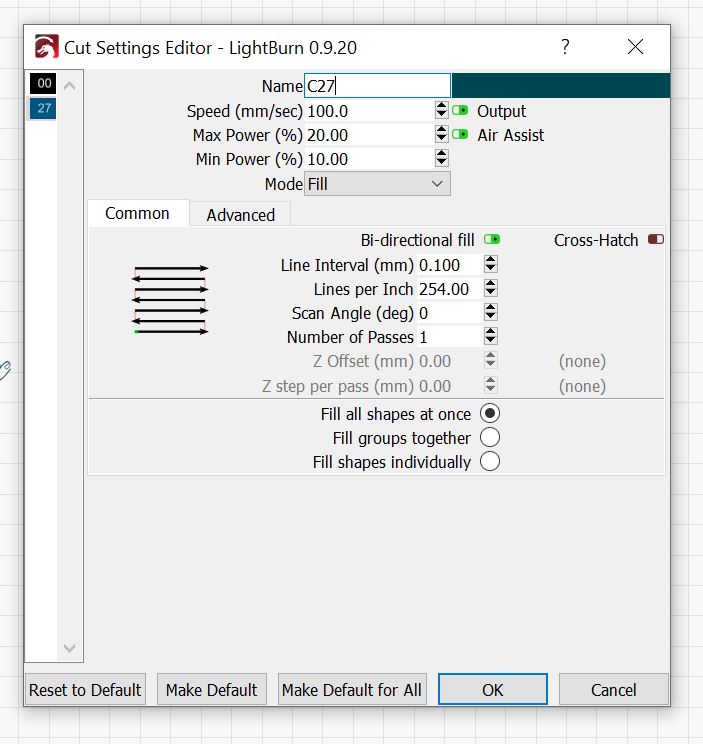
Open your image, resize it to the output size. Select the image, right click, and choose ‘Show Properties’. In the Shape Properties window, set the following values:
With regards to the power, is that max or min power?
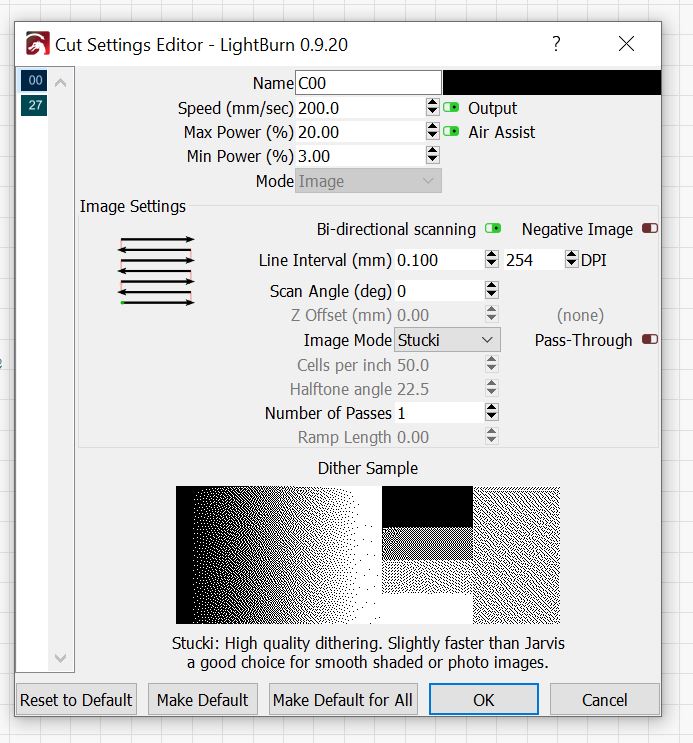
Also what do you mean by Stucki? What image mode would also be best? I watched a few videos and was inclined to go greyscale? What is your preferred image mode?
Stucki is the suggested image mode. Grayscale is the most challenging image mode to dial the settings in so be aware of that. Additionally, when using grayscale, CO2 lasers tend to vaporize the material creating depth or 3D to the cut, verse just changing the color of the material like a less powerful diode-based laser systems.
The best thing you can do is actually test on your desired material. Settings for cardboard will be different than for other material. Different types of wood will need different settings too, so don’t practice on pine for a burn on alder - it won’t really help.
Min Power is ignored when dithering, so set it the same as Max Power.
The image itself has relatively low contrast (there are very few true black or white areas), so increasing that might help. What is the wood? The grain is clearly burning much darker than the rest, so that’s going to be troublesome.
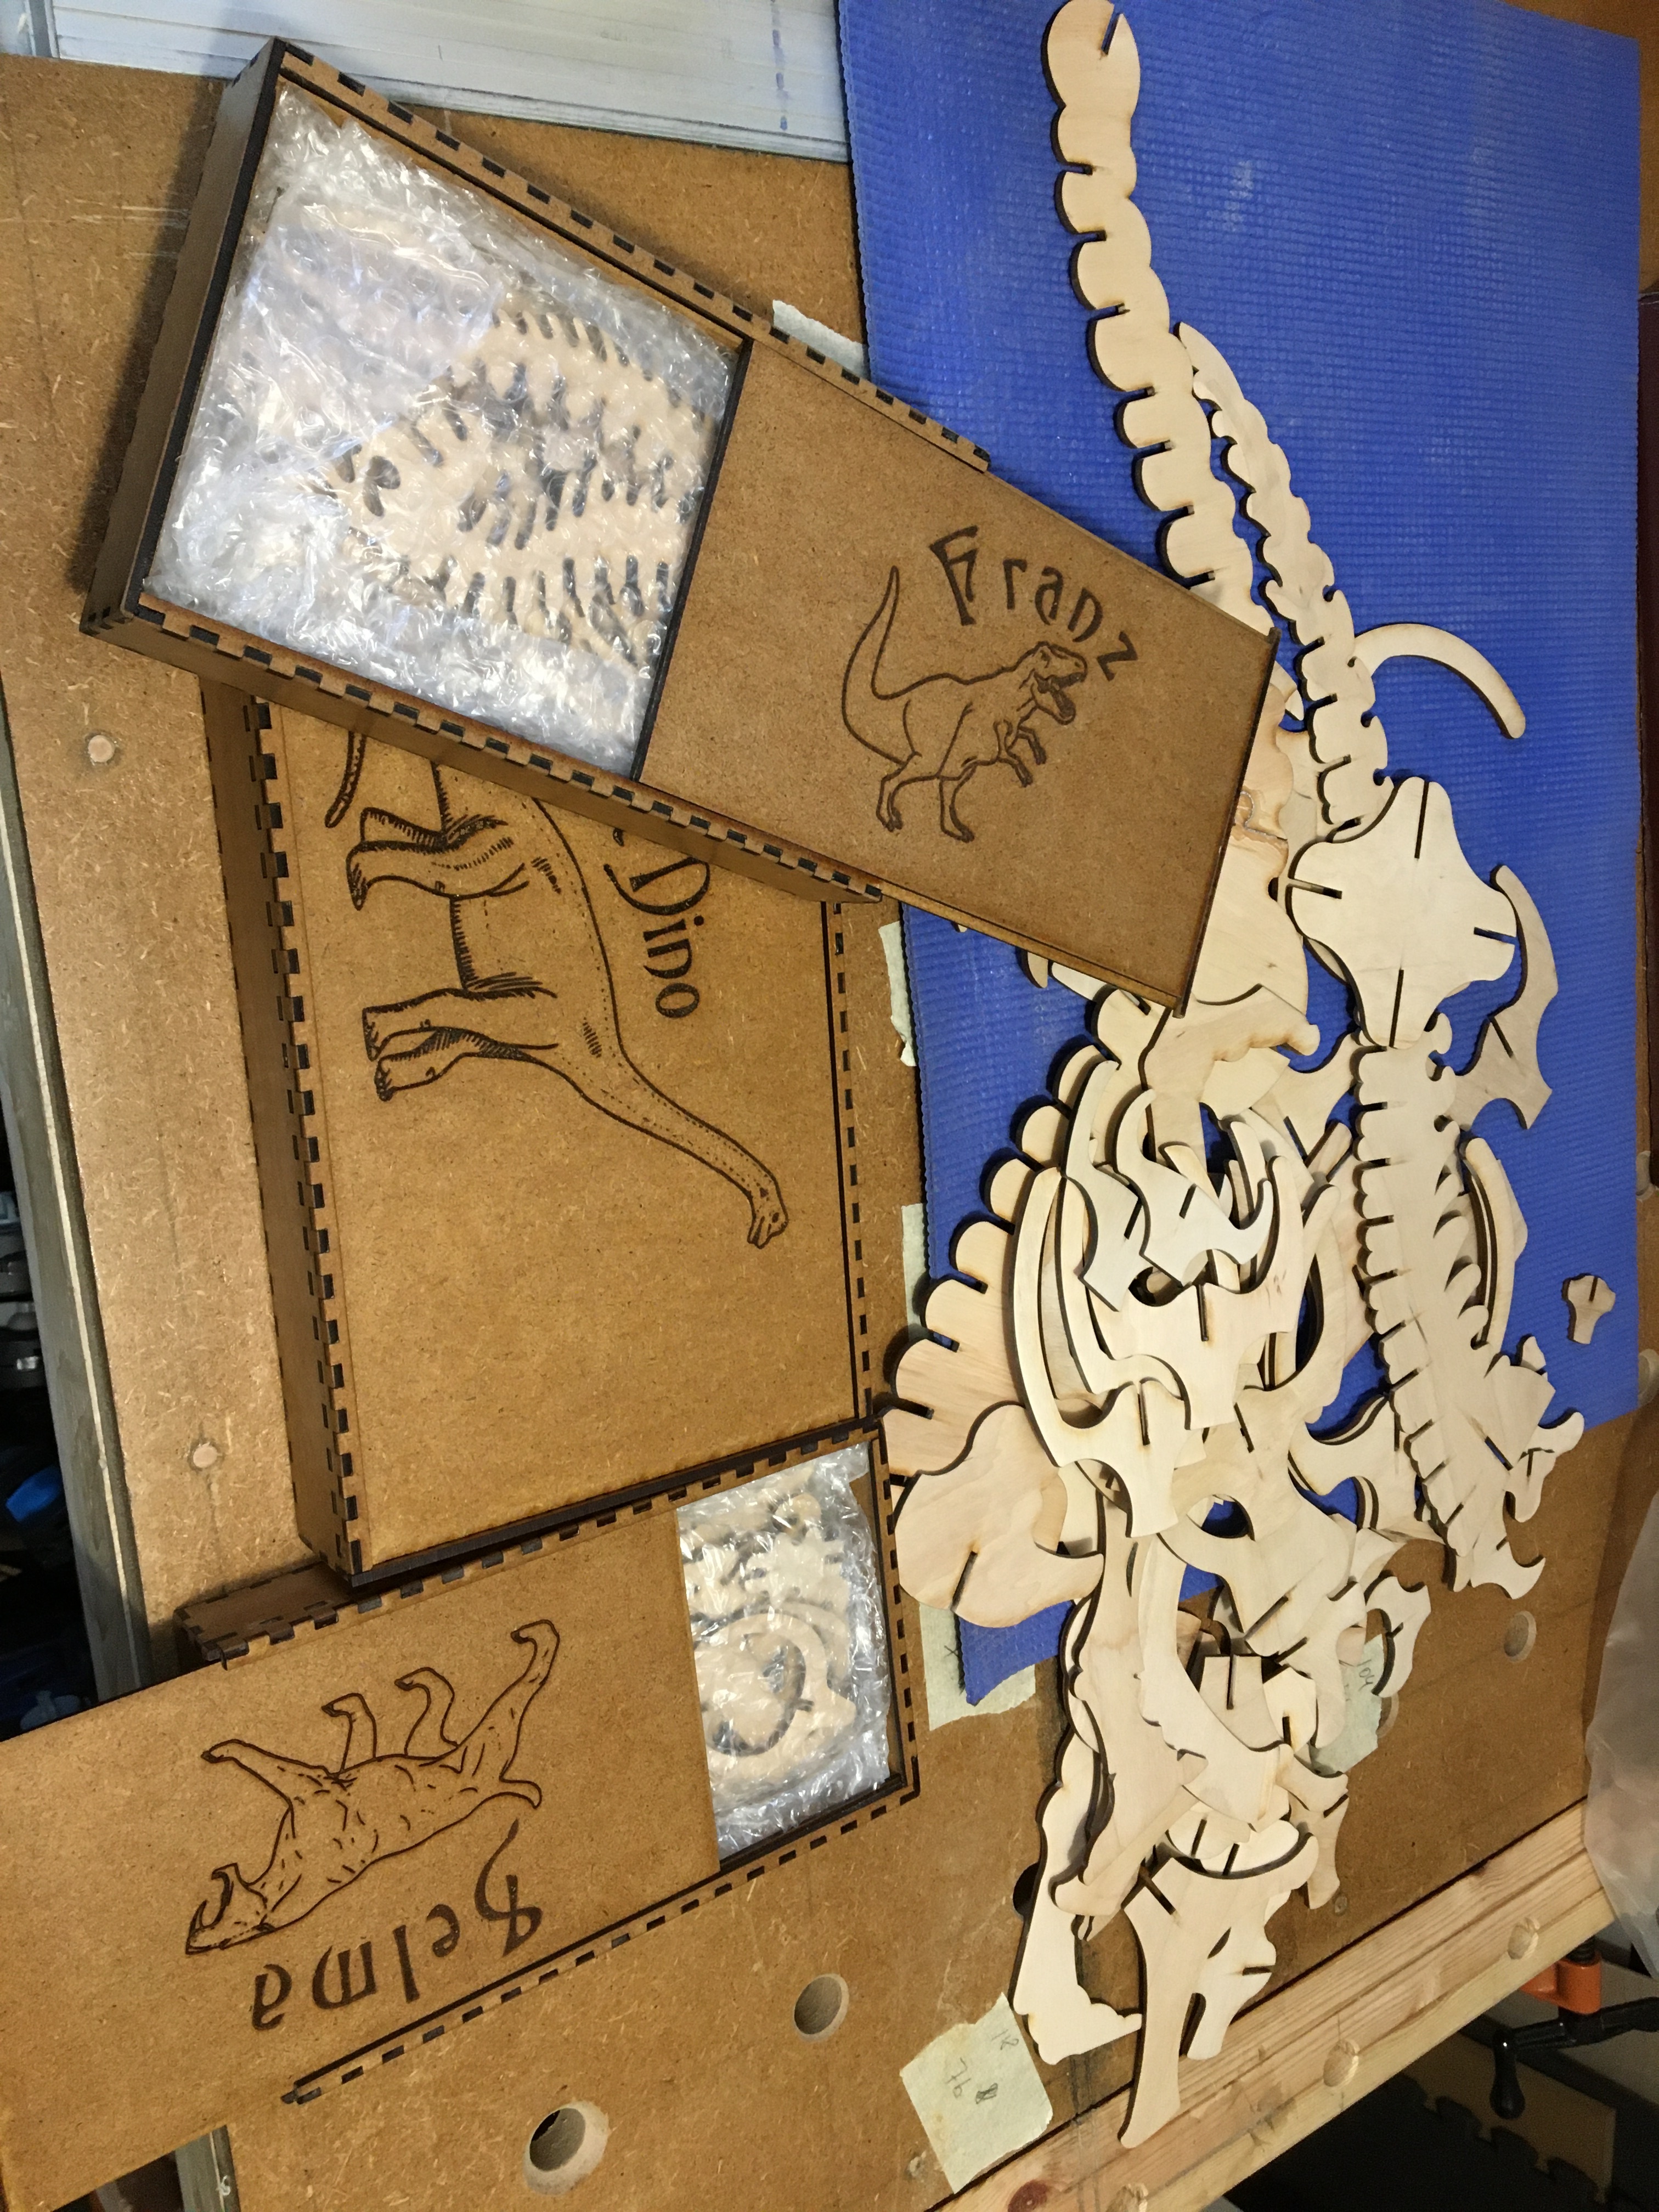
… boxes, - I just made three pieces of MDF to wrap some dinosaur puzzles for my nieces’ children. The nice thing is that I can decide the size and appearance myself and of course it’s fun to make them.
Thank you, the kids love the dinosaur, putting them together in good company and they love all the boxes I make for them. It is very comfortable to work with MDF and HDF because the structure is much more uniform like plywood. For surface treatment I use beeswax, it smells nice and gives the material a warm and soft and a bit old-fashioned look.
They do look like an excellent way to gift wrap a present.(actually 2 gifts in one)
Shame i can’t do them myself yet, looking into buying a co2 laser so hopefully give them a try in a month or so…