I had imported a PNG customer file to mark a cup. File processed in LB with a large square around the actual image, I was able to estimate/overcome that without too much problem. The logo had 2 colors, one solid black one orange. The preview looked good, and the laser was set at the same min/max power -
However - when it marked the cup it marked the black as I would expect, but clearly throttled the laser power back on the orange portion rendering a “shaded” product but not one that I could pass on to the customer. Basically…the black portion of the logo etched the powdercoating off cleanly as I would expect, but the orange portion did not.
Interesting - and I’m sure LB did exactly what I told it to do…only the outcome wasn’t the expected one.
How can I fix the .PNG in LB to be all one color and avoid this in the future?
ps -I’m tried converting it to a vector in inkscape - but the image isn’t high of enough resolution and the tiny lettering details get “messy”.
Just a consistent mark across the entire cup/logo instead of the shading attempt which doesnt look very good. I’m sure I could/can convert to a vector and then manipulate the color using another program…just hoping LB would do that for me and I can save some time
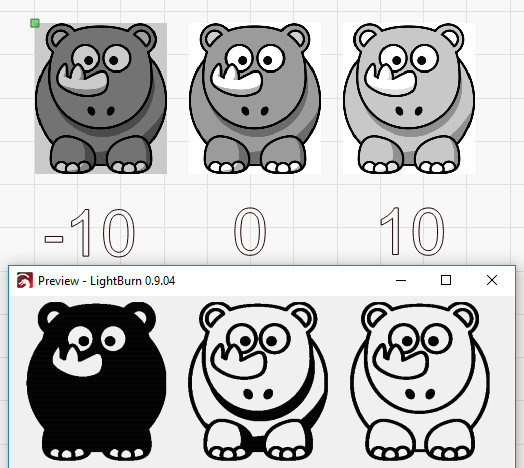
Enable Threshold mode for the cut, instead of dither. Check the preview and if the logo doesn’t show up, lower the image brightness on the “Shape Properties” pane about 10% and try again, until it looks right.
Gotcha. New problem…maybe laser related but I dont think so…
Output/preview looks good…but typical settings to use with cermark arnt working. I dropped the speed to 200 and upped the power to over double what I use (normally 25% on a 150w) and it’s barely marking at all. Like its nerfing the laser power.
Clean leans, alignment checks.
Maybe I should just convert to vector elsewhere? I’d really like to learn how to make this work though
Current issues…wont mark anything. Old files new files…nothing.
Checked alignment, good
Checked output at nozzle, dead on in the circle (using pulse)
But running a file…any file…laser wont power enough to burn through a single layer of masking tape.
Min power set to same level as max power (as I’ve always done.)
Make sure the ‘Enable’ flag is on for the tube, perhaps, and make sure you have the laser main switch on. On my big machine if I have that off it just doesn’t fire, but still runs through the motions.
When cleaning/replacing the pens I put it on the top side of the tobe… not the bottom as it should have been. No wonder the spot size on the pulse was so big.
Seems to be marking well now…although I only cleaned the lens off after I was having trouble the first time. I’ll try and mark the png file we spoke of earlier and see what the result is. I wanted to make something that I new worked first which is why I resorted to an old file.