I am using the rotary to engrave glass. I sprayed the glass with a cold galvanizing compound which works great for getting the engraving on the glass.
The issue I am having is after I have setup the rotary and everything, it is compressing the image.
The first time I got the rotary to work properly It did the image right the first time and then it started compressing the image. This was without me changing any of the settings, it just started doing it. I have since reset the machine to normal settings and used it for classic burning and now I am trying to burn using the roller again and it is still compressing the image.
Currently my solution is to stretch the image to make it appear on the glass better, but it is still off and I know I shouldn’t have to stretch it.
HELP!
I’ll assume you’re using the Ortur rotary but correct me if this is not the case.
The only time the design will be compressed is if the object being engraved is rotating less than the design dimension. For example, you have 30 mm of designed height but the linear rotation is only 25 mm.
The under-rotation could be something mechanical or something electrical. If mechanical, is your object literally slipping on the rollers? It’s possible that due to slipping the object is not rotating perfectly with the rollers. If something electrical it could be that you’ve specified the incorrect circumference of the object for the rotary or the steps/mm setting is incorrect. You can test this by creating a rectangle design that is exactly the same height as the circumference of the object. Then burn the design. The top and bottom of the rectangle should meet exactly on the same line.
Check to see if what you’re seeing is caused by slippage. Normally slippage would not be uniform so you’d see varying distortion across the engraving. But that’s not always the case. If not mechanical, then check your rotary settings.
Thank you, so I ran the test with the rectangle and I got the mm per rotation to where I needed them to be and I tried it again, and it is still compressing the image.
If I use the tool to set laser position and click on the edges of the design it appears to be where it should, proper proportions and size, same for when I frame it. Once I hit start and it begins burning is where the problem is.
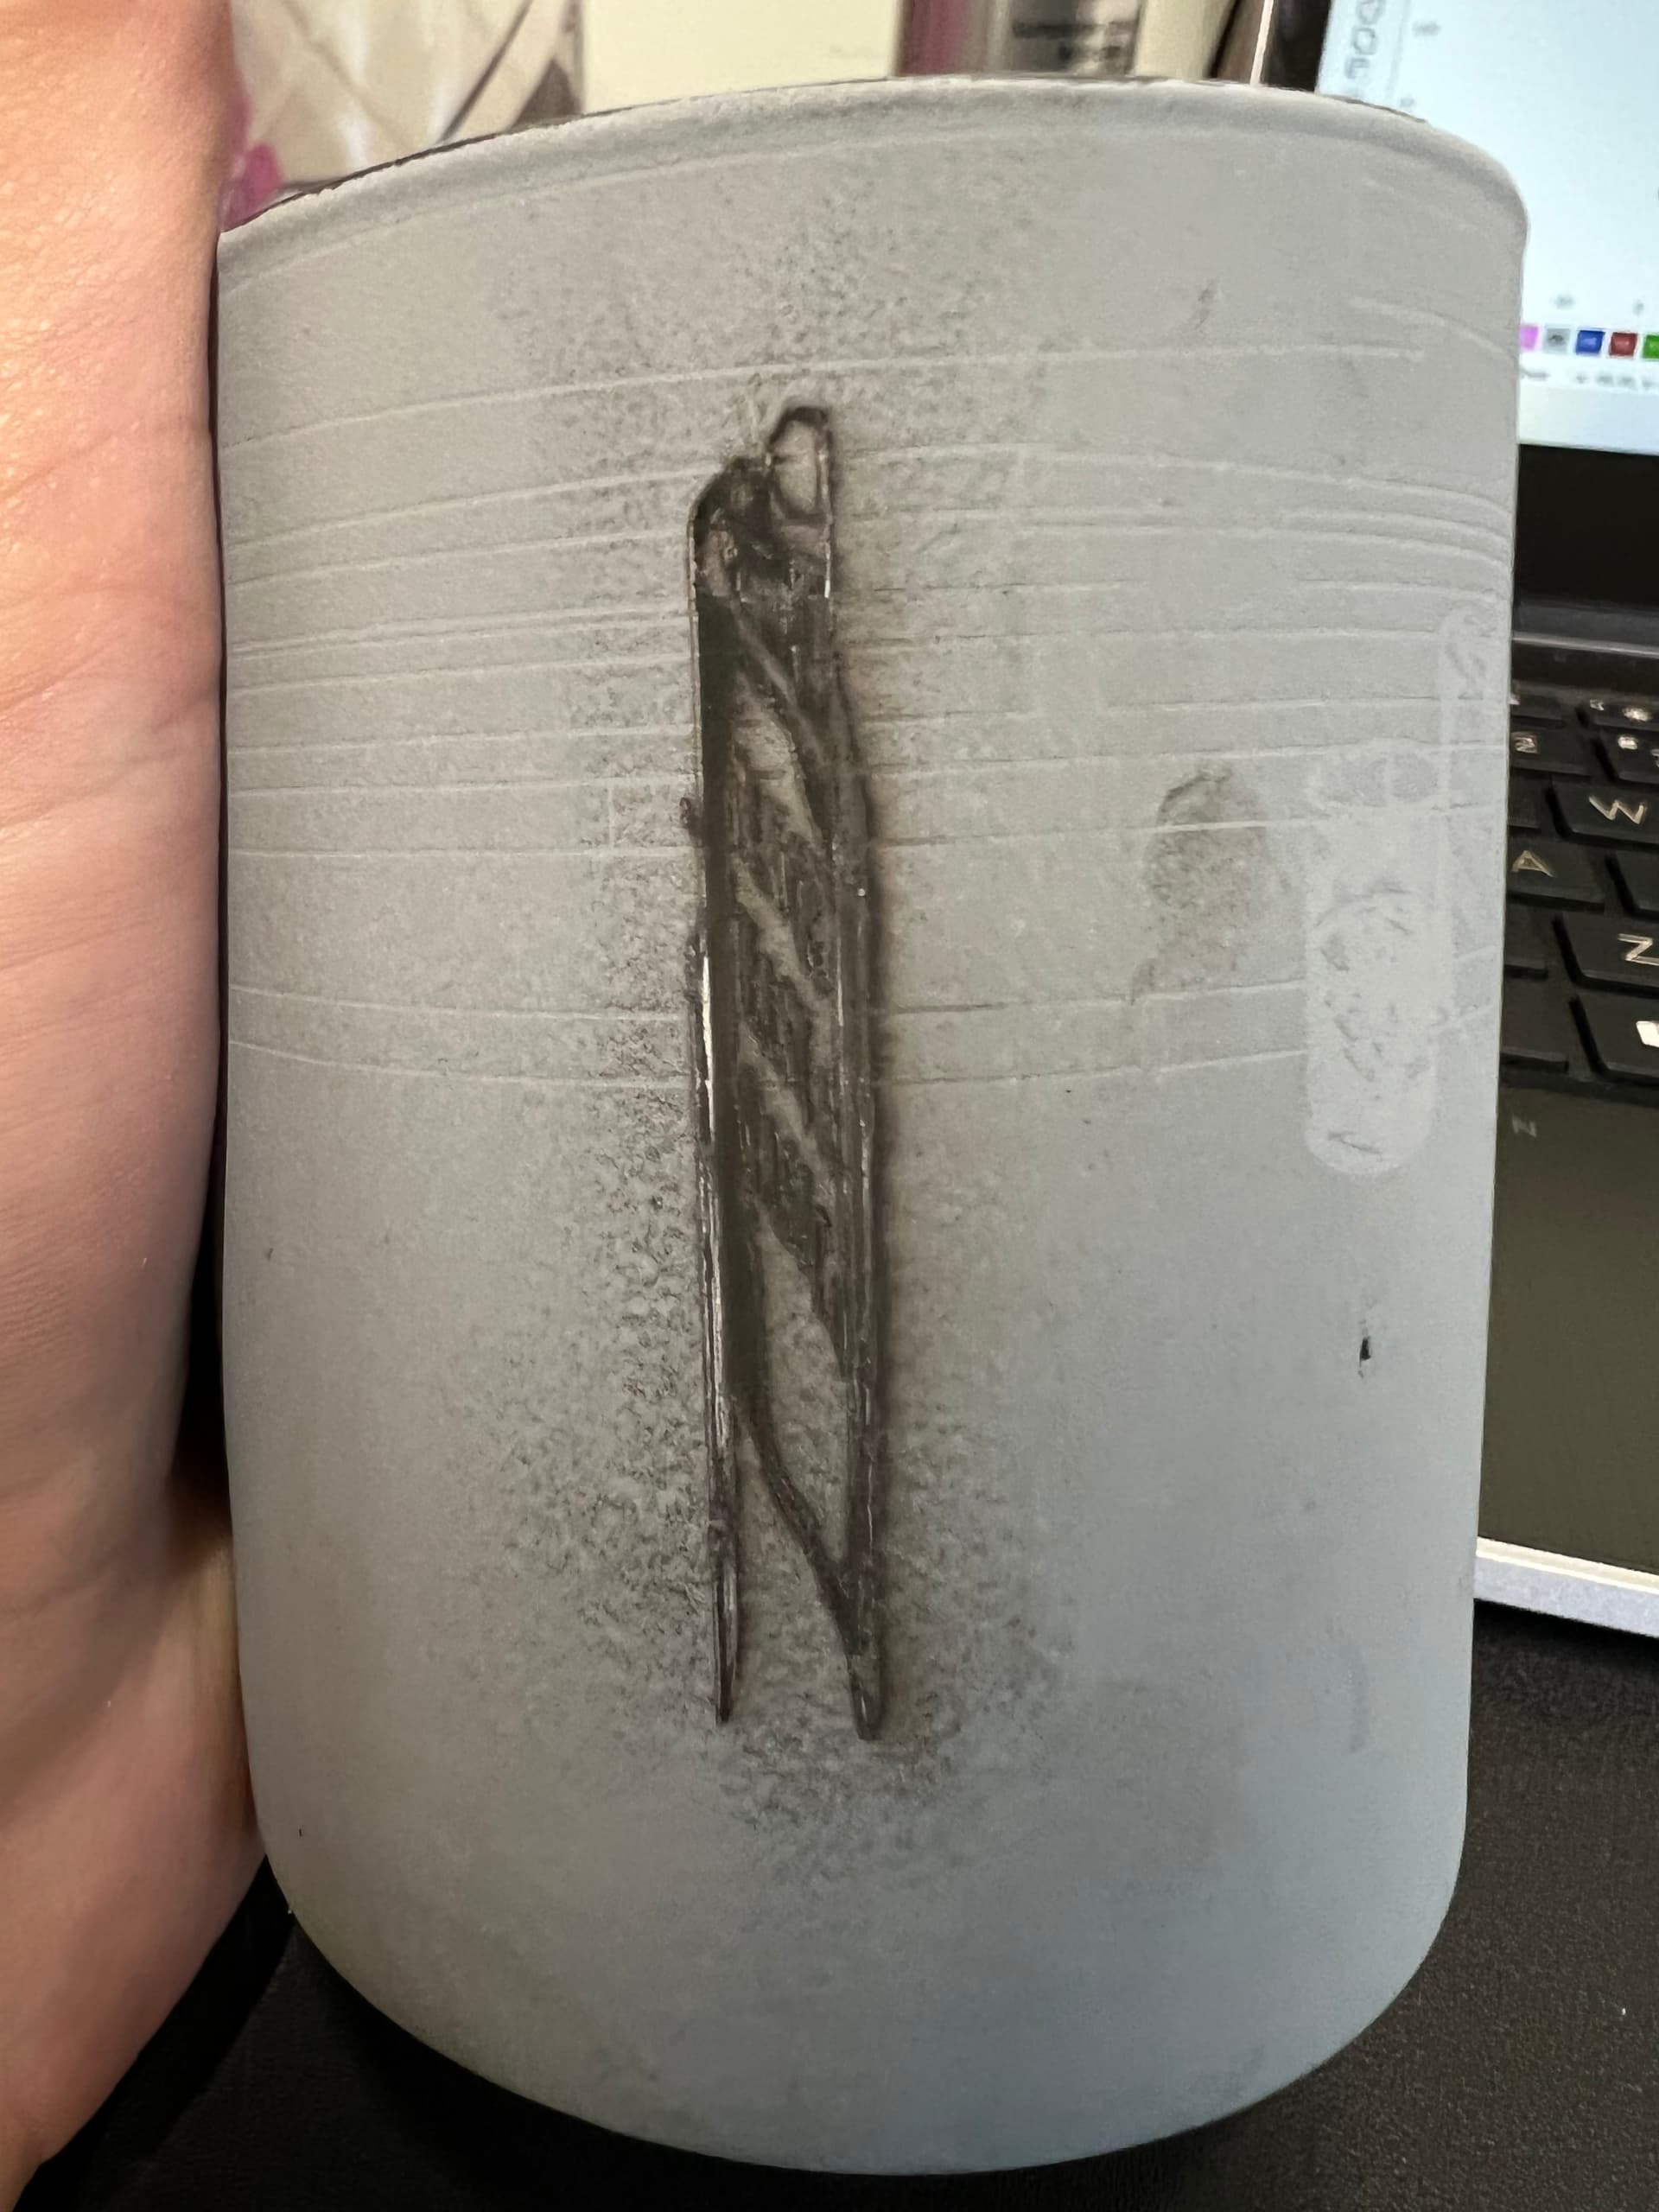
Can you take a photo of the resulting engraving and post here?
Please also upload .lbrn file and screenshot of your rotary settings.
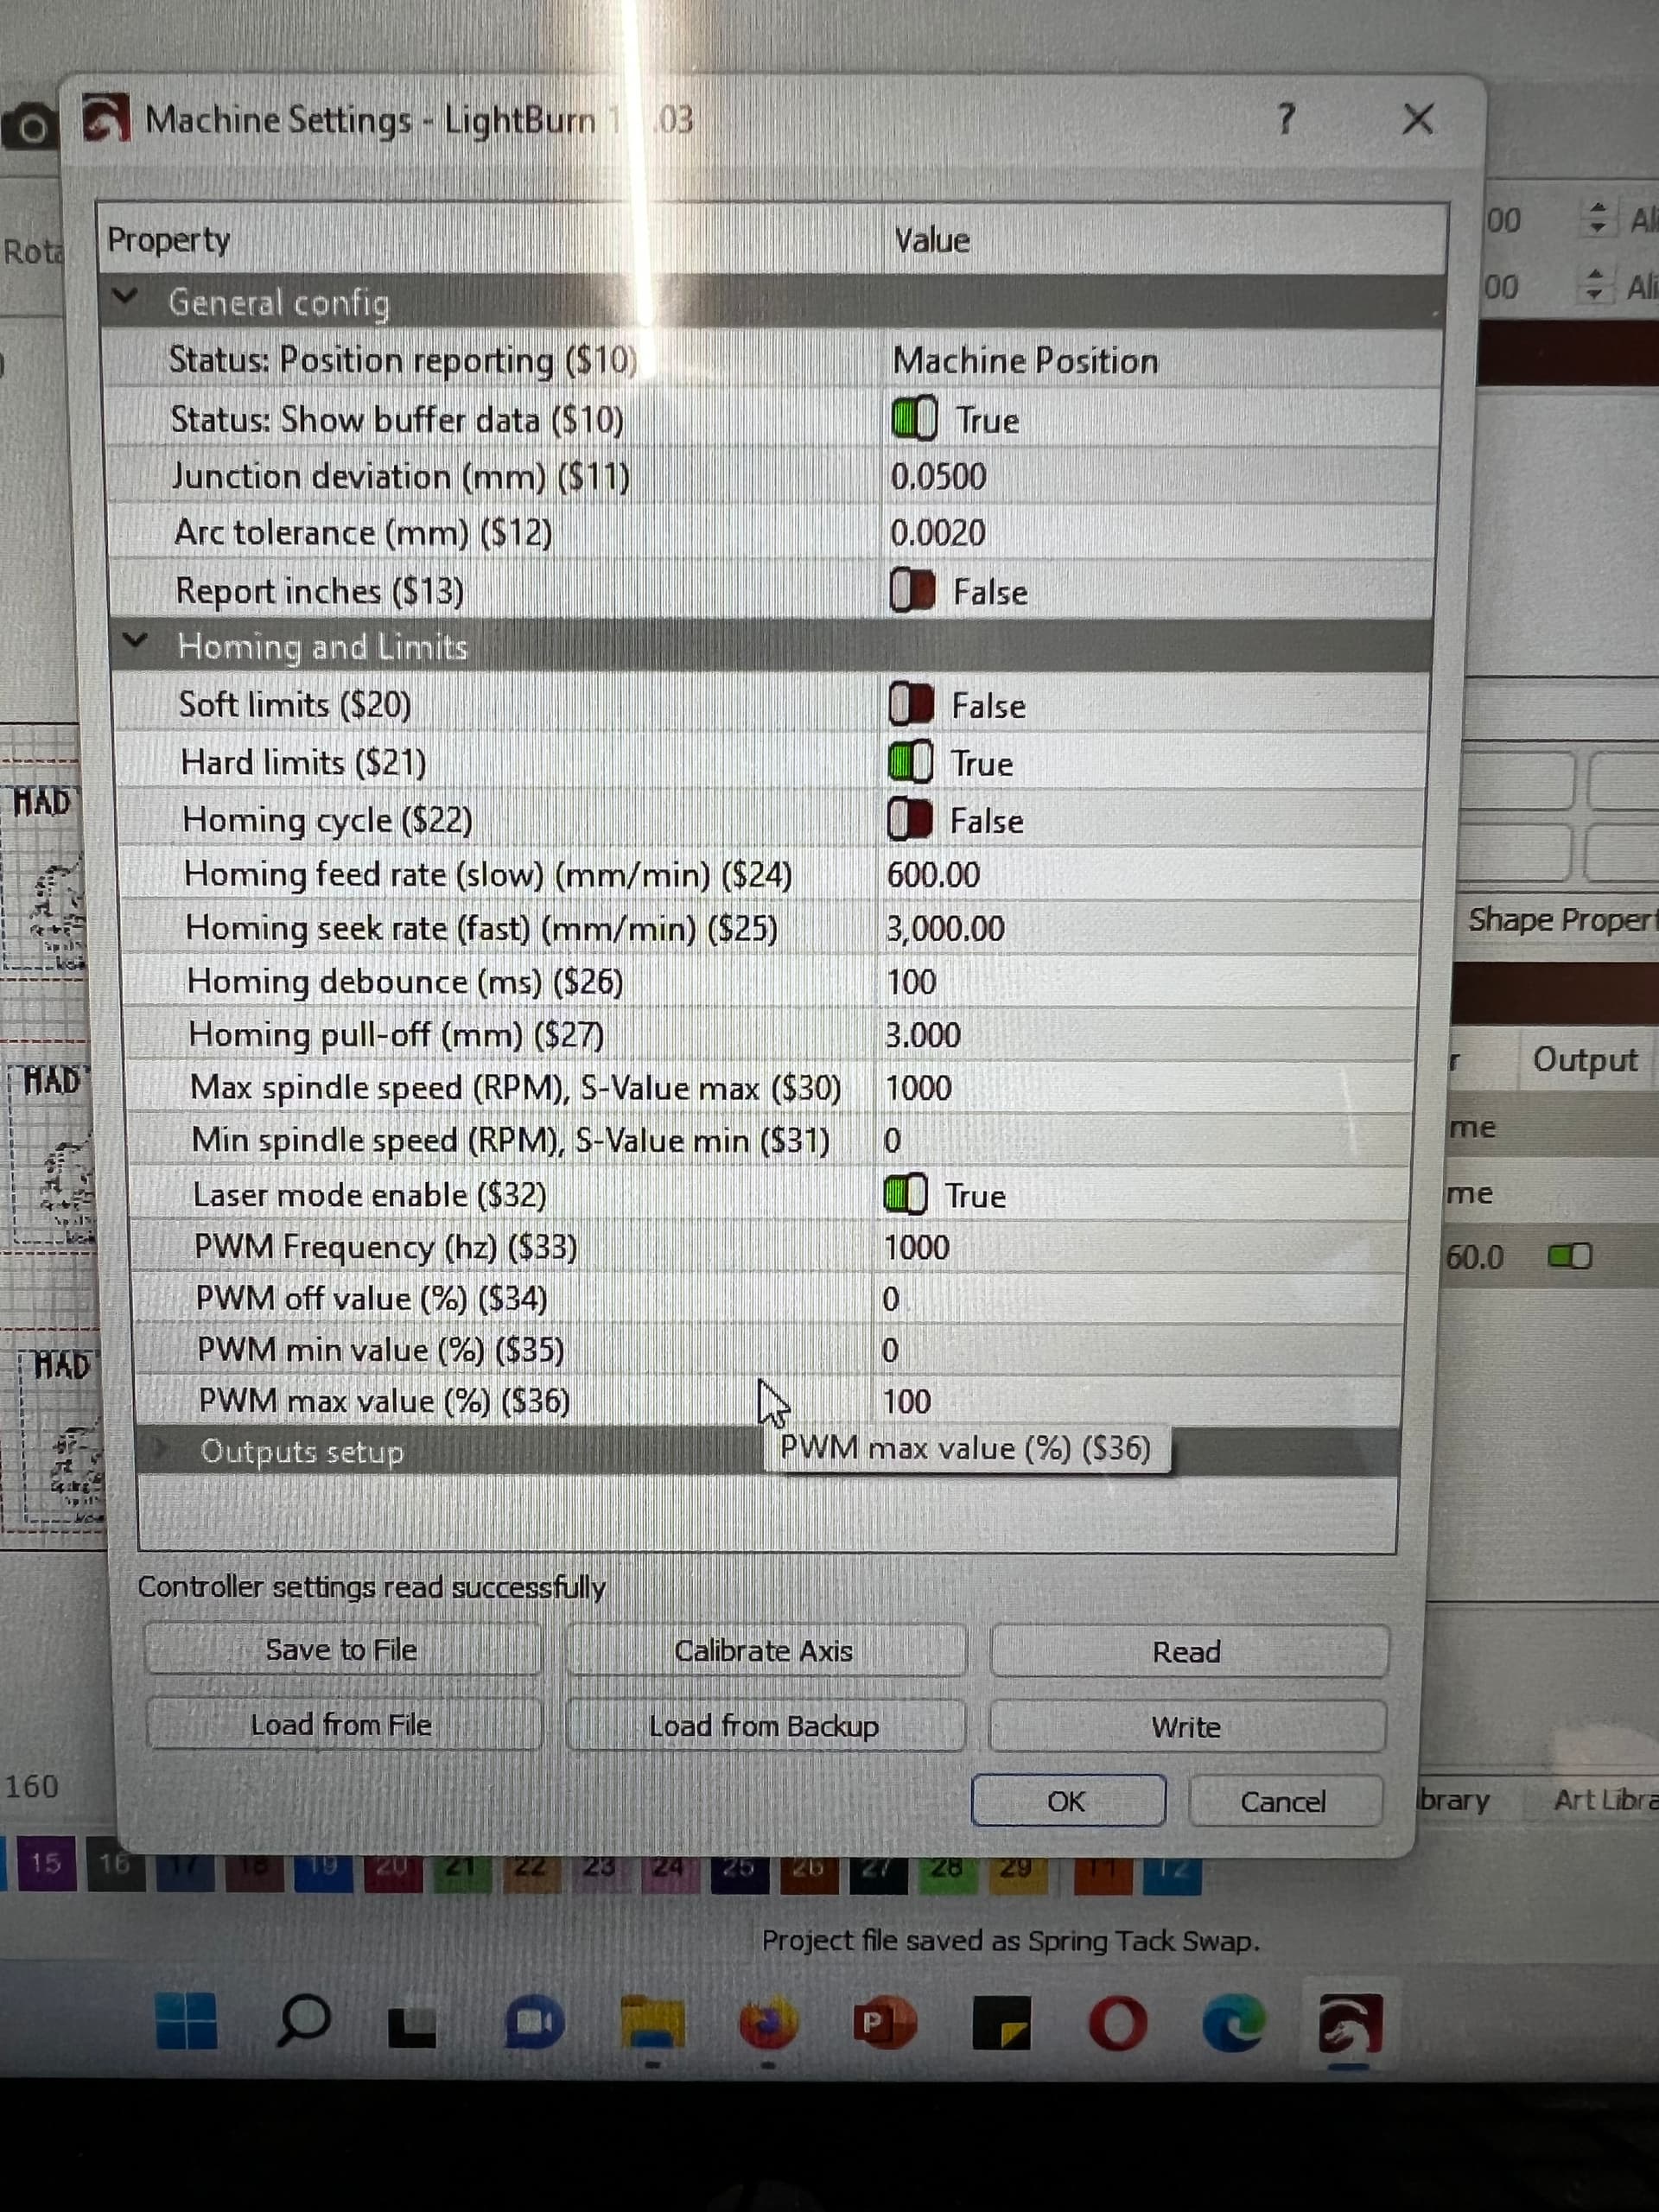
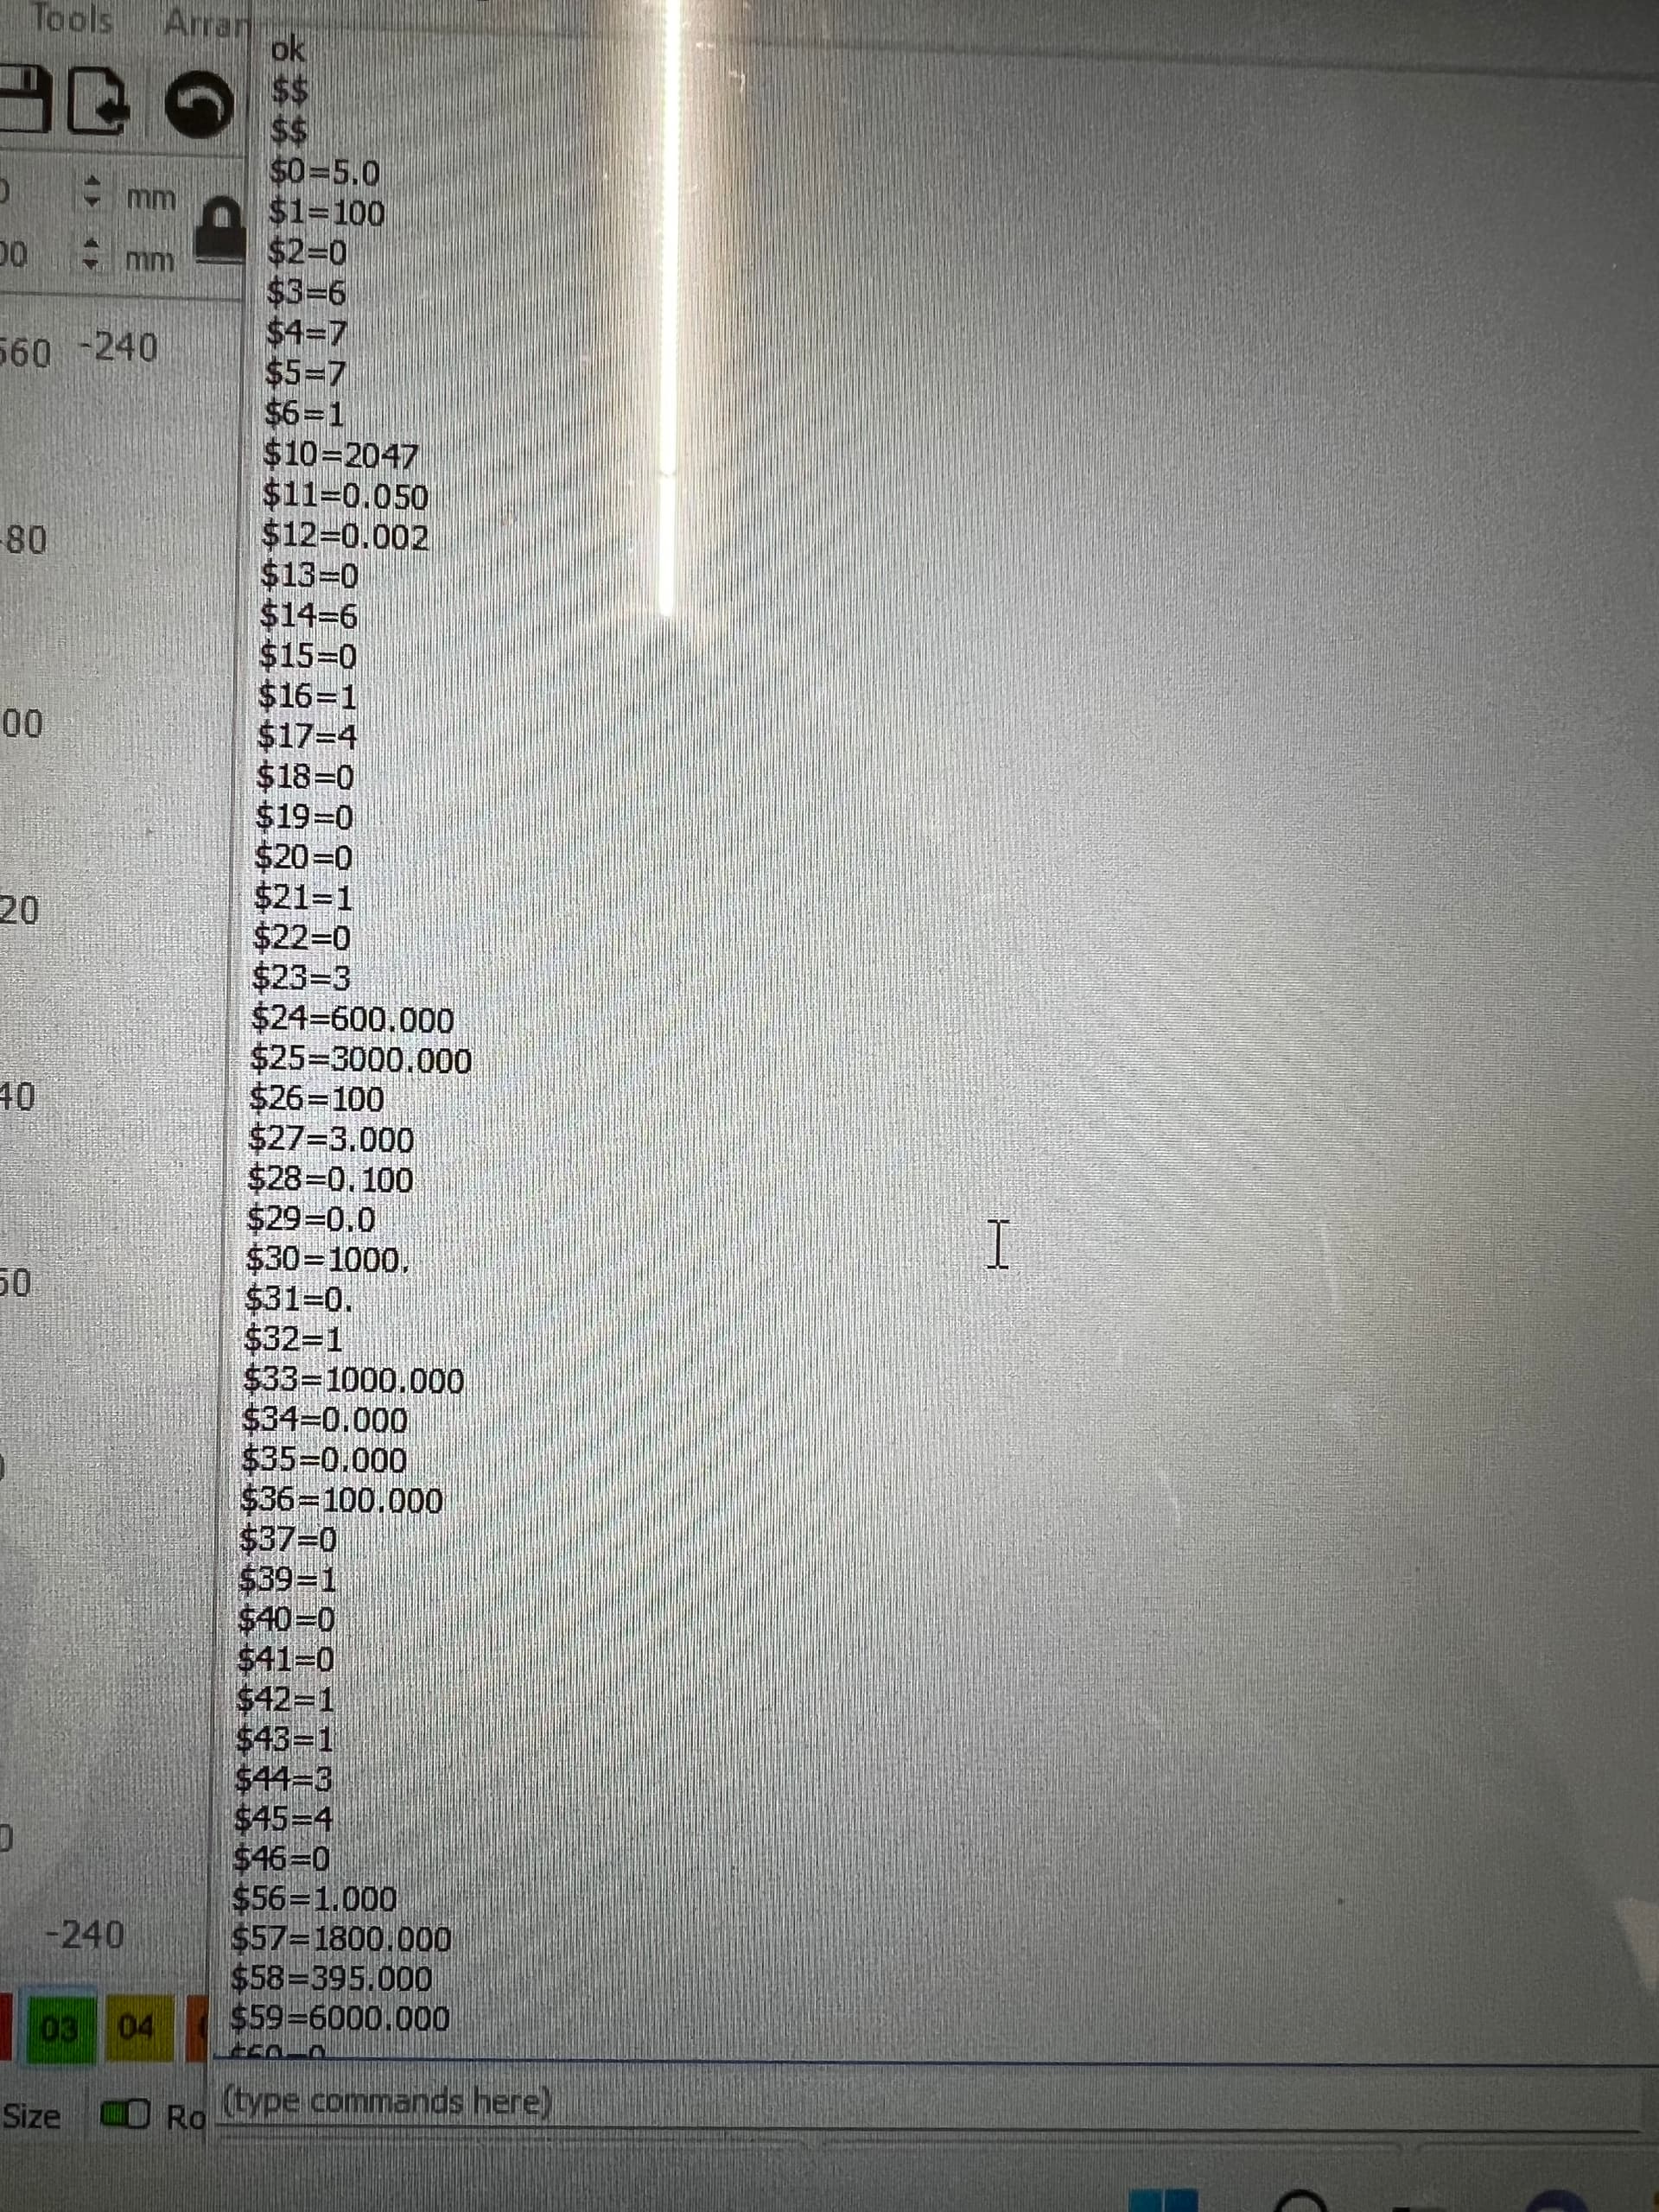
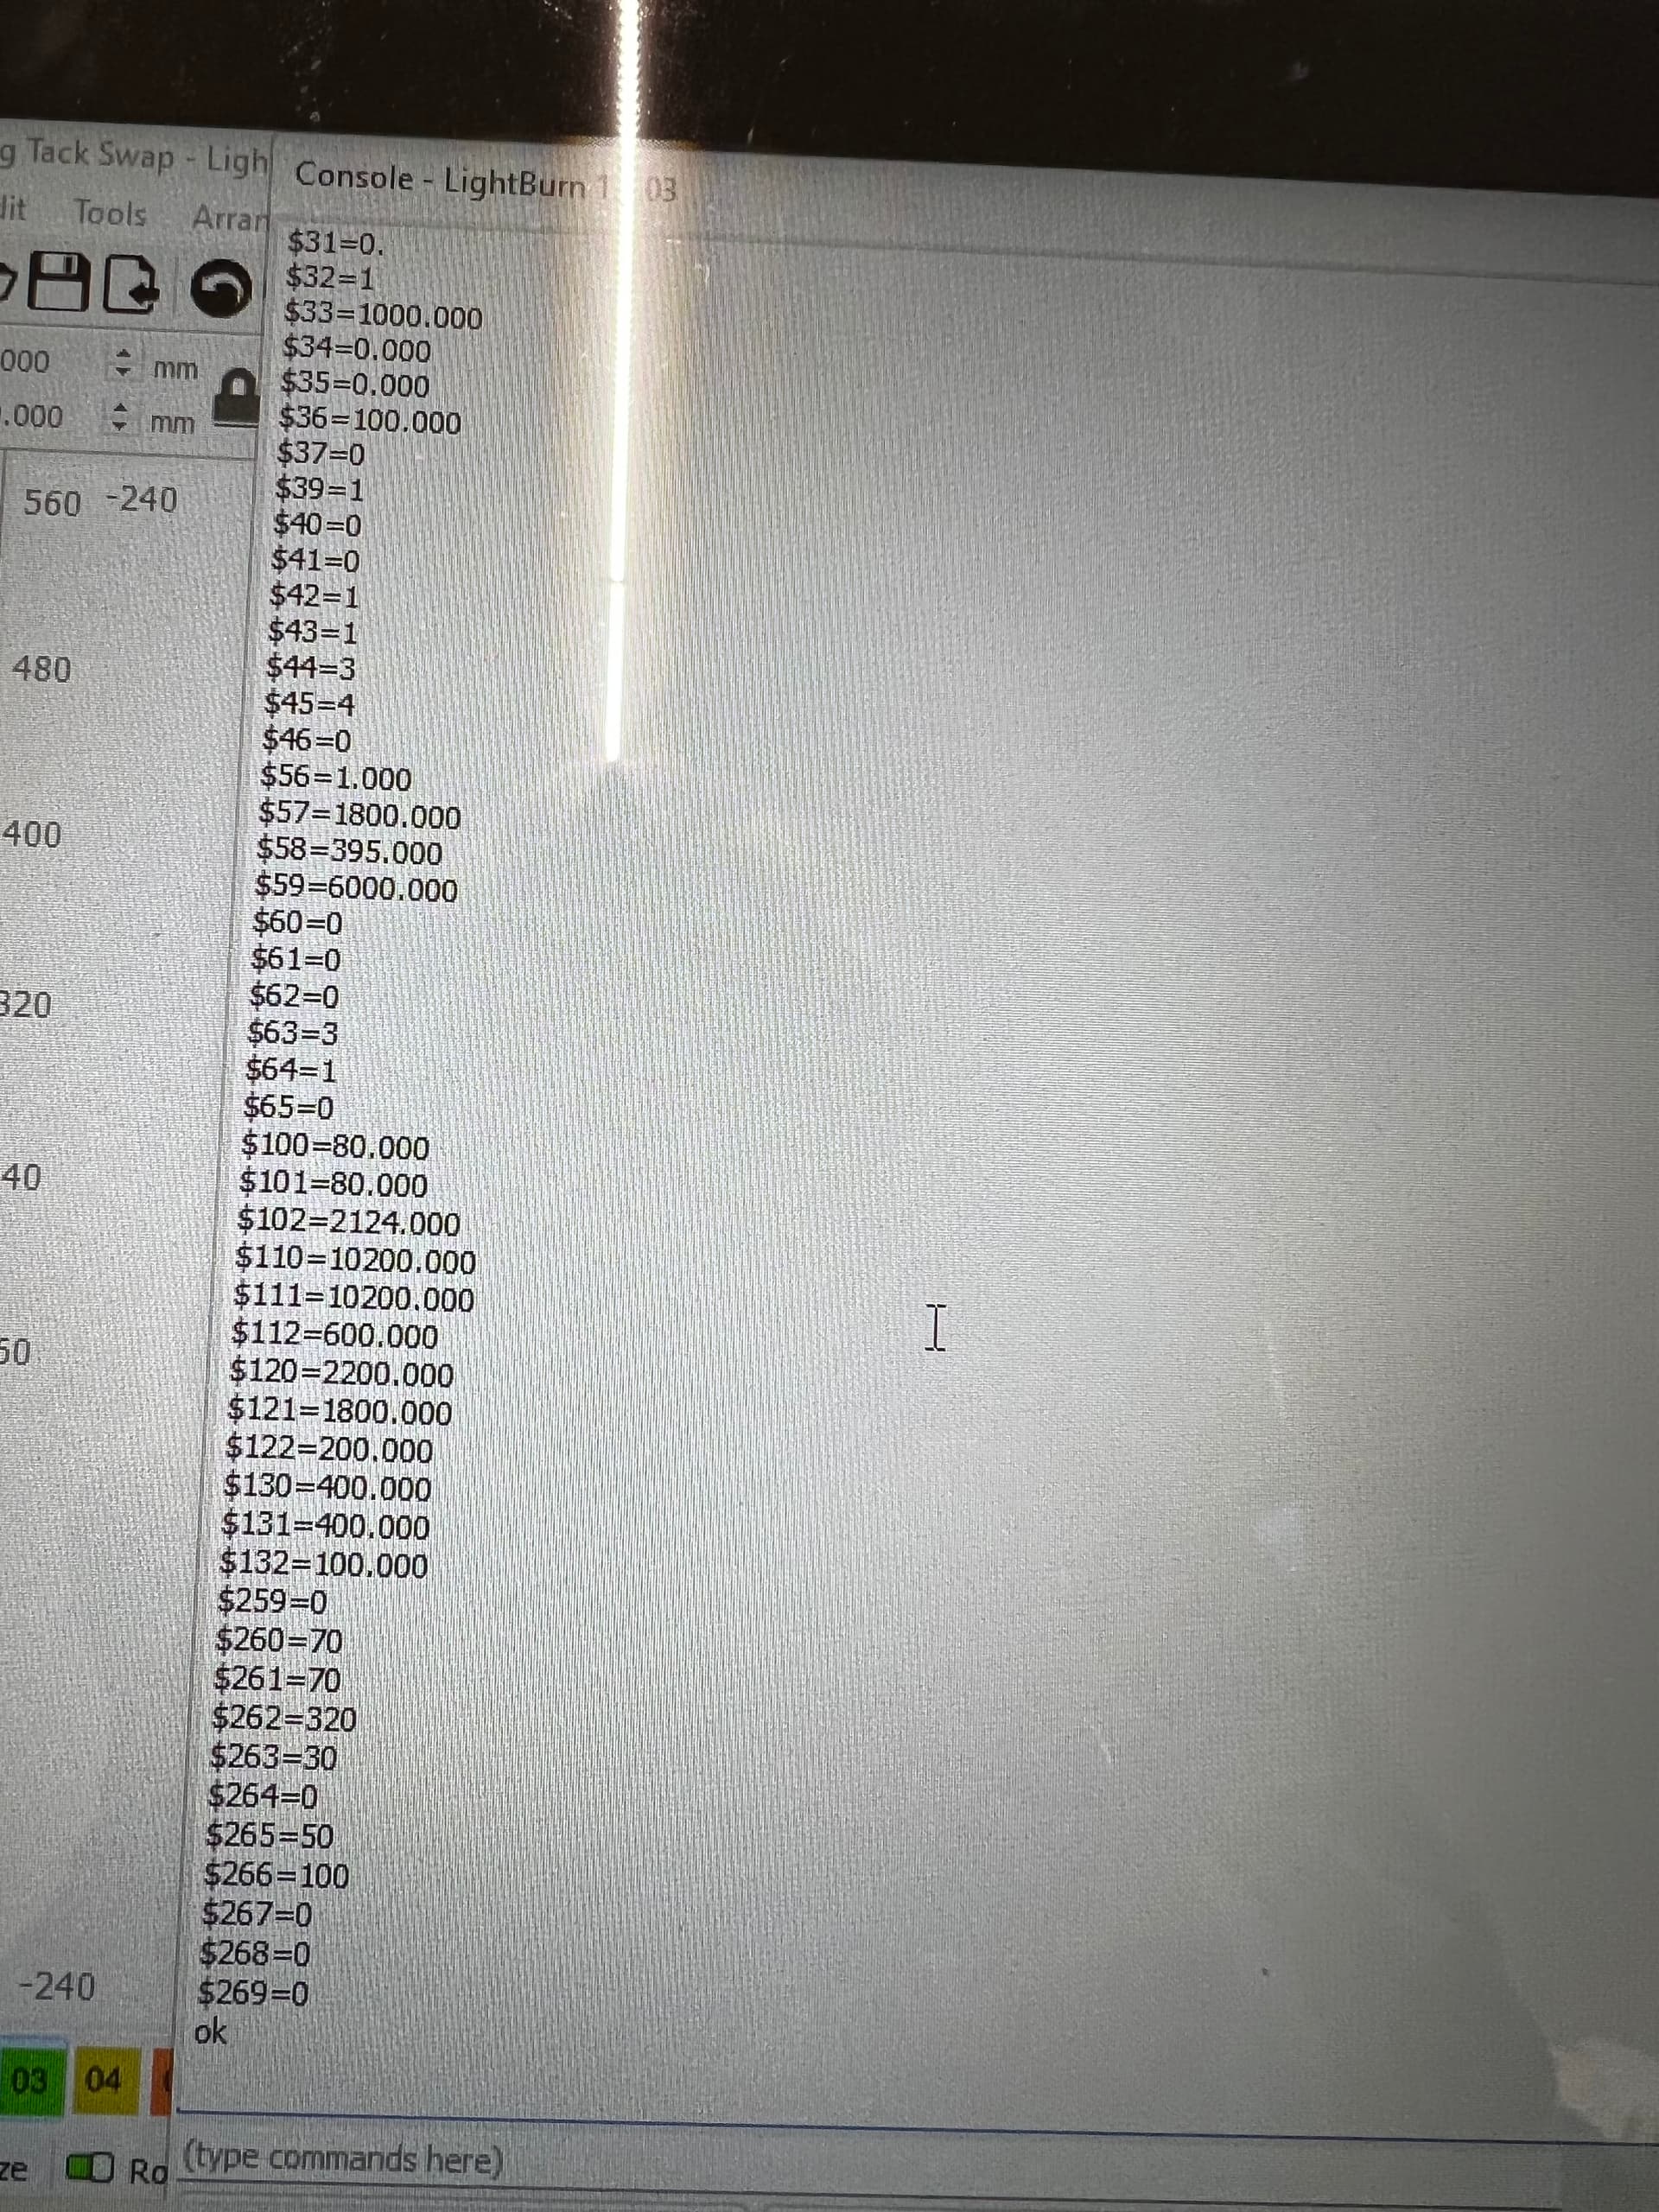
And this is the settings for the whole system at the time it was compressing the image.
I got these to display in the console by typing $$ in the command box
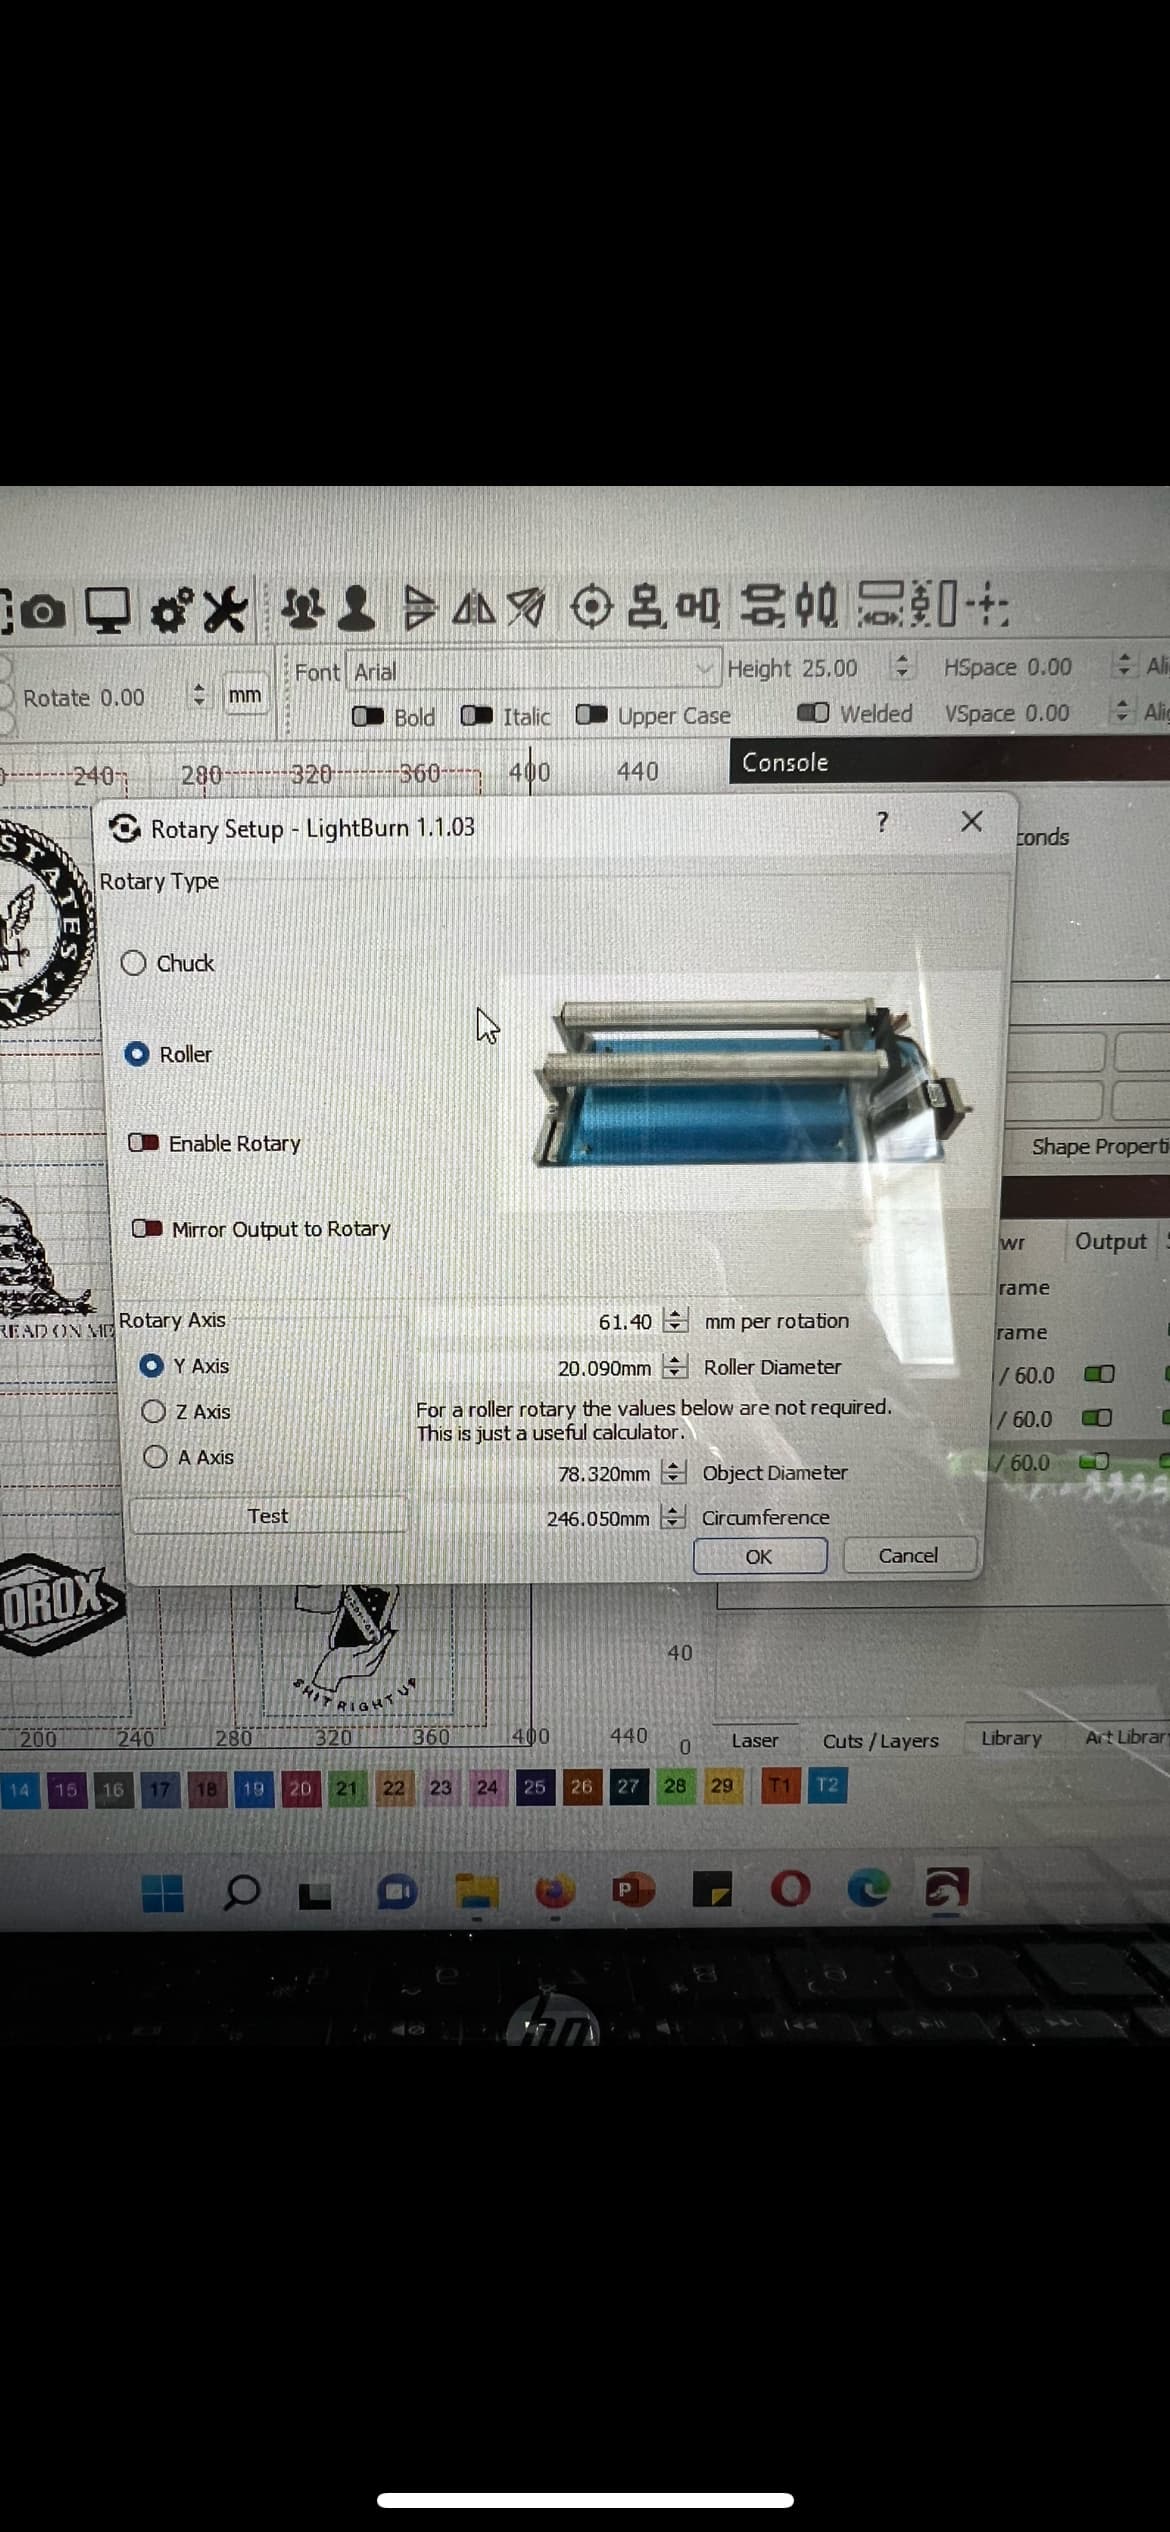
Can you take a screenshot of the actual Rotary Setup screen?
Also, the photo you attached, is that of your test that you used to check overall circumference? If not, can you send a photo of test results as well as the .lbrn file that you used to do the test?
Also the .lbrn file of the last photo you sent. It’s impossible to tell what it’s actually supposed to look like.
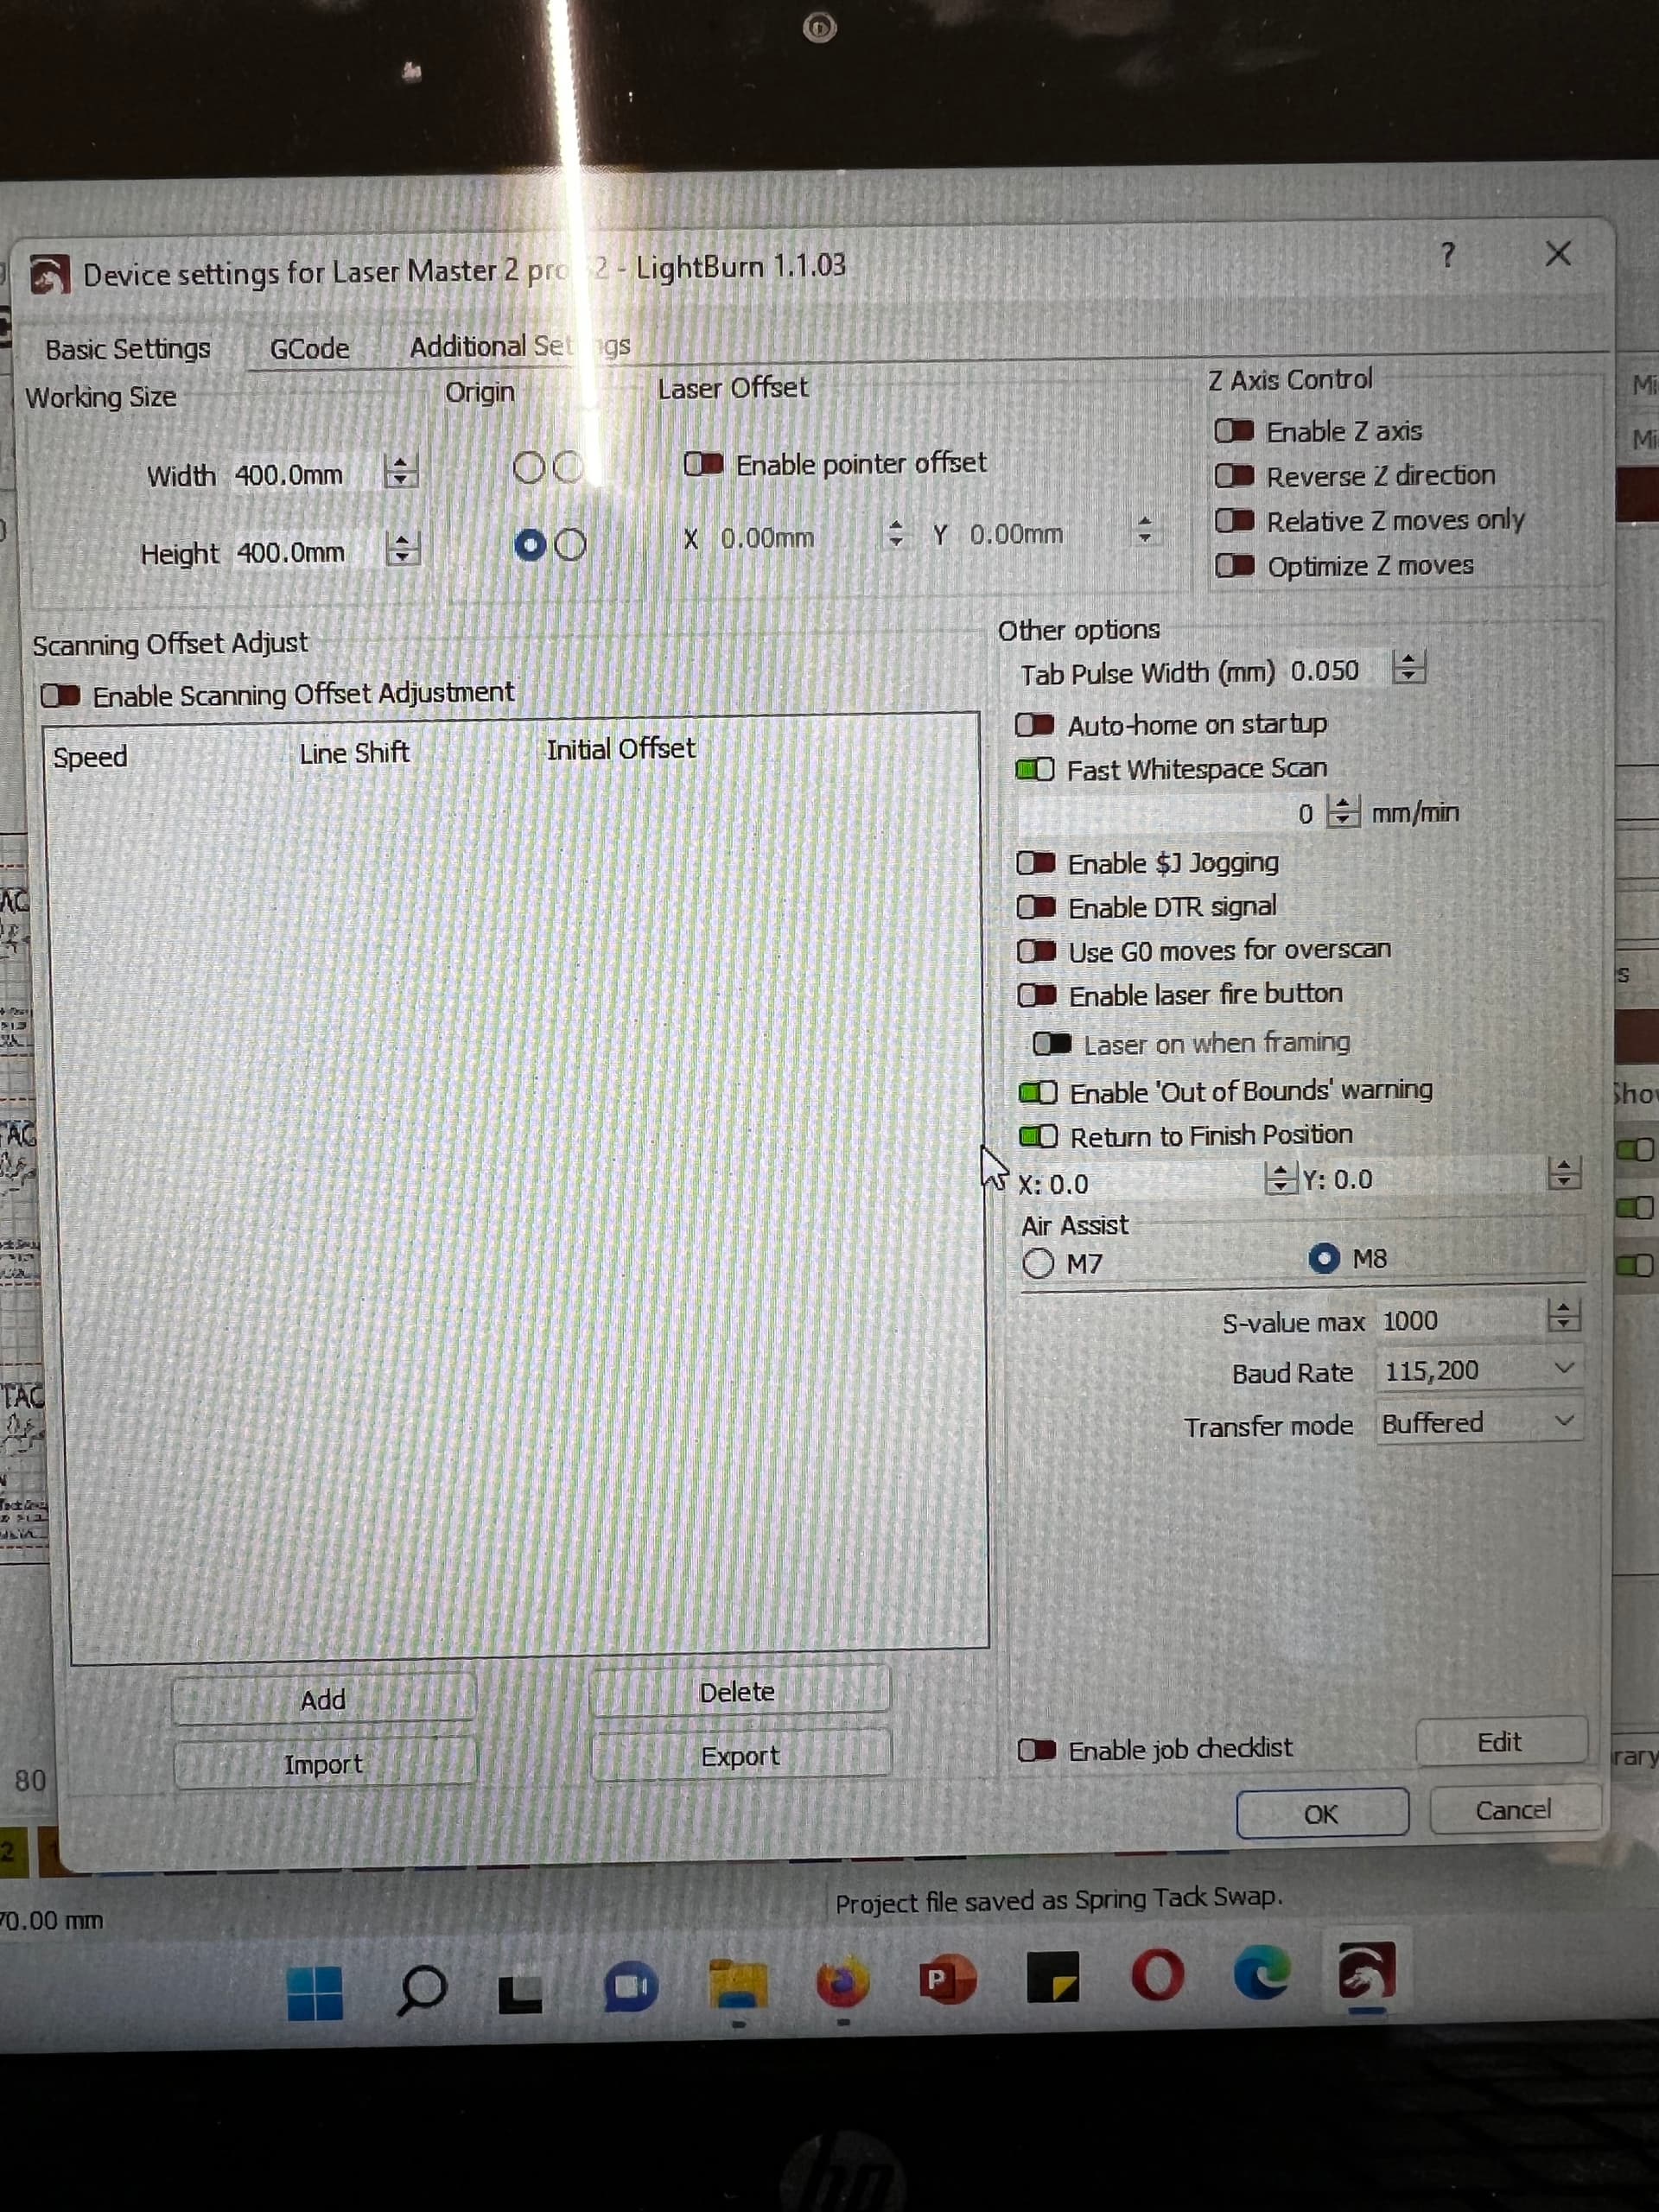
Sorry I took so long to get back I had an event for my business and bass to burn a lot of stuff for that. This was my rotary setup.
This is the file I used when I attempted to burn the glass with the rotary
whiskey glass our logo.lbrn2 (232.0 KB)
I suspect your mm per revolution value needs to be adjusted.
Can you confirm that you’ve measured the roller diameter size and that’s correct?
You may want to step through the Louisiana Hobby Guy’s guide:
Setup-Ortur-YRR.pdf (lahobbyguy.com)
If you have an issue, at what point are things going bad?
Yes I did measure the diameter of the roller and when I did the test with the long rectangle on the glass I was working with I adjusted it until the ends met perfectly.
I had found and followed the Louisiana Hobby Guy’s guide before I did anything else with the roller. But it did not work completely with just his instructions, I always have to play with it.
My issue is only after I press start. I can frame and use the button to manually point the laser to different locations on the image and the proportions for those functions are accurate to what I am trying to burn. But when I hit start it doesn’t cover the same area.
In what way is this different than how you did the long rectangle test? What happens if you were to put horizontal lines spaced something like every 5 mm along the rectangle test. Do those come out correctly?
If something is not behaving in a repeatable fashion I suspect there’s still something wrong in the setup. Either the parameters are incorrect and/or your rollers are slipping and you’re not getting a consistent and reliable rotation of the object on your rollers.
Maybe try taking a high speed video showing the roller and the object and checking that they’re moving in lock-step. There should be no unaccounted motion.
I haven’t tried vertical rectangles yet, I will try that next time I burn.
This topic was automatically closed 30 days after the last reply. New replies are no longer allowed.