Rotary workflow

Hey gang!

I’ve got one of the roller style rotaries and have been doing a number of cups, but curious if anyone wanted to share their workflow to either do TWO sided or to put the engraving on the side that is exactly opposite of “up”.

As an example, I often like to engrave on the side opposite of the brand logo (Yeti, RTIC, etc.). The only way I’ve figured out to get it centered is to hold the cup up, make sure the brand is on the bottom and place it down on the rotary. It gets “close”. But there’s always a little shift.

Was thinking it would be great if I could figure out a way to place it with the brand logo up (to ease alignment) and have the rotary spin my tumbler 180 degrees so it starts directly opposite.

I know someone smart out there has figured it out. :slight_smile:

its just math, rotate half the circumference

Yep - I’m aware of how math works…and geometry for that matter. But I’m not clear on how to rotate it in the software. So if my circumference is 6 inches, is there a setting that rotates it 3 before starting the engrave?

That’s why I was asking about the workflow (within the software)…and not just math.

Are you setting your work origin to the center in LB?

Yes, typically do the center/center. Sometimes do center/left (which places the origin at the top of the cup on the rotary), which allows me to keep the head out of the way when changing cups.

I must be missing the point, 2 graphics at 3" apart on center will have them evenly spaced on a cylinder of 6" circumference

1 Like

BCanning - perhaps you could show me your workflow for doing this? I guess I’m just not as educated in how to perform these tasks as you are. Lets say I want to put one graphic on, but on the opposite side.

Hey Mod/Oz -
If you want to clean up the prior parts of this thread and just use this post in the tips and tricks, go for it.

I spent time tonight thinking through the problem and how to create the workflow to do what I was looking for. That is, to put a cup on a rotary and have it engrave the image on the EXACT opposite side of what I’ve got rotated up.

I came up with this workflow:
1 - measure the cup and plug dimensions into rotary settings. If you’ve got the diameter, you can pull the circumference.
2 - Create a tall, skinny rectangle in your workspace. The height should be equal to the size of your circumference.
3 - Set the origin to be bottom left.
4 - hit frame (or “start” if you’ve got a scrap cup). You should see that the cup rotates ALL THE WAY AROUND back to the starting point as it traces out the frame. If there is overlap, decrease the height of your rectangle until it goes away. If it doesn’t quite make it to the starting point, increase it. (as a side, if these don’t match up it means your rotary setup is slightly off as well).

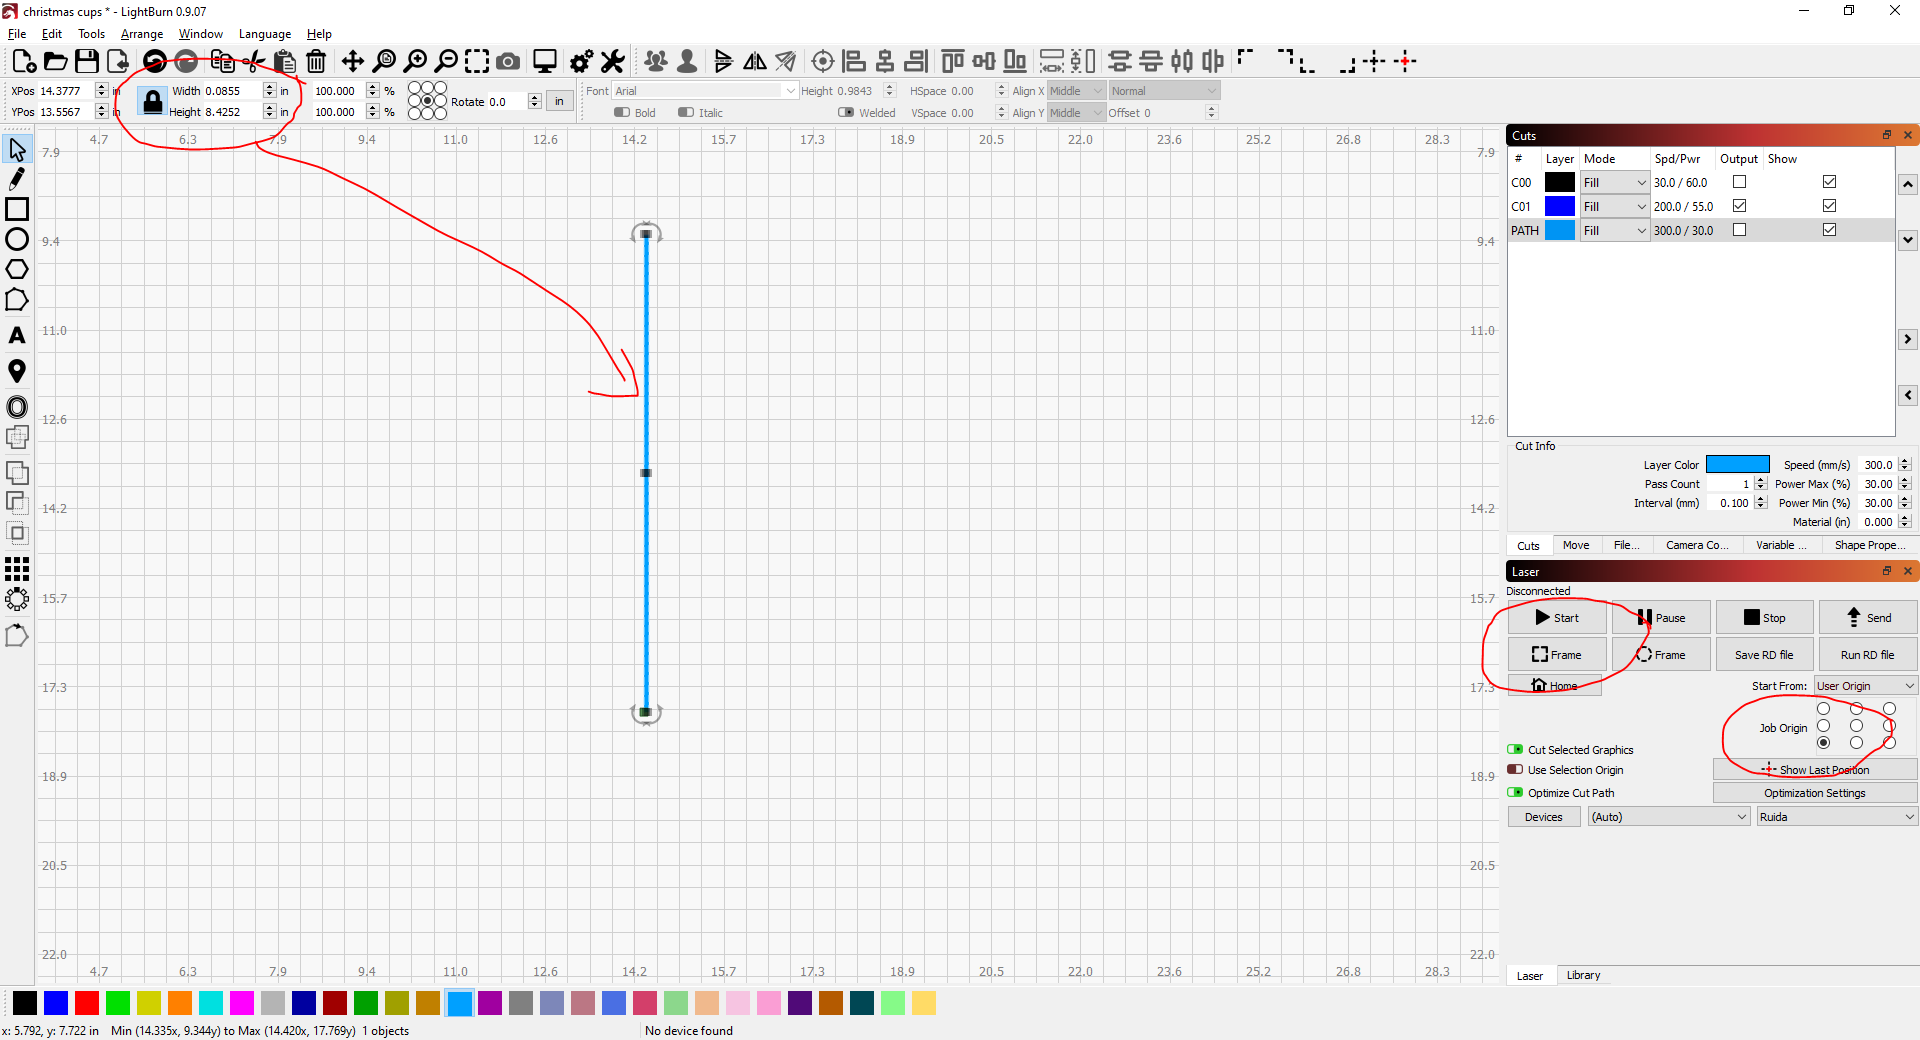
You’re nearly there! This rectangle is going to be your reference marker. One day, Lightburn Devs are going to make layers “lockable” (hint, hint). Until then, just make sure you don’t accidentally resize it.

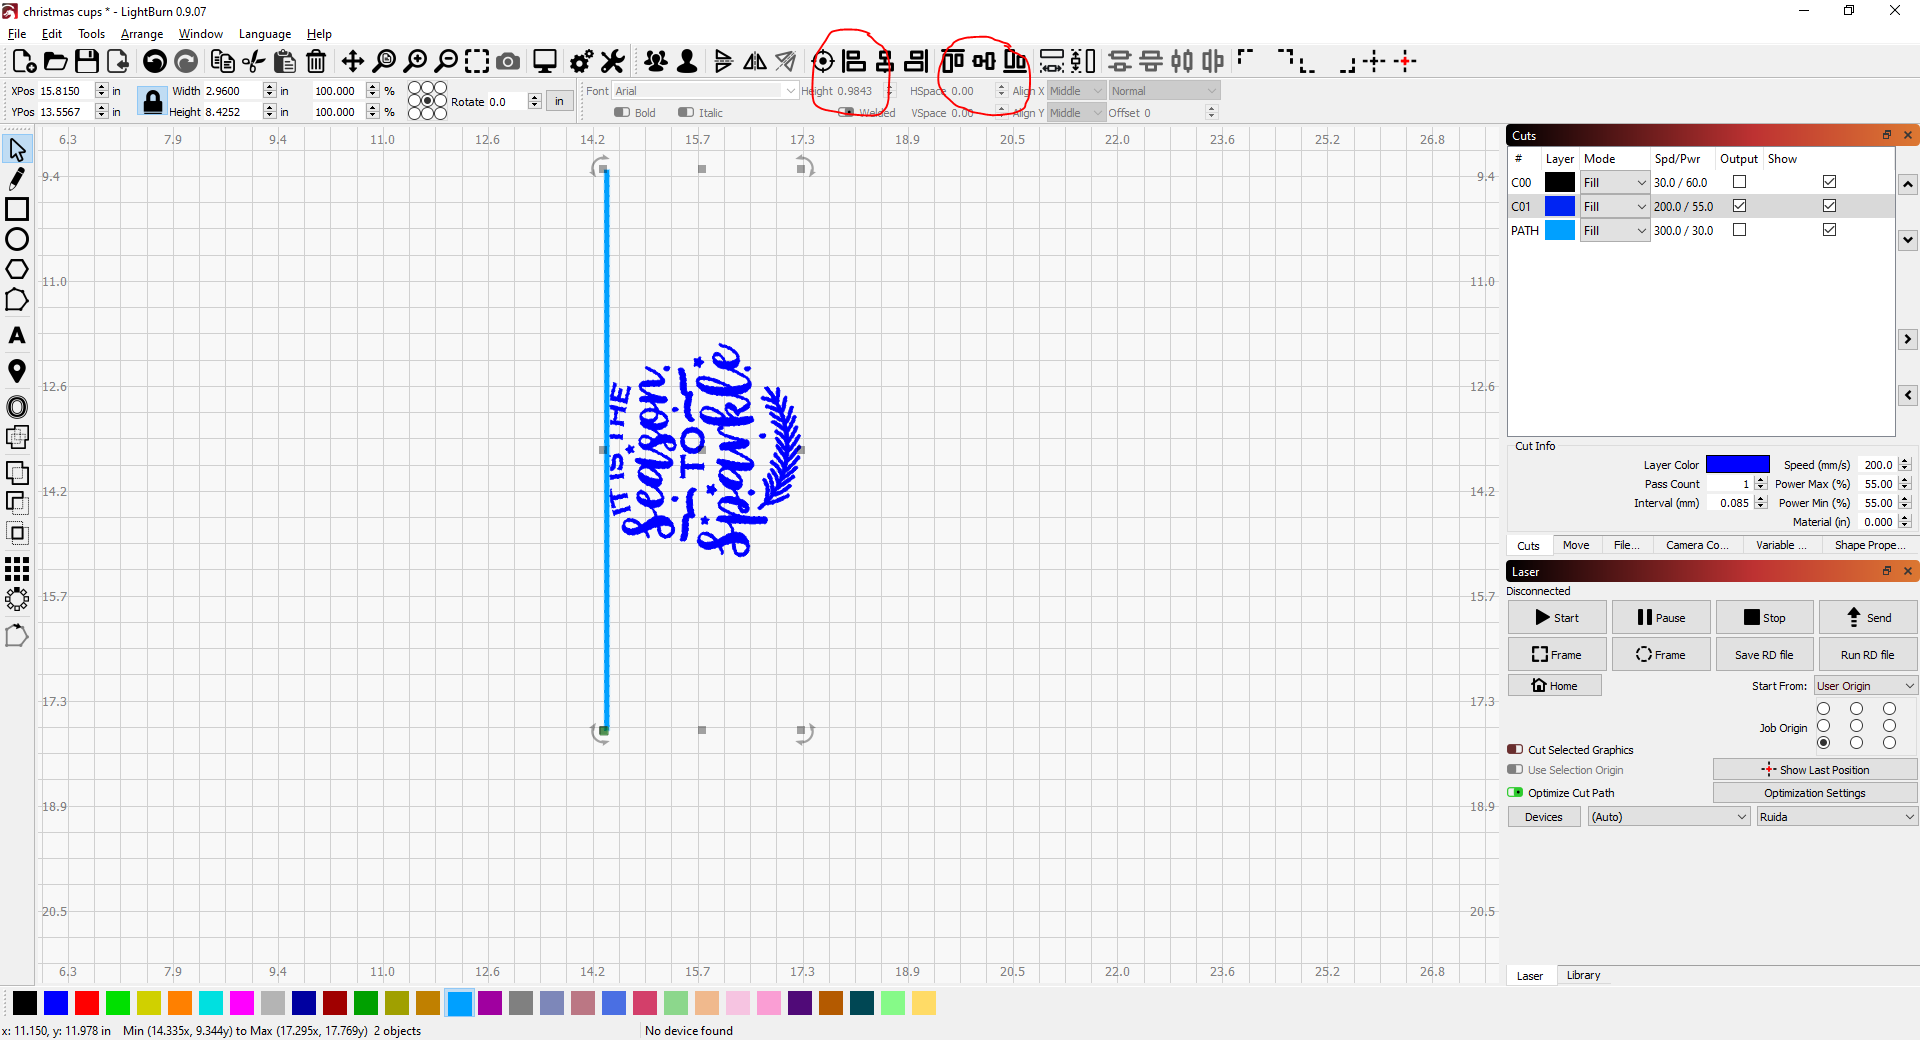
5 - Select your graphic. Ensure the orientation is right. Shift select your box. Click the “center-horizontal” button. Then the “align selected objects across left edges button”.

This will place the center of your graphic directly opposite of where you set up your cup/tumbler/etc.

I’m sure some of you are light years ahead of me here - but thought this might be helpful to others so took the time to type it out. Good luck!

3 Likes

I just watched a video on something similar. The guy is using Adobe Illustrator but maybe there’s something here that could help you. I have yet to venture out to try my rotary but its coming soon so I’ve been trying to learn as mush as I can before I try it.

https://youtu.be/Y5rozOsbSiQ

1 Like

watched the video and yes that works well. I still think it’s overly complicating things unless it’s a production run. For one offs, I simply measure the cup and go from there. If I want a logo directly opposite the logo, I’ll zero my origin at the logo center and rotate the cup exactly half the circumference. then use that as my user origin. Even when doing multiples I do the same.
If I want 2 graphics evenly spaced on both sides I simply cut the circumference in 4 but still use that same origin directly opposite the logo. The 2 graphics will now be centered exactly half way between the point opposite the logo, on both sides.
As said earlier, I may be totally missing the point here???
Regardless how one does it, the point opposite the logo is always half the circumference

1 Like

just for interest to mark the centerline of the logo, I simply place a square on the top edge of the cup and mark it on a bit of masking tape

1 Like

Yep - I can put tape on them. And mark them. And manually rotate them around. Was looking for a workflow that was quicker. Where I could use a mark that is ALWAYS on there (the branding logo) for alignment then have the machine make the engraving on the opposite side.

The workflow I showed above does exactly that. I saved that file as a template specific to that cup. Now anytime I want to engrave a cup, I open the template, slap my graphic in, align and engrave. (in other words, I just do step 5.) No tape. No marking. No measuring. No squares. No holding cups above my head to make sure the branding logo is on the direct bottom. No surprises when I realize it wasn’t “exactly” on the bottom once the engraving is done.

If your system of tape and markers works for you, great! It worked for me for a while. Was just looking for something better. And I found it!

2 Likes

we’re both doing the same thing in different ways, the logo is always the reference. only difference is I don’t bother adding the rectangle to the design

This topic was automatically closed 30 days after the last reply. New replies are no longer allowed.