So I am engraving a cutting board and I am putting a 1/2" wide border around the edge and it is taking hours Instead of just scanning the cut it is scanning the entire surface of the board. Is there a setting to only scan where the cut is? It would go so much faster if it followed the path of the cut instead of what it is doing right now
Your best bet might be to cut it into 4 separate rectangles, and then engrave them.
For the Ruida controller, we have removed a feature known as ‘Flood Fill’ as it was causing issues. We are continuing to refine this feature and plan to add this back once sorted.
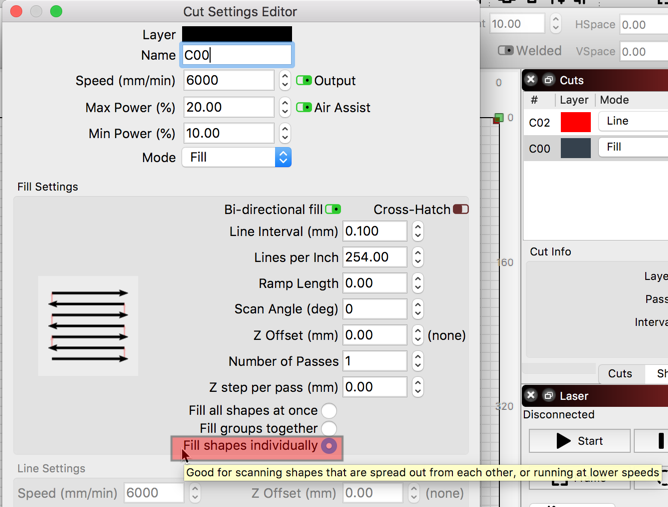
For now, you could break the frame into sections (right-side, left-side, top and bottom) and run them separately by selecting the ‘Fill shapes individually’ in the ‘Cut Settings Editor’ window to speed the process.
1 Like
Thanks for the help
thanks for helping out, looking forward to the feature returning/
May I ask what the issue was? I had issues with that, and I might have misdiagnosed them as belt slip.
The issue relates to how the motion planning of the Ruida controller interpreted LightBurn’s request. Using this feature, the motion planner of a Ruida controller tended to have the laser head move around the job more than required. If left to run, the job will finish, just in a very odd order that was causing users to think something was wrong, canceling the job midway.
This was causing a lot of support questions so we decided to pull it completely from the DSP version while we work on a better solution. This work continues and we will make a formal announcement when resolved.
1 Like
For simpler jobs, Rick is spot on, and much of the problem was user confusion over how the output progressed. For slightly more complex jobs, the Ruida controller would sometimes omit sections of the job, and still others would refuse to run at all.
I believe the omitted sections were actually belt slip or backlash, causing overlaps or gaps in the output, because of the way the path progressed, but the jobs that simply wouldn’t run at all prove that there’s something deeper going on, at least in some cases. DSP controllers have fairly rigid requirements for how data is structured, so ‘random access’ is probably breaking some of the rules. I have a few ideas to try in order to resurrect this, but it gets prioritized in with everything else.
3 Likes
An option, depending on the artwork being used, is to produce your own fill using the offset tool. The offset tool will use the previous settings if you hold the Ctrl key when you press the offset button, so setting ‘Select results’ and using a small inward offset amount, like 0.1mm, can give you a “contour fill”, like this:
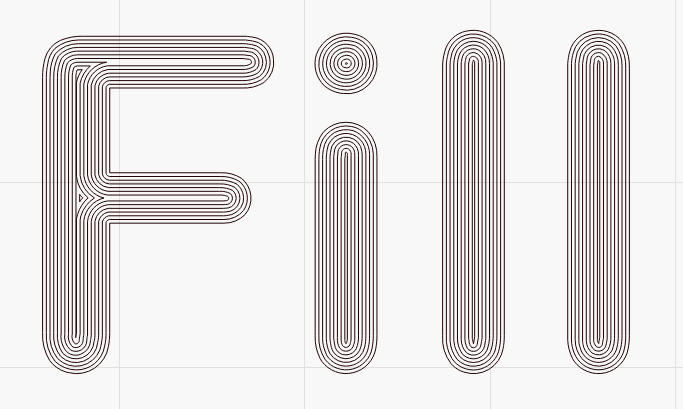
Then you just run the result as a standard Line, tracing all those paths with the laser, instead of having the software fill it for you. If the shape is a simple square border with rounded corners, for example, this would run much faster than scanning the job, even if the flood-fill option was still available.
3 Likes
Hmm, I need to try that “lawnmower style” fill (it’s pretty much the same way I drive my lawnmower). It might give a different structure to the filled area, which might look nicer…
Thats awesome, I tried this and think it will work if I can figure the right settings. My problem is the corners burned through the material or they dug deeper than that rest of it. Its like the laser paused for just a tiny bit there each time
@bobh928, this is due to the Min/Max Power cut settings not being set correctly. If you have them set to the same value, the laser will not adjust the power up and down as the head slows or accelerates during direction changes and thus deposits more energy in the corners of your project.
2 Likes
This topic was automatically closed 14 days after the last reply. New replies are no longer allowed.