I am learning how to make simulated embroidery stitches on twill. I have learned that I will need to use “Scribe” settings to achieve the desired look.
Scribe is supposed to run like vector (line) but output like raster(fill) I take this to mean uses a vector (line) option and alter my power and speed settings to discolor/mark the twill without cutting the twill.
Is this correct?
Does anyone have experience with this process?
No idea what this is. I take the word “Scribe” to mean a light marking or scratch. If you want to fill an area with lite markings in the pattern of stitching you can achieve this setting the layer to ‘Fill’, turn the power down, speed up or do both so the result is a very lite burn.
If you show the original art and the result you are after, we can refine our suggestions.
I am trying to recreate a similar stitch effect. If you look closely, the outside of each twill layer is cut white the inside is laser marked to give a stitch appearance.
If you have experience, tips and tricks will reduce my “playtime”
thank you
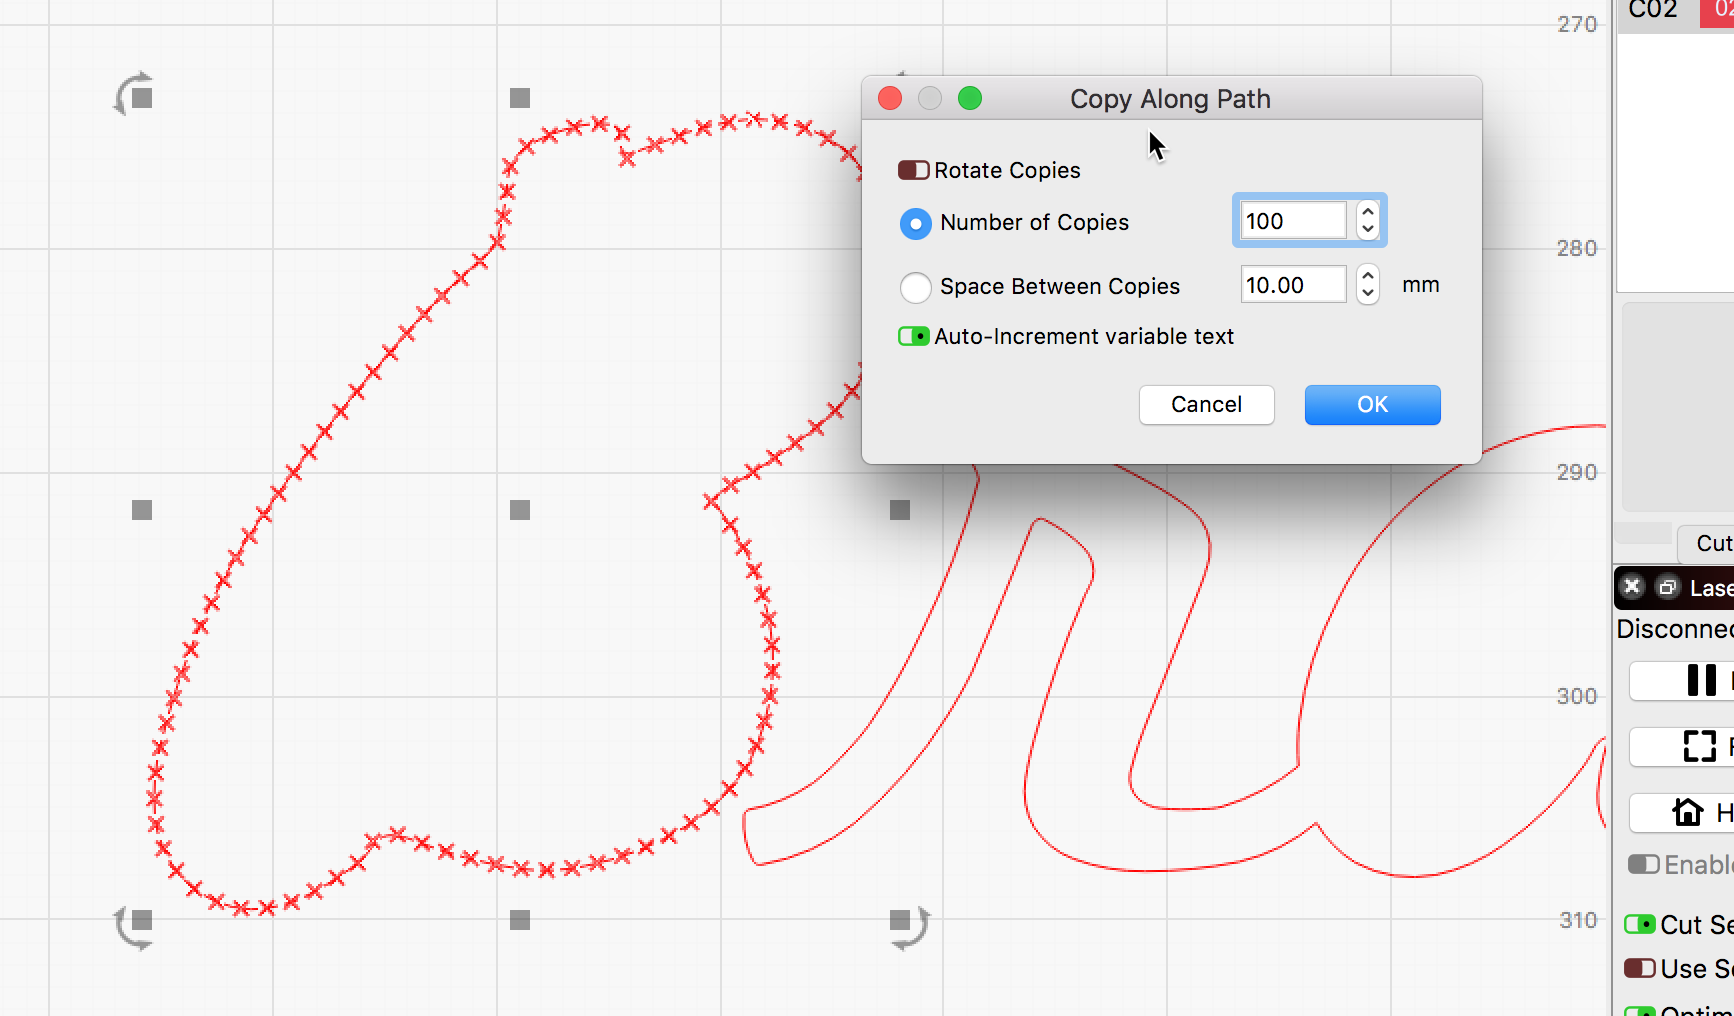
Fun challenge. It can be done, but not easily in LightBurn. You would need to create and convert to paths the text and offsets as you desire, and a “stitch” vector (I created an ‘x’ ), then use the ‘Copy Along Path’ to place the stitch along the outlines as you’d like. Not exactly what you want but might be workable.
 ), then use the ‘Copy Along Path’ to place the stitch along the outlines as you’d like. Not exactly what you want but might be workable.