Hi Paul here.
Have a shapeoko 3, grbl 1.1 Just added a jechtechphotonics 7W laser. All seems Ok but I cant seem to command laser to the bottom left origin. Have tried off set for grbl and all $ symbols look right, BUT laser keeps homing to top right… When I set an origin X0 Y0 it moves the laser to Y0 but X203! (table size 406).
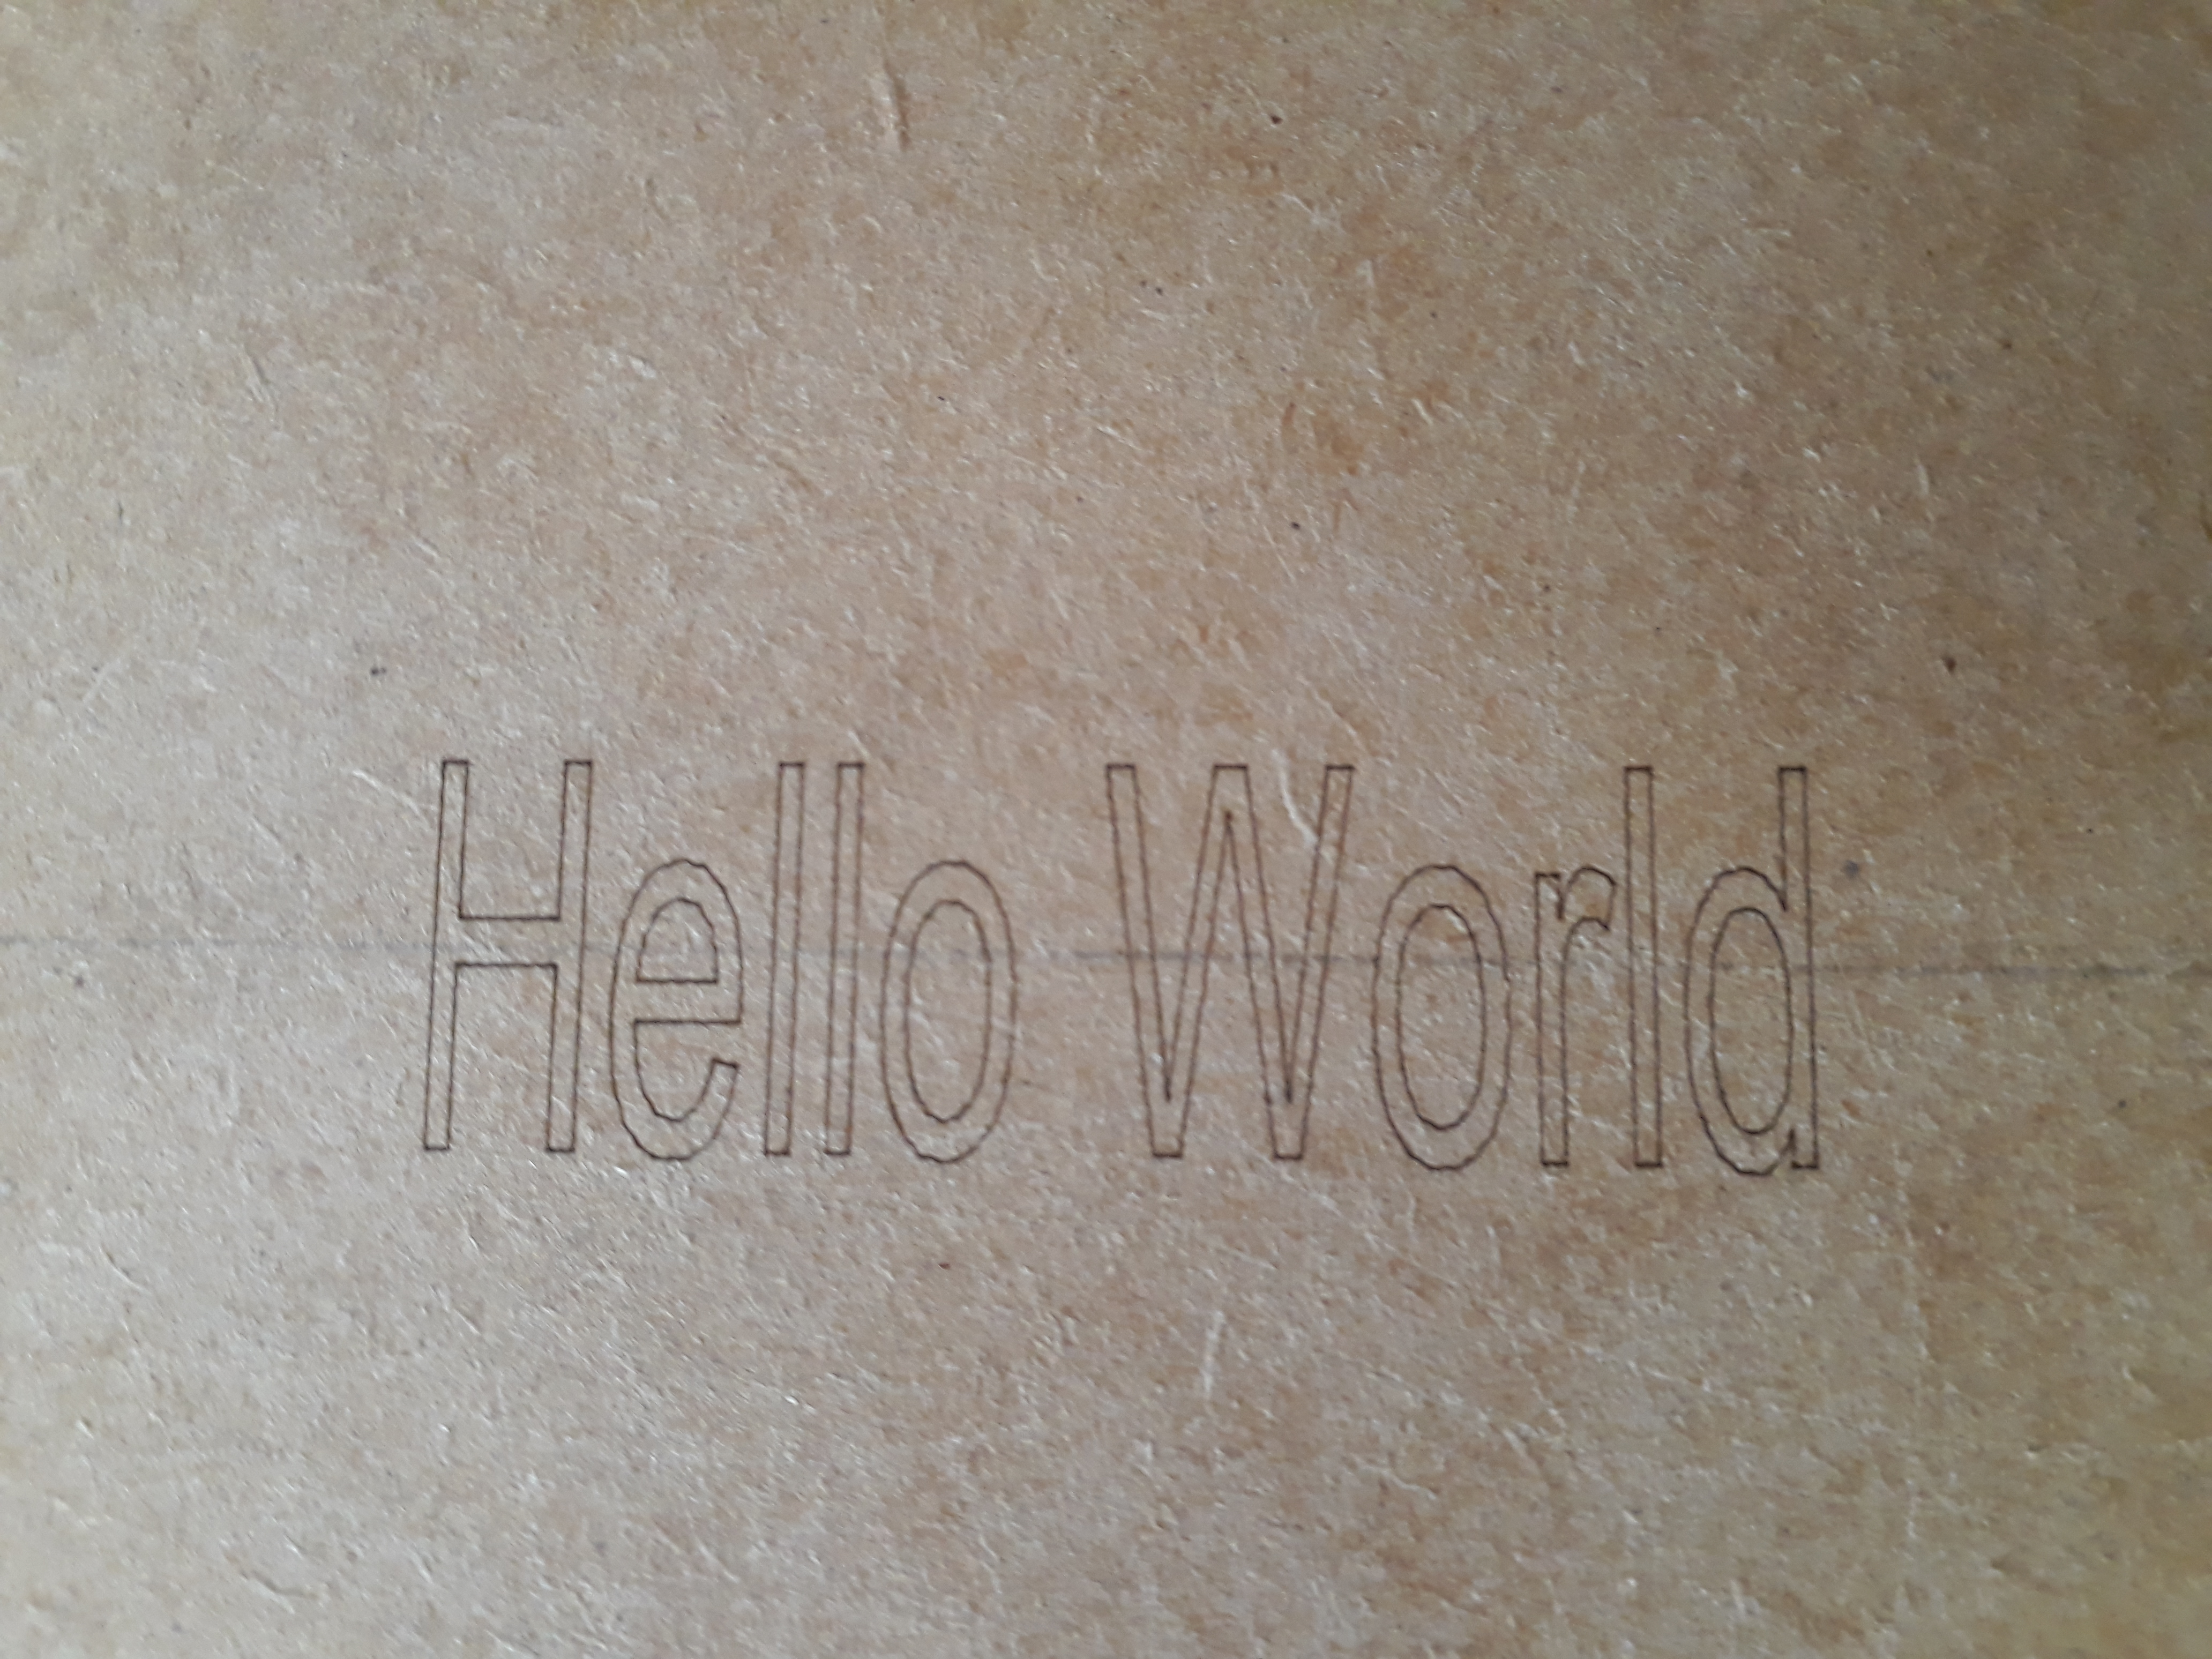
When I try to engrave something it is all streched top to bottom
I tried to work this out but can’t see what I’ve done wrong.
Any suggestions? I’m sure there is a simply fix!
Cheers Paul
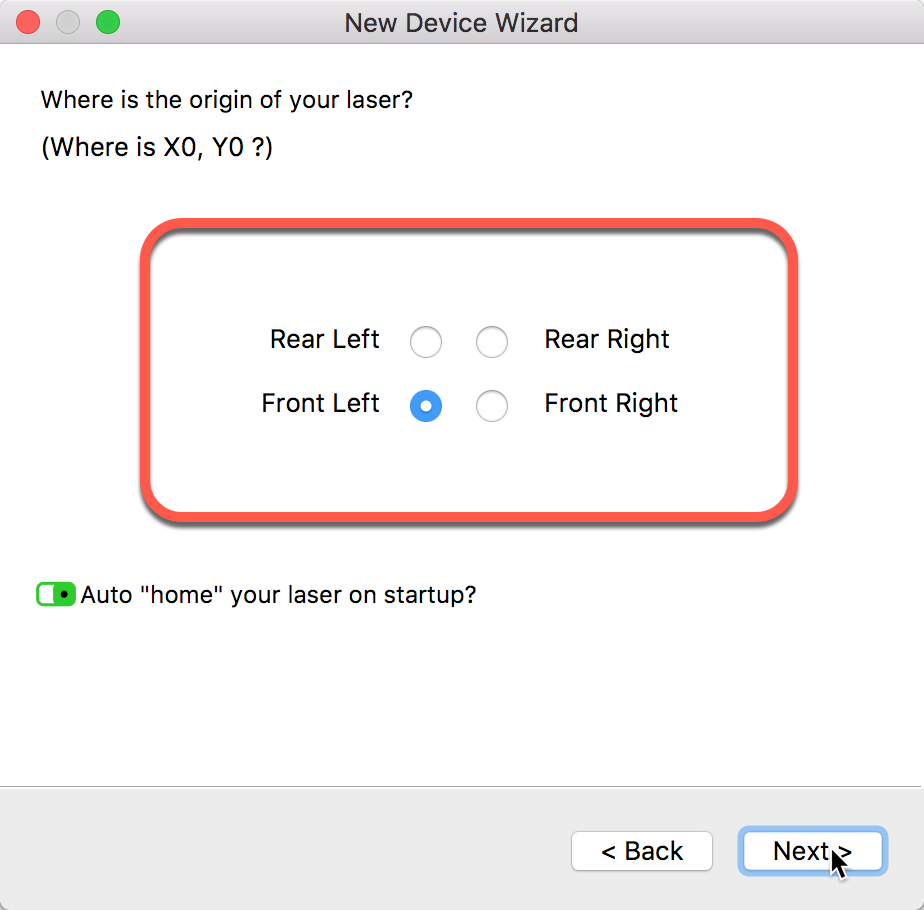
Here is the best and most accurate setup procedure for your gear and was produced by our friends over at JTech Photonics.
Double-check this with your setup and let us know how you get on. Sounds like you do not have the Machine Origin set to the correct location in LightBurn.
Hi Rick
I did as you suggested and went through the setup from jechtech.
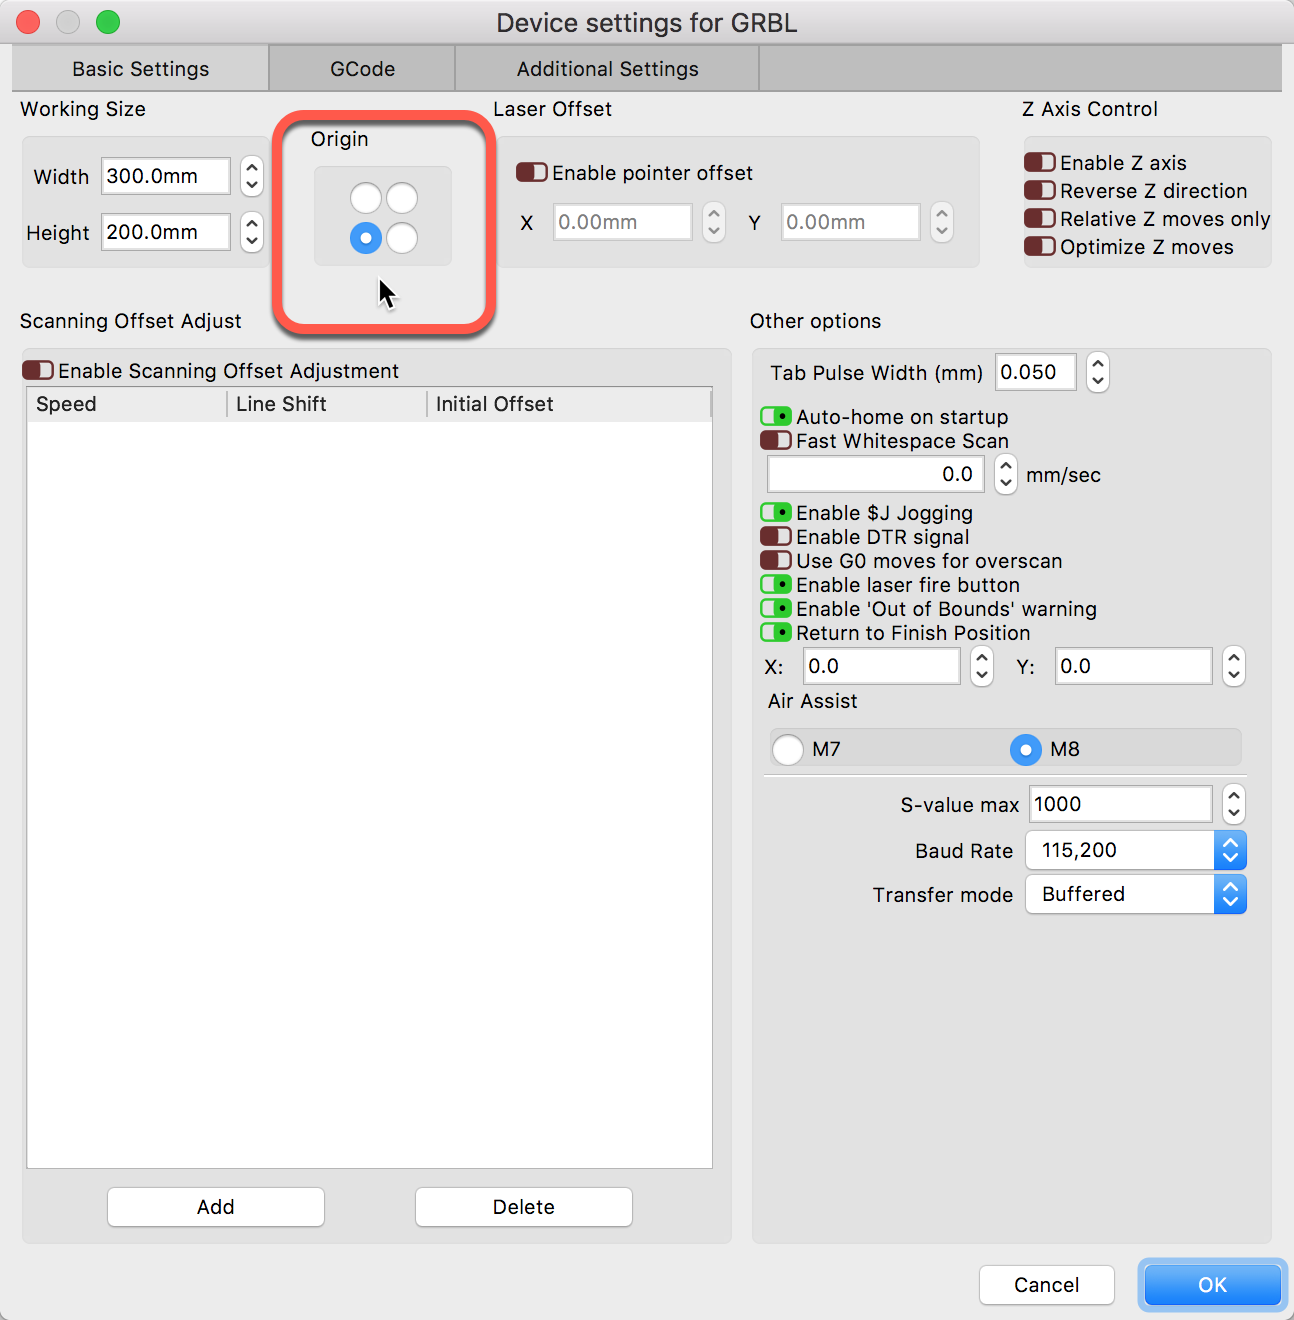
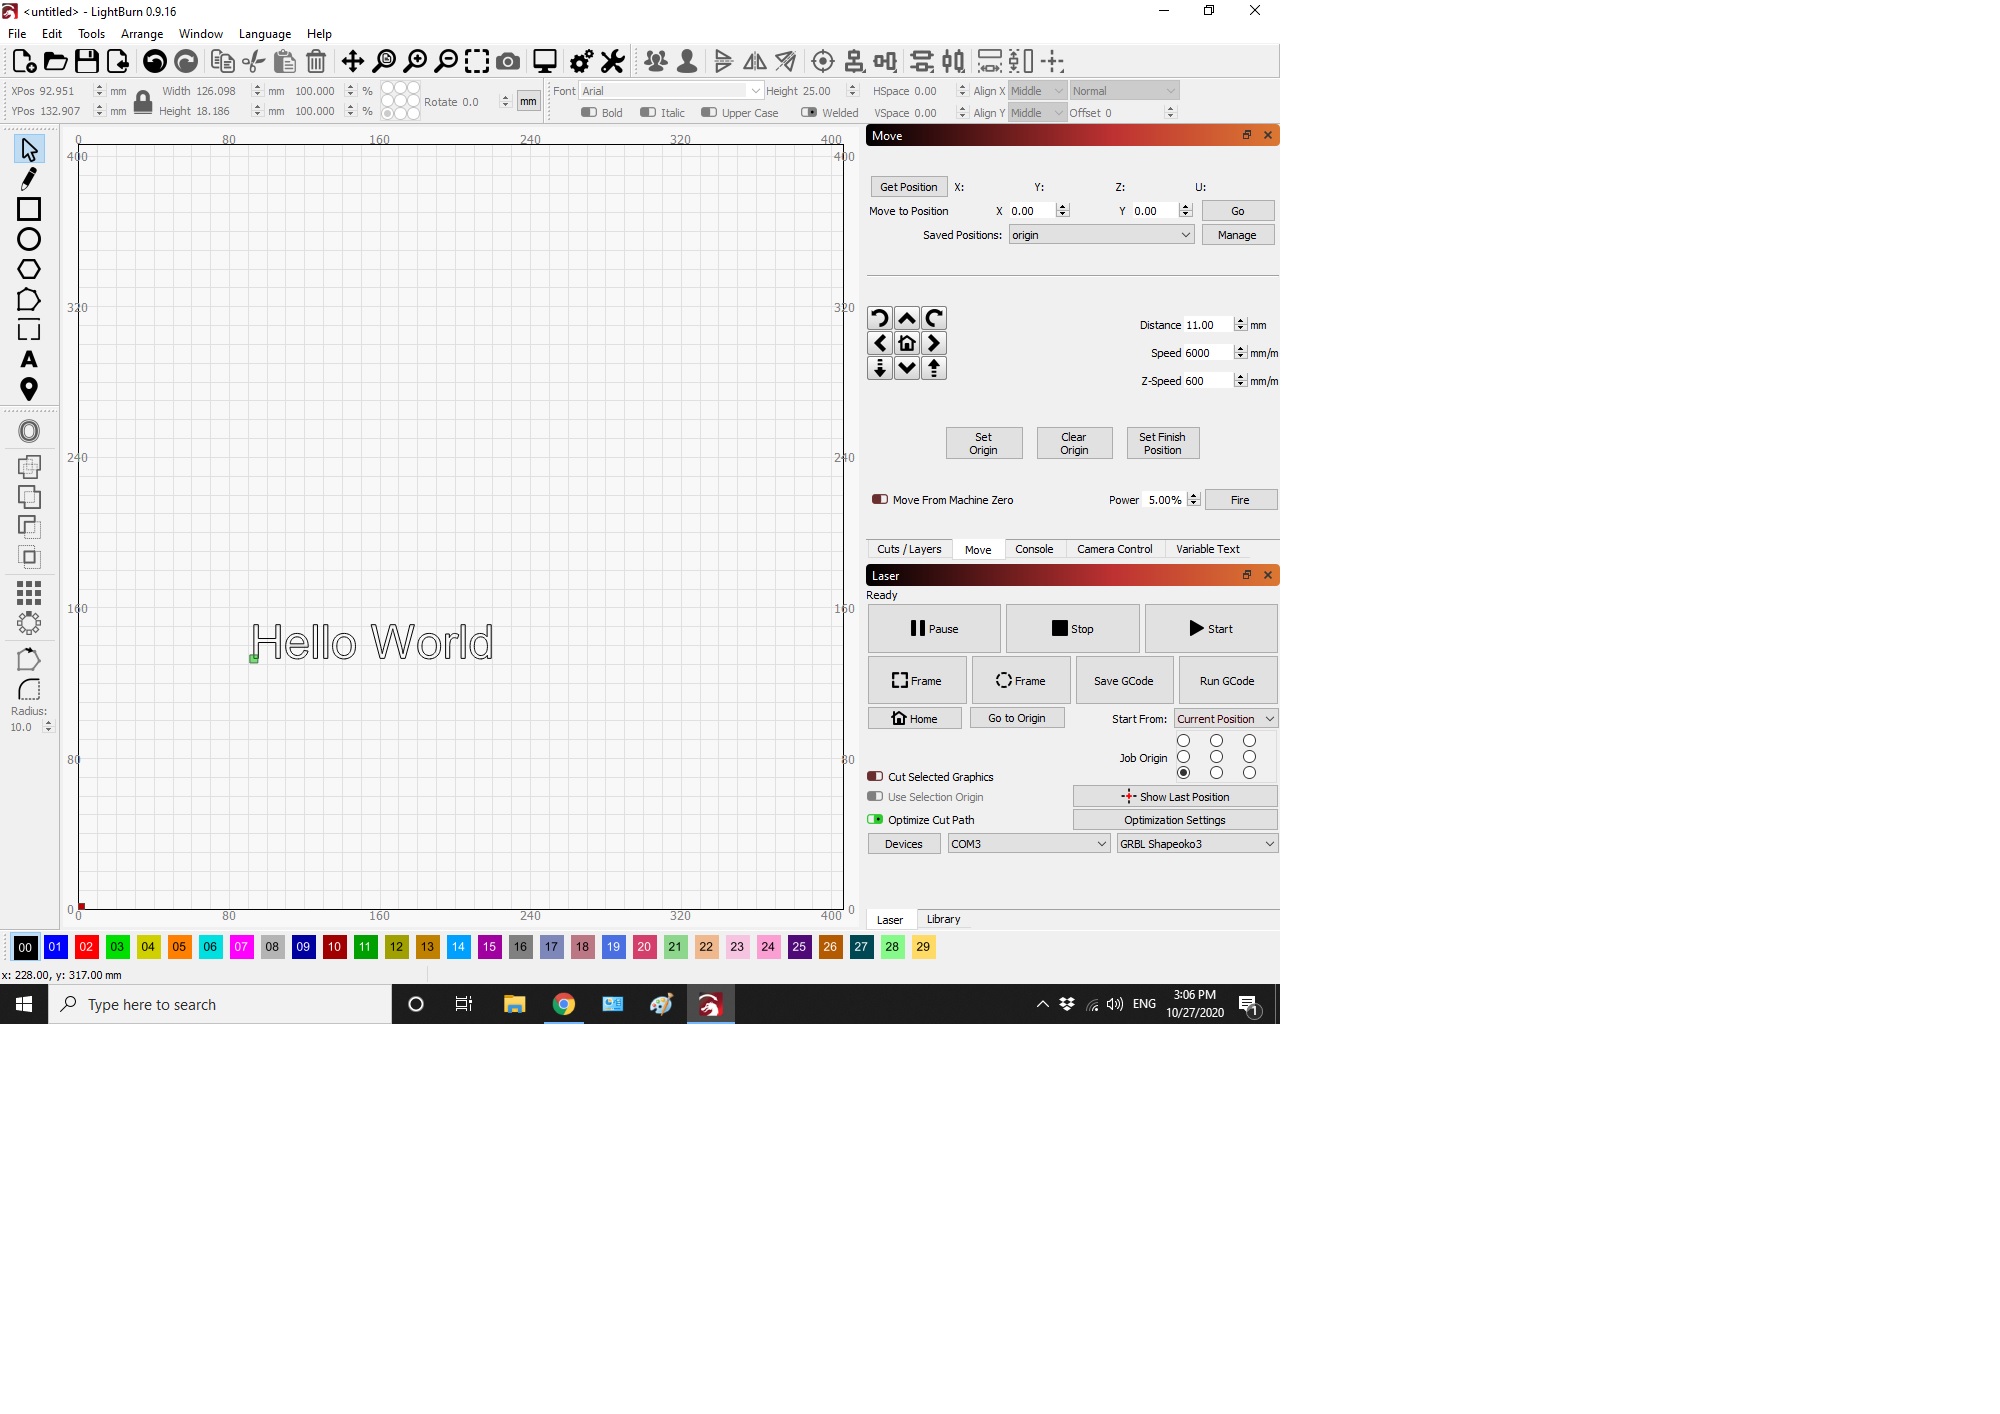
I still can’t get the machine to origin at bottom left (X0 Y0). I have attached screen shots of my settings for reference, Can you see where I’m going wrong from those?


Cheers
Paul
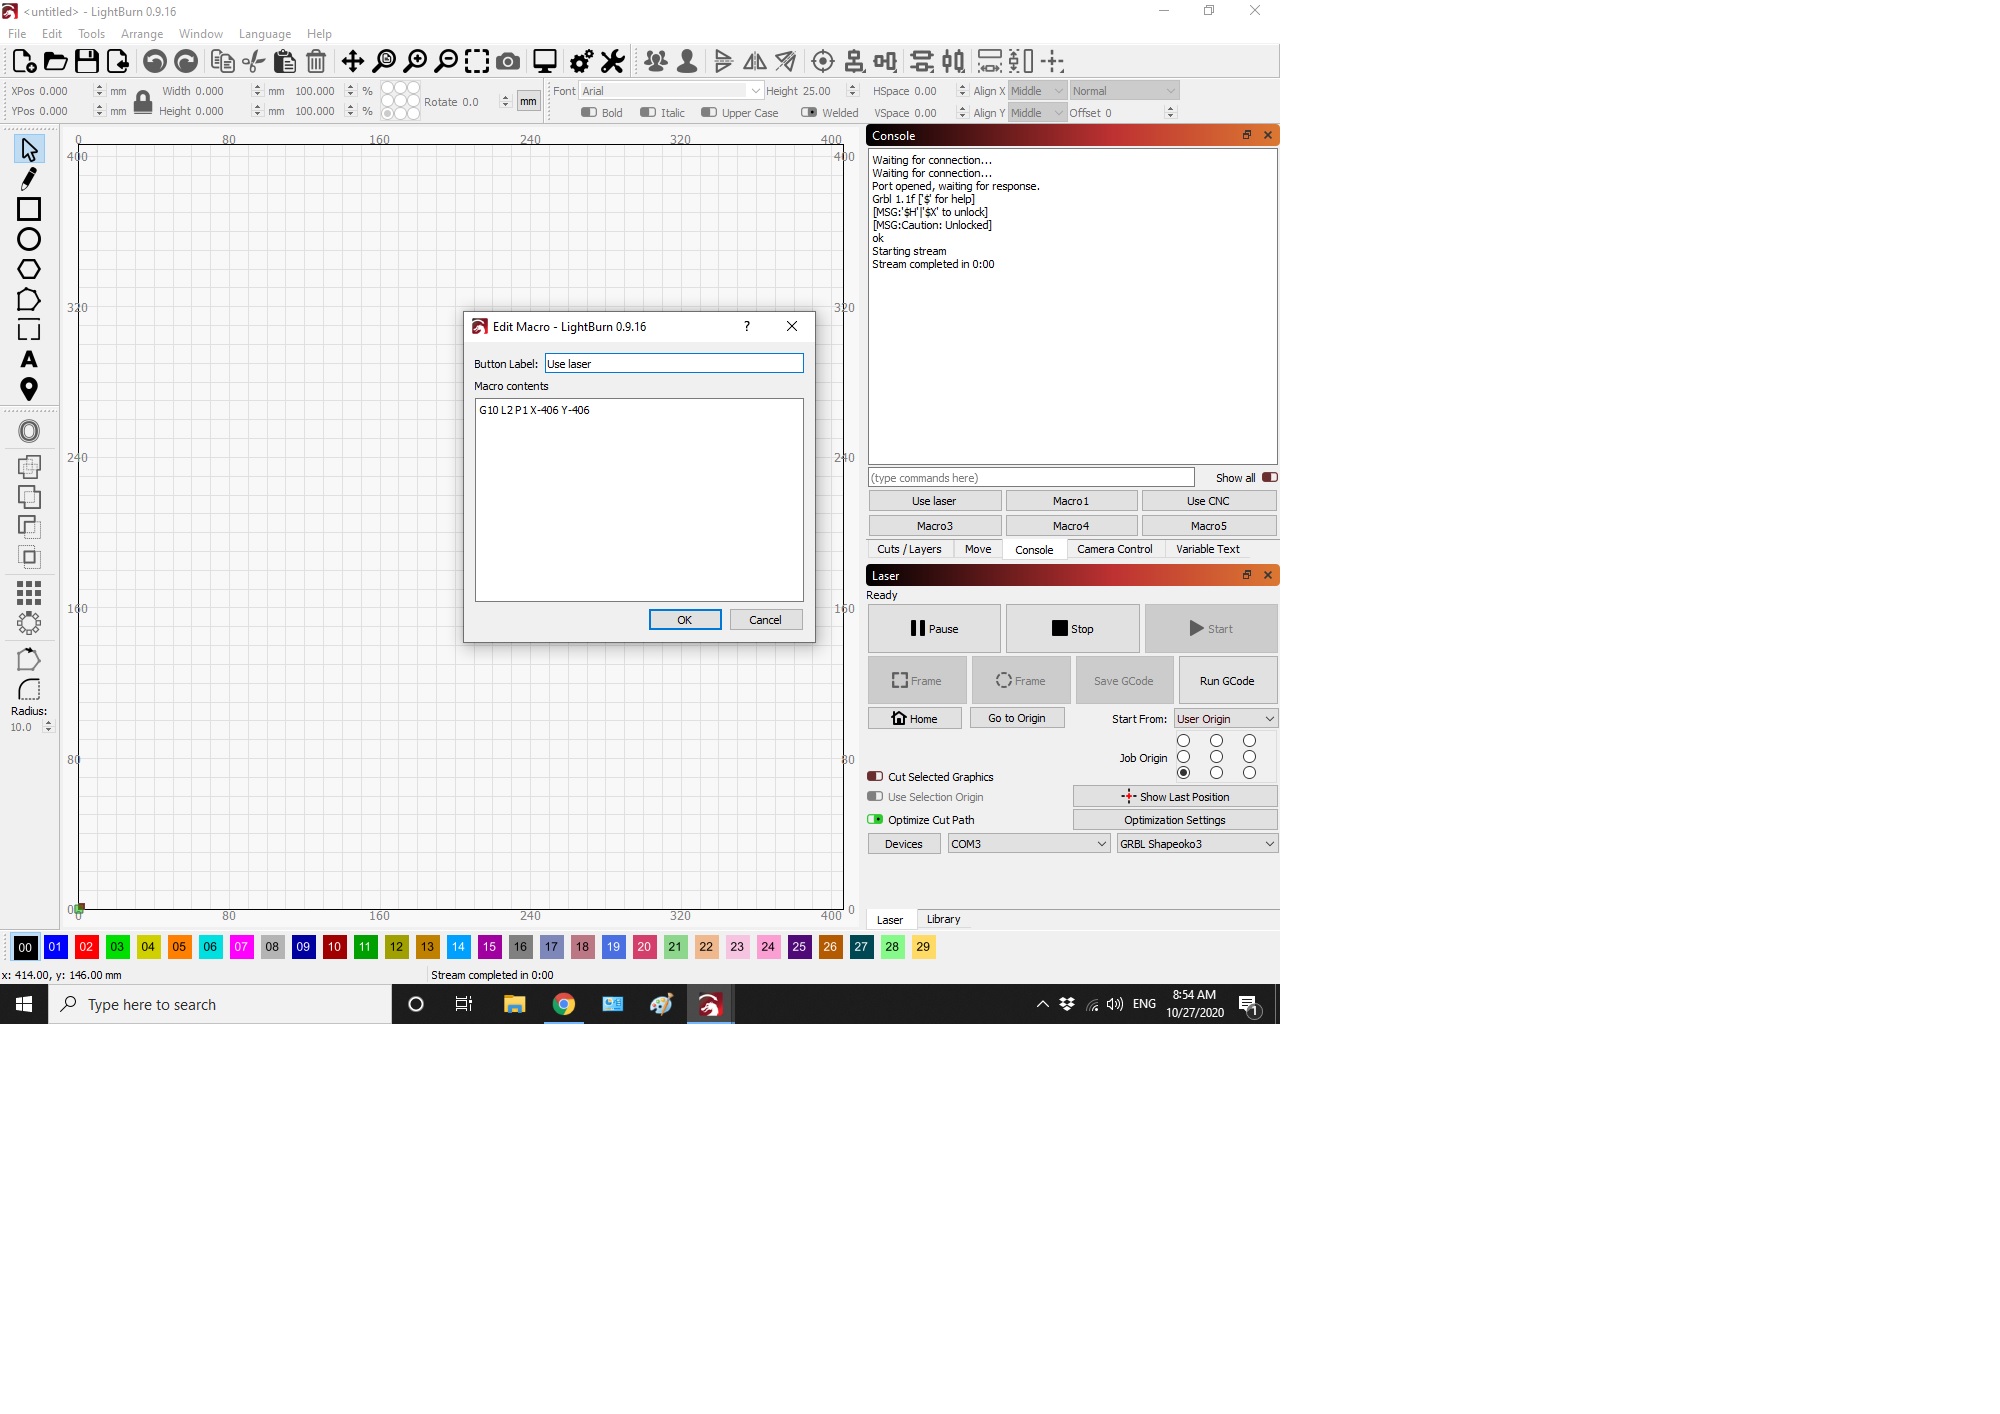
I do not see anything jump out at me but I am not the expert for these setups. Did you click the Use Laser macro first? What was your result for this step in that JTech process?
4. Run the machine
Set the start from “current position” in the laser tab. If you chose the bottom left corner of the letters in the last step, then make sure you have enough travel space on your table for the engraving.
Press “Start” to run your job.
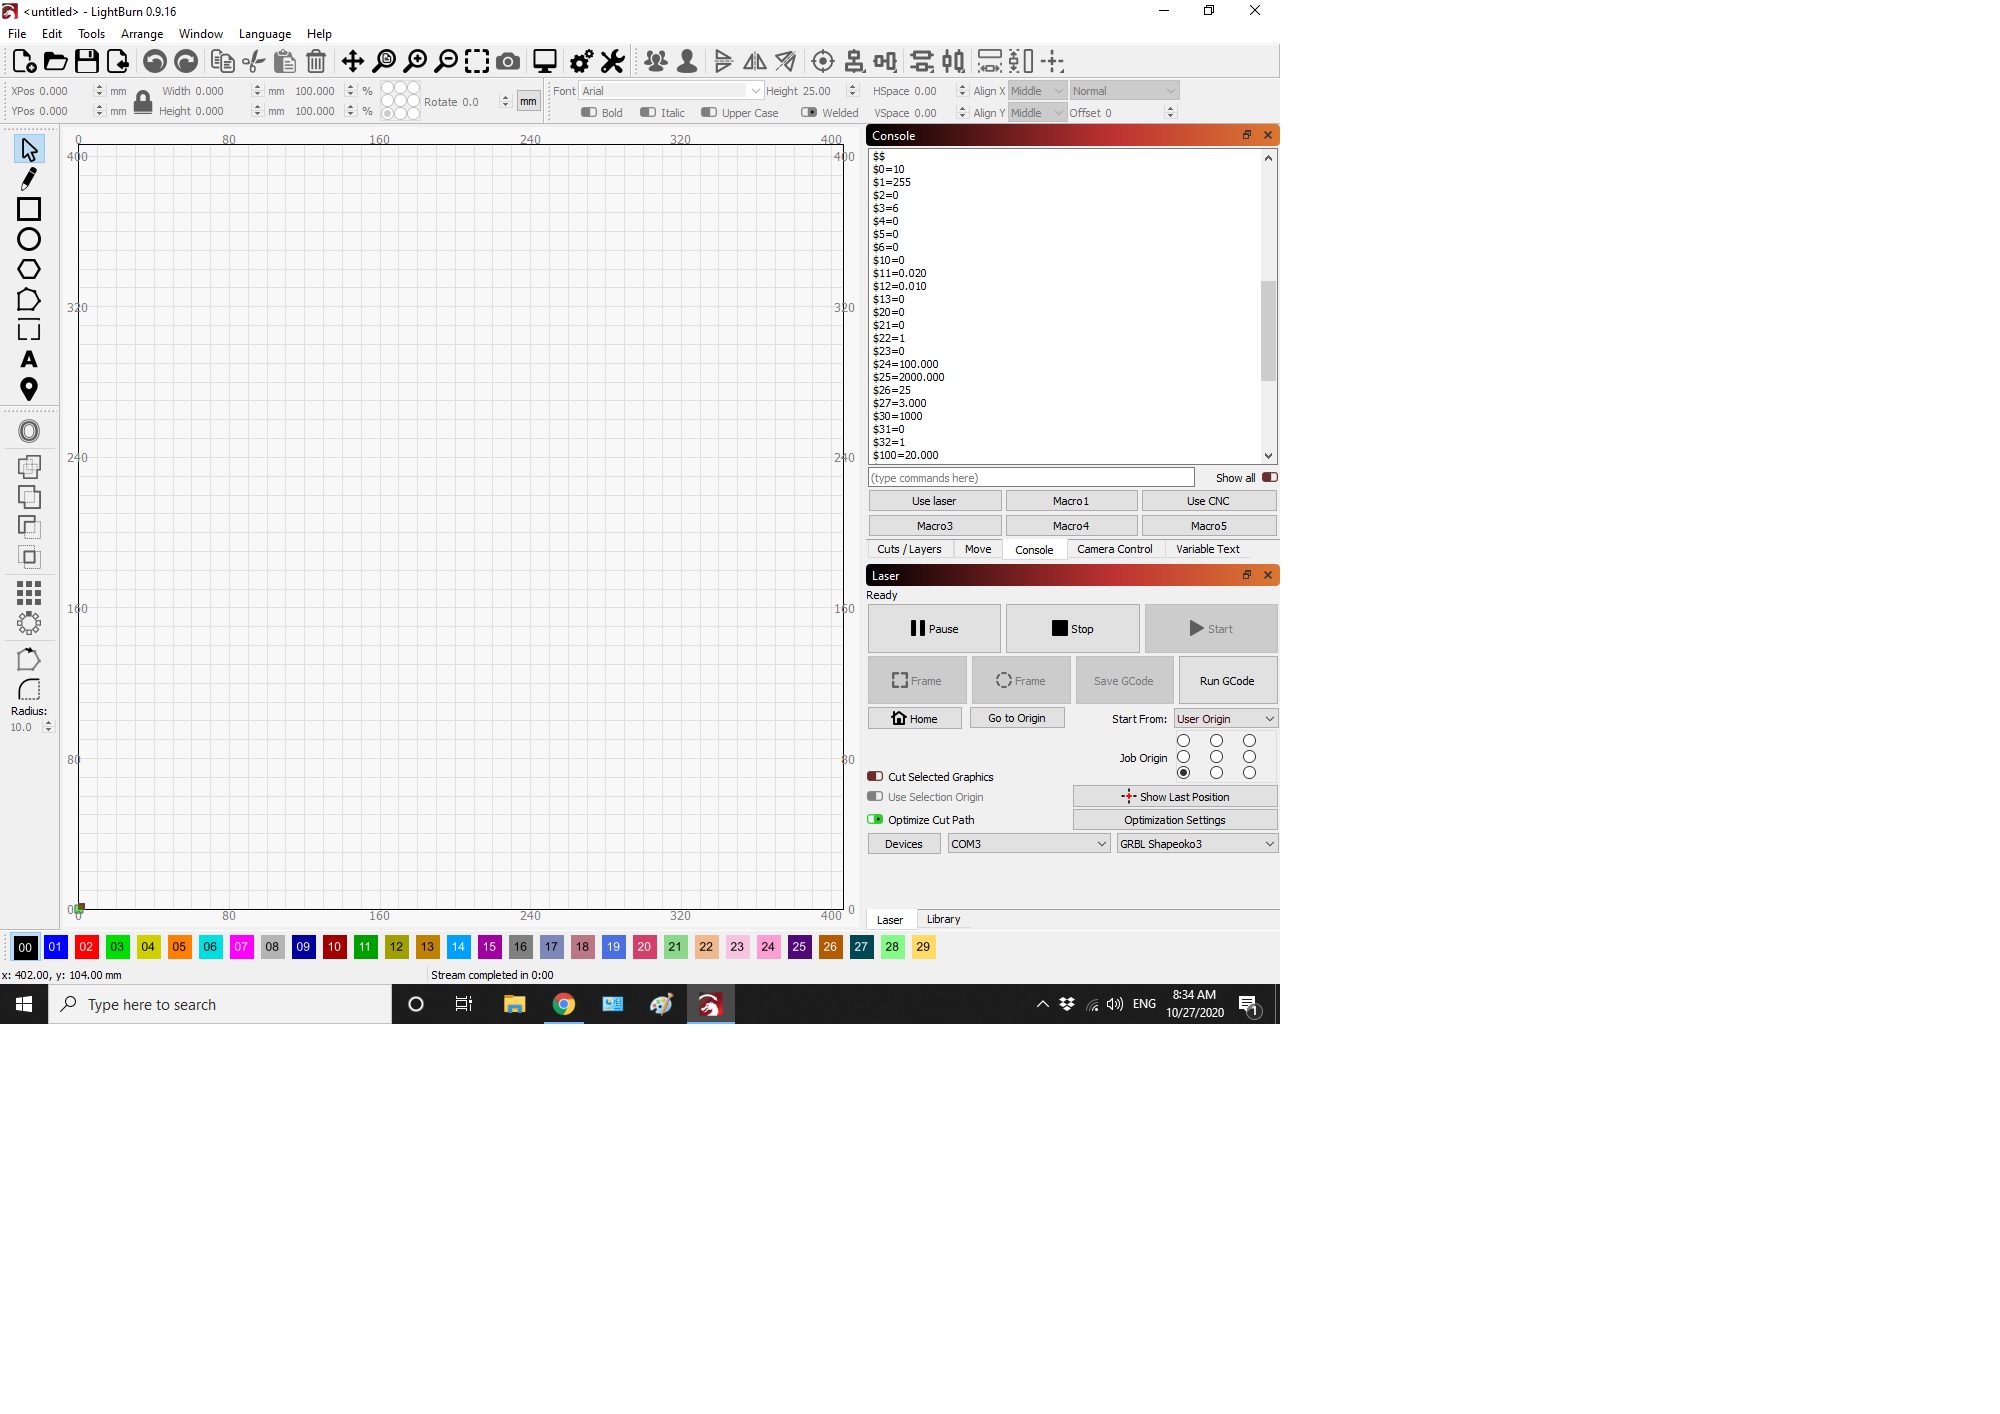
Please paste the entire output from the ‘Console’ window after entering “$$” and Enter/Return. You must scroll the console window to capture all content returned.
Hi Rick here is the entire console window plus I have attached pics of what the real problem is. The finished engraving is always coming out with the everything stretched upwards . Comapre the aspect of the design on the lighburn workspace to the finished cut lines.
Cheers
Paul
hello world line cut|666x500
$0=10
$1=255
$2=0
$3=6
$4=0
$5=0
$6=0
$10=0
$11=0.020
$12=0.010
$13=0
$20=0
$21=0
$22=1
$23=0
$24=100.000
$25=2000.000
$26=25
$27=3.000
$30=1000
$31=0
$32=1
$100=20.000
$101=40.000
$102=40.000
$110=10000.000
$111=10000.000
$112=5000.000
$120=500.000
$121=500.000
$122=400.000
$130=845.000
$131=850.000
$132=100.000
ok

Your Y steps per mm is double what they are for X. That’s unusual, and would likely be the issue.
Draw a box that is 50 x 50 mm, run it, and measure it. Then go to Edit > Machine Settings, and click the ‘Calibrate Axis’ button on the bottom. Pick an axis, enter the requested number (50) and the measured size. Write that, repeat for the other axis. Then scale that up to 200 x 200 and do it again. (you start small in case things are really wonky so you don’t go out of bounds).
Yes that has worked wonderfully. Thank you so much for the invaluable advise I would never have worked that one out myself.
This topic was automatically closed 30 days after the last reply. New replies are no longer allowed.