I’ve entered text and it seems that my image engrave is great but the text comes out lighter…
Sorry, not following your question here.
Are you scan filling the text? What are the current settings for both layers, image and text layers?
Edit:
What is the default DP for text… - Can you please tell me what you mean when you say “DP”?
yes, scan filling everything. Let me look to see if I saved that job…
DPI, sorry DPI…
Text was at 321dpi (wish that box, like all the others was in MM by the way  )
)
the graphic was in pass through, as I noted. I don’t think (?) that LB reads it from the file and displays the files LPI anywhere - though the passthrough mode documentation says that’s what the software will use and not apply any additional processing.
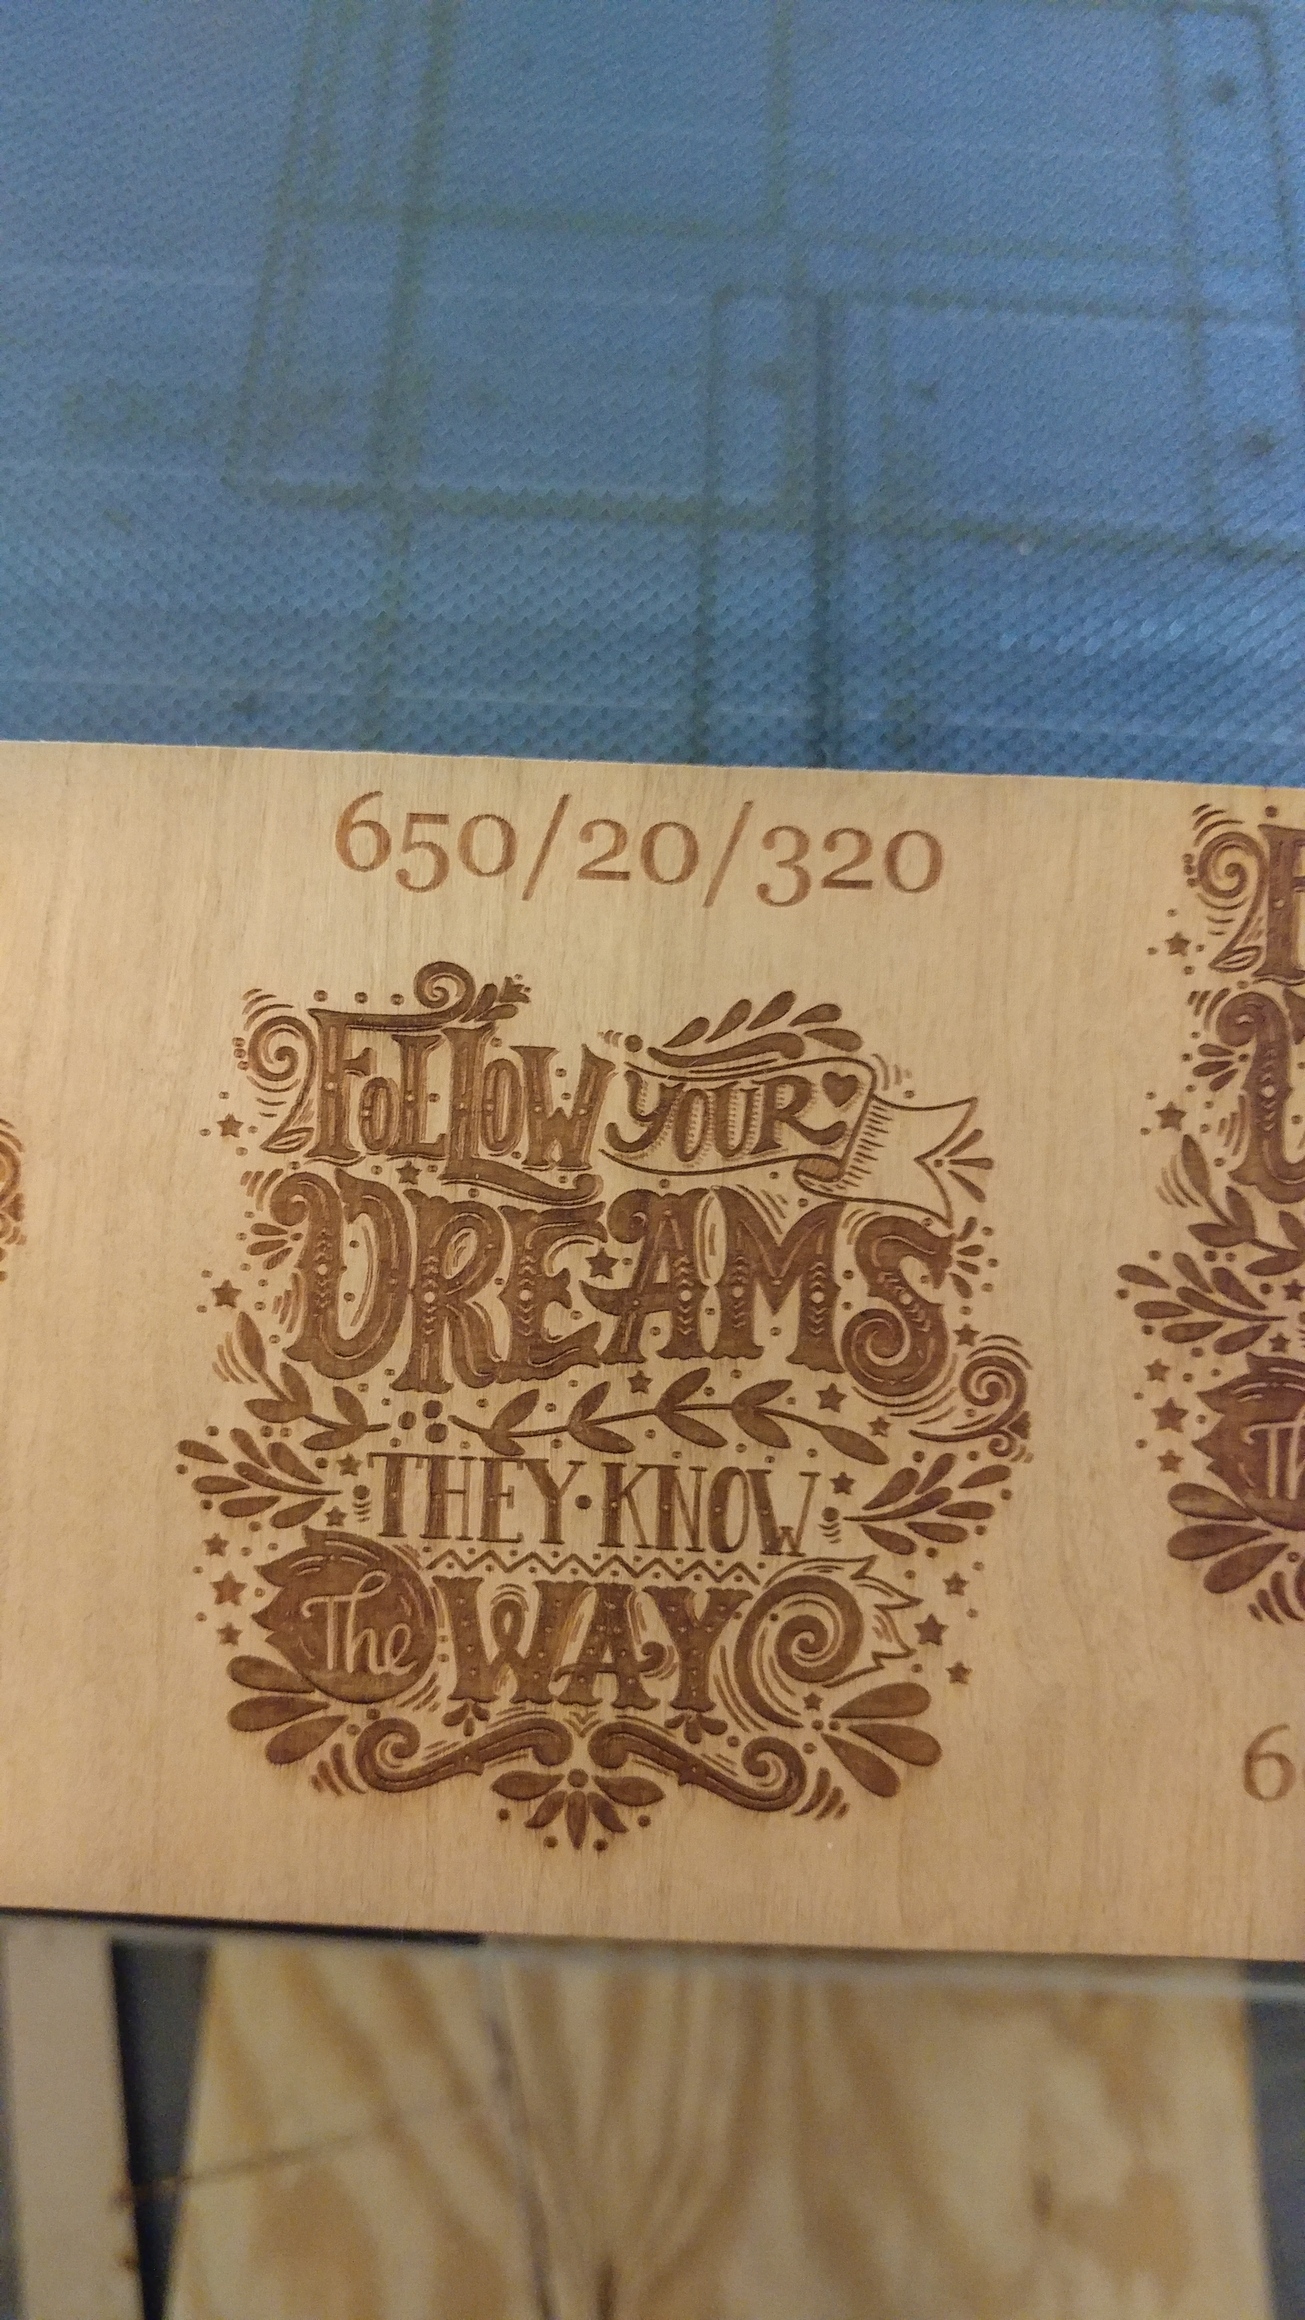
The graphic looked great at 650mm/s @20% power. The text was set to 500mm/s @20% power and does not look anywhere near as dark…
I’ll take a photo.
EDIT: Here is the photo
DPI is not a value used to define the fill of a shape, including text shapes, so not sure what this is referencing.
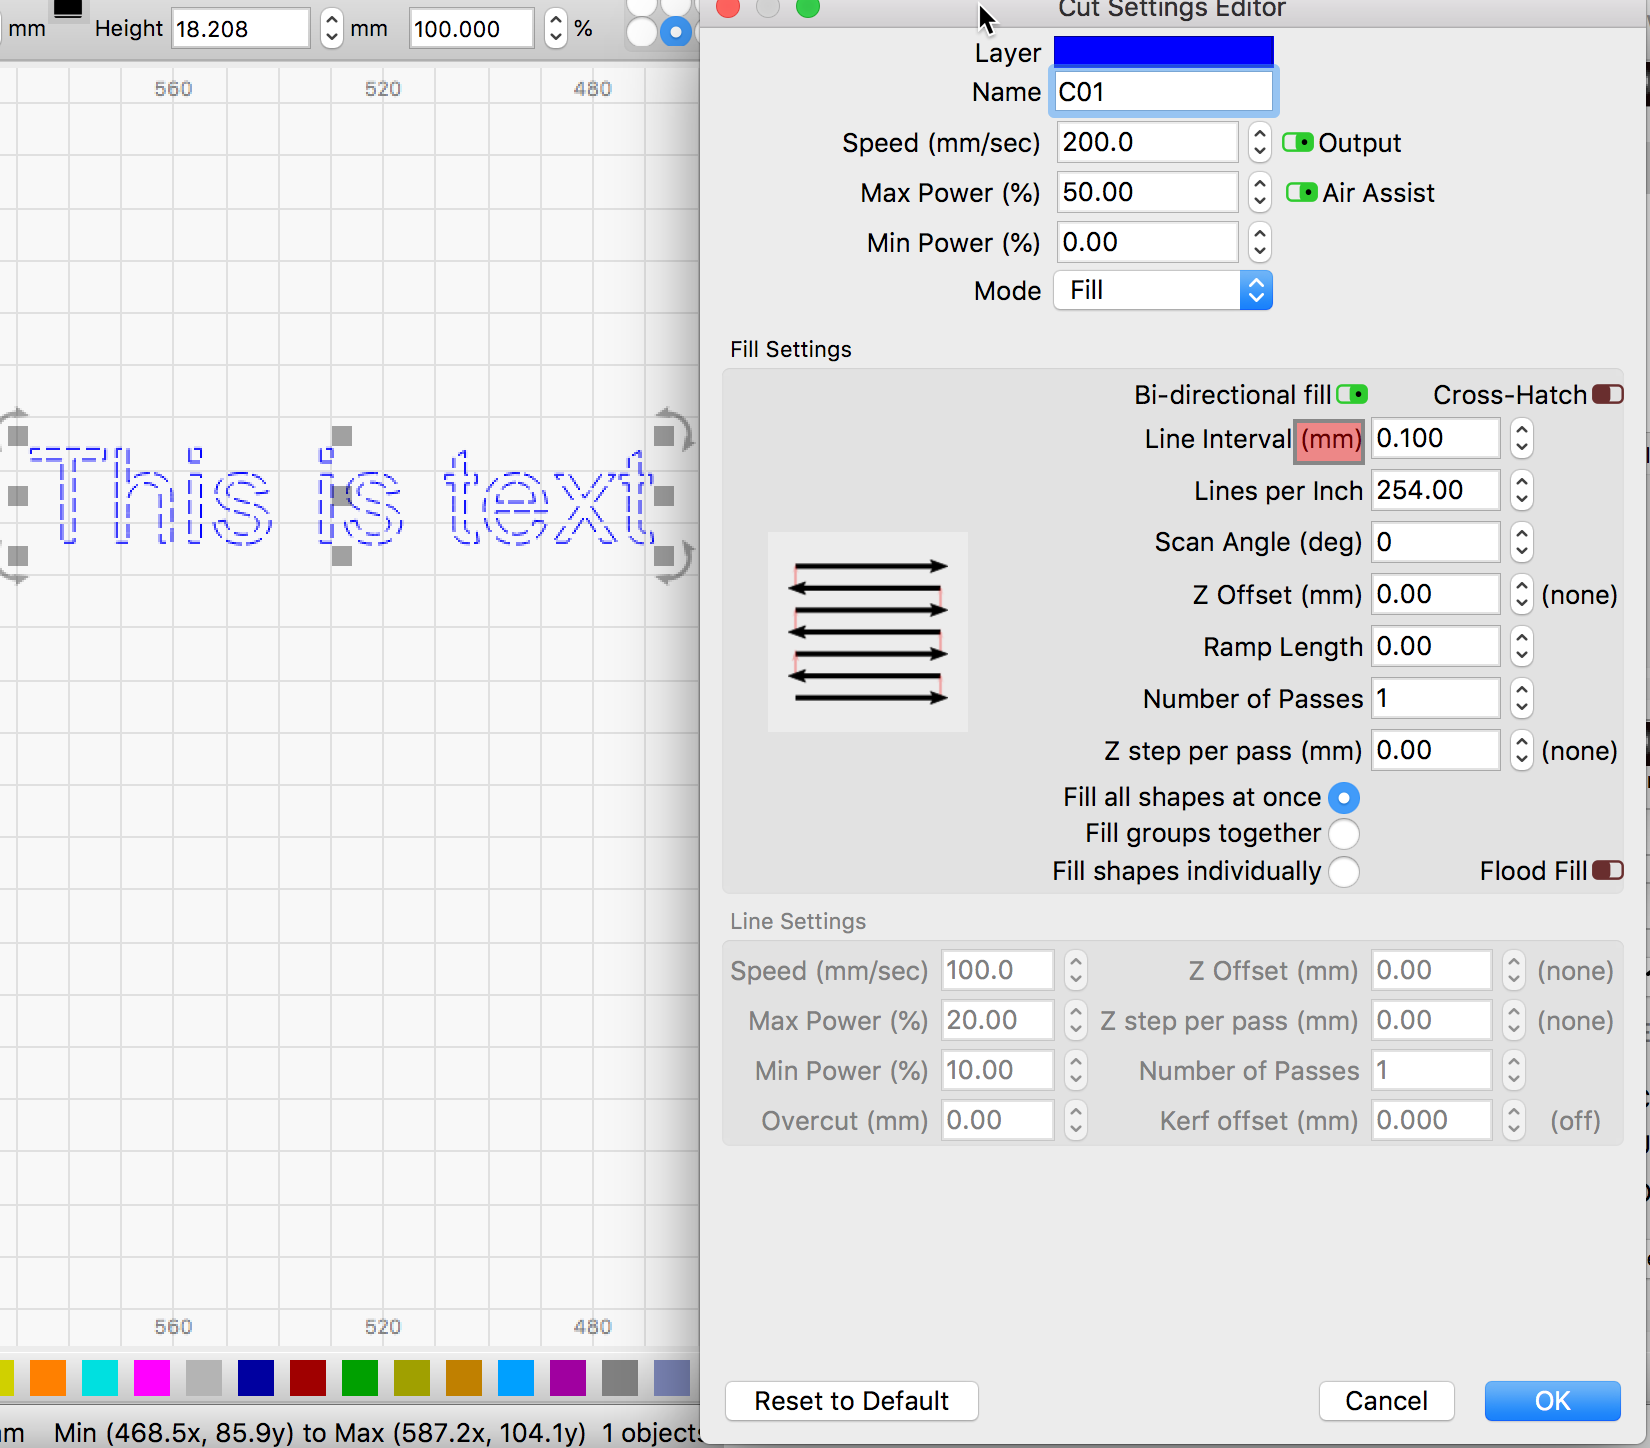
LightBurn uses the terms ‘Interval’, ‘Line Interval’ and/or ‘Lines per Inch’, which we added for clarity for some in the American user community.
The 'Interval" is the gap or distance between each scanned line and is displayed in Millimeters. DPI is a definition of the number of dots in an inch and used as a unit of measure for images, not the darkness of each dot. That is controlled by the value of the dot on a scale from black to white. These are two very different components, yet are related. Moving the scan lines closer together can create a darker appearance. What are your current cut settings for this job?
Excuse my faux pas, but LPI in your screen shot = DPI in my words…
Not trying to call anyone out, just want to ensure we are talking about the same thing here. ![]()
Share those and we might have some further to produce what you’d like.
Hey Rick.
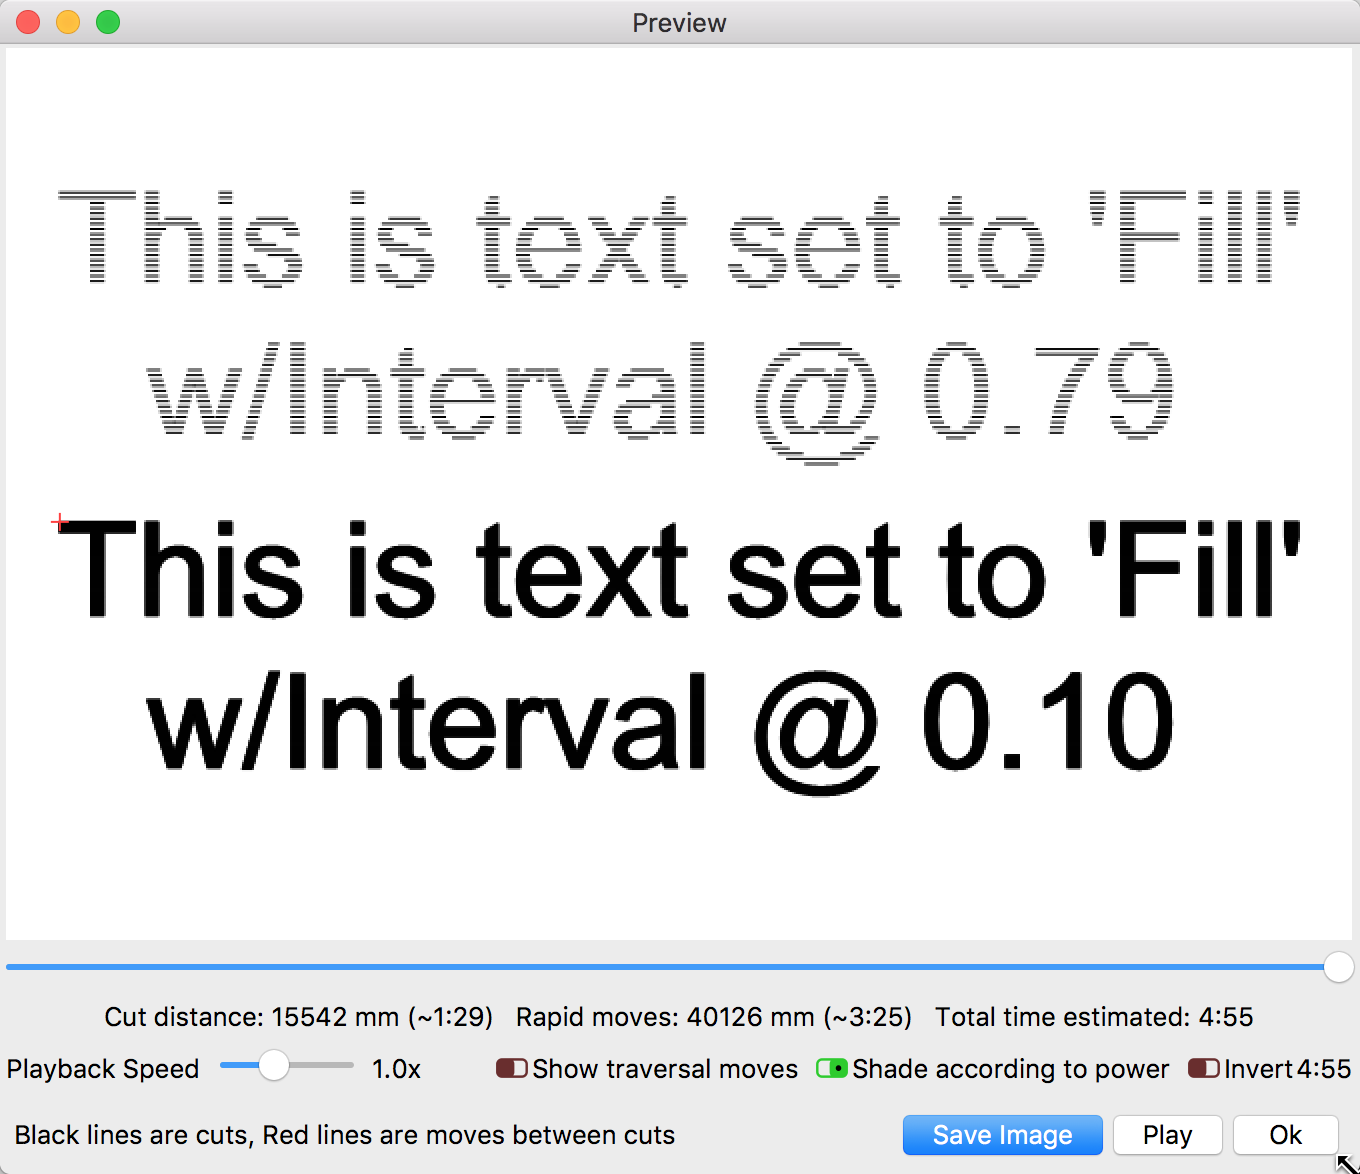
Per my previous / and on the picture / the settings for LPI were “passthrough” for the image ( though I think the screen / black layer was previously 320 as shown on the picture), and, the text was indeed set at 321.xx (interval .79).
John
You might want to decrease the Interval, reducing the gap between the scan lines for your text layer.
This is one way to darken the appearance of a scanned object. Another is to play with power settings.
What’s the diameter of the laser .01?
(CO2 - aeon mira 9…)
John, you have to help me here. I have no idea what you are asking.
I’ll try…
If you are asking what size is the diameter of the beam from your AEON MIRA 9 laser system, I could not say without more information. What wattage system are we talking about? CO2 glass tubes will produce a range of sizes. In general, the lower the wattage the smaller the dot size.
Is this what you are after? Did my previous answer help you and answer your original question? I want to make sure that is resolved.
You did help, thanks.
I’m just not wanting to overlap my beams too much because that means at any given power the engrave will go deeper. and will take more time. slight defocus can achieve the same effect (making the beam bigger… ) - I’ve experience, but with a glowforge 40w laser. Typically engrave at 105 lines / cm.
The Mira is a 100watt rated tube (based on the info on the tube itself) but I think it’s tweaked down to something in the 80-90w range…
John
Yep, I have see the de-focus used to great affect as well. Running a series of testing scans can help dial in the desired results. LightBurn can help automate to test building process using the Array tool to quickly produce a bunch of test squares. Once you have your test file(s) built, this can be helpful when changing material as each might require a different Interval to produce the best result.
Im having same problem, i think it is that the text when being burn is a continuous beam which is vaporizing the wood so it is not burn and the image setting is using dither which is a number of small dots so leaves a burn layer behind. Is there any way to convert the text to an image? if this could be added to lightburn it would be a great option.
Not following you. What problem, in particular, are you referring to?
LightBurn does not have a convert text to image function. If you want to create text as an image, you will need to do that externally.
This topic was automatically closed 30 days after the last reply. New replies are no longer allowed.