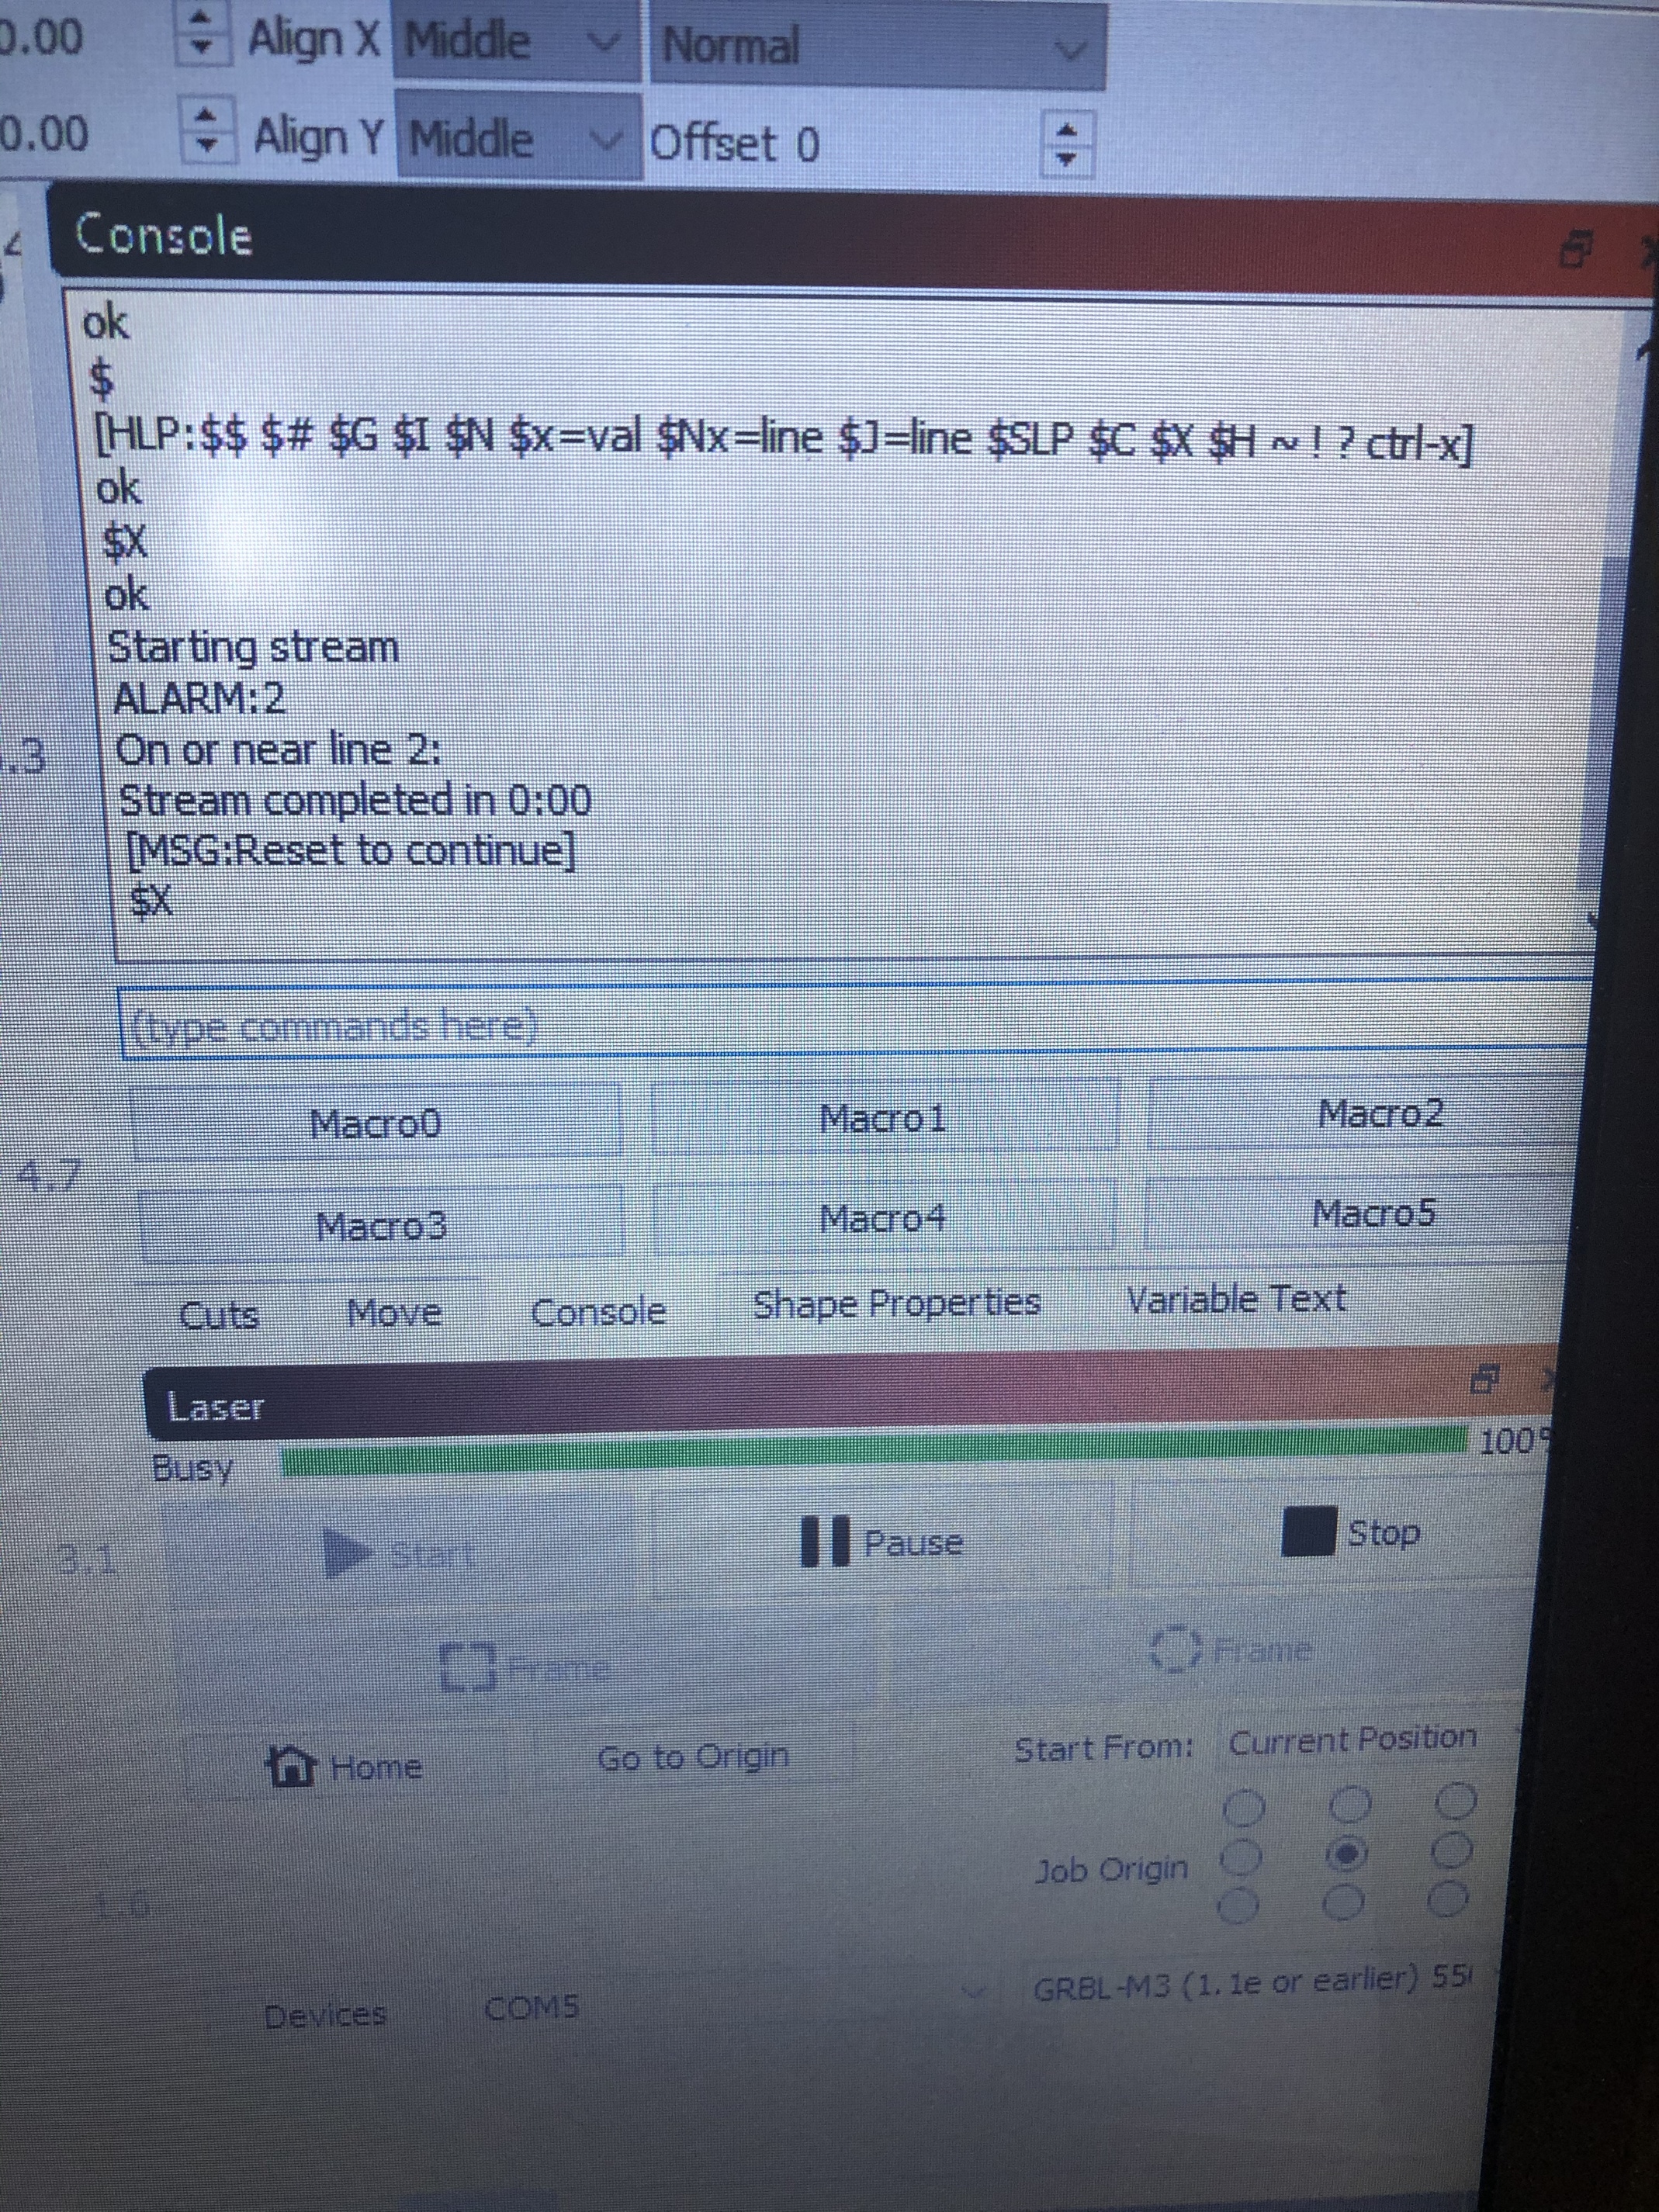
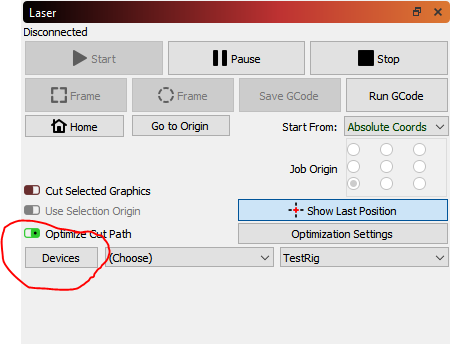
Okay so I’m running into a problem where, when I try and jog, the machine throws of off A alarm 2 which I have know clue what that means here’s the picture of what it’s saying
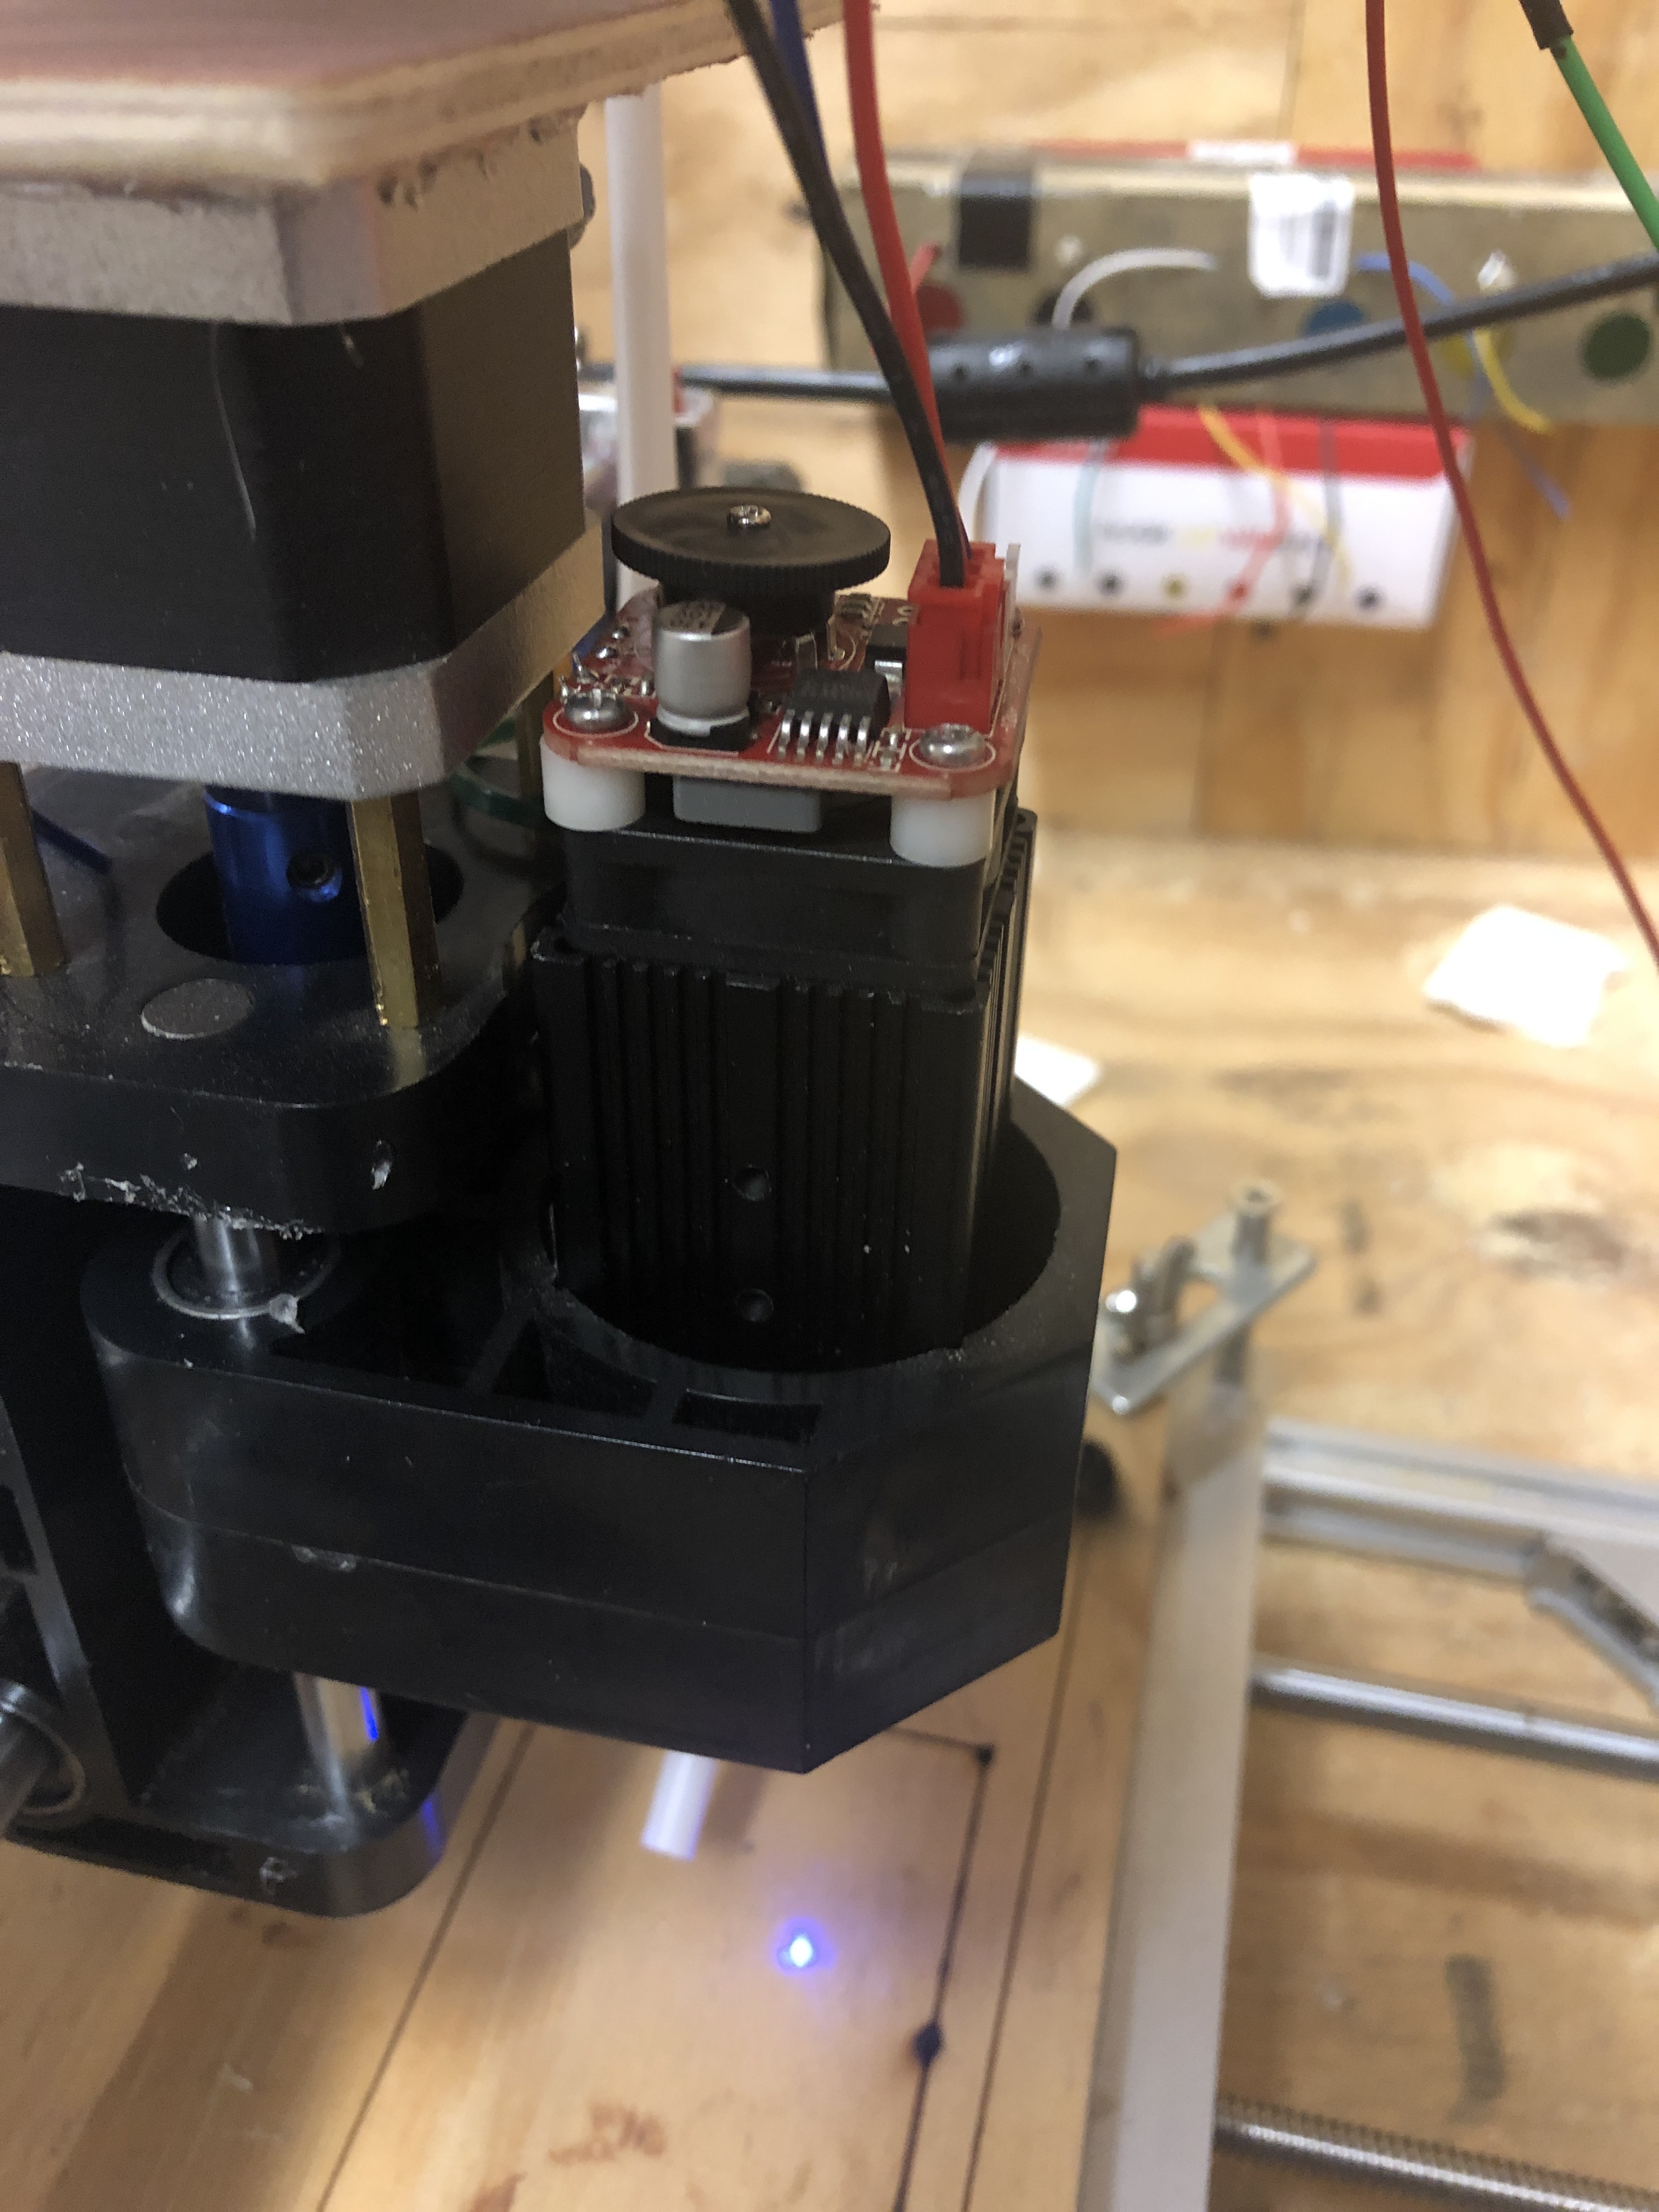
now when I actually try and attempt to run a program it says on or near line 4 no clue what that means and I don’t know how I should look all this up online or YouTube. Another important thing to know which you will see in the picture is when it throws the Alarm 2 and I reset the machine it no longer responds to my commands, what’s the reason for that? I literally have to restart the software for it to respond but once I try and jog or run something, the same thing happens again and again, not sure what to do right now, now I don’t know if this could have affect on the laser is that I’m also at the moment trying to add limit switch’s so I can maximize the LightBurn software capabilities, this all started happening once I turned on the laser, here’s a picture of the laser 5500mw China laser
The black knob is how you turn the laser off and on it has 2 inputs but the guy on eBay says you only need the one, no clue what the 2 pin input is for. Thanks for any advice or help in Advance
Well that’s just it this didn’t start acting up till I turned on the laser before that the machine could run programs or job anywhere, I did a little CnC mill work with it but the frame just wasn’t strong enough for my satisfaction, it came with the laser but I wanted to upgrade so I bought one that was compatible with it, it wasn’t until I plugged it in and turned it on that it started acting up like that with that Alarm 2. I will double check again, I already looked at that before but it won’t hurt to check again .Thanks for your time and support
I’m still not sure what you are getting at there. Regardless, Alarm 2 means you are trying to move to some place that your controller believes to be out of bounds. The only way this would happen in LightBurn generally is if you have a mismatch between what the controller thinks the size is and what LightBurn thinks the size is.
Does your machine have actual limit/homing switches?
No, I’m in the middle of trying to figure out how to Install limit switch’s and homing, I’m just confused why throw the alarm now after I have been ran programs off of LightBurn, But as soon I plugged in the laser I get the alarm that’s what I’m getting at, it doesn’t make sense at least to me, if the soft limits weren’t set right at the beginning when I set them wouldn’t It be throwing the alarm off as soon as I try to run my first program not after like the 15’th one? But it didn’t throw the alarm 2 till I plugged in my laser that’s what’s throwing me. Thanks again
So that’s not my problem as far as I know, I made a video where I show and explain the best I can, hope this helps shed a little light on the subject! Thanks for your time and support
The ‘Failed to load library’ message is because at some point in the past you made a library and saved it, but then deleted it. LightBurn remembers the last one you used and is trying to load it for you, but can’t find it. Just go to the Library window and click ‘New’ to clear it. That should get rid of that. (still watching the rest)
ALARM:2 is GRBL telling you that the GCode on that line would send the machine out of bounds, so there are a couple of things we can check for that. First, GRBL has travel limits - it knows how big the machine is because you tell it in a firmware setting, and if that setting is wrong, it’ll be convinced that you’re going out of bounds even if you aren’t, so we can start with that. If you didn’t have limits enabled before, the machine wouldn’t have cared.
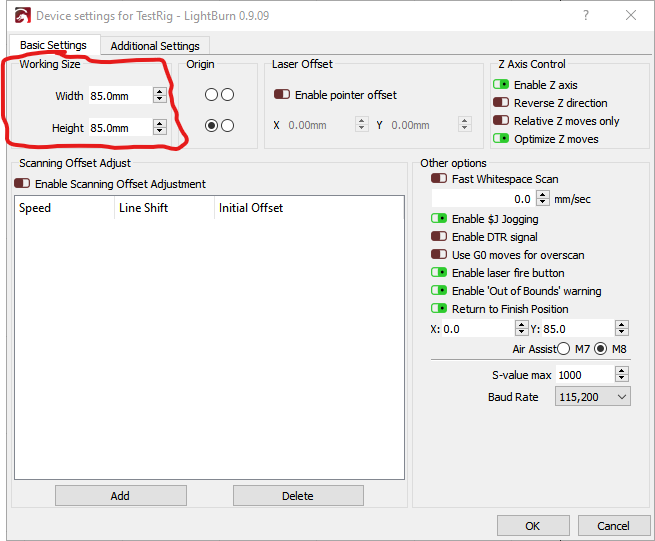
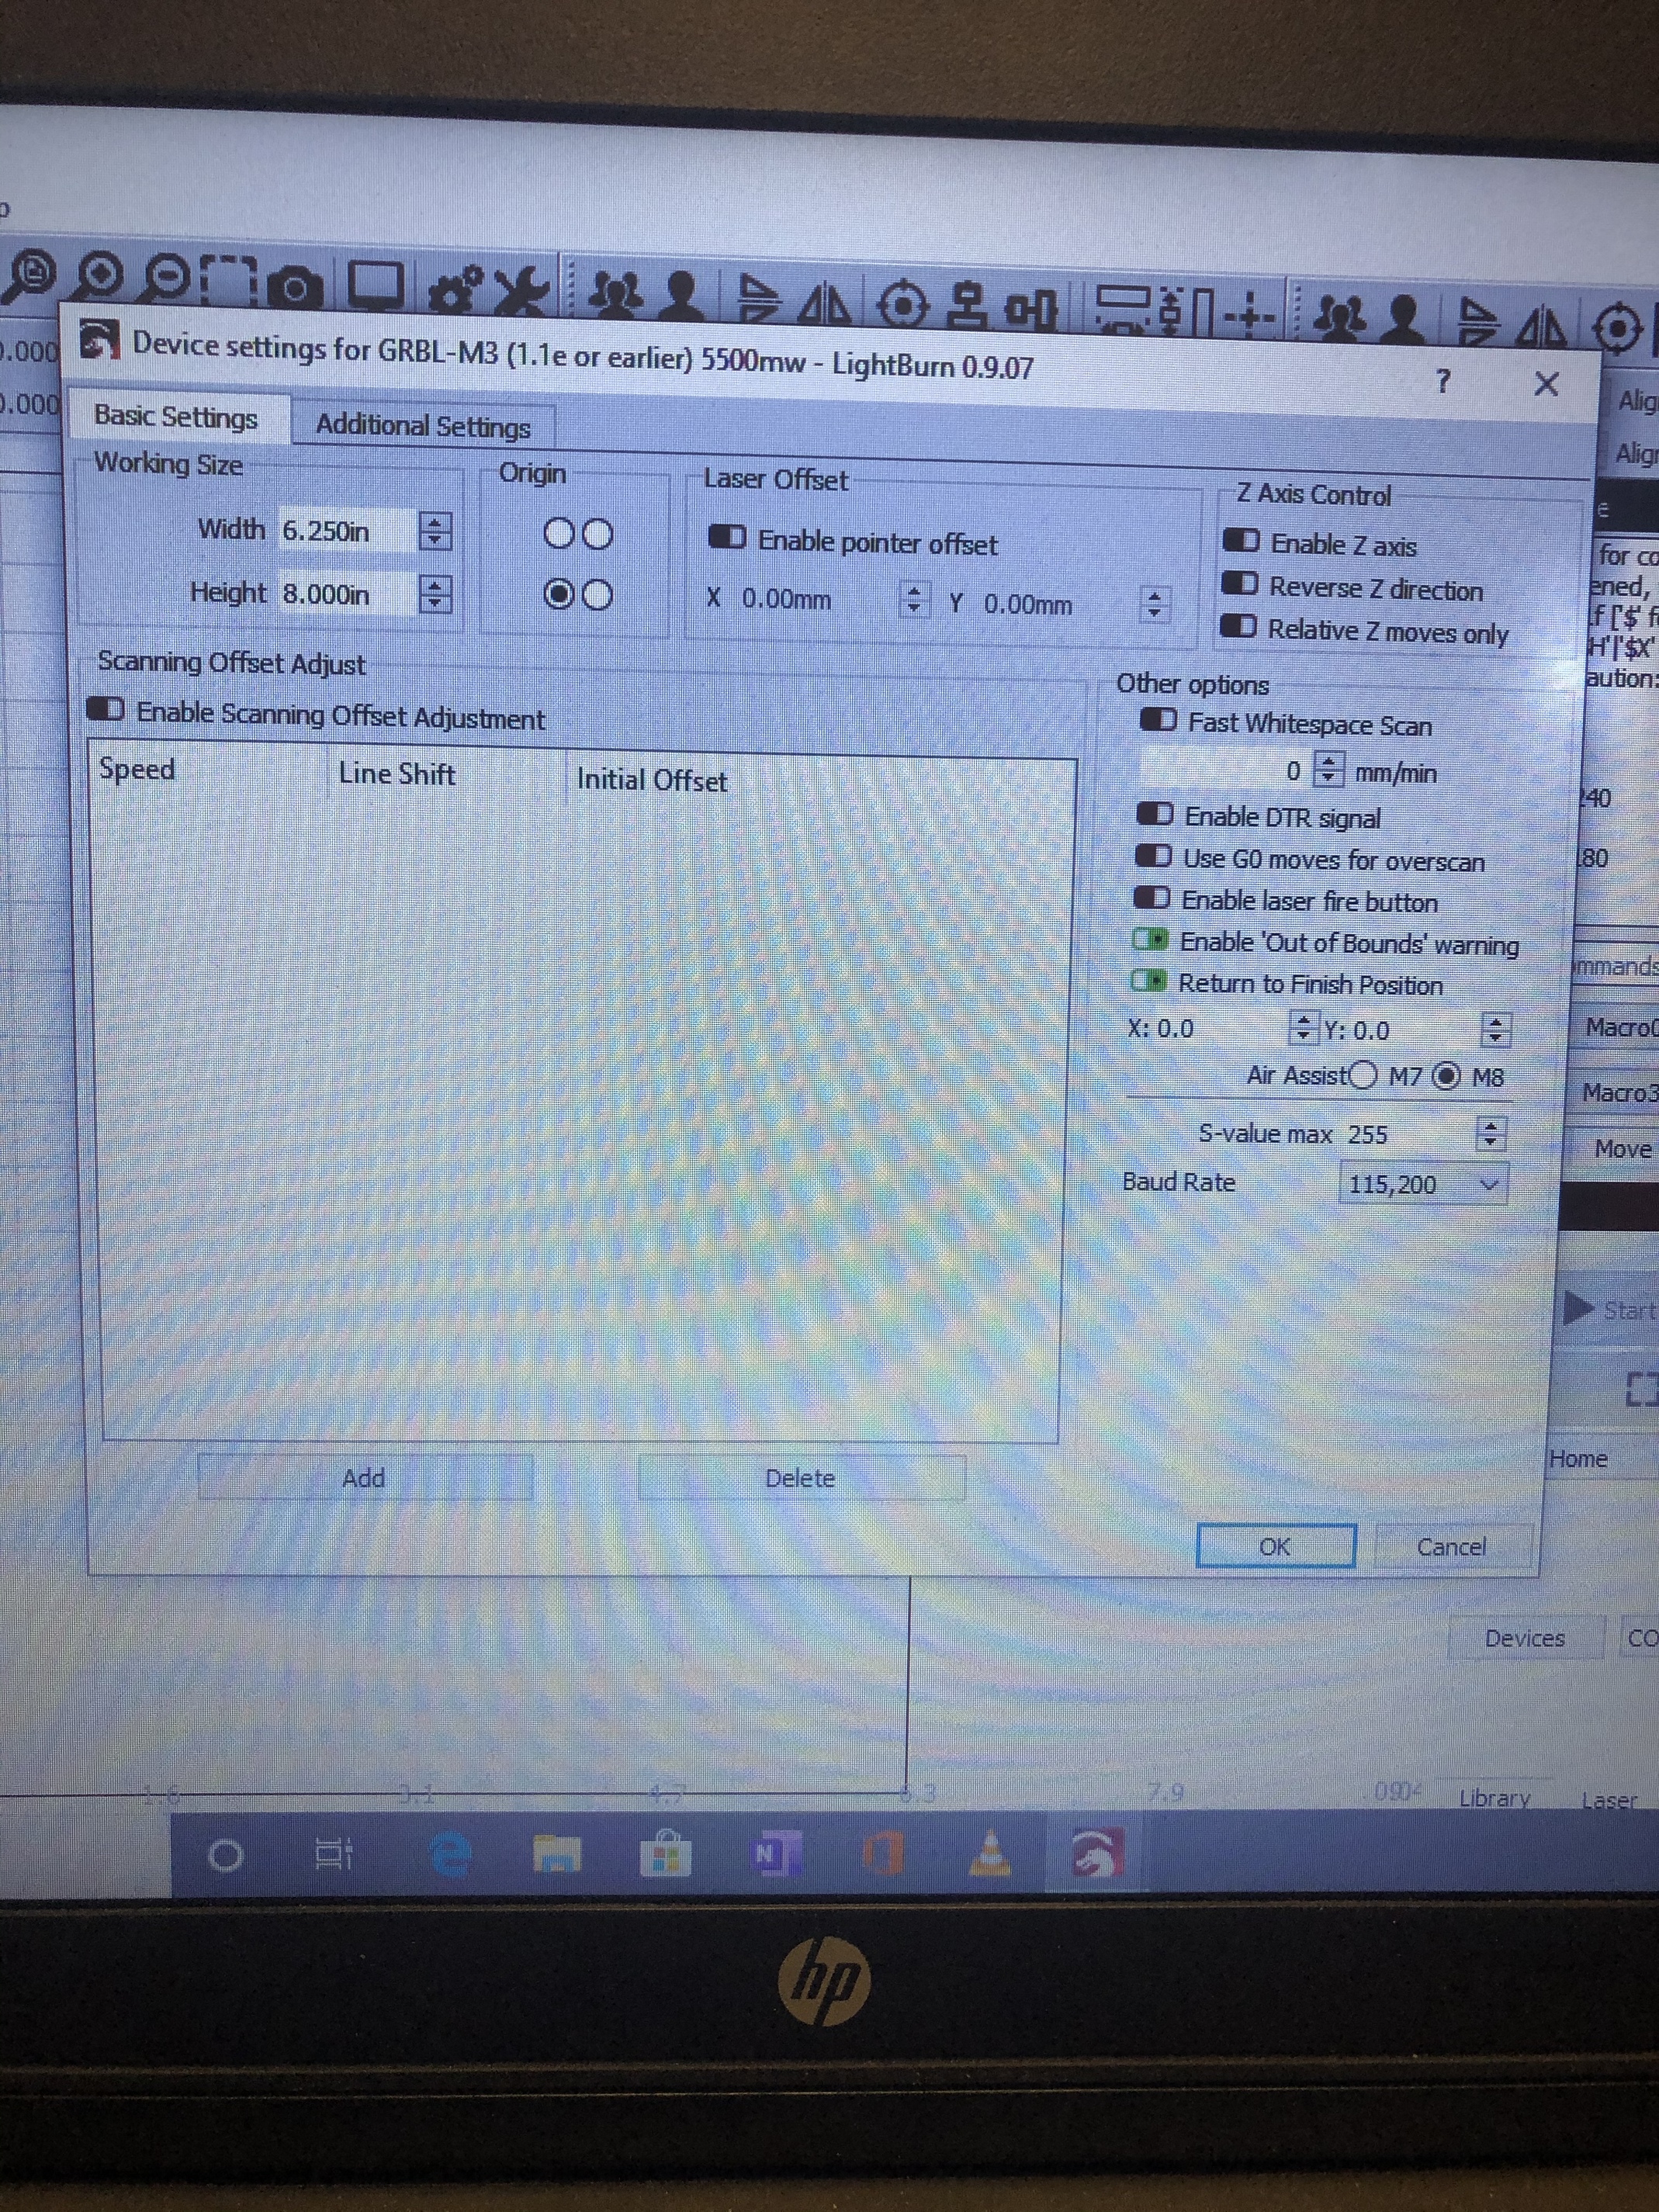
these are what my GRBL 1.1 is set too To be honest I don’t really understand how to adjust those settings in the firmware, is there a video I could watch to better understand what I’m looking at and reading, because some of the examples are a bit confusing and at least to me blunt because I don’t really understand how GRBL works if I’m being honest so it’s basically trial and error for me since I can’t seem to find anything on YouTube. thanks again for your time and support
It’s 6.125 by 8 inches 6.125=X,8.0=Y if I’m remembering right, have to check, but those are the sizes just not 100% positive the order. And I don’t have the homing set up yet, I was in the middle of doing that when the machine stopped letting me jog and alarmed out.
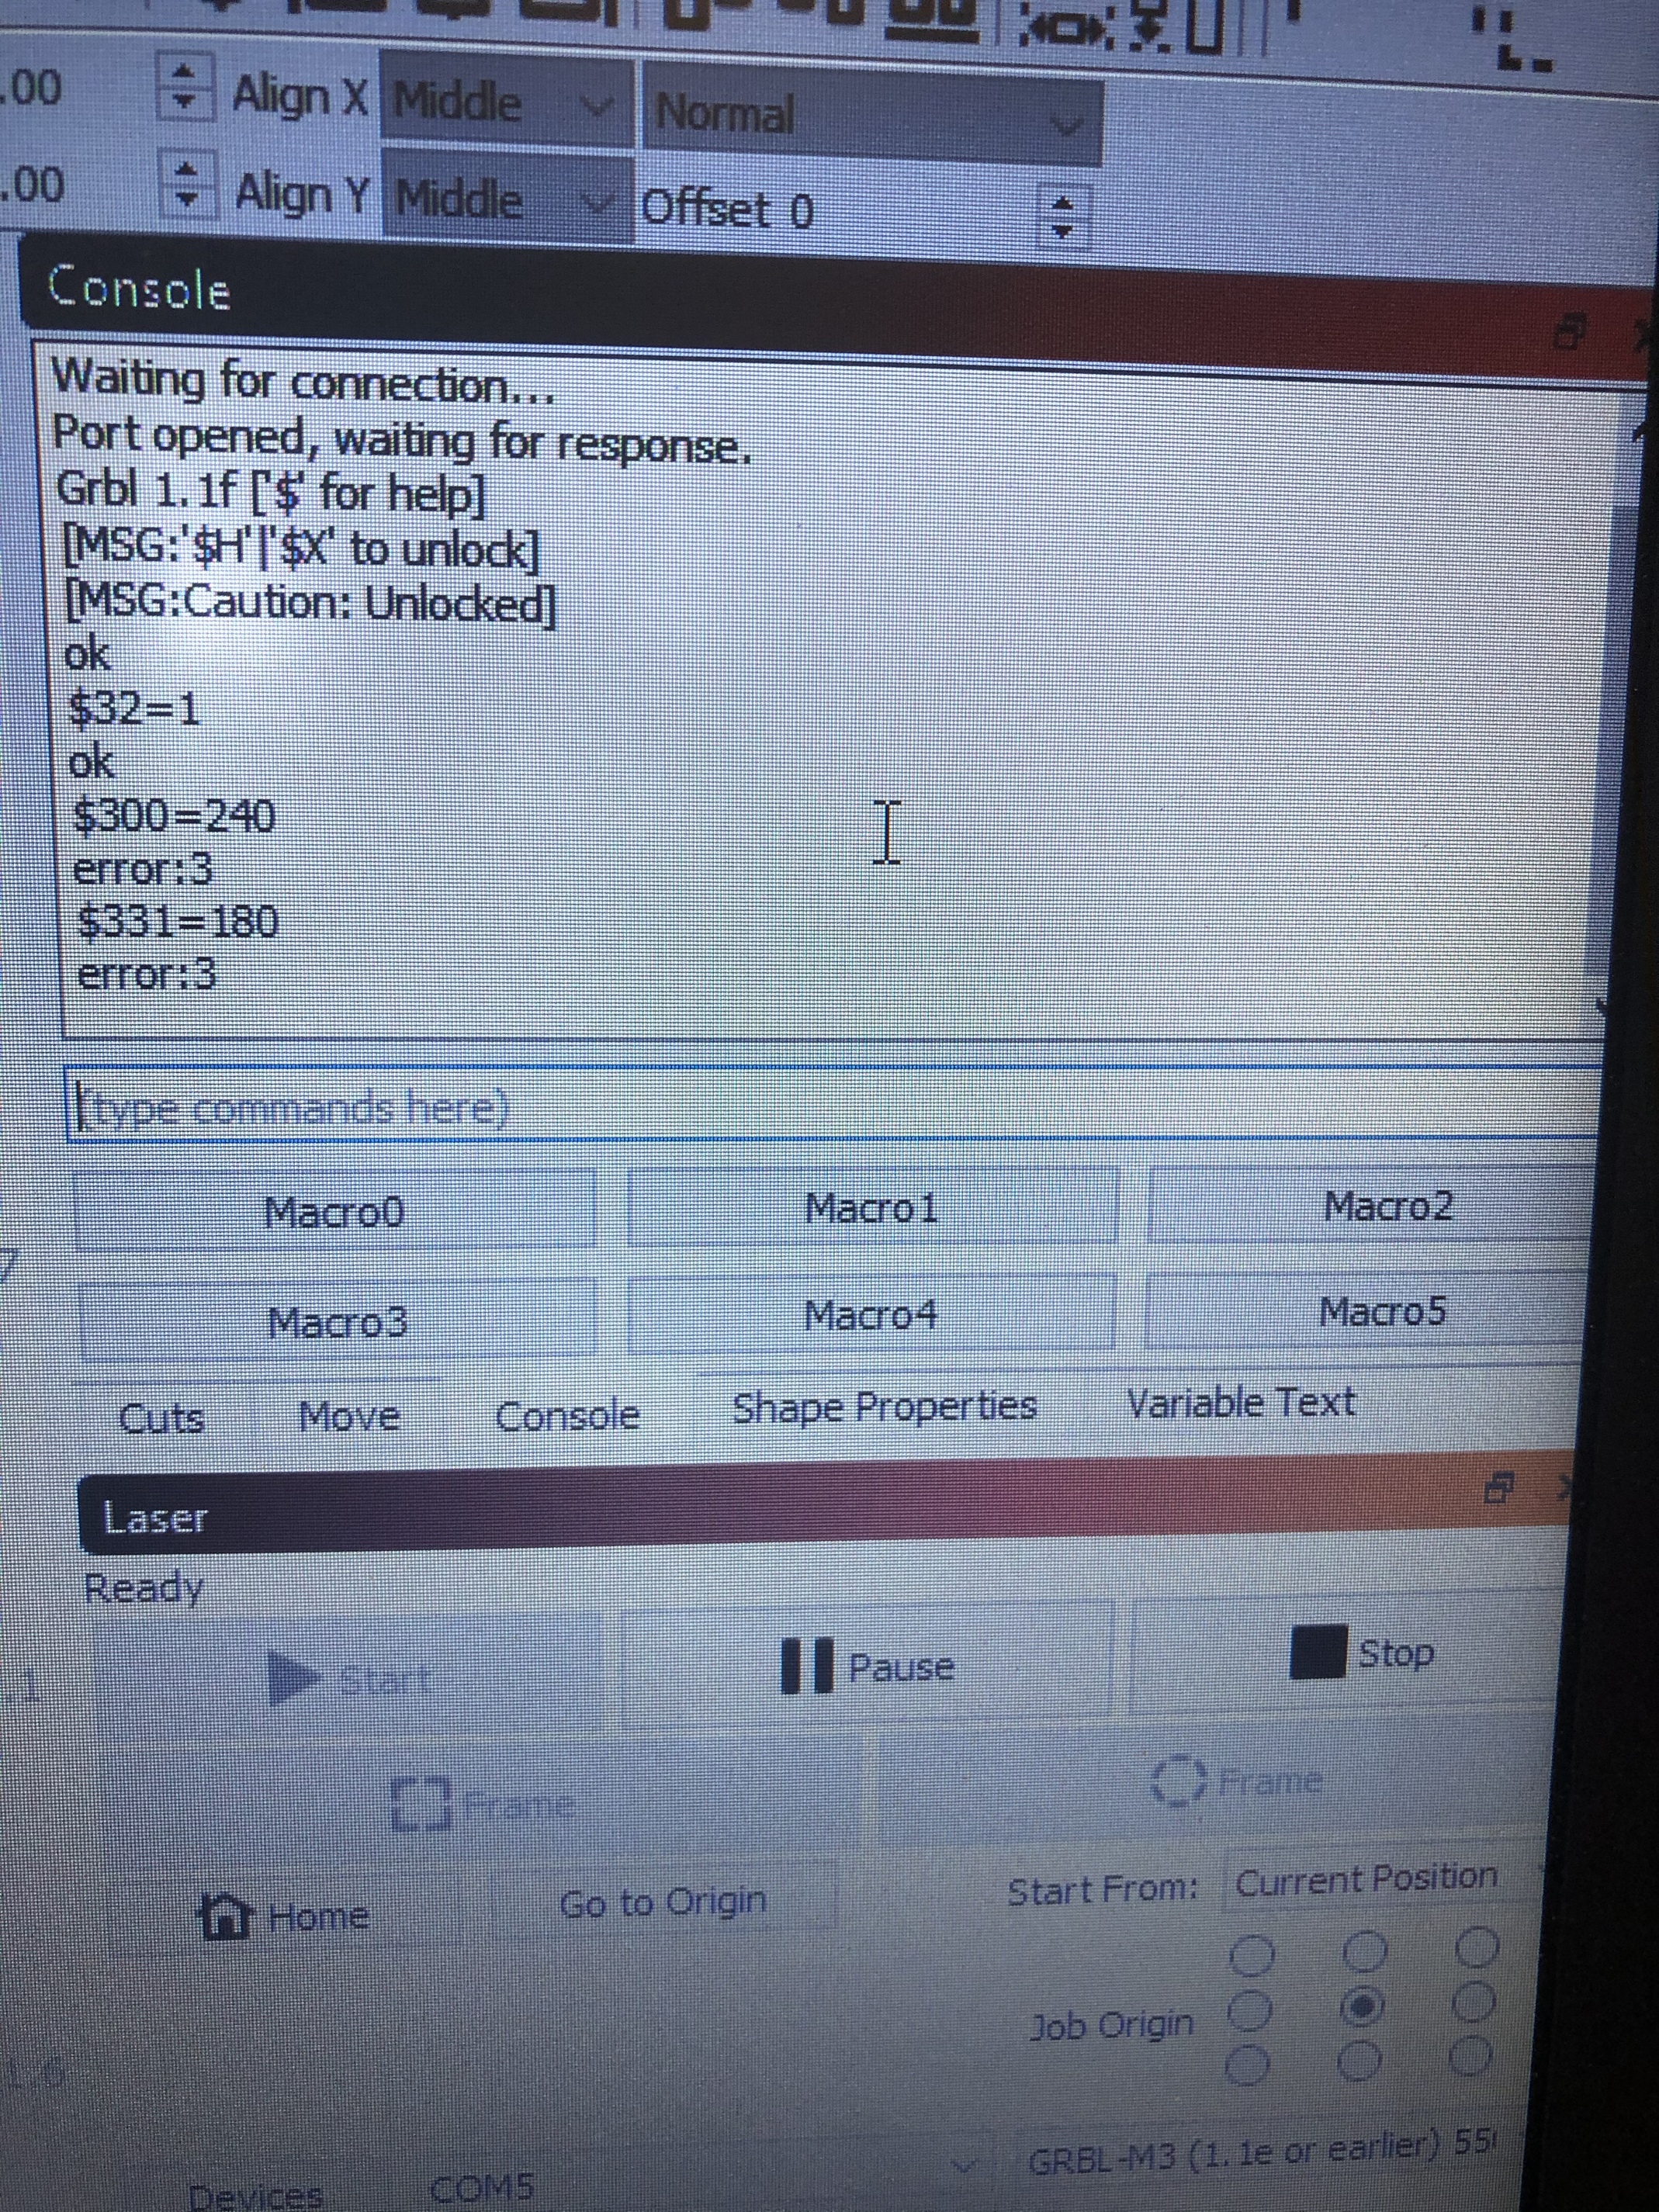
So I entered in the actual table size of the machine and it popped up with error 3, which doesn’t that mean it doesn’t recognize the command? Also I had the machine set up to my safe cutting conditions earlier which is what you’re seeing in the one picture should it be my safe cutting area that I should enter in the consul or the max movement span? Because when I entered in the command was the max travel, as you can see in the picture below off of eBay that’s the max travel but I had originally whenever I first got LightBurn set the machine up as far as as my limited understanding was concerned the actual safe cutting Area also I had LightBurn set to inches would that make a difference?
Okay ya thanks, that works now my other question is I’m setting up homing right now and when I send it to find home it hits the limit switch and it doesn’t shut off or recognize is that because it’s homing too fast? Because it Alarms out when I back it off the limit switch, that’s what I figured but wasn’t sure. To be honest I’m a little confused how that adjustments work, so is kinda like this, here’s how I’m understanding the commands please tell me if I’m understanding wrong. example: $10 is saying what you’re looking at and the = means I’m changing it to, then the 180 or whatever you put after = is what you’re updating it too?Thanks for your time and support
If it’s not registering hitting the homing switch there’s generally 2 possibilities:
Your homing switch is not properly connected to your controller and there for not getting the signal
Your homing switches are wired to the wrong axis. As in it’s homing Y but thinks it is hitting the X homing switch.
So, check your wiring. If you have a multi-meter put it in “continuity test” mode and connect to wherever each limit switch connects on your controller. With the machine off, just press the switch yourself and make sure you get a beep out of your multi-meter.
Not sure I under stand the config questions… but yeah, $10 is the config option and everything after the = is the value.
Note: you can also use Edit > Machine Settings and there’s a nice UI to change stuff with descriptions and such. Just be sure to click “Write” when you are done!
Okay so I’m currently working on installing my limit switch’s, my problem I’m running into now is that when I Home it goes up in Z first and just crashes my question to that is there a command that ties the limit switch and homing as one? Because the limit switch doesn’t go off till AFTER I stop the homing because it’s crashing, here’s my settings


 so it’s basically trial and error for me since I can’t seem to find anything on YouTube. thanks again for your time and support