So there’s a line missing and a part in the middle of the C got no clue why?
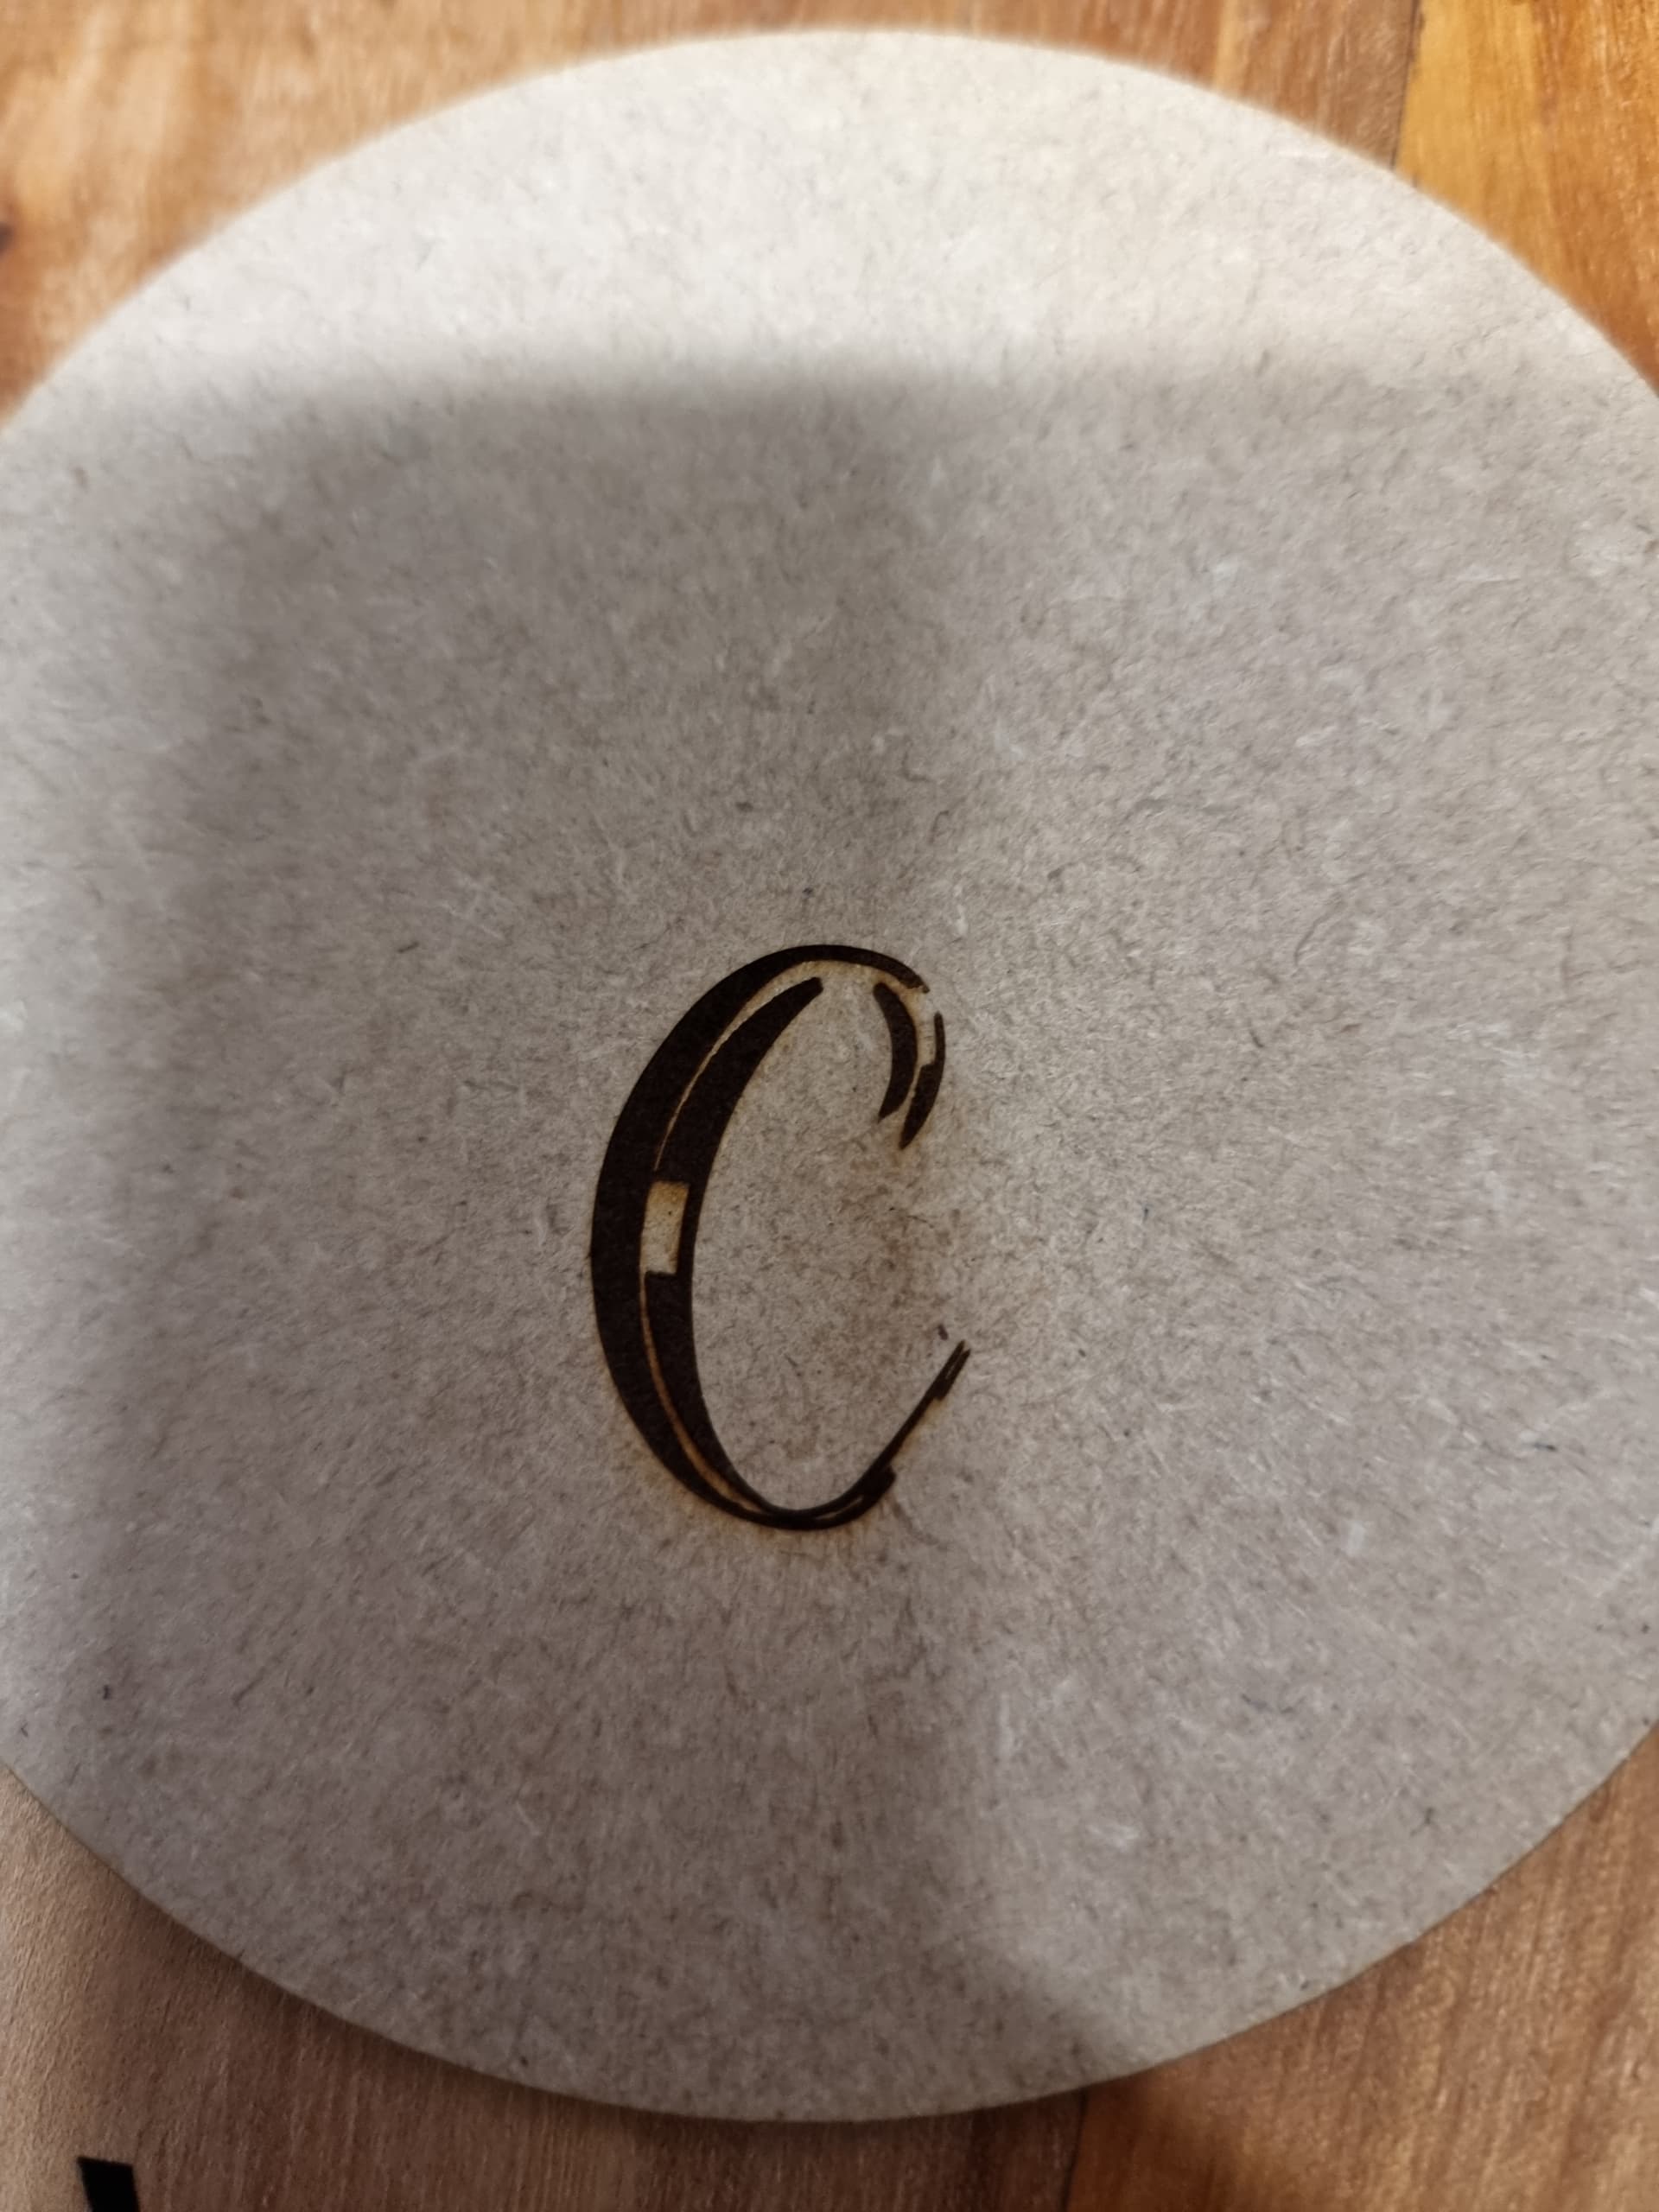
Post this file for review. ![]()
2 Likes
Sorry what do you mean?
It’s not a file it’s just text I have wrote in
Save it as a LightBurn project file, and attach the LBRN file here so we can have a look at reproducing it here.
1 Like
FOR LIGHTBURN TO LOOK INTO.lbrn2 (19.3 KB)
Hi i had to change
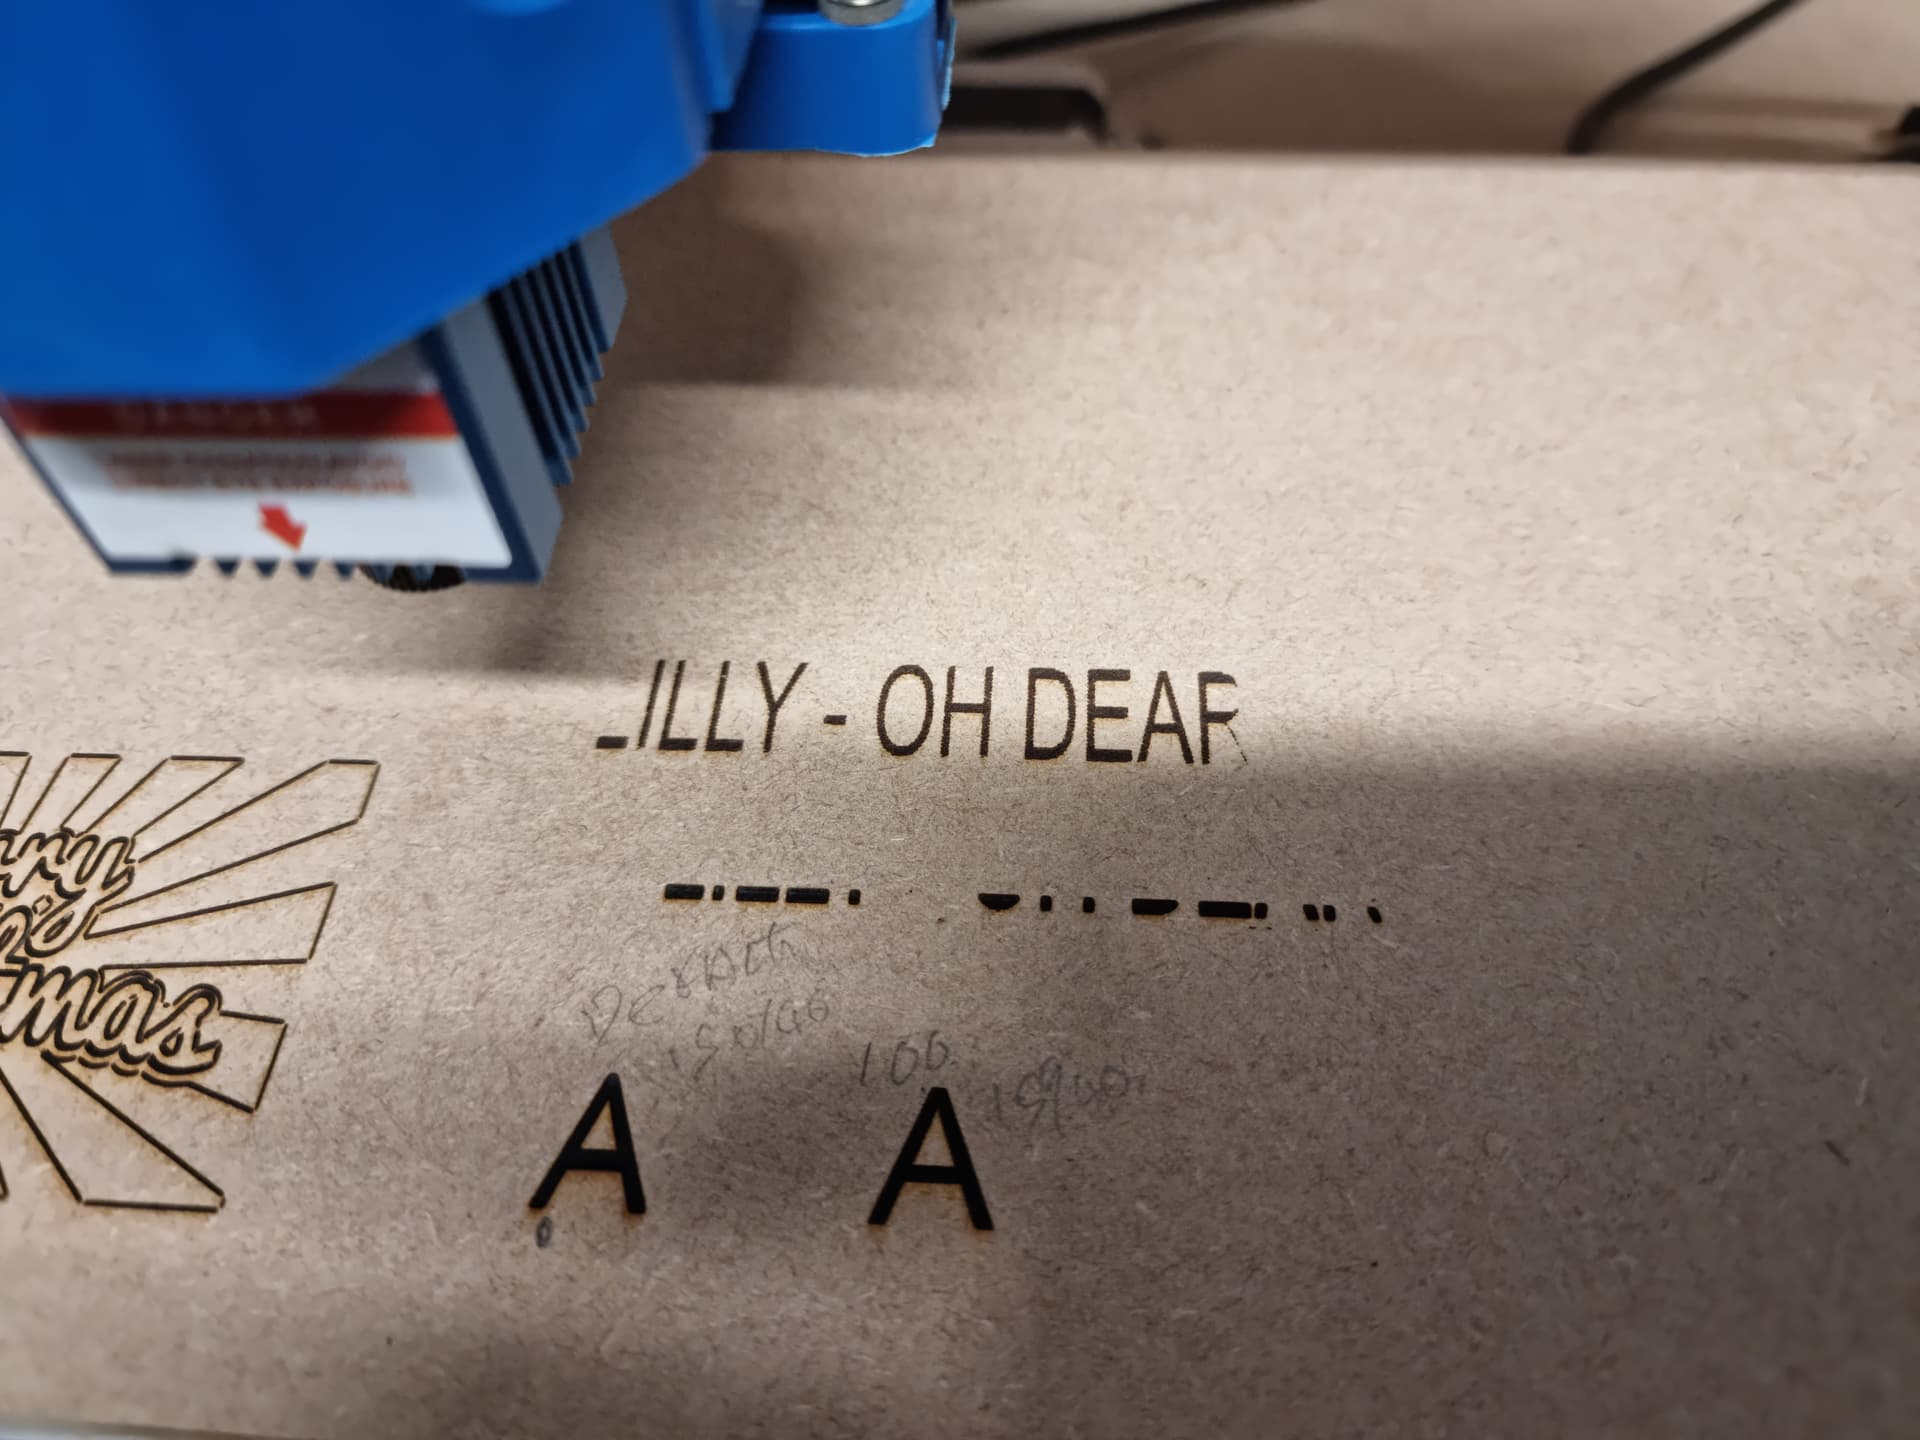
the file as i didn’t save the one i shown you this is the similar situation i burn the liily oh dear it missed of the first and part of last letter
i have reduced the lines in fill mode only to do it quicker but this happens anyway
if i download a image and trace it it comes out near enough perfect but soon as i fill i get errors
That just looks like you aren’t using ‘Overscanning’ in the fill setting, and your laser is accelerating too slowly. At the very beginning and end of a row, the laser has to speed up / slow down, and as it’s moving slower, the power is reduced. If you enable ‘Overscanning’ it adds an extra line to the start with the laser off, so it can get moving before the beam comes on. This keeps the power up, and prevents this problem.
wow brilliant ill try this
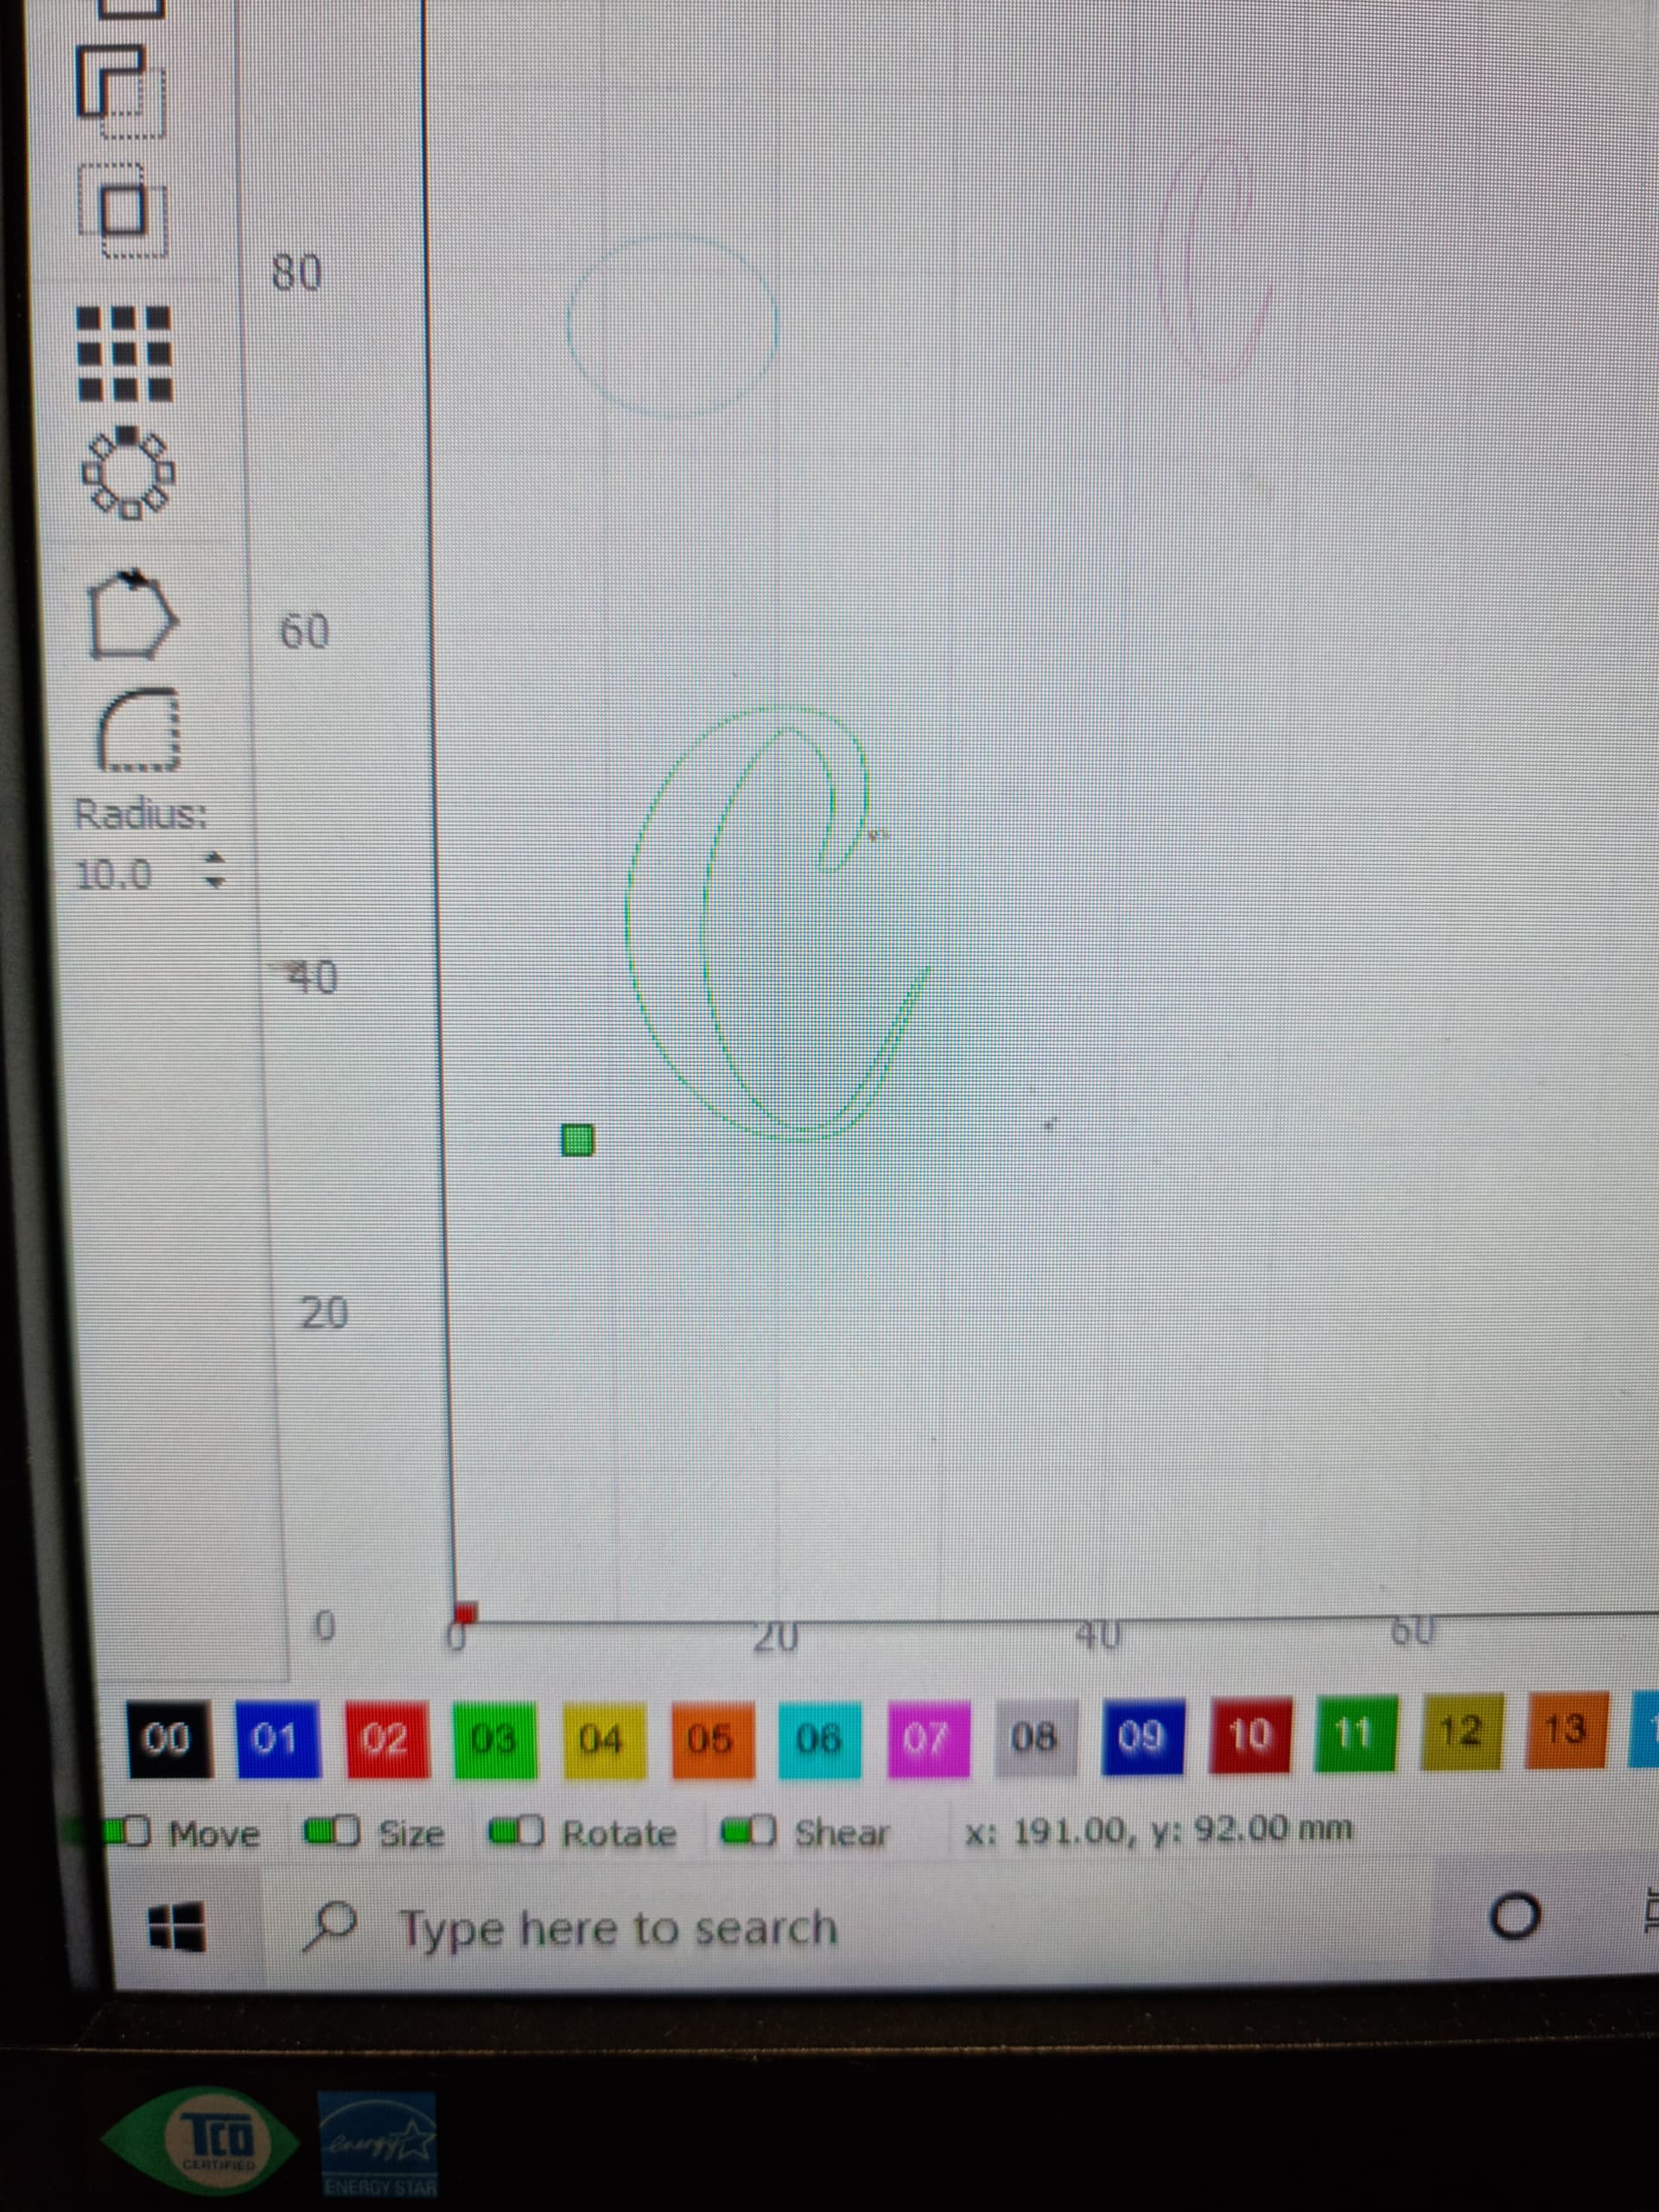
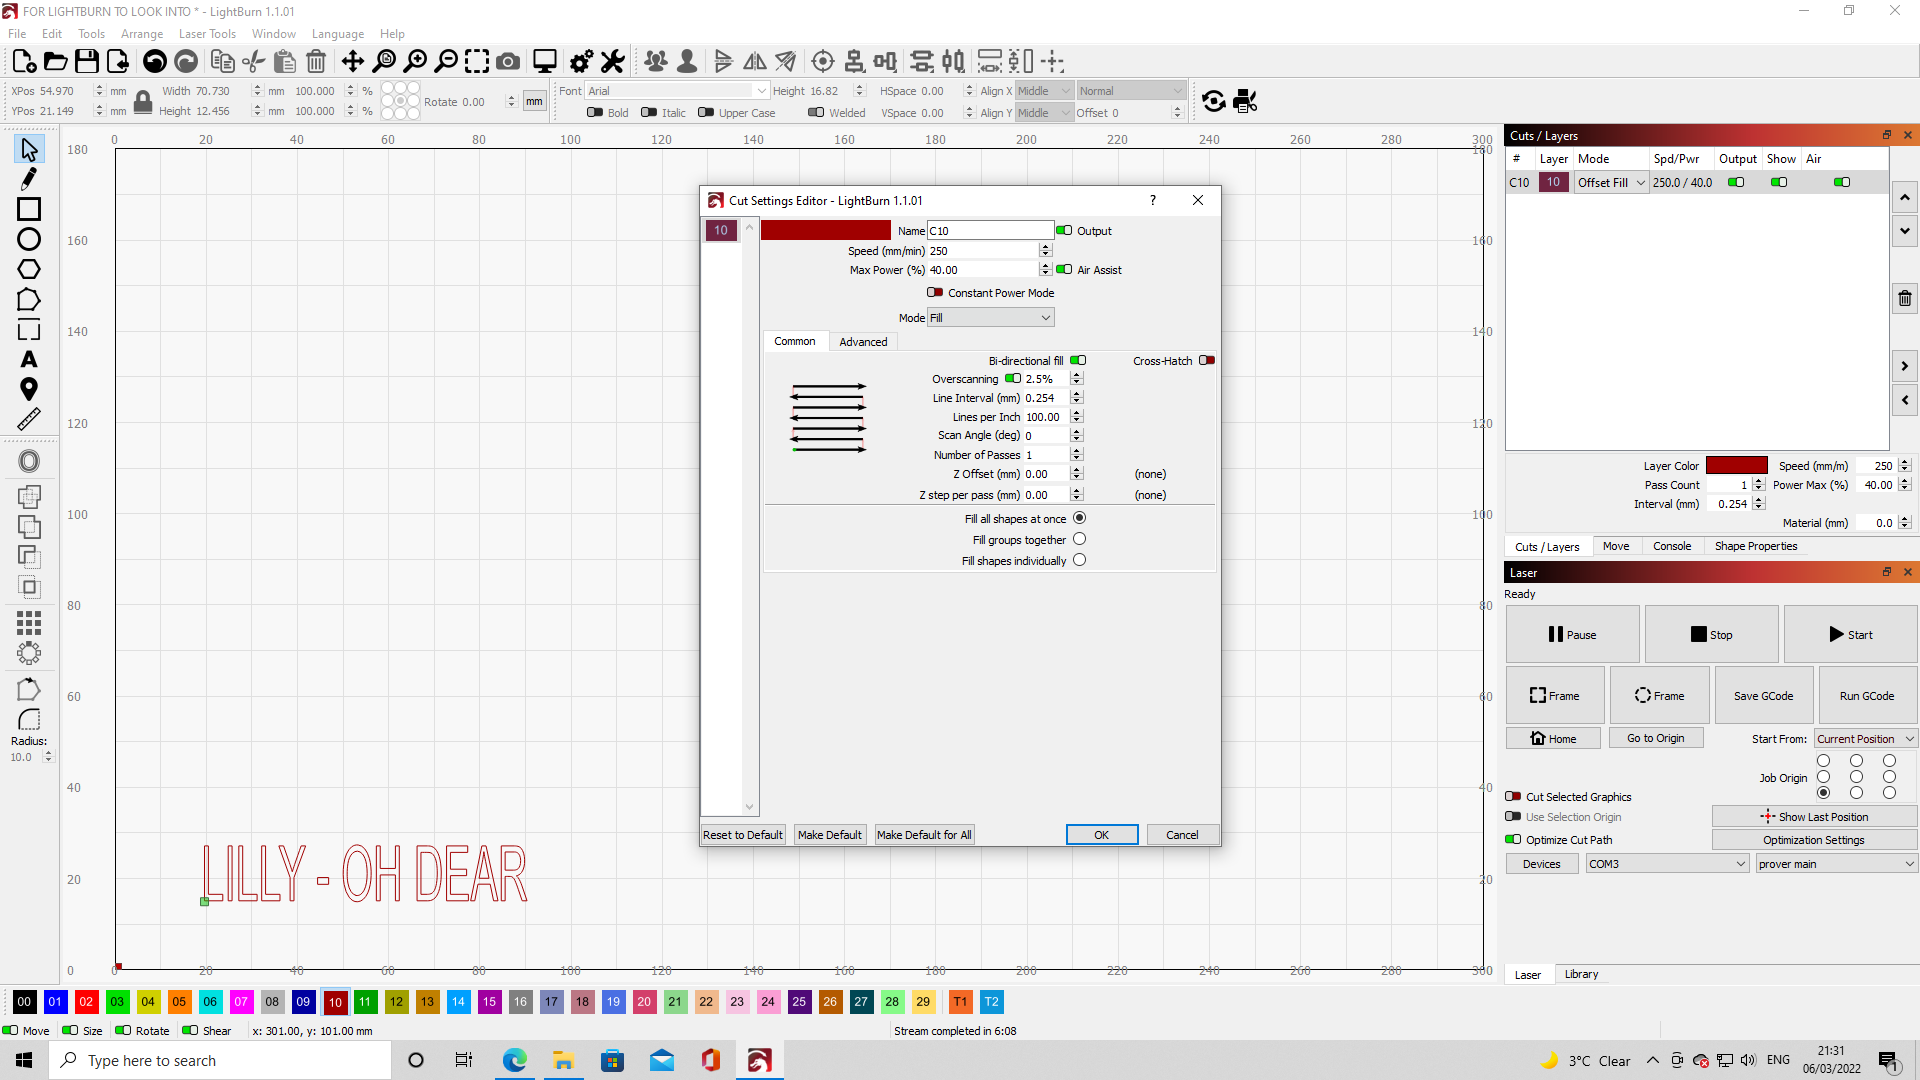
i am currently trying the same text but will offset fill on it seems to be missing a line or something im not sure ?
see image below
Go to the console window and type this: $$ (then press enter)
Copy the text your laser responds with and paste it here. I suspect your acceleration settings are really low, which is about the only thing that would cause what you’re seeing.
I just realized you have a SainSmart laser, so that’s quite likely what’s happening. You can likely increase the acceleration, but I’m not sure by how much. My guess is that it’s going to be at about 10 mm/sec right now - This will be the $130 and $131 settings when you type the above command. You can try bumping them up incrementally. Try typing $130=50 (and press enter) to set it to 50 mm/sec, if that still has visible gaps, but is otherwise working, try going to 75, 100, and so on.
$$
$0=10
$1=25
$2=0
$3=2
$4=0
$5=0
$6=0
$10=3
$11=0.010
$12=0.002
$13=0
$20=0
$21=1
$22=1
$23=3
$24=25.000
$25=500.000
$26=250
$27=1.000
$30=255
$31=0
$32=1
$100=800.000
$101=800.000
$102=800.000
$110=2000.000
$111=2000.000
$112=600.000
$120=10.000
$121=10.000
$122=10.000
$130=500.000
$131=400.000
$132=100.000
ok
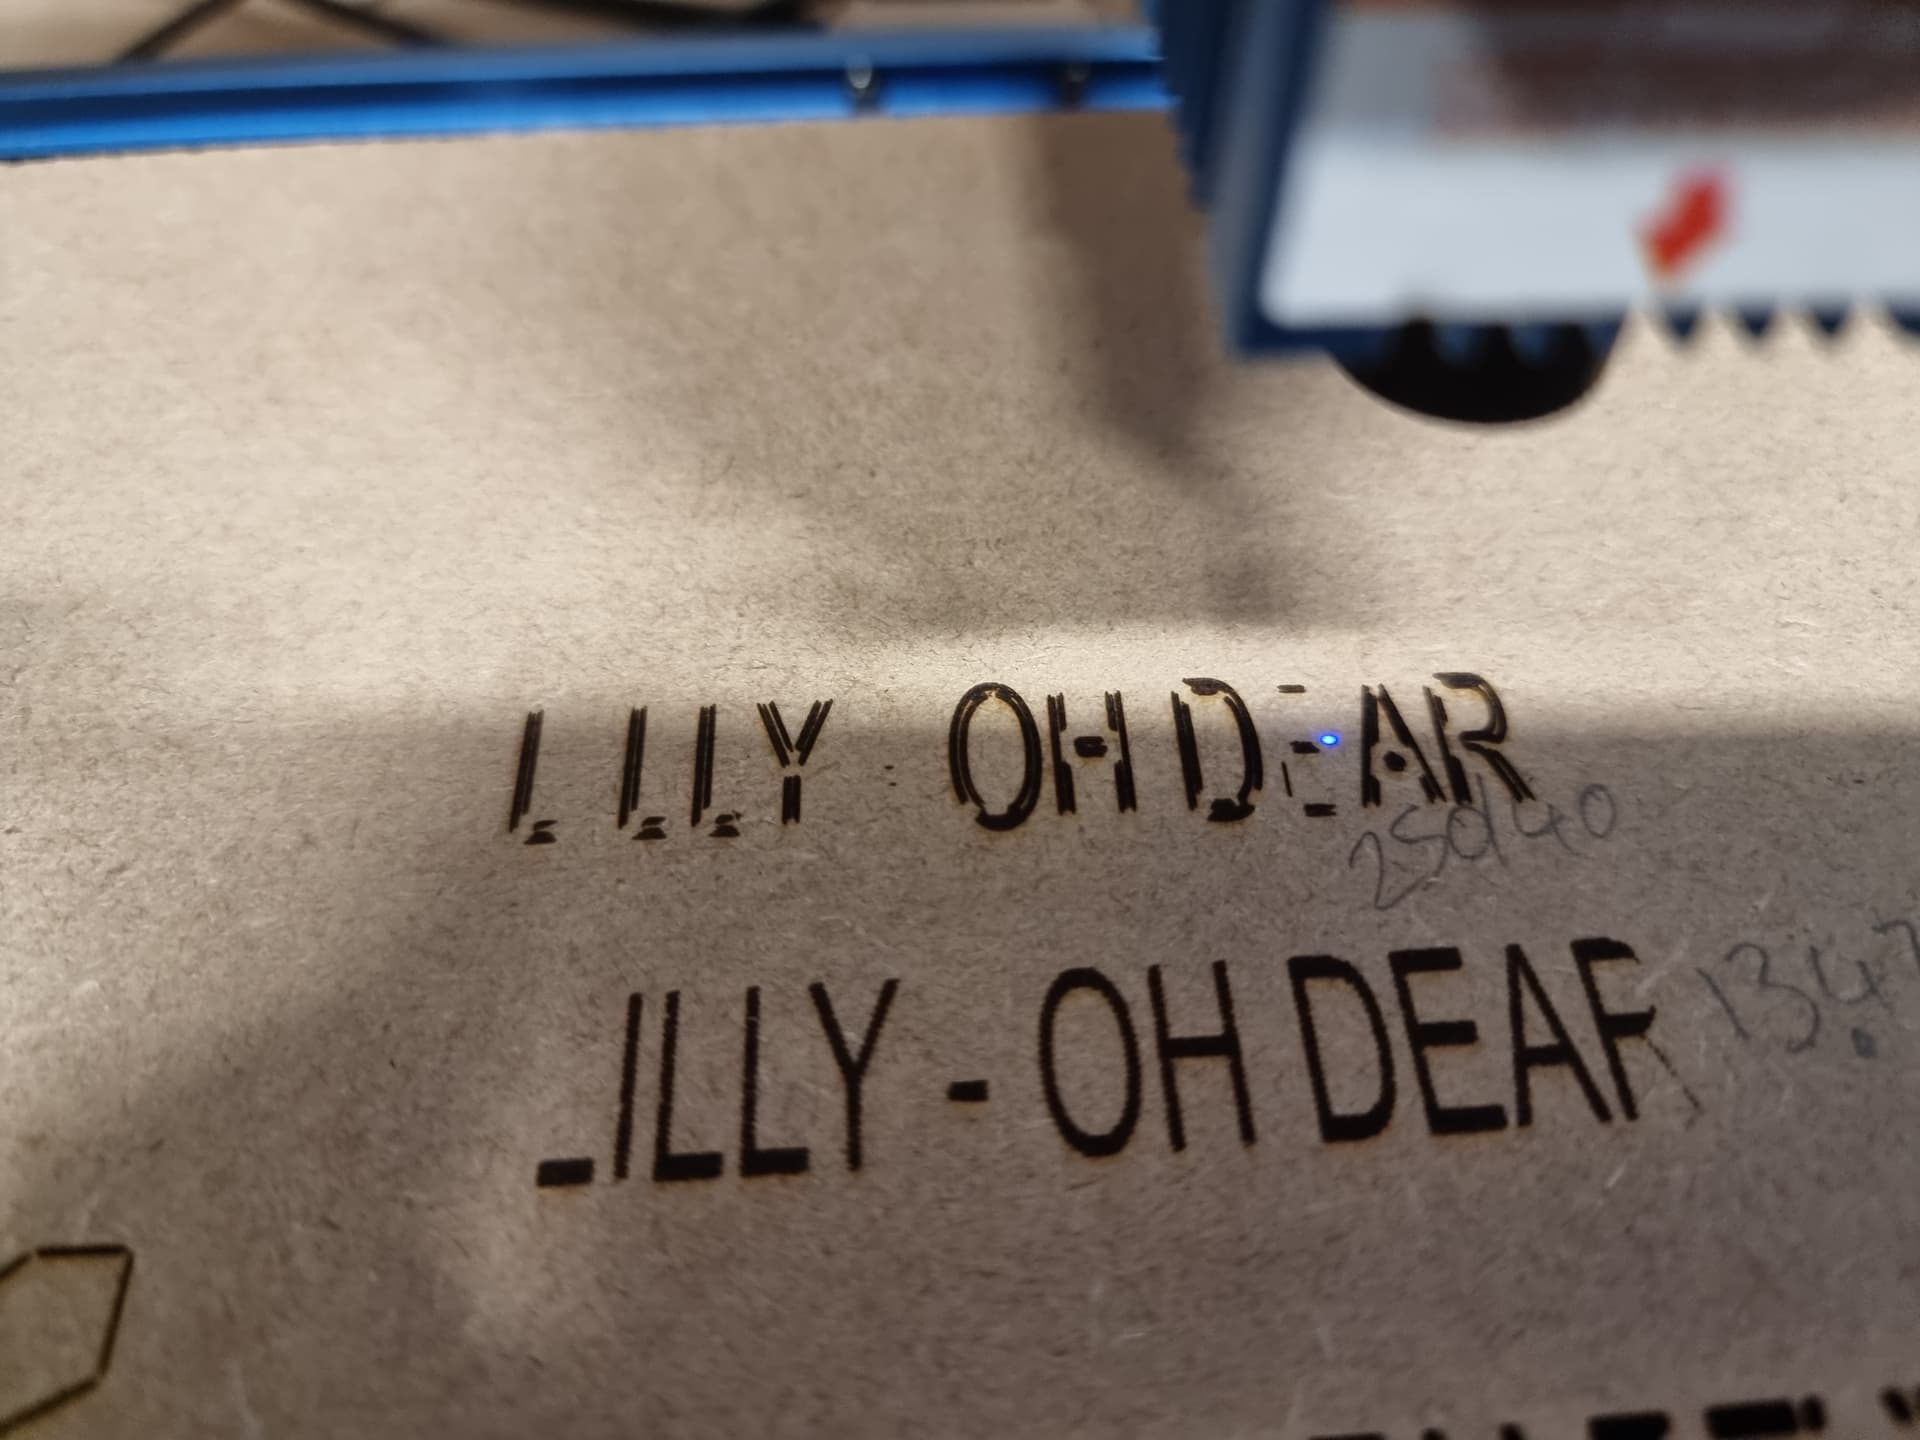
i tried it with overscanning at 5% 0.21mm it corrected the “R” a little bit but “L” still isn’t visible
does it matter how high i put the overscanning to ? this lasers minimum power is 40% not sure if that has anything to do with anything
I got the setting numbers wrong - It’s $120 and $121, not $130 and $131. Yours are extremely low, so that’s likely the problem.
Try $120=50
2 Likes
it works it works ![]()
![]()
![]()
![]()
![]()
thank you so much well happy
is this likley to of been the probelm in offset and fill as well?
Yes, same issue for all.
1 Like
wow excellent thank you
one more thing do i reset the overscanning or turn it off or should i keep it as it is?
I’d leave it at 2.5 to 5% for that laser.
1 Like
so happy with that thank you so much ![]()
This topic was automatically closed 30 days after the last reply. New replies are no longer allowed.