If it’s an image and without knowing anything more about your project your best bet may be to use the “Start Here” feature in the Preview simulation tool.
You can use the slider control to move to the point where the job failed and then use “Start Here” to resume at that point.
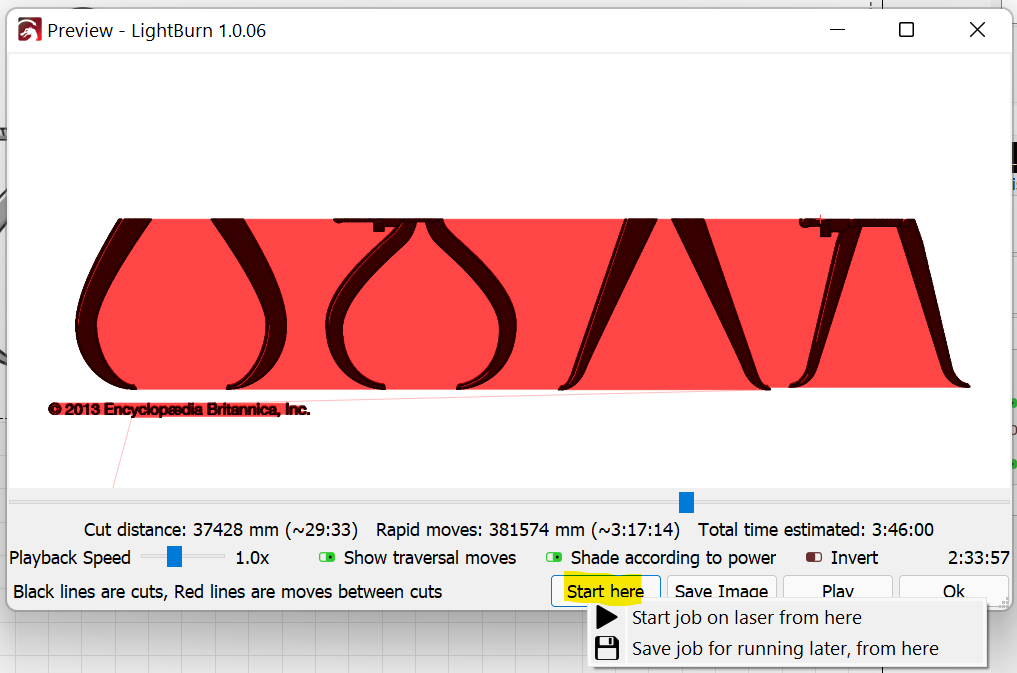
Note that you can use up or down arrows to make very fine tuned adjustments to the progress bar. It will move very slowly so you may not notice movement immediately. Similarly, you can use PgUp and PgDn keys to move more rapidly.
I’ll caveat that the accuracy of this will depend a lot on how reliably your machine homes. Even a small difference of half a millimeter will likely be apparent. Also, it can be very difficult to line-up the Preview point as to start at the correct point. Just to temper expectations it’s likely that even if you do this extremely well you’re likely to see a seam between burns.
You only really get one shot at this. You may want to run a simulation by setting the laser power down to framing levels and then trying this. Will give you an idea if your alignment is fairly close. Once you’re relatively confident that things are working as you’d expect then put the settings back to actual burn levels.
Another tip: If you do “Start job on laser from here” you can’t come back to the preview with the same starting point. You’ll have to relocate the starting position. There’s potentially a way of avoiding that by using “Save job for running later, from here” but you’d have to change the code in the generated file manually if you want to change the power level there.
Good luck. Let us know where you end up with this.