I’m new to using LightBurn Pro with a fiber laser and I’d love some advice on dialing in settings for 2.5D (3D sliced / grayscale heightmap) engraving.
Material: Standard aluminum plates 4 mm and Brass plates 4 mm
What I’m doing now:
I import a grayscale PNG into LightBurn, set Image Mode to 3D Slice, and run tests. A recent run was:
600 mm/s speed,
50% power,
30 kHz frequency,
0.025 mm line interval (~1016 DPI),
dot width 0.08 mm,
10 passes, scan angle 0°.
My questions:
How can I refine these settings for better depth and smooth grayscale transitions on aluminum and Brass?
Should I adjust frequency/power balance differently for aluminum vs. brass/steel?
Any tips on scan angle, cleanup passes, or multi-pass strategies?
I’ve seen beautiful results on coins and reliefs shared here, and I’m trying to reach that level of detail. Any settings, workflows, or project examples you can share would be super helpful.
It would help if you could post something you’ve done, so we can look at it.
Which lens is on your machine? If I’m not mistaken, I usually run 1/2 the dot width of my lens. This also applies to interval values.
In my experience, you have to get settings related to the material. I think it has a lot to do with the metals hardness and it’s ability to conduct heat. Brass is about 110 on this scale.
When I do cleanup passes, I usually raise the frequency and lower the power. I have a MOPA, but with some practice, you should be able to produce similar results.
I always try it without a clean up pass, before I resort to that.
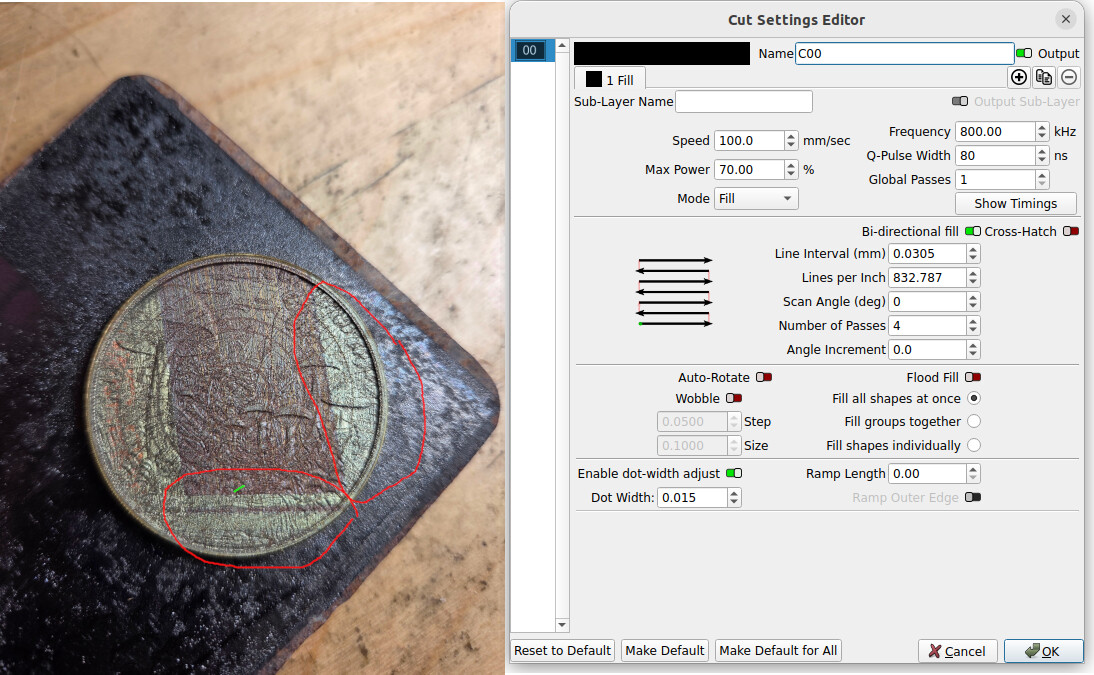
This is a pretty nasty brass coin from Amazon that I use about anything I can think of. It was pretty abused. The areas circled use these settings.
As I stated, this is my MOPA, you’ll have to figure out how to handle these changes with a Q-switched fiber. The short piece marked green was 100mm/s, the others were 80mm/s. Boy does this thing get hot.