I am trying to create some personalized Test Grids. The problem is that there are only 30 Cut / Layers (C00 to C29) and I need more than that. I can not believe that this software is so limited and the creation of more layers is not possible.
Or maybe someone knows another way to get around in a project where 50 Cuts / Layers are needed.
Material Test is out of the question. The squares are too close to each other and there is no way to choose other parameters like: frequency. for example.
Thank you.
I’m not sure if this will work with a fiber, it was designed with diode/c02 in mind, but this can give you 100 options per layer using the power scale setting.

2 Likes
Uh, yes there is?! Speed, power, interval, passes, frequency and Q-pulse are all variable, and if you want to specify a constant for a parameter across the test, you set that under Edit Material settings in the test window.
IIrc, the limit of 30 layers was to take into account the limits of a specific (Ruida?) controller.

this is what I want (just one of many examples)
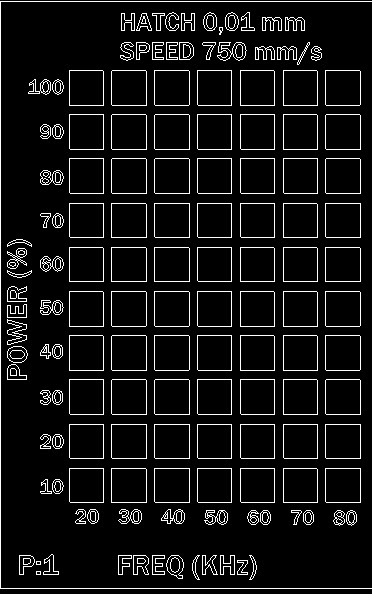
and then play with Hatch 0,05mm and with Passes …and create grids with Speed and Frequency etc.
Use the SUB-LAYERS function
Have you even given Tim’s nice video a chance? We use powerscale to make test setups. In real life/production I have never come close to running out of the 30 layers.
1 Like
You mean the video with the blue stars?
3 Likes
Each color layer has an option to add 10 additional sublayers.
Aren’t 300 layers enough for you to work with??

1 Like

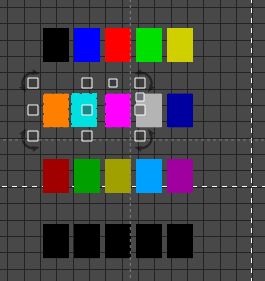
I assigned parameters to the first 29 squares. How can I assign something to the rest of them …is the C29 is the last one.
i want to select my entity (next small square) and assign the parameters that i want.
Sublayers? I am new at this and I can barely understand the Layers. And I thought select - assign - next would be enough. Until I runed out of Layers.
It will involve using your CUT SELECTED OBJ ECTS option.
Annoyed response removed.
1 Like
We openly welcome all constructive feedback, and yes we all have quite a bit of learning to do.
First impressions are valuable and hard to capture. Staff are here for it.
I have carried several opportunities for refinement up the ladder, to benefit us all.
6 Likes
I have 70 squares. The design is made outside LightBurn and saved as .dxf and imported.
How can sublayers help me assign parameters to individual squares?
I select the first square (Power 100% and Frequency 20) and change the parameters that i want inside C00 (hatch, angle, number of passes etc).
Then I select the second square - from left to right (Power 100% and Frequency 30) and change parameters.
Then: Power 100% and Frequency 40 and so on.
Soon enough the 30 different colors are …gone. Now what?
I want to do it like this because the Material test Menu is not offering any setting for spacing of the squares …they are too close together.
Is there any way to assign what I want to my 70 squares?
Your quest is not a “one click” get it done project.

CUT SELECTED OBJECTS allows one to selectively engrave single or multiple objects on the screen. You are going to have to set your paramters, select the objects to engrave and then engrave.

The next iteration, set different parameters, select different objects and engrave.
The next iteration … and so on.
Thank you very much for your patience. All I wanted was to have the possibility to right click on a self designed entity and to get to use a Template Layer (C00 to C29) or create new. It would be so easy. So elegant.
And I was half kidding when I thought that EzCad is not friendly enough.
Looks like LightBurn is also light years away from being intuitive or user friendly.
I am really bummed out.
Regards,
T.
Hi Nass,
Have a look at the Power Scale parameter in the Shape properties window.
In your example each column should be on one layer, with the Power scale option set to a different value per line (10, 20, 30, etc).
In your example you really only need 7 layers for the boxes plus one for the text around.
1 Like
I had the same problem as nass till I found this video explaining power scale and how to use it. https://www.youtube.com/watch?v=BOfslKvUolk
Just wish there was an easier way to implement it… i.e. set your min & max power, then set your interval power, and total number of shapes, and have it generate for you.
Hi,
I’ll try to make sense of what’s being described in the video. Thank you very much ! Have a nice weekend.
This is what I want and it can’t be done.

And after that …just play with Hatch 0.1, number of passes, speeds.
Regards,
T
Making it easy is typically what powerscale generators do. There is one built in LB under Laser Tools / Material test, but there are many external ones like Lightburn Advanced PowerScale Generator - O2 Creative