When 3D Slice a depth map for coin engraving and setting passes to 255, the last pass (level 255) is the deepest and the “background”.
Since LB creates 255 images to engrave, after it’s done, I don’t see a way to go to the LAST level (255) and just ask LB to redo that one again BUT i want to do a different setting (BLACK to make the background the best black possible)
How can I get LB to provide that last image so I can use it again for my final engrave to make the background the blackest possible.
*Please note, I’m not asking for a fill over everything.. I need the image LB creates in the last (deepest) level of 255 to only engrave those areas.
It’s not available once it’s created, as far as I know. Lightburn has the preview, but it shows the path of the whole job.
It’s for 3d type engraving, so it’s a function… Lightburn would have to break this out, but I doubt they would spend the time.. Some of this sounds simple, but if you don’t know the internals of Lightburn and how your specific controller works, it’s all a guess.
I taught software for over 12 years in a community college. I was amased at how some of the code was written… I even asked a few of them what were they thinking.
You never know the architecture of a software products internal use of data, so it’s all speculation of what they can and can’t do.
Hang in there and see if someone like @Rick can help you understand what’s going on and it this is possible.
You can always go to the feature suggestions on the top of your screen and suggest an addition for us to vote on.
Yes, I don’t know if they would add this or not, however it should be simple as all “255” levels are created and stored in memory to process. I just want a copy of the last level to make the background look even more amazing.
I’m trying to say, they may not save this after creating the scan, it might just be immediately reduced to machine code for the fiber and there might be no way to really tell where one starts and the other ends.
We’ll have to wait for someone at Lightburn to advise us, I don’t know how Lightburn or the controller actually work, so it’s sheer speculation on my part and probably yours too.
How do you suggest handling a 512 pass image? Or more likely 256 passes.. How do you adjust the preview?
Once you get the final trace of the last pass, do you just add it as a layer to process after the 3dslice has been performed? I could see changing the pass count with three passes, but I commonly use 256 passes if I’m using 3dslice.
I guess I’m trying to visualize what’s happening at the material level, sorry if I made too much of this.
Thanks for the link… I’ve thought about that many times and never saw a post or anything on this being suggested.
Adjustment of preview? That would be difficult to do with many passes.
(As a new feature, it might be neat if the preview could somehow include a spin box showing the pass number changing as you drag the time slider “through” a 3D slice operation, and allowing for manual fine tuning so you can ‘start here’ at a specific pass.)
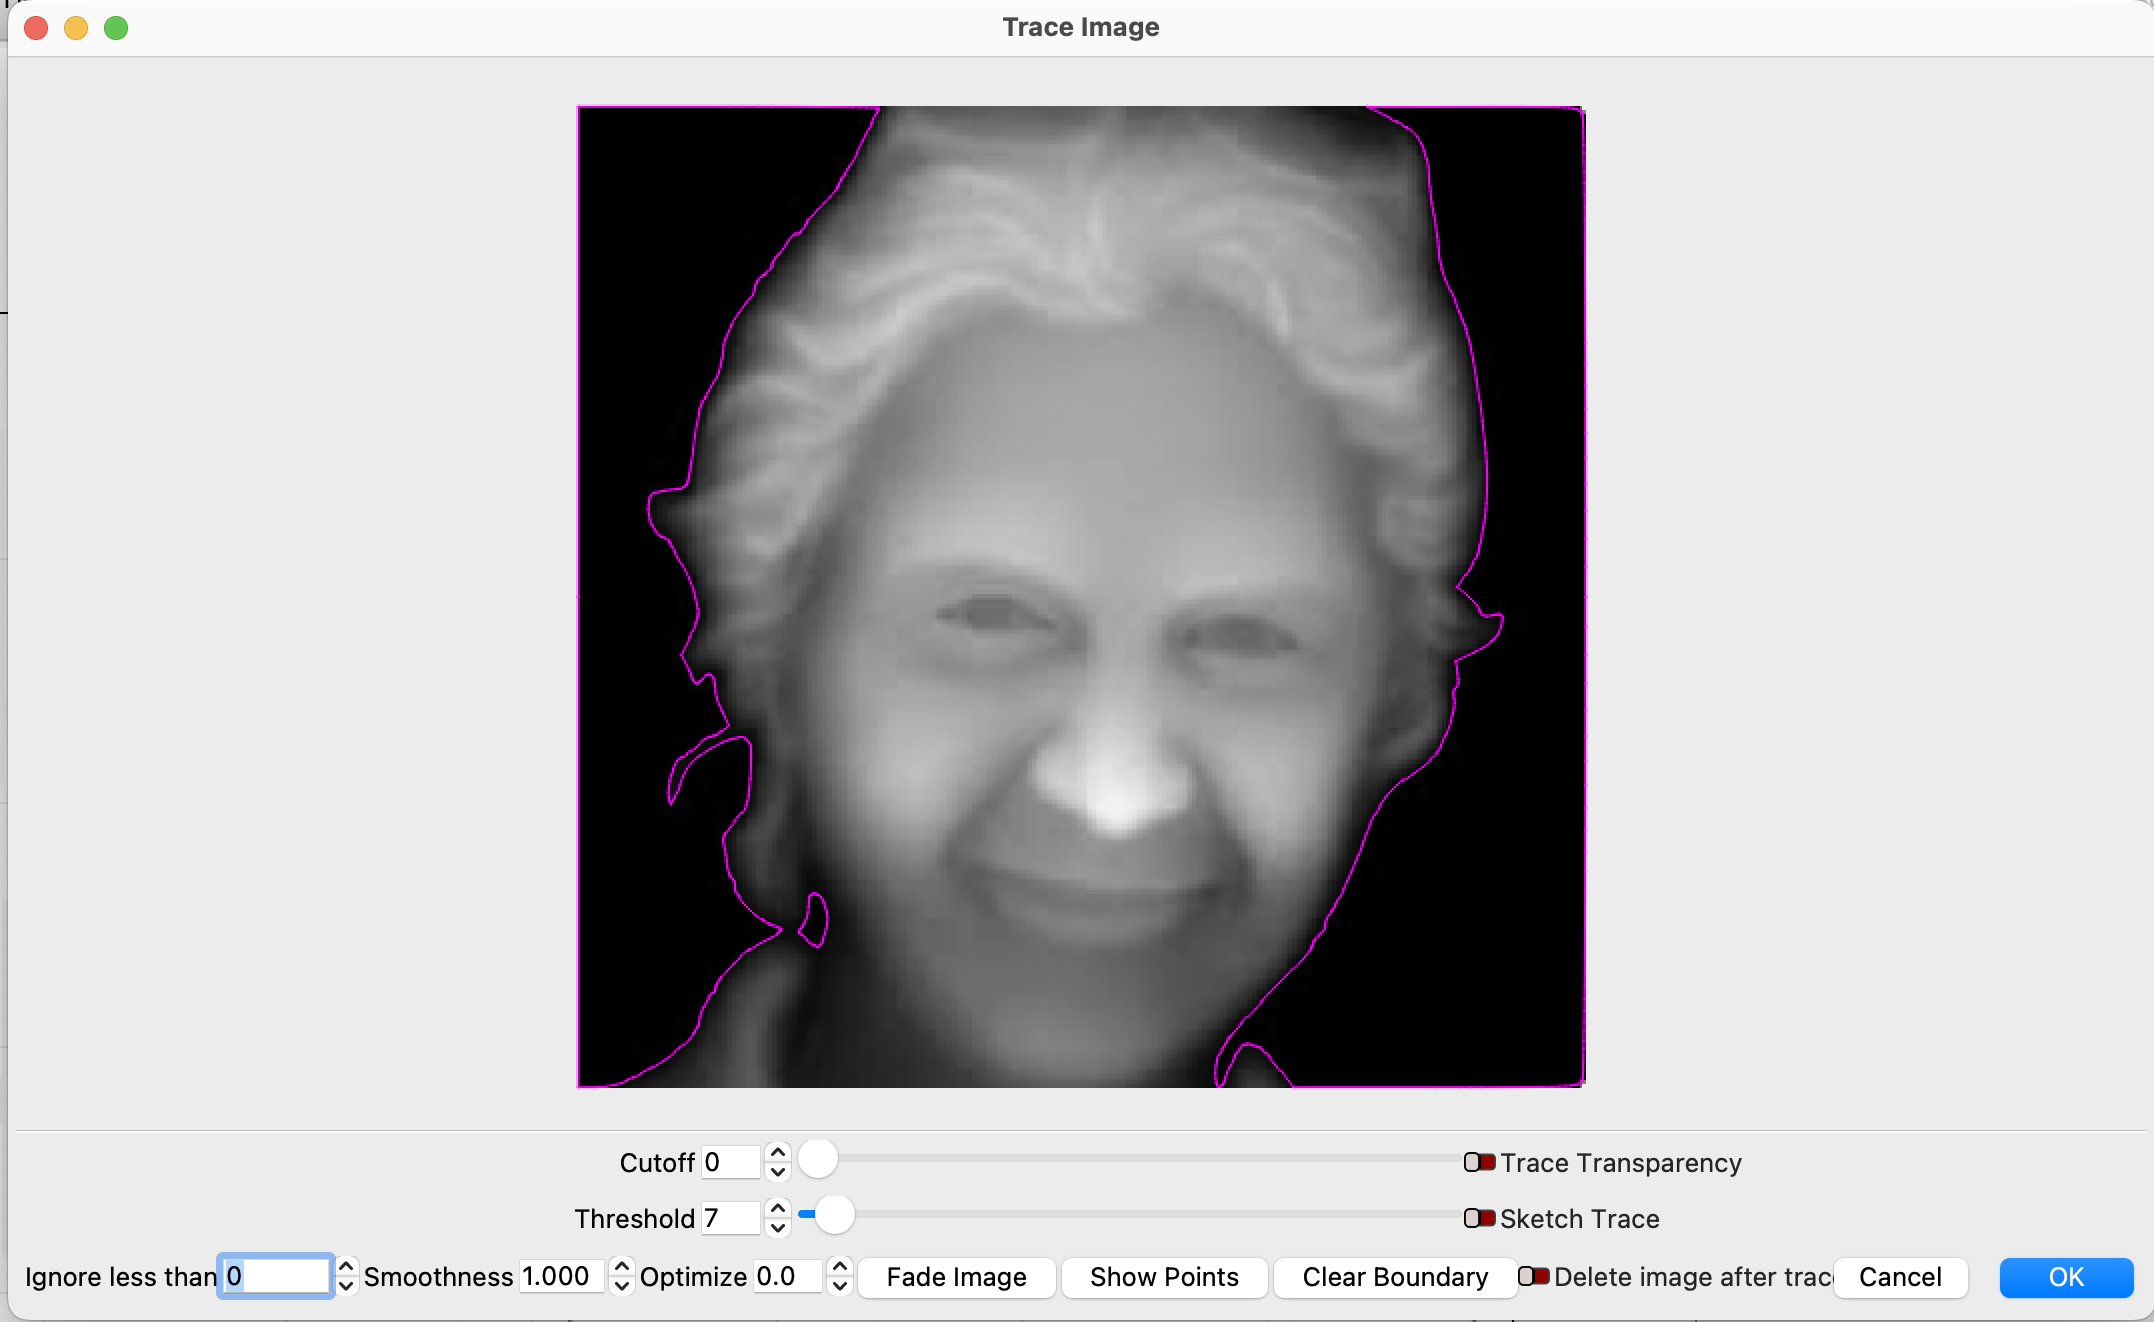
I had suggested using the Trace Image tool, where you can fairly easily select all the pure black pixels that would be the target of the last pass of a 256+ pass job.
Using Trace to visually select the pixels that represent the background will allow you to setup a final layer for your “BLACK” fill strategy.
Thank-you so much.
Could you explain the math for a moment.
I had asked if I have 255 passes you mentioned for the slider to be 1/3 to get the last pass.
I thought if I have a greyscale image, there are only 255 levels of black, so thats why I do 255 passes. If I select 1/3 the way through the pack, that wouldn’t be the background only???
or is it 1/3 because you still want other pieces of close to 100% black… but this case it would be 2/3 more then just full black?
sorry i just missed this part. Thank-you in advance.
It think it’s if you have two passes, you move it 1/2 way, 3 passes move it 1/3 of the way from the end, 256 passes then move it 1/256th of the way from the end.
Easy with a few passes… this could be difficult with more passes. I tried it with one of my scans.
There is a feature request to make all of these generated levels be available to the user. This is probably the best and most controllable approach. Combined with using the threshold will give you more control.
I could not get it to work correctly, but haven’t spent much time trying.
There are actually 0 through 255 in the way of values, this relates to 256 available steps..
Think of it as a label for each pass, not necessarily low to high power, but created layers labeled 0 through 255 for 256 unique layers that it’s going to build. These resolve to the power, but you can’t ignore zero.
From Oz on how this works in the beta area which you likely need access, so I’ll paste it here:
With 3D Slice, each pass is thresholded to the current threshold value, and the result is run as a 1-bit image. If you use 256 passes you get exactly one pass per gray-level in the image. Every pixel at or below brightness 255 for the first pass, every pixel at or below 254, then 253, and so on.
If you choose 128 passes, you get every pixel at or below 254 for the first pass, then 252, then …
It “clusters” the layers together into batches if you use fewer than 256 passes, and will duplicate some layers (with even spacing) if you use more than 256. 384 passes would duplicate every 2nd layer. 512 passes would duplicate every layer.
The 1/3 was just an example - to show the math (if your job only had 3 passes), but please ignore the math and just use the threshold slider of the Image Trace tool (not the slider in the job preview) to visually extract the most suitable 1-bit background image as shown in my post above, because the background will likely be better represented by an image that combines the area of several of the most deepest levels.