Problem: I have tried to engrave several different images with all only engraving certain parts, while leaving other sections white with no dots whatsoever. There isn’t even one dot in these completely white sections. Tried using different computers, new USB cable, all different combinations of speed/power/DPI.
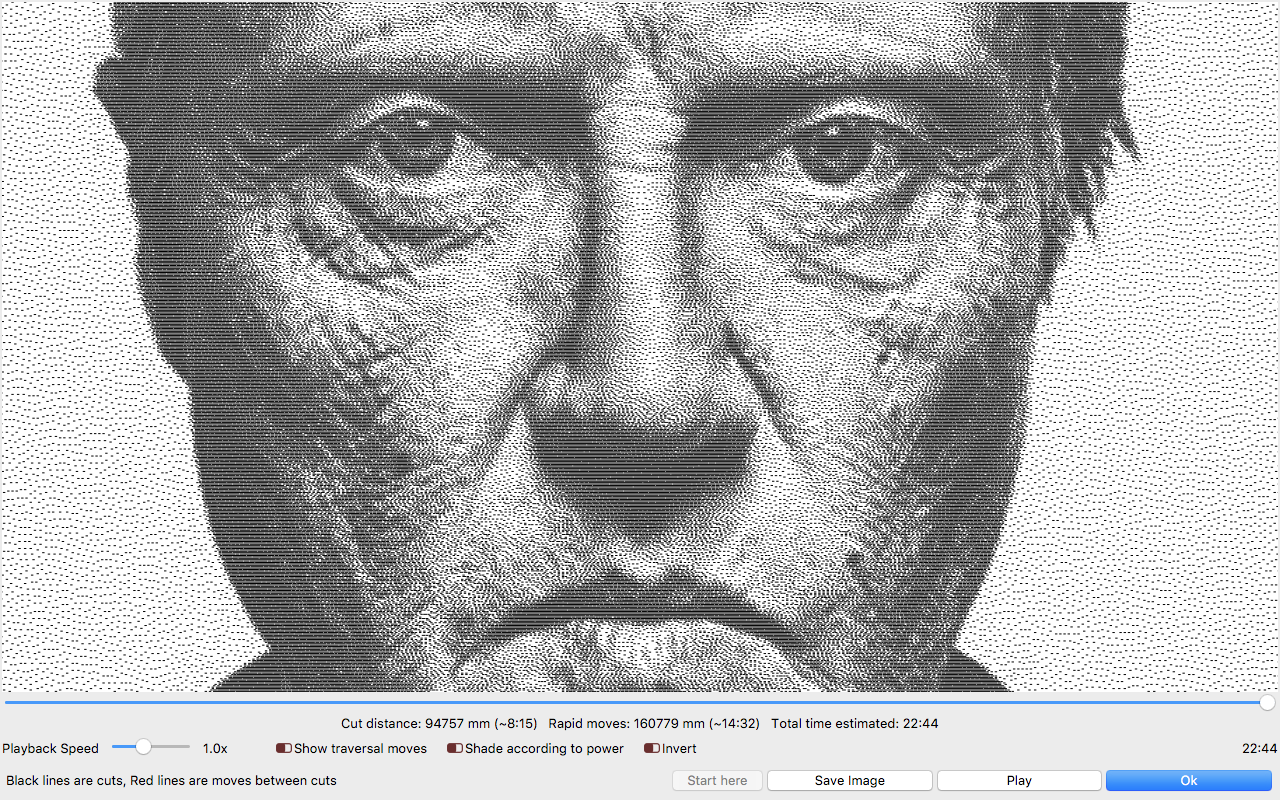
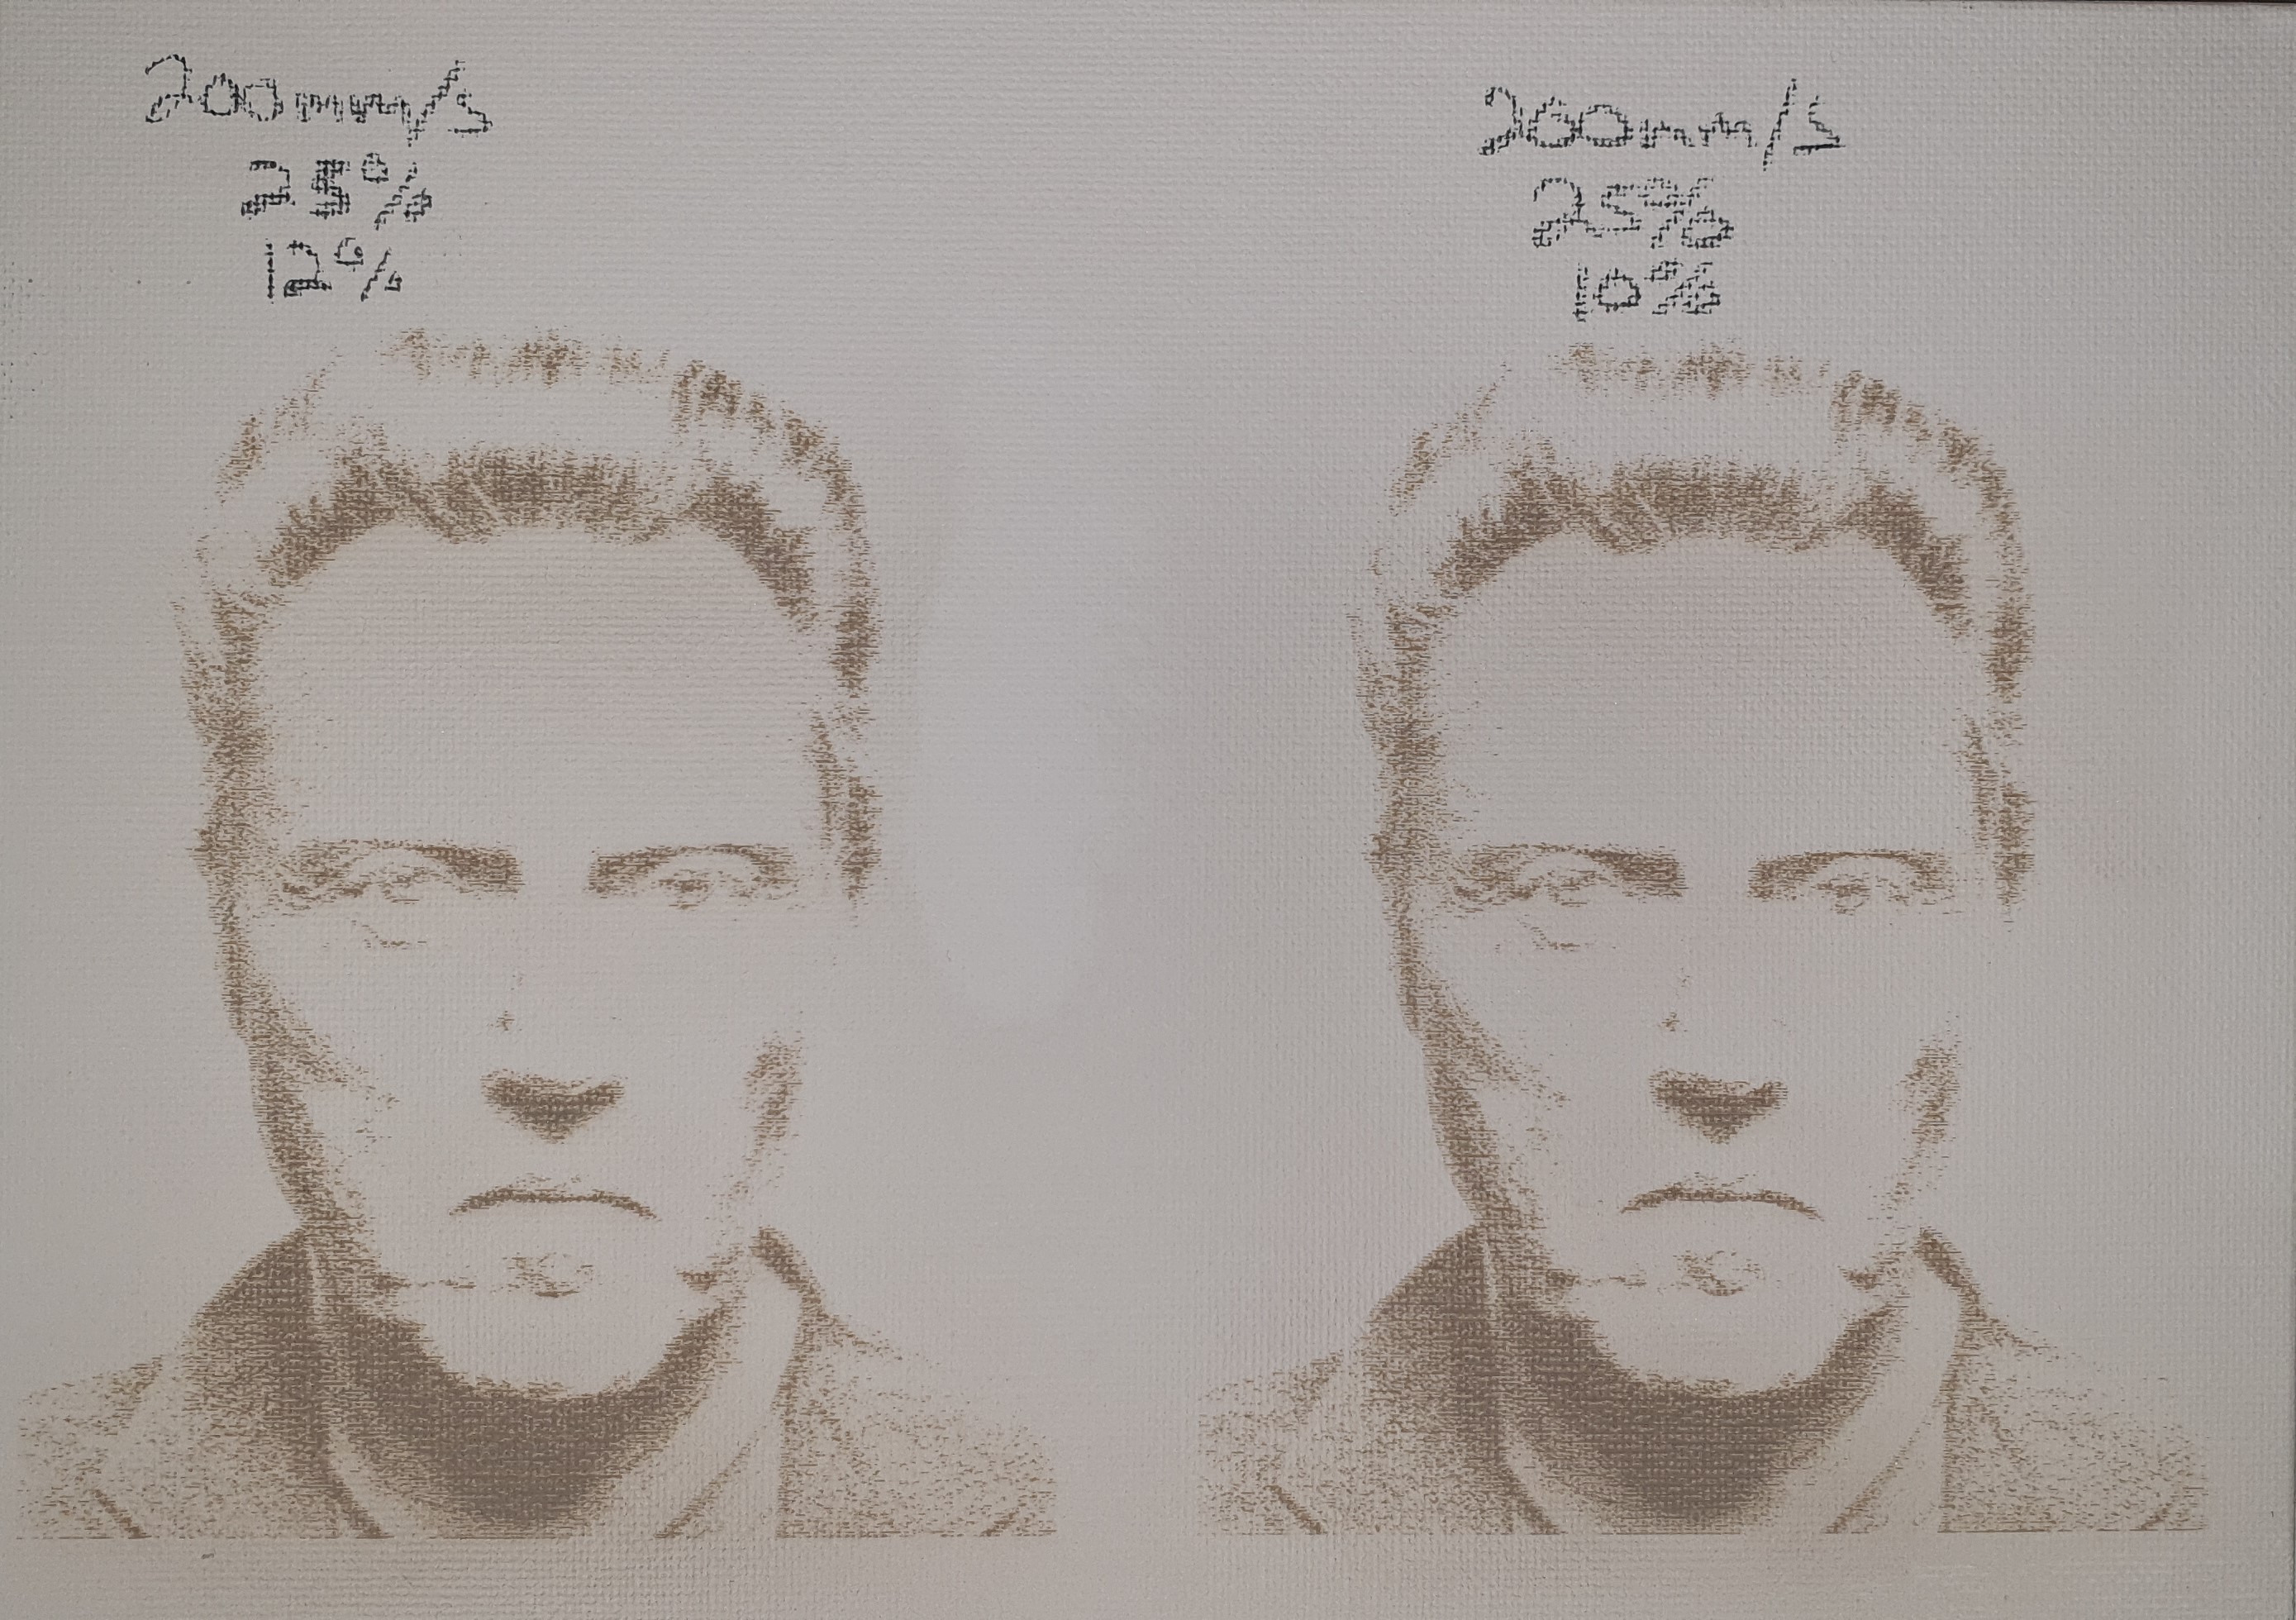
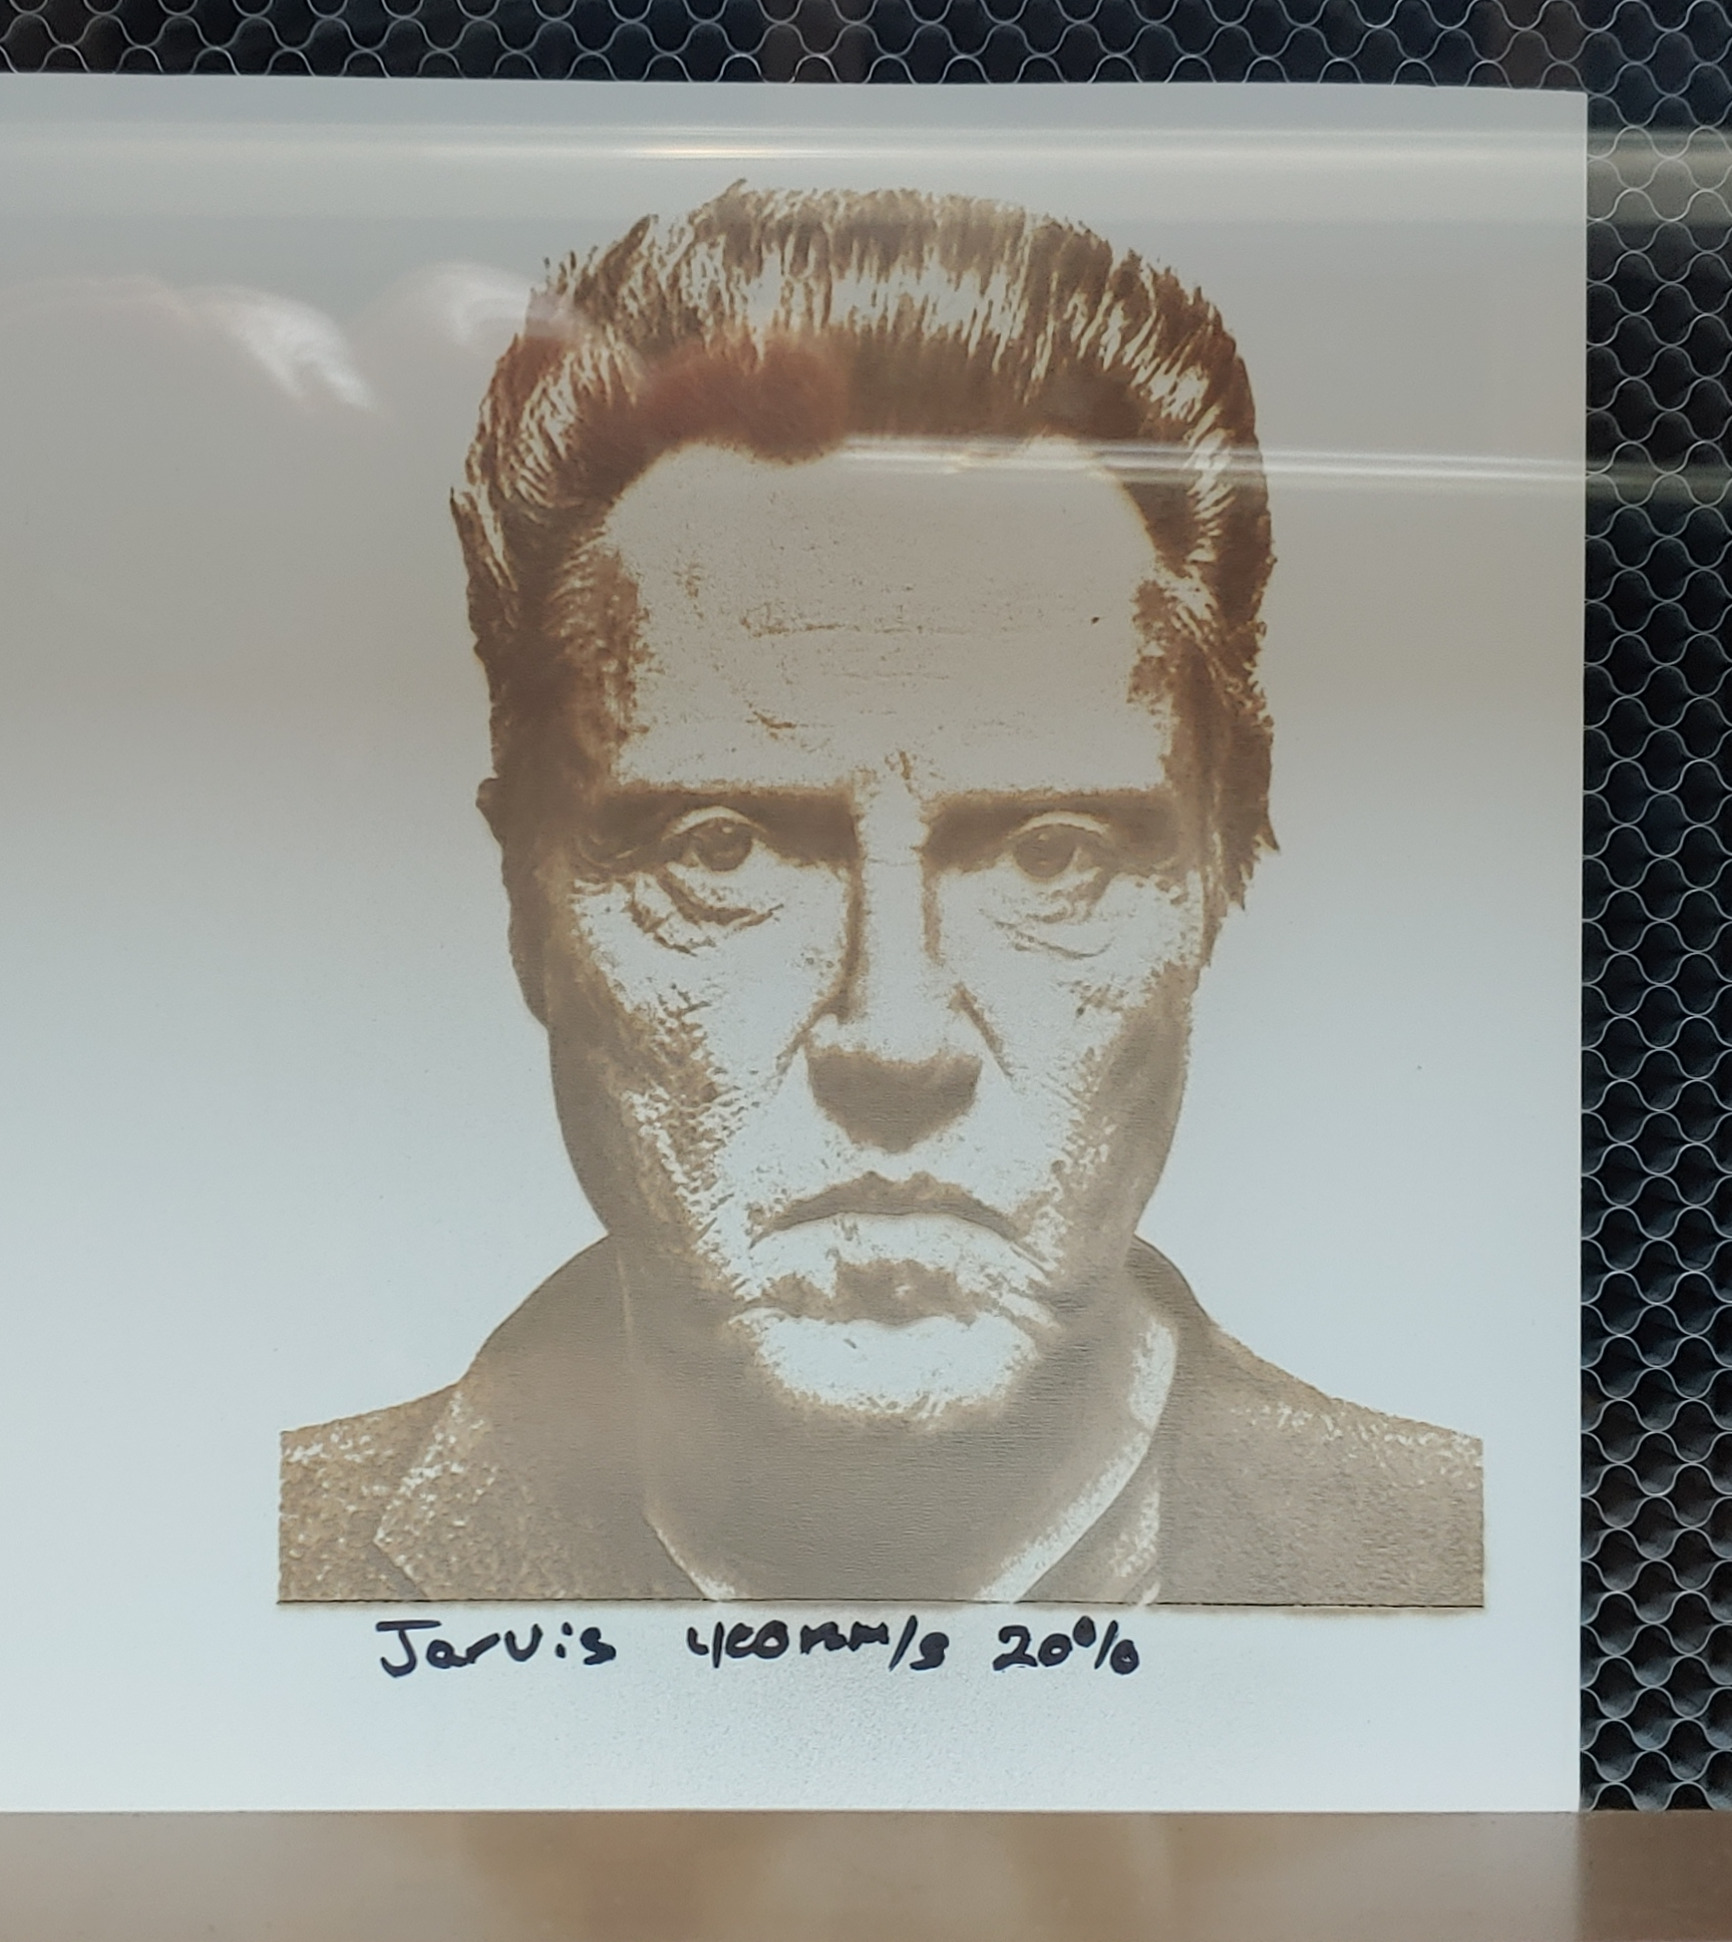
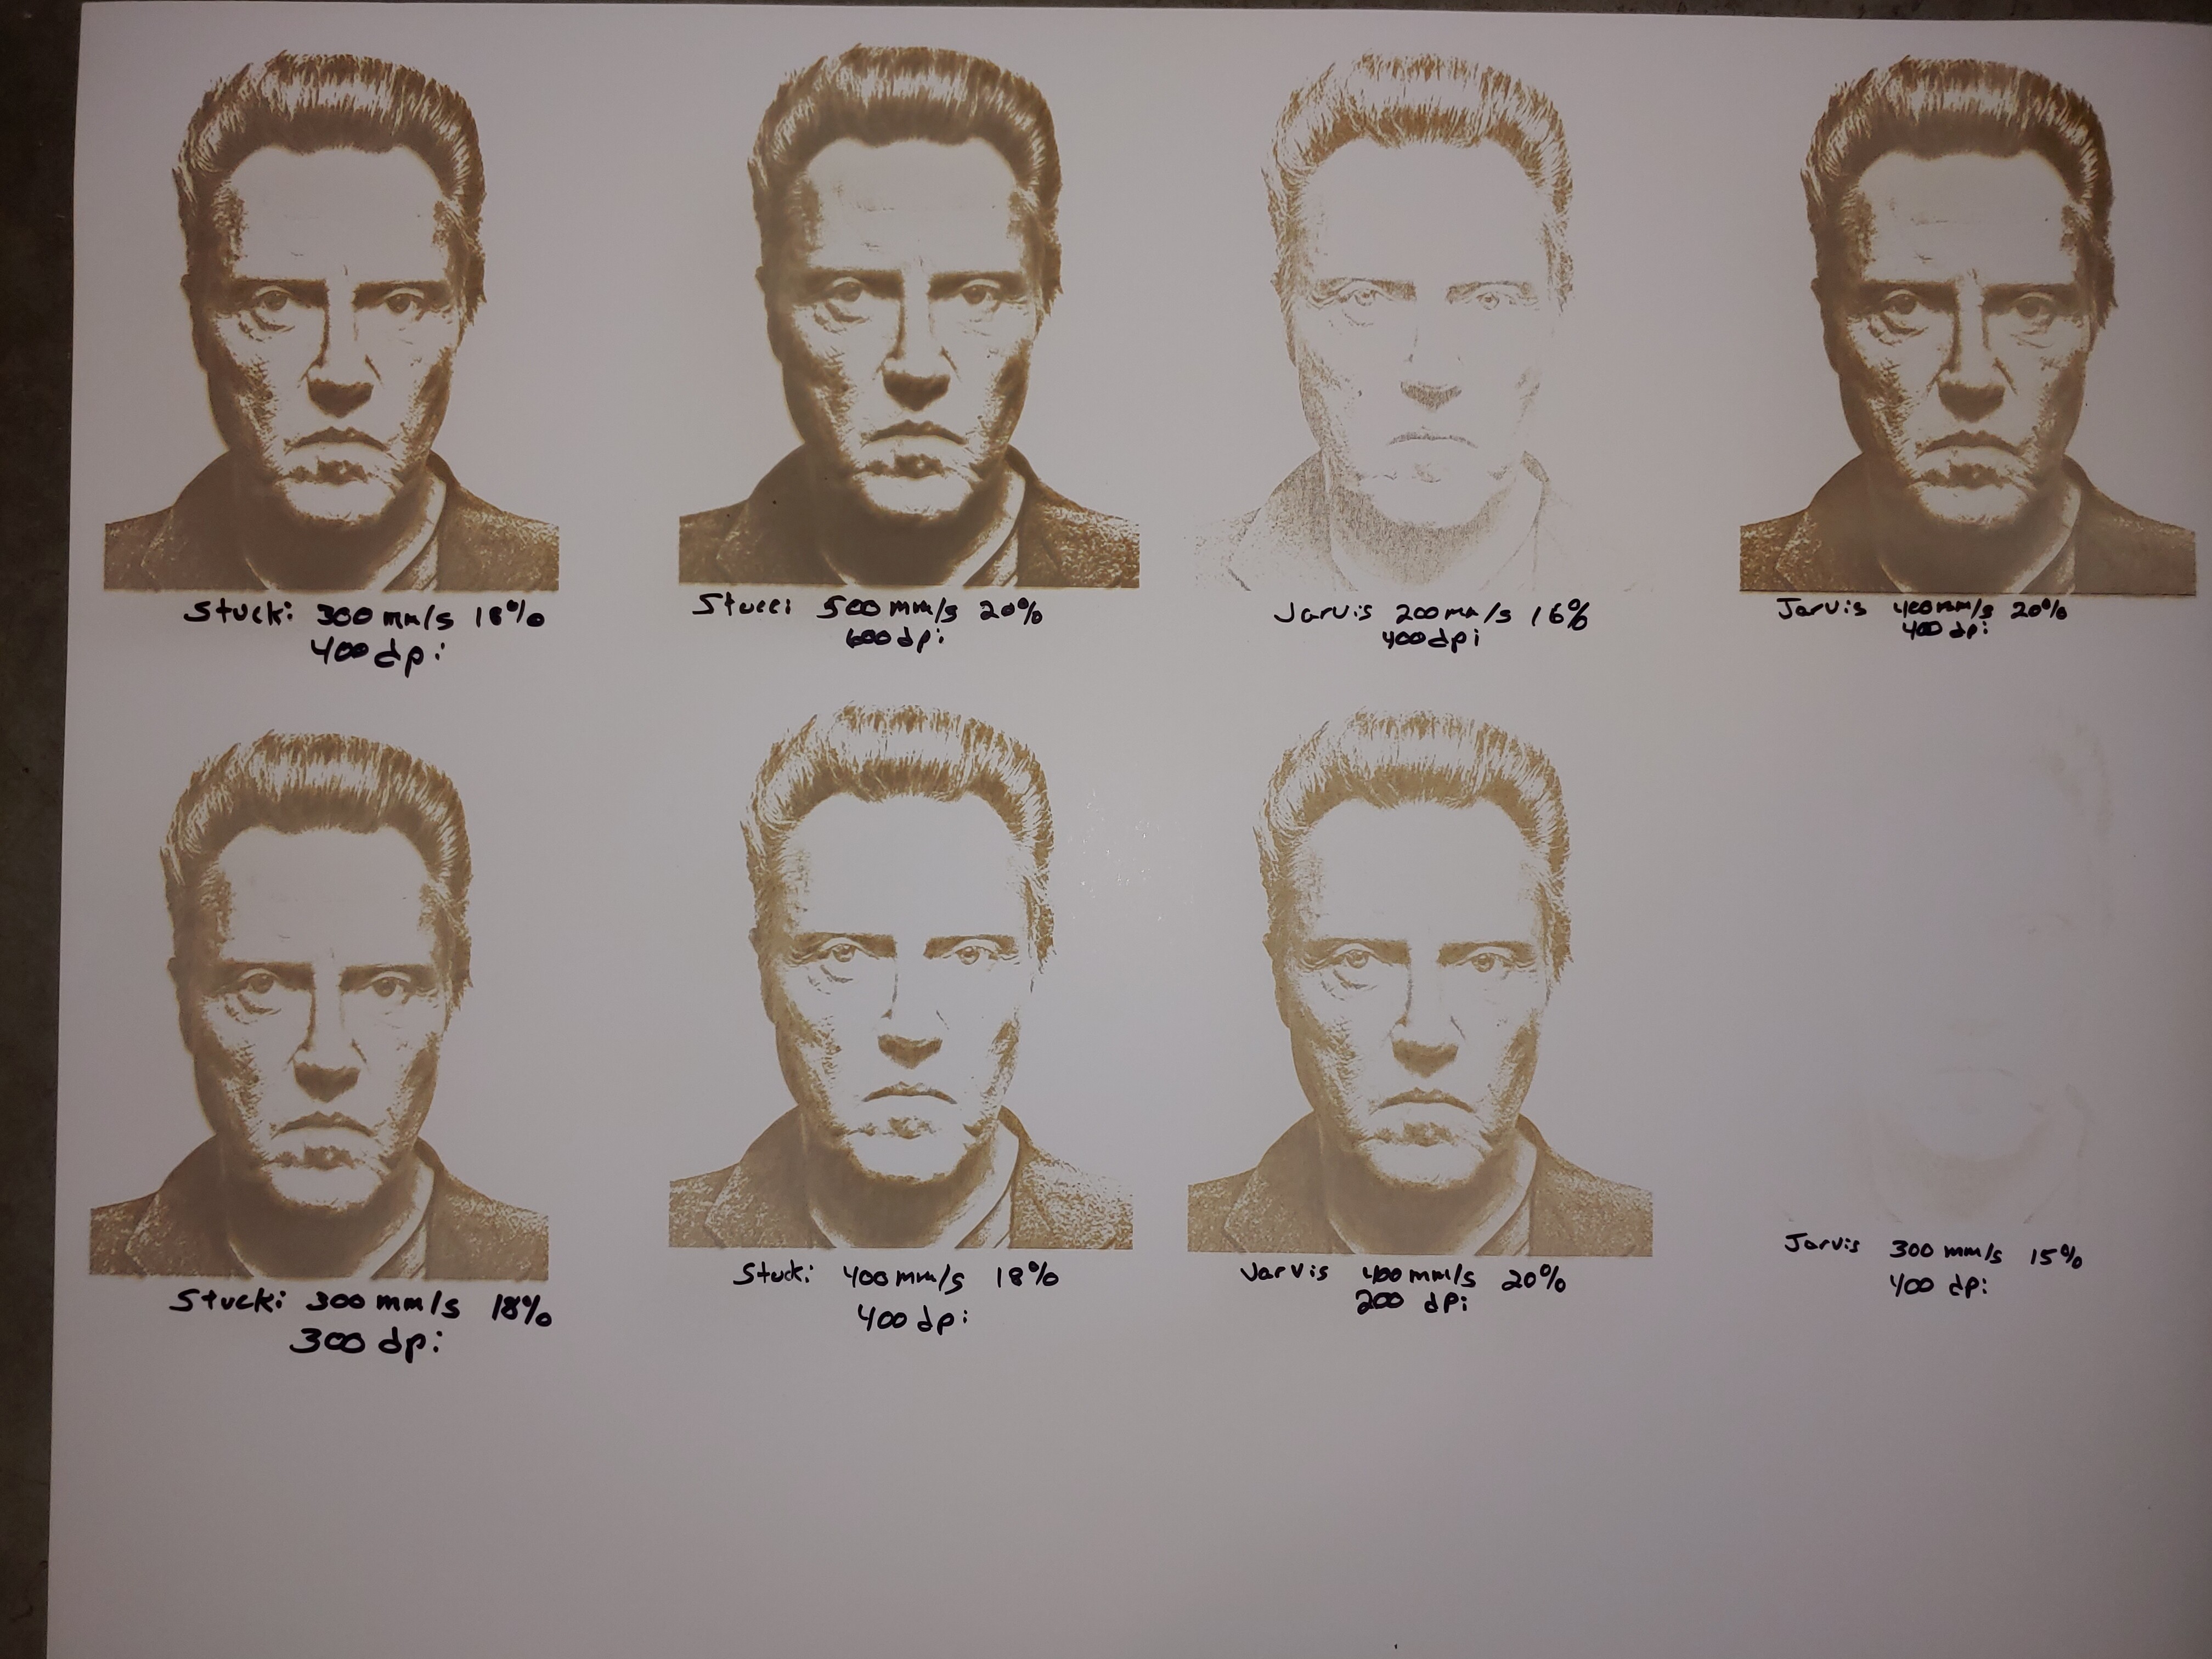
Below is the image being engraved (the Chris Walken one LB did way back, so the image itself has no issues), what the preview shows, and what is engraved. Settings for machine located below said images. Any help would be appreciated, at first i thought it was a firing rate issue and slowed the speed right down, but that wasn’t the case…laser can engrave great detail as seen.
I definitely am a novice but it looks to me that you are negating most of your power setting by setting Minimum power the same as Max. Plus: I think you are trying to engrave too fast. Slow it down.
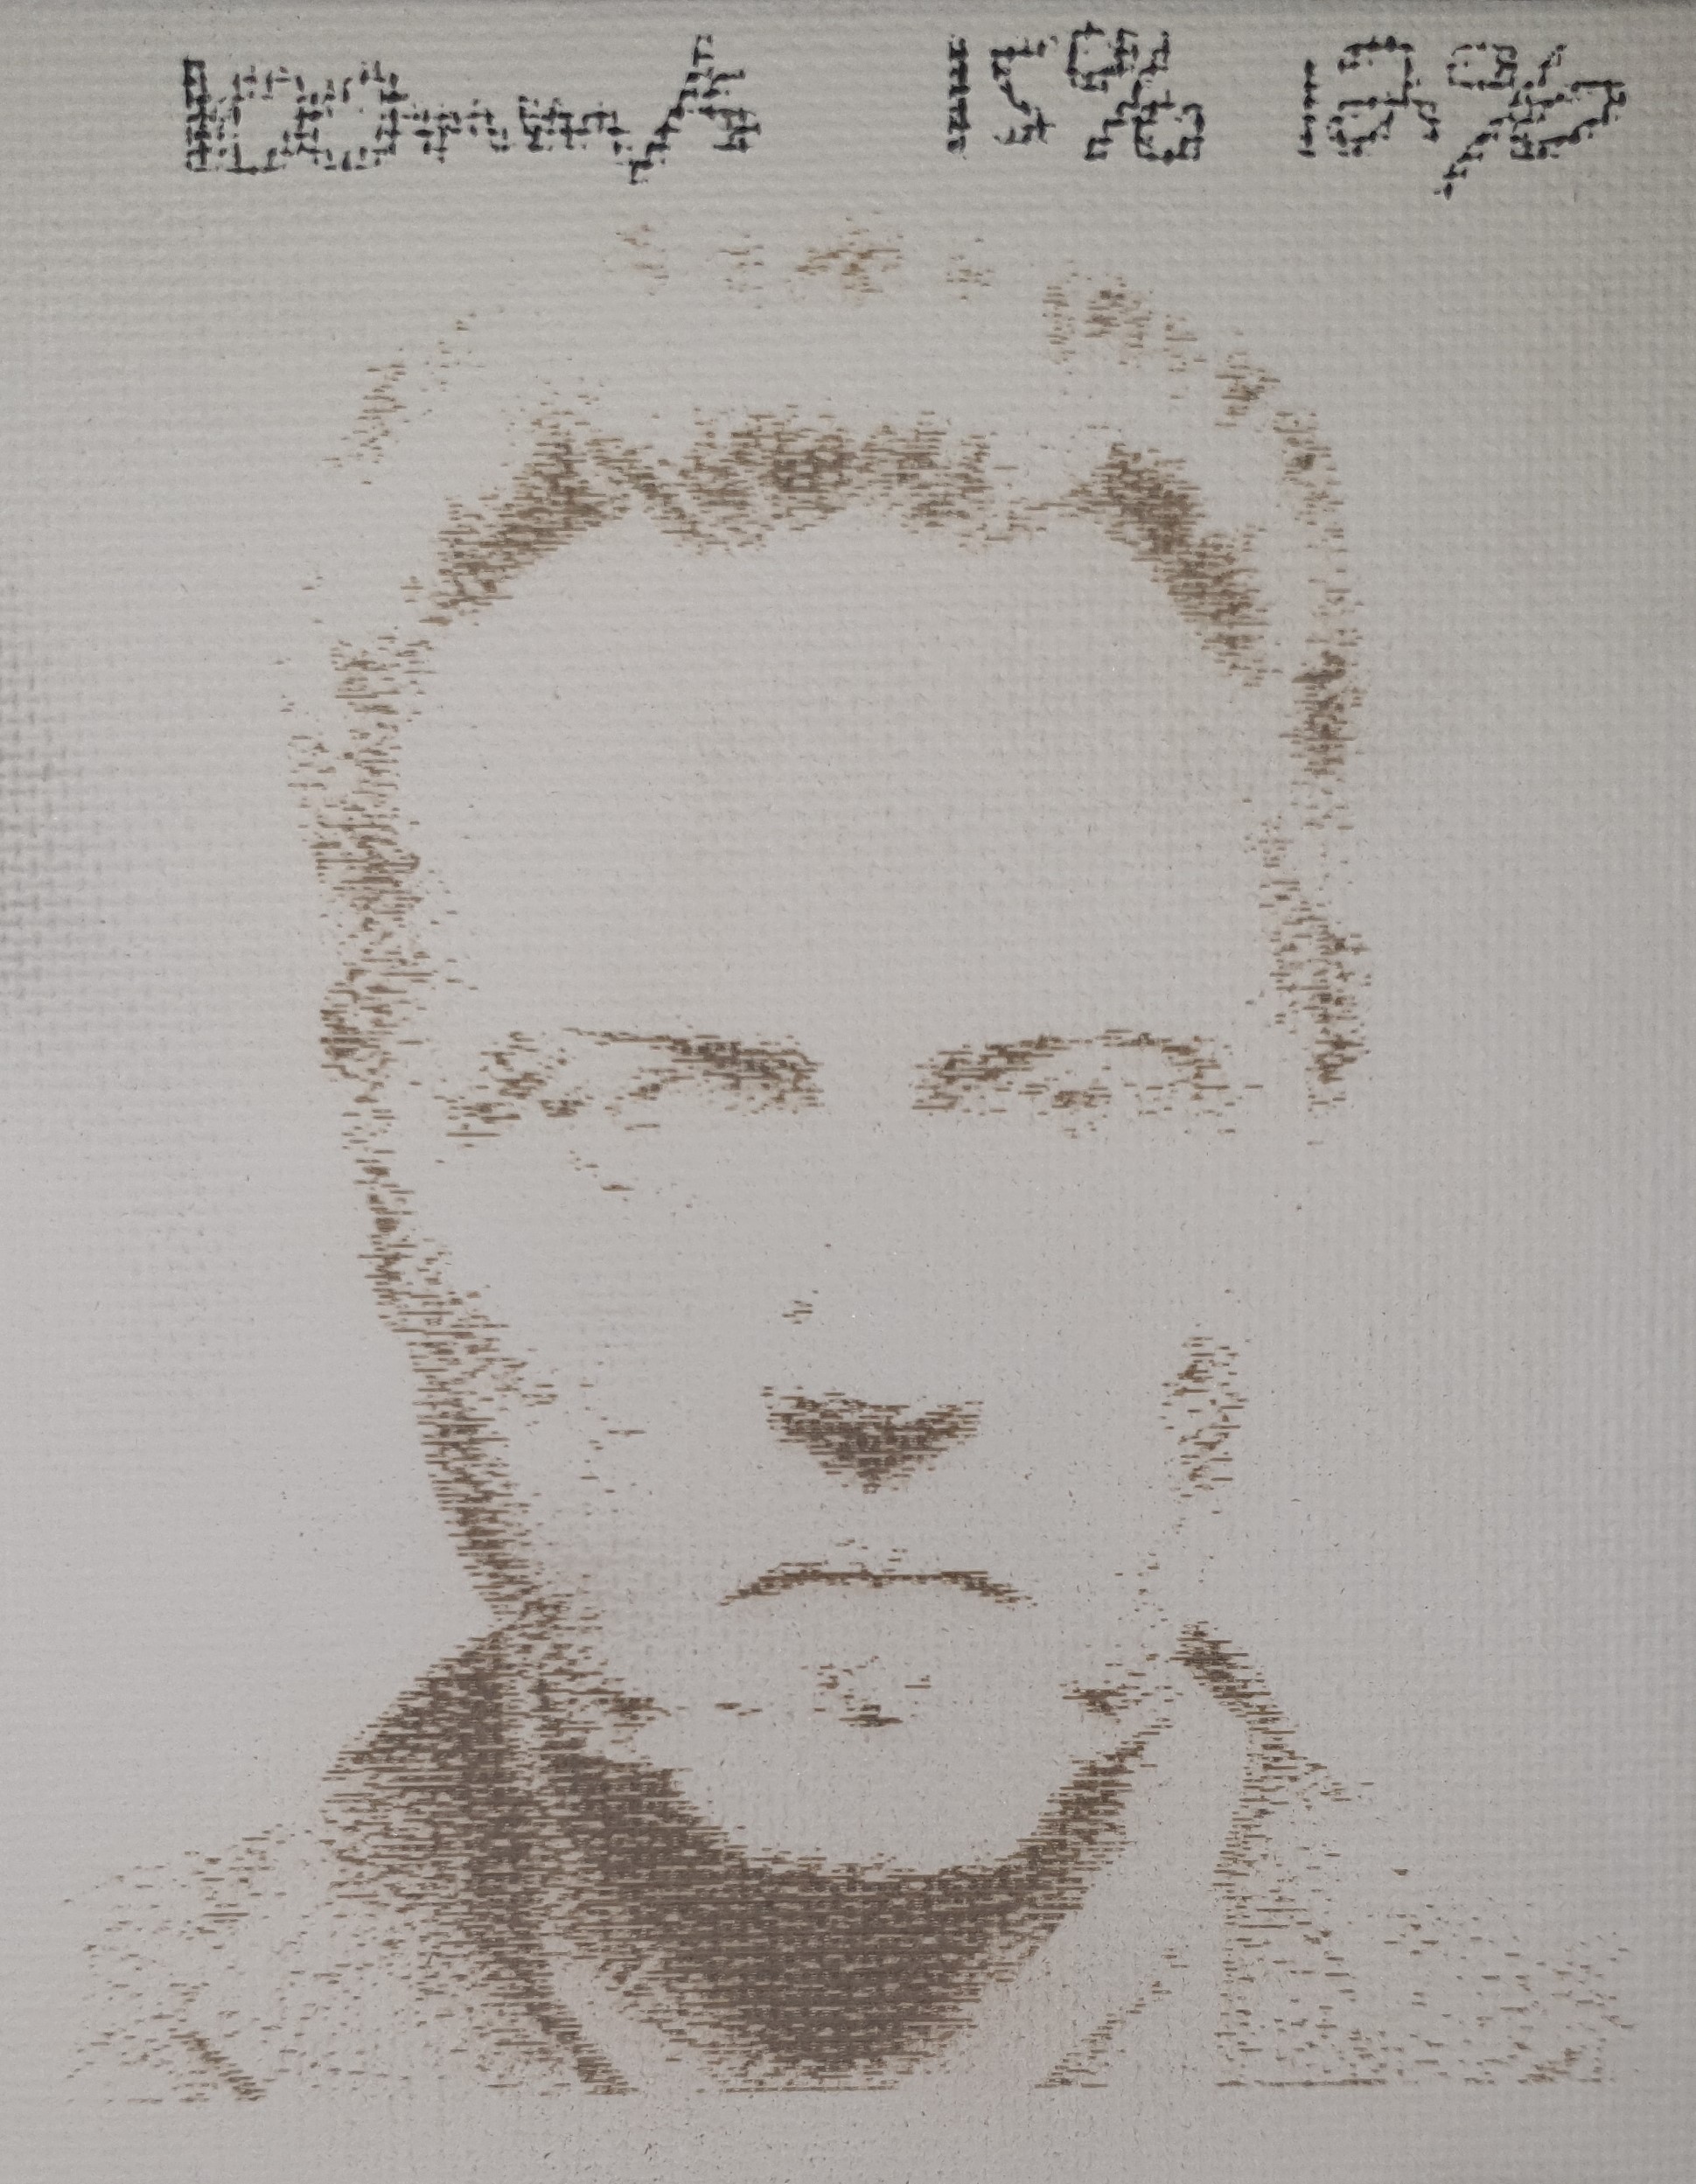
Regarding the max/min power, I believe the dithering works by optical illusion by increasing or decreasing the density of dots to create shades, unlike diode which changes power. I did lower the min power just incase (as seen below) but this didn’t affect the final image. I have lowered the speed as suggested to 150 and 50mm/s respectively, however this did not fix the issue either. The dots are darker than before and you can see some of the detail better, but the large blank white spaces are still there (chin, lips, nose, cheeks)…it’s like the controller doesn’t know to fire in these sections?
Well, I suppose you can believe what you want, but I think @ferg 's point is valid. You’re essentially killing the software’s range of choice to nil.
Establish the limits. Set your min to the lowest value you can get on your laser (8-10% probably) then up the max a bit from 14% to darken the dark areas. I wouldn’t slow down the speed, 200mm/s might even be too low for white chip board.
Ah, I didn’t know that the software chose from a range of powers for each dot. I thought it just applied one set power (max) to all positions it’s told, my bad.
The lowest power for my tube is 12%, anything under that and nothing happens. Tried with 12% as minimum and even lower at 10% to see what would happen.
200mm/s is not a problem for that machine, I think the single dots are just evaporating the material without time to darken, could try to go a few mm out of focus
When dithering, Min Power is ignored, so any suggestions to the contrary are incorrect. You have Max Power or zero, and that’s it, so setting Min the same as Max is correct (when dithering).
What Enno says is correct - if you are going fast enough, it’s possible that the smallest dots are firing too quickly to darken your material, so you may need to increase power or slow down, or both. What’s the material?
Well, I have now gotten it to work. Changing shape properties and DPI had no effect. What did work was changing to a thicker material (3mm ply) and setting speed to 80mm/s and both min/max power to 60%. The dots that were missing now make a mark however it carves through half of the wood lmao. Will keep fine tuning from here. I guess the problem was just the white card i was using was too thin? But then again many other people seem to have no issues engraving on similar materials.
So try a much slower speed and lower power. Maybe try finding the lowest power your laser fires reliably at, use it. Set the speed to control the burn. You are searching for the speed and power that will fire all dots and not burn deep.