Hello. I’m trying to figure out the best way to create a raster image that will be etched into the wood and a vector path that will cut out the etched image and keep both perfectly aligned, similar to what you’d do when making a sticker on a cutter/plotter. In Photoshop you can add a work path to a transparent raster pretty easily, but I can’t find a share format between Photoshop and Lightburn that retains both, nor can I find a way to create the exact path directly in Illustrator. I also tried creating the path and raster separately but can’t get them perfectly aligned in Illustrator. Any ideas? Thanks.
Something like this:
- Import raster image into LightBurn
Tracethe image to get its outline on aLinelayer- Offset the outline outward by a millimeter or so
- Tweak the
Imagelayer settings for best image - Tweak the
Linelayer settings for best cut - Fire The Laser
If that doesn’t get you close to the goal, some screenshots & photos will help us see what you’re seeing.
2 Likes
Hey I really appreciate you responding. The problem I run into with that is that when you trace a raster into a vector (especially one that isn’t well-suited to the transformation), it changes the image a bit and then the resulting outline doesn’t line up perfectly. It’s close, and perhaps I just need to accept that perfect isn’t an option here, but it’s internally frustrating that the data for a perfect match exists, I just can’t get the various bits of software to access it.
I’m not in a place where I can upload some samples at the moment, but I’ll add those when I get a chance.
Thanks again for taking the time to respond.
We might be able to help you more if you can post the image you’re working with.
![]()
Okay here’s a screenshot. I’ve been given a Sandworm sketch to construct into a prop for a production of Beetlejuice my daughter is in. Here’s the shape I need, with all the black etched into the wood and then the shape cut out.

To be clear, I want the border outline as a visible etch on the edge of the finished shape.
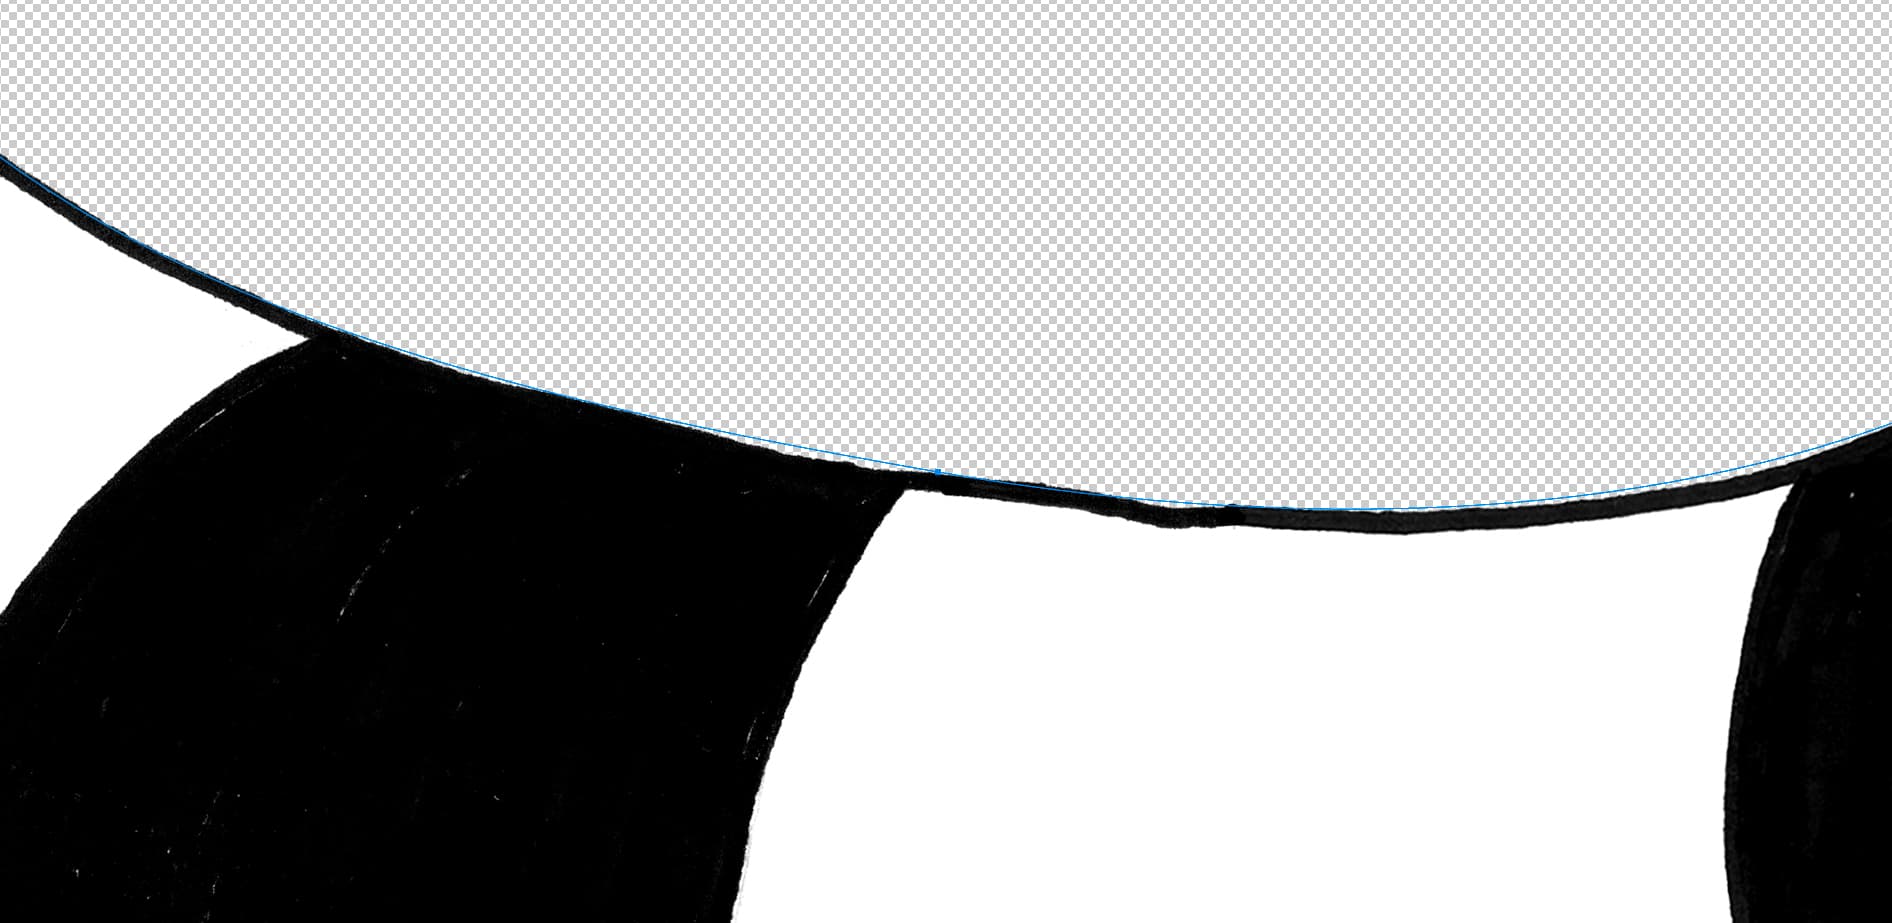
When you vectorize the raster sketch, it makes small adjustments to smooth out the shapes as a natural consequence of the process. So in the following screenshot, you can see that the path is close, but not an exact match for where the cut would go if I proceeded as directed, leaving unetched gaps at the edge of the finished product.
Does that help? At this point I assume I’m just being too picky, but as I mentioned in the beginning, it just seems like there should be a solution here.
Thanks again to everyone taking the time to respond.
I’d suggest converting into a vector. I did this just using the default settings in trace image. Most of this separates and allows you to fill most of the items.
Where I circled this, zoomed in on the right and you’d have to a little node editing to fix where it makes contact with the outline.
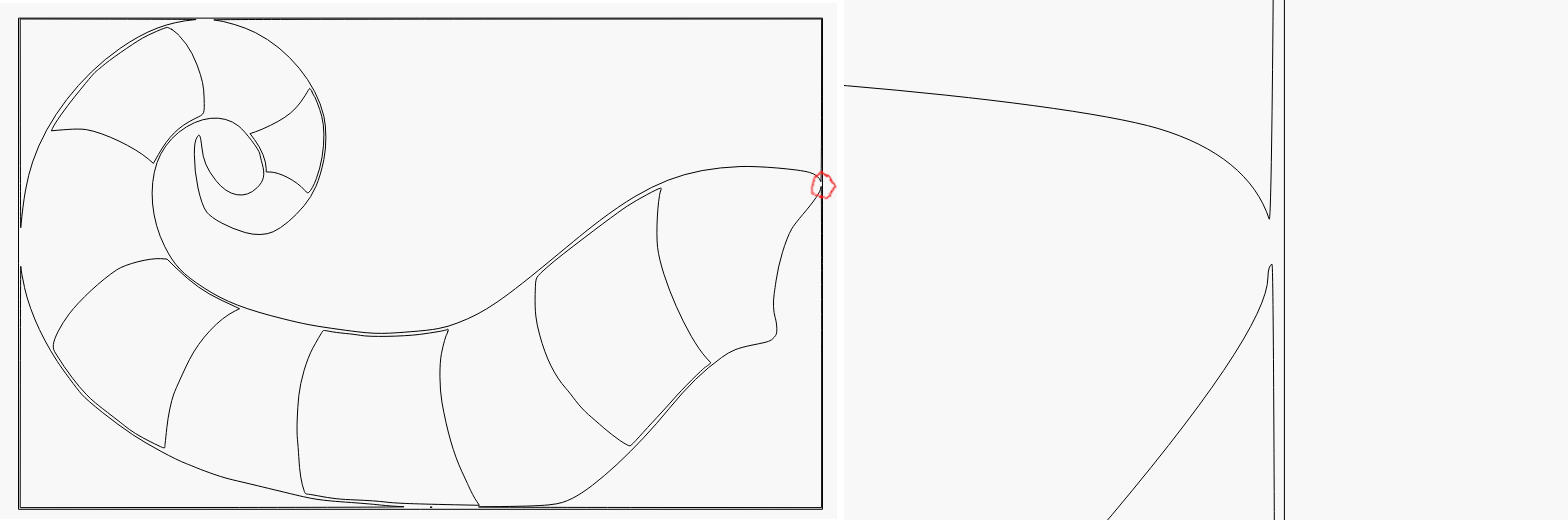
Usually vectors are a bit more easy to deal with and re-produce. Changing the interval will change it’s grayscale appearance level.
![]()
That’s controlled by the Optimize value in the Trace window: more optimize = fewer nodes.
Comparing the first image:

With the second:

Something else seems to be going on, because the first curve is smooth, albeit pixelated, and the second is crisp, albeit wiggly. The background transparency checkerboard suggests they have vastly different sizes.
If you can upload the original image, that will help everybody see what’s going on.
This topic was automatically closed 30 days after the last reply. New replies are no longer allowed.