**Update.. The only thing that fixed this was to delete my machine and set it back up again.
**
Falcon A1 10w machine. When I engrave the alignment test, the #1 is in the bottom left corner, #4 is above that and the numbers are reversed. When I connect the numbers, in order, and finish the process, every project that I attempt to do is upside down and backwards. Everything I have read says to make sure that I connect the numbers in order, 1-4, which I do. What can I do to correct this problem? Thanks in advance for your suggestions.
Check your Orign settings and that nothing is toggled to flip or reverse your project.
1 Like
I did check the origin and it was where it should be and nothing was changed in flipping or reversing the project. I solved the problem by deleting my machine then setting it back up again, and that solved the problem. Thanks for your reply.
1 Like
Well, I spoke too soon. I placed an image on wood to fill engrave. The image shows correctly in the image overlay update, but when it actually does the job, the image is upside down. For some reason, even though everything works well yesterday, that is not the case this morning. I messed around with the origin setting, since that seems to be the problem today. Instead of the origin in the top left, as it was yesterday, I changed it to each of the different settings, and found that the lower left is where the origin should be for my machine. Frustrating, but hopefully this solves the solution. I will wait to set this solved until later, after I shut everything down and restart a couple of times. Thank you for taking to read and help.
Front left is the correct Machine Origin for most Diode Lasers. Once it’s correct you should never change this setting. Incorrect Machine Origin is what caused your upside down engraving.
Job origin is a completely different function and can be changed from job to job. That is set with the 9 dot grid in the Laser Tab if you use User Origin or Current Position. If you use Absolute Coordinates it is always the same as Machine Origin.
As I try to figure out how this program works, where the origin is, now makes sense. When I aligned everything, the #1 was at the bottom left. That did not click for this old 72 year old brain very quickly. Now to figure out how much power to use for certain things, and that comes with experimenting. .
Thanks for responding and verifying.
Exactly!
This video may help your understanding of origin and start from.

I’ve figured out the “start from” fairly quickly. I bought a sheet of euclyptus with a white side paneling at Home Depot yesterday for $12. I cut a few pieces this afternoon to play with. This is line drawing with a power at 80%, 70% was too light. There is a stray node or two that I need to correct in Inkscape and try it again. Again, thank you for your assistance and patience.

1 Like
The origin was the key. After I finally got it to work correctly, it hit me that with my numbers starting with #1 in the lower left, it was actually showing me where my origin was supposed to be. I appreciate your suggestion.
I think the Origins catch most people, they certainly caught me. It really is a learning curve and its irritating to go through it but its also rewarding.
Im looking ar my screens and windows in a totally different way compared to only one week ago.
Glad you got that sorted and well done on your first pieces.
First piece from Lightburn.
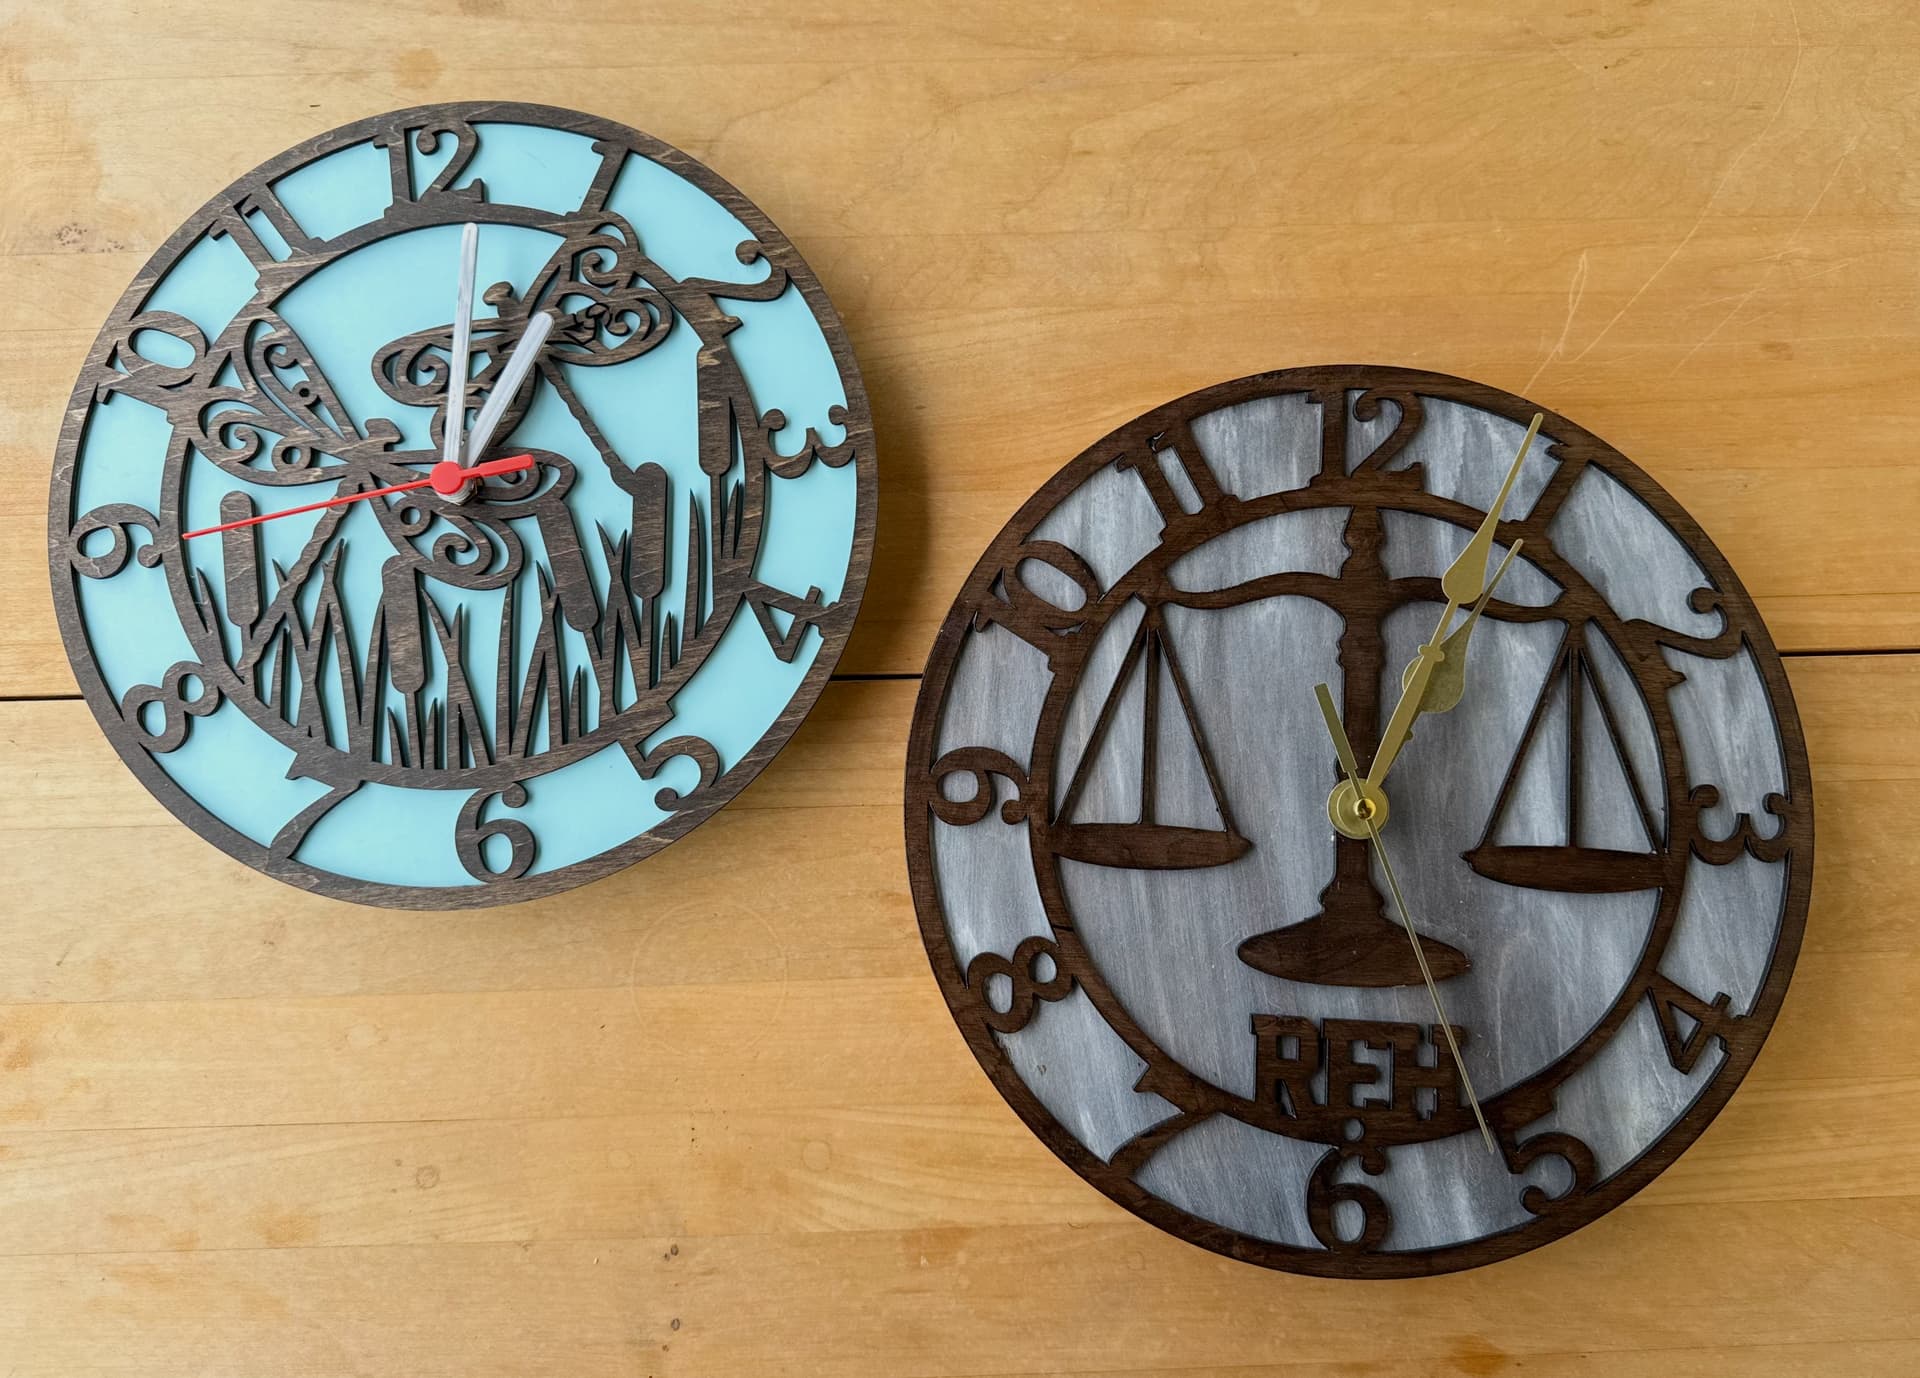
I did these in the Falcon Design Space. The Scales of Justice was for my daughter’s birthday and the Dragonfly was for my neighbor. The dragonfly one has a paper backing and the Scales have a basswood backing. The clock faces are done in walnut plywood.
Did this today. I thought I had it dialled in pretty good in the smaller tryouts.. the bottom left gave a great overall effect and had some depth and luster to it but I had lost the detail on the wire wheels so I brightened it a bit…but too much and lost it on the rear and headlight area.

Its about 290mm wide x 180mm and took a whopping 4.5hr…I’ll be getting the tweeks bang on next time.
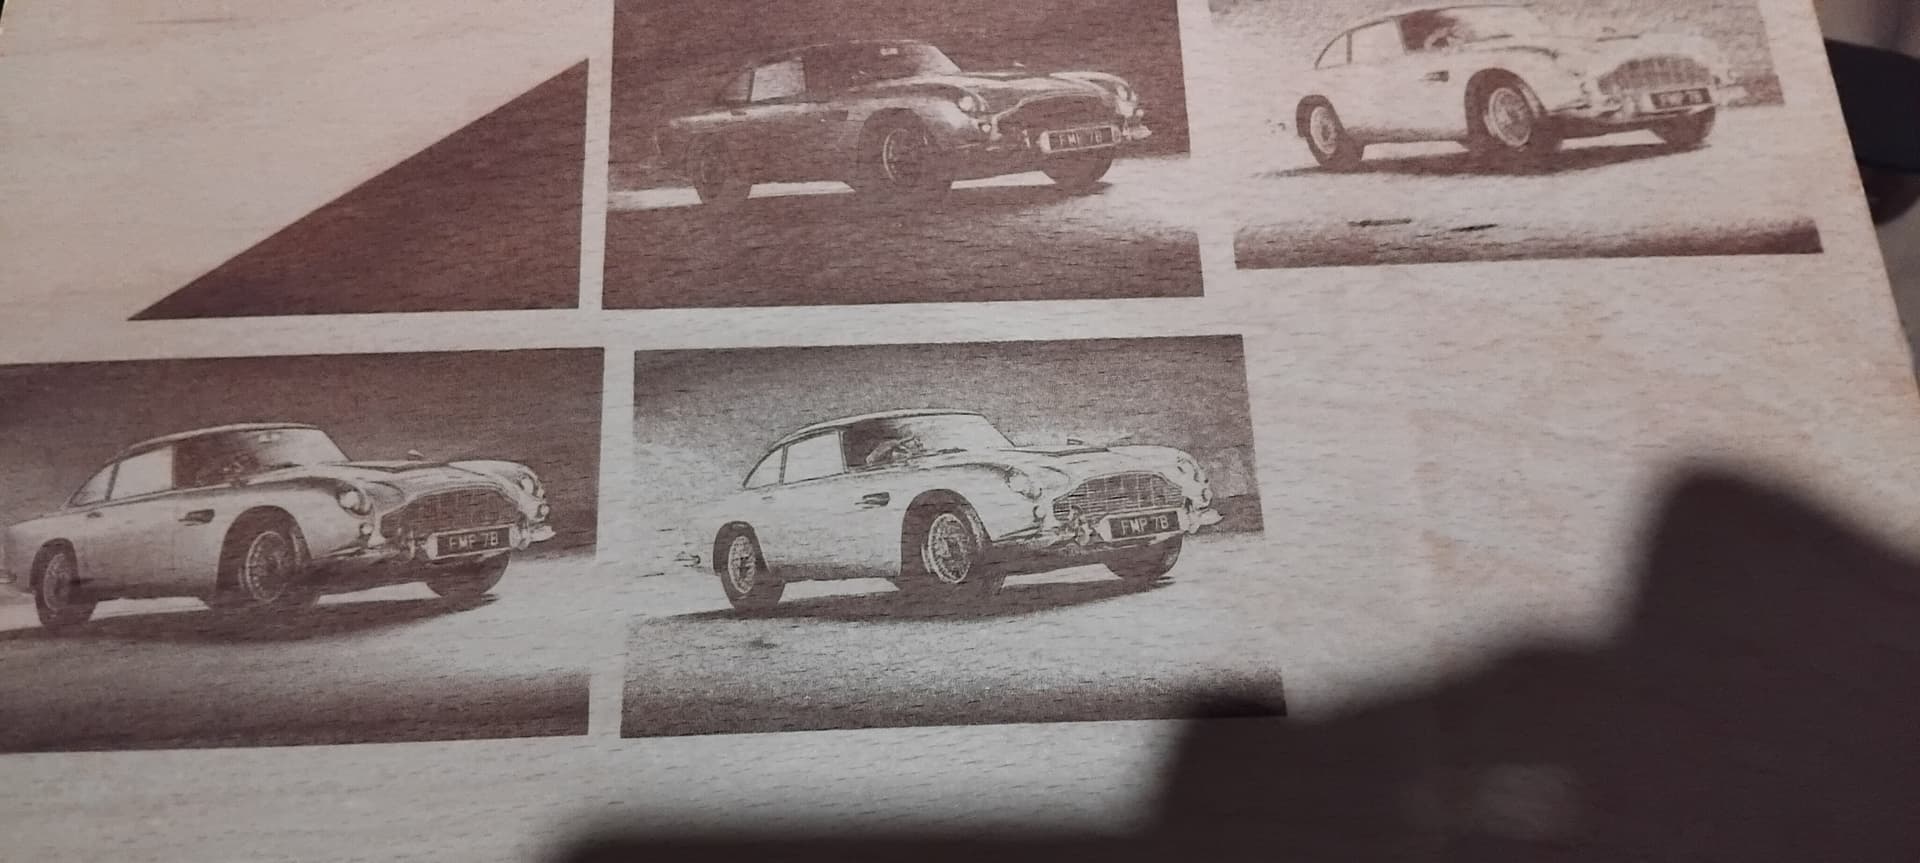
Handy to do the tryouts small on the back and go for it on best quality side. Its the biggest Ive done so far and I totally doing images for the next couple of weeks until I’m well acquainted.
Keeping notes on settings seems esential.
I have a little notebook that I write everything down in. I then transfer that info to my Mac and Excel. My laser is in my craft room with my sublimation equipment/printer. I bought an HP laptop that was greater than 50% off and am using that for my laser stuff. Nice job on the car. What is it? I was thinking Jaguar, but am probably wrong.
Its an Astin Martin, think its the james bond car.
Its quite a bit off the quality it should be given the time involved.
I usually cut the background to save time but some pictures will need context.
I can crop a bit and maybe go a little faster than 2400 but the image adjustments will have to be bang on to put any kind of value on it.
The notes are most important as I was doing the tryouts I think I forgot to note one setting change and that cost me hours.
I’m looking forward to trying out some clock’s as well..they’ve been my fathers hobby for many many years and would like to be able to make him a personalised eight day wall clock..Maybe something like a Regulator.
Lightburn has a very good node editor.