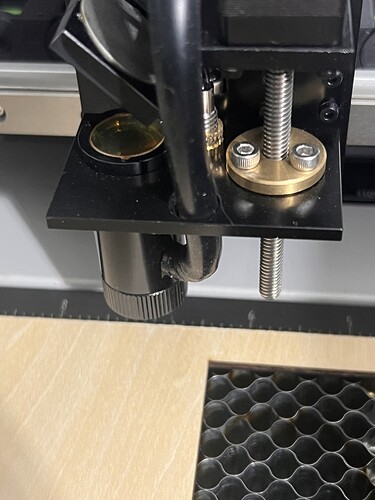
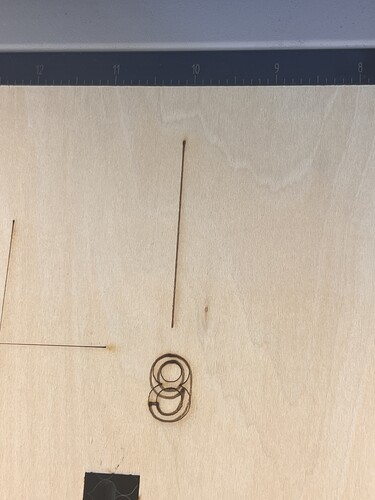
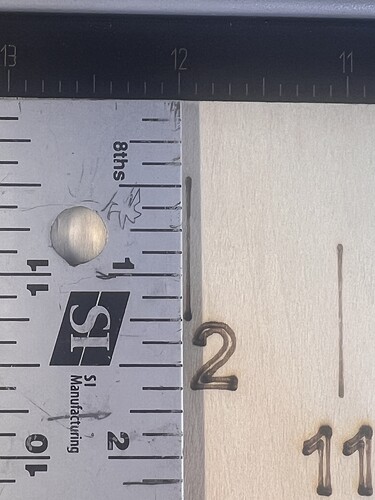
Hello, I have been in contact with Omtech support with no resolve and was hoping I might find someone here with suggestions. I believe I have found the issue that is having absolute coordinates not work correctly with my machine. The laser itself is offset in the laser box (I am attaching a photo of the laser head with cover box off to show this) so that home position of x and y of 0 are not actually at zero. My laser is currently firing approximately one inch farther to the left than x’s absolute coords, and approximately .5 lower than y’s absolute coordinates. Is there a setting in lightburn to change so that it is aware that the laser itself is not at 0/0 to begin?
Do you have Enable Pointer Offset enabled in Device Settings?
I was looking at that setting as an option, however my laser (Omtech polar plus) does not have a red dot pointer. Maybe I’ll try working some different settings with the pointer offset in the morning and see if that’s what I’ve been missing. Thank you so much for your help! I’ll let you know if I get anywhere with this. ![]()
Pointer offset was disabled. I enabled it and played with some numbers and have it almost correct. I’m not sure how to go about total accuracy or if that is even possible. This firing I had set to be at 12” and start 1/2 down. I’m super close! Thank you for your suggestion, please let me know if there is anything more accurate than my attempts and then checking with a ruler to see how far off it might be. ![]()
I was implying that if it was enabled that was likely causing your problem. Do not enable it if you don’t have a pointer
I guess I’m not understanding how you came to determine that your position is off. Home your laser and pulse it. This is your 0,0 position. If you’re concerned that the laser doesn’t align with the honeycomb edge, that is normal. Is that what you’re describing, trying to fix?
Do this test. Draw a box the size of your work are. That should be 510mm x 300mm. Run it in line mode using Absolute Coordinates. It should burn the line completely. Verify the dimensions of the line. That is your work area is on that machine. It will most likely NOT align with the honeycomb bed.
When you home your laser, it goes to the home position then moves off a few millimeters. As far as alignment with the homey comb that is just a matter of placing the honeycomb in the correct position. As mentioned above, use the useable area of your machine and make a box of that size. Put the box in the center of your work screen. Run Frame and move the honeycomb until it marches up with the useable area of your honeycomb. That should be sufficient. My thought is, I never use the markings of the honeycomb to align my project. I put a small x in pencil on the middle of my project where i want my design, then i jog the laser head in lightburn to the center of my useable work area. So example if your machine is set up for 400mm x 400mm I jog to 200mm x 200mm. Fire the laser and move the project until it alligns with the X
Yes, I suppose this is what I was trying to correct as it was over an inch off from the honeycomb ruler. The honeycomb in this laser is not able to move freely as it slides into a slot at the bottom of the laser.
Loren, that makes sense as well. When “firing” your laser though I assume it’s with a red light to check for center though correct? I am new to co2 lasers, and was looking at red light attachments to add to my polar plus. Maybe this is a helpful addition?
Yes, I have a laser machine and i do use the Red Light to set the laser position. But if you do not have a red light no reason you couldn’t just fire the laser at lower power to set the position of the project to the X. If you decided to get a Red Light Pointer then you can use the Pointer Offset in Lightbun to calibrate the Pointer by measuring the offset X and Y distance between the actual laser beam and the pointer. Then you will use the Red Light Pointer to set your project instead of the laser beam.
So it doesnt matter if your using the laser beam or a red light pointer the procedure for placing the honeycomb and the project is the same
The thing i dont know is what kind of laser your using. If your laser beam is not visible then a Red Light Pointer is a must and you cant use the laser beam to align your project
The problem with Red Light Pointers is if the shine down at an angle on the workpiece then you have to recalibrate them everytime you change the distance from the laser to the workpiece. The red light pointer on my machine fires straight down so the x y offset from the laser beam to the Red Light is always the same and i only have to calibrate it once. Hope I explained that well or was that TMI (Too Much Information)
I have a larger C02 and my honeycomb is about 20mm larger on the back and it is actually smaller on the right side by about 10mm.
In my opinion, the best thing you can do is affix plywood to the honeycomb and burn a line through at the extents of your machine, creating a fence with it’s edge at X-0 and the corners at Y-0 and Y-510. Then you can work in absolute coordinates and use the fence to align your projects.
A red dot pointer can be very valuable when properly aligned. However I’m not a fan of the ones that sit off the side of the nozzle and angle to the laser. They are easily knocked out of alignment, and because the beam is angled, focus distance is imperative as any deviation causes the angled point to be off. I installed an inline pointer on my machine, eliminating the angled one, but I don’t know if there’s enough physical space on the Polar to install one.
This topic was automatically closed 30 days after the last reply. New replies are no longer allowed.


