I have imported a photo image (.jpg) into a greeting card template I have created; see step 1 below. The photo is too wide to fit into the greeting card front panel. (I’ve also imported a second image, same format, for the inside of the card; it too is to wide for the allotted space. For simplicity, I’m just focusing on the front panel in this post, but the same problem occurs with both images.)
The problem: When I enclose the overflow portion of the image in a rectangle and select Apply Mask to Image (step 6), the part of the image I want to keep disappears, leaving the waste portion visible.
What am I doing wrong?
Here’s what I’ve done (using Lightburn v 1.7.08 in Windows 10, connected to AtomStack A10 Pro V2):
- Import the image file into the template.
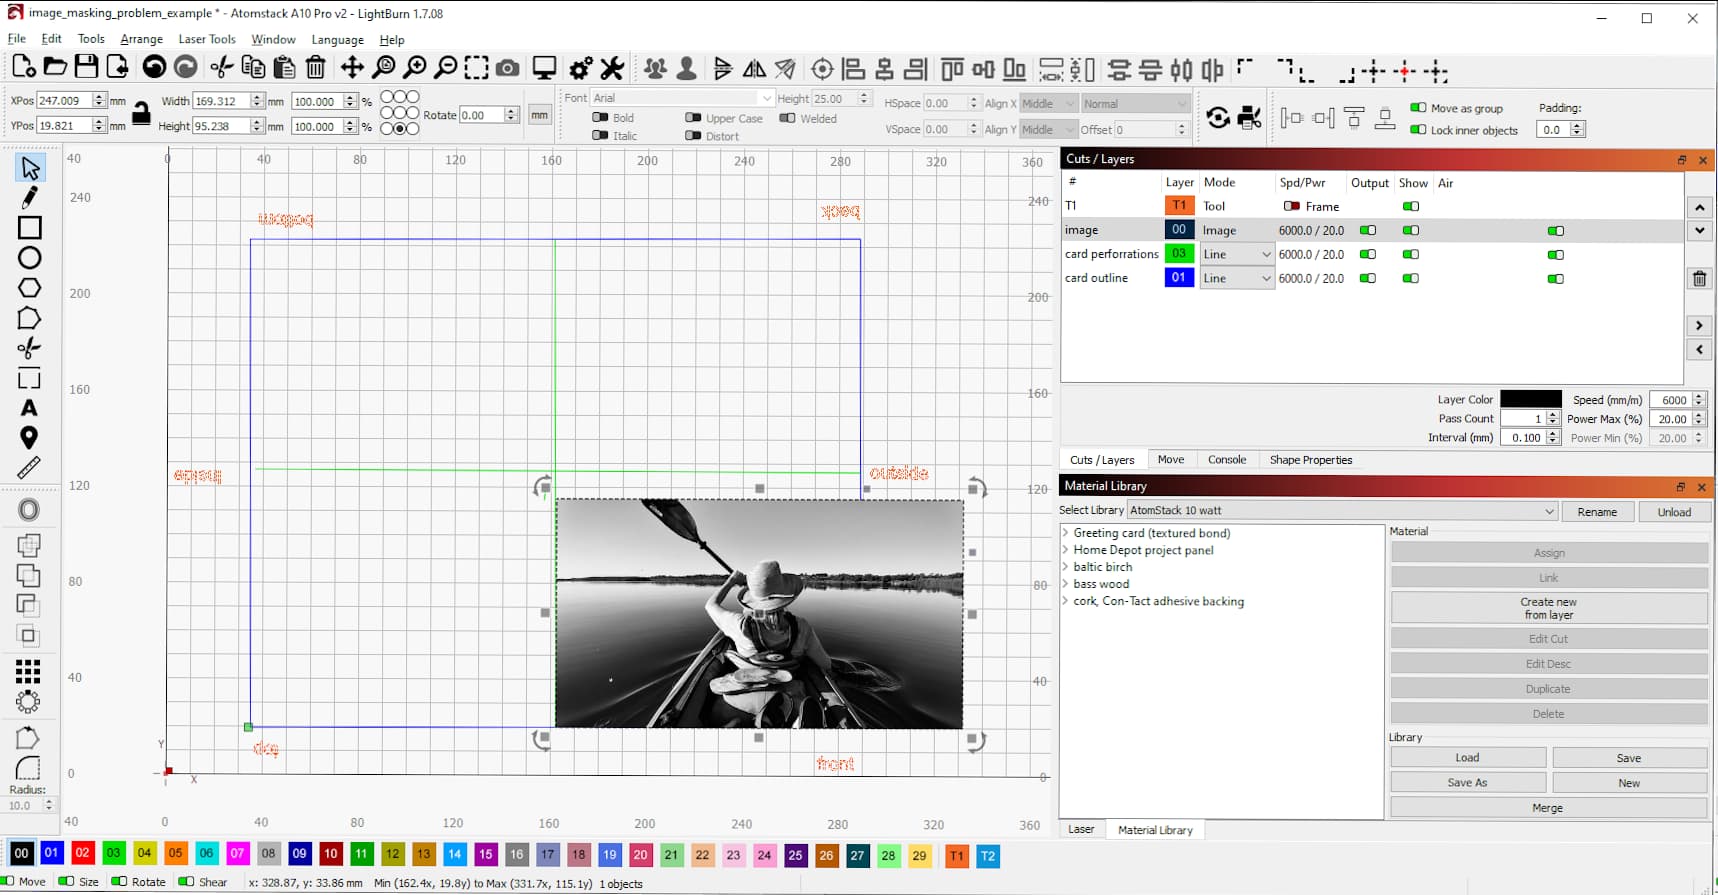
The large blue rectangle is the cut line for trimming the card to the required size. The green lines are perforation lines for folding the card to size. Text outside of the blue rectangle is on a tool layer.
- Create a mask boundary around the waste part of the image.
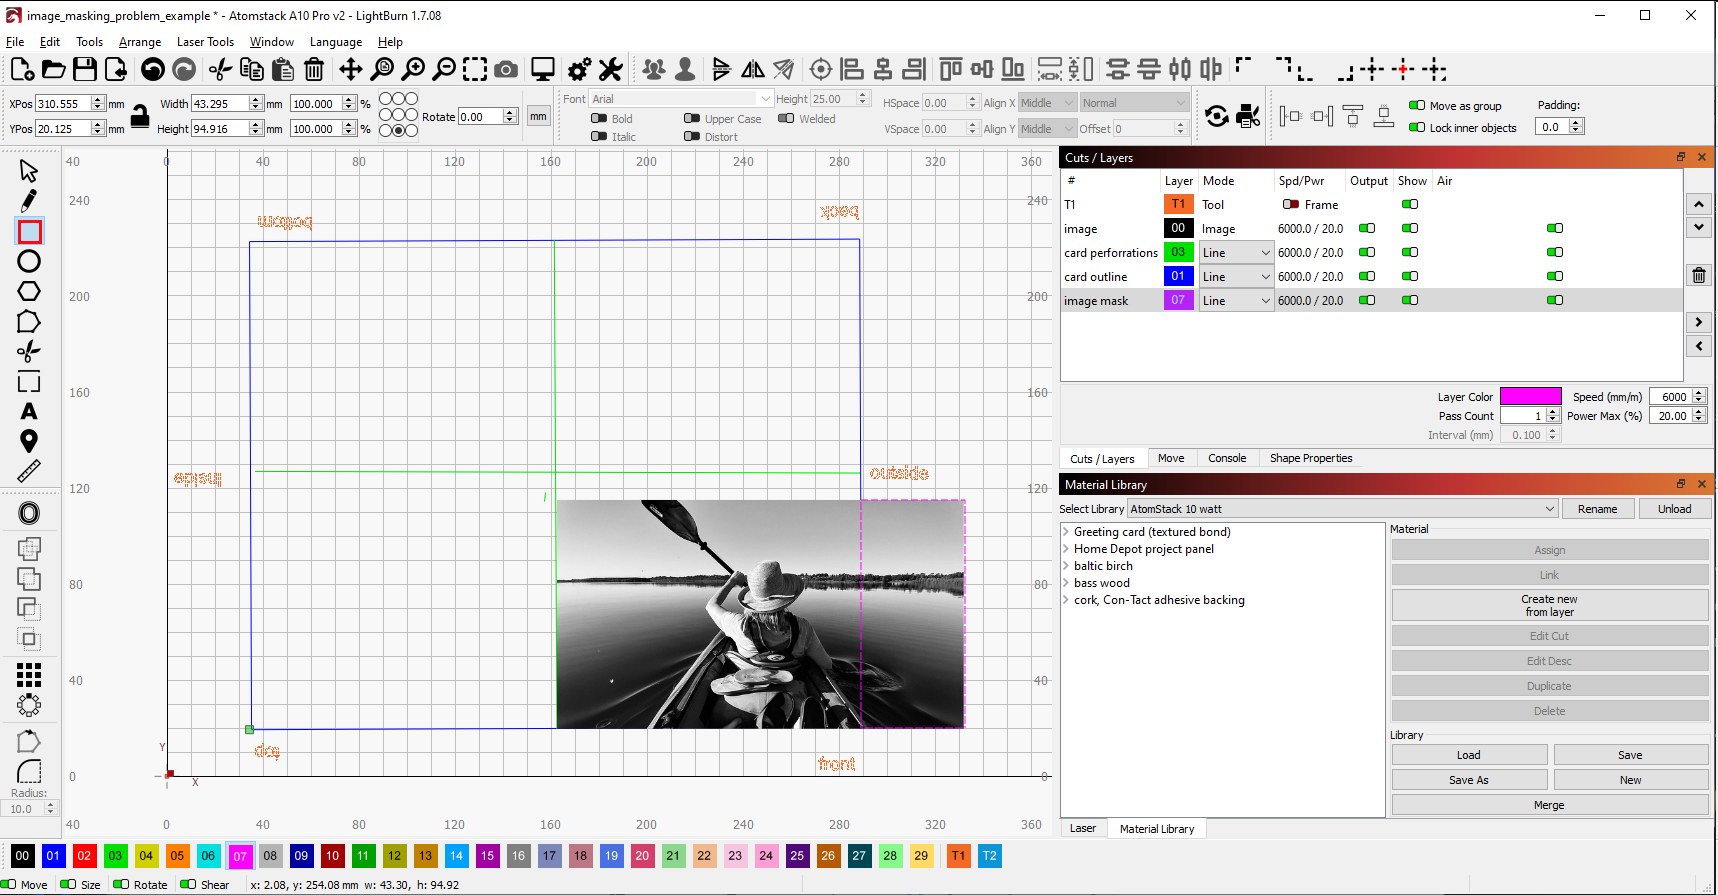
Mask is defined by the pink rectangle (on layer 7) surrounding the right most quadrant of the image.
- Select mask and image.

Select mask first, image second; or image first, mask second, doesn’t matter, same result.
- Select Apply Mask to Image on Tool menu.
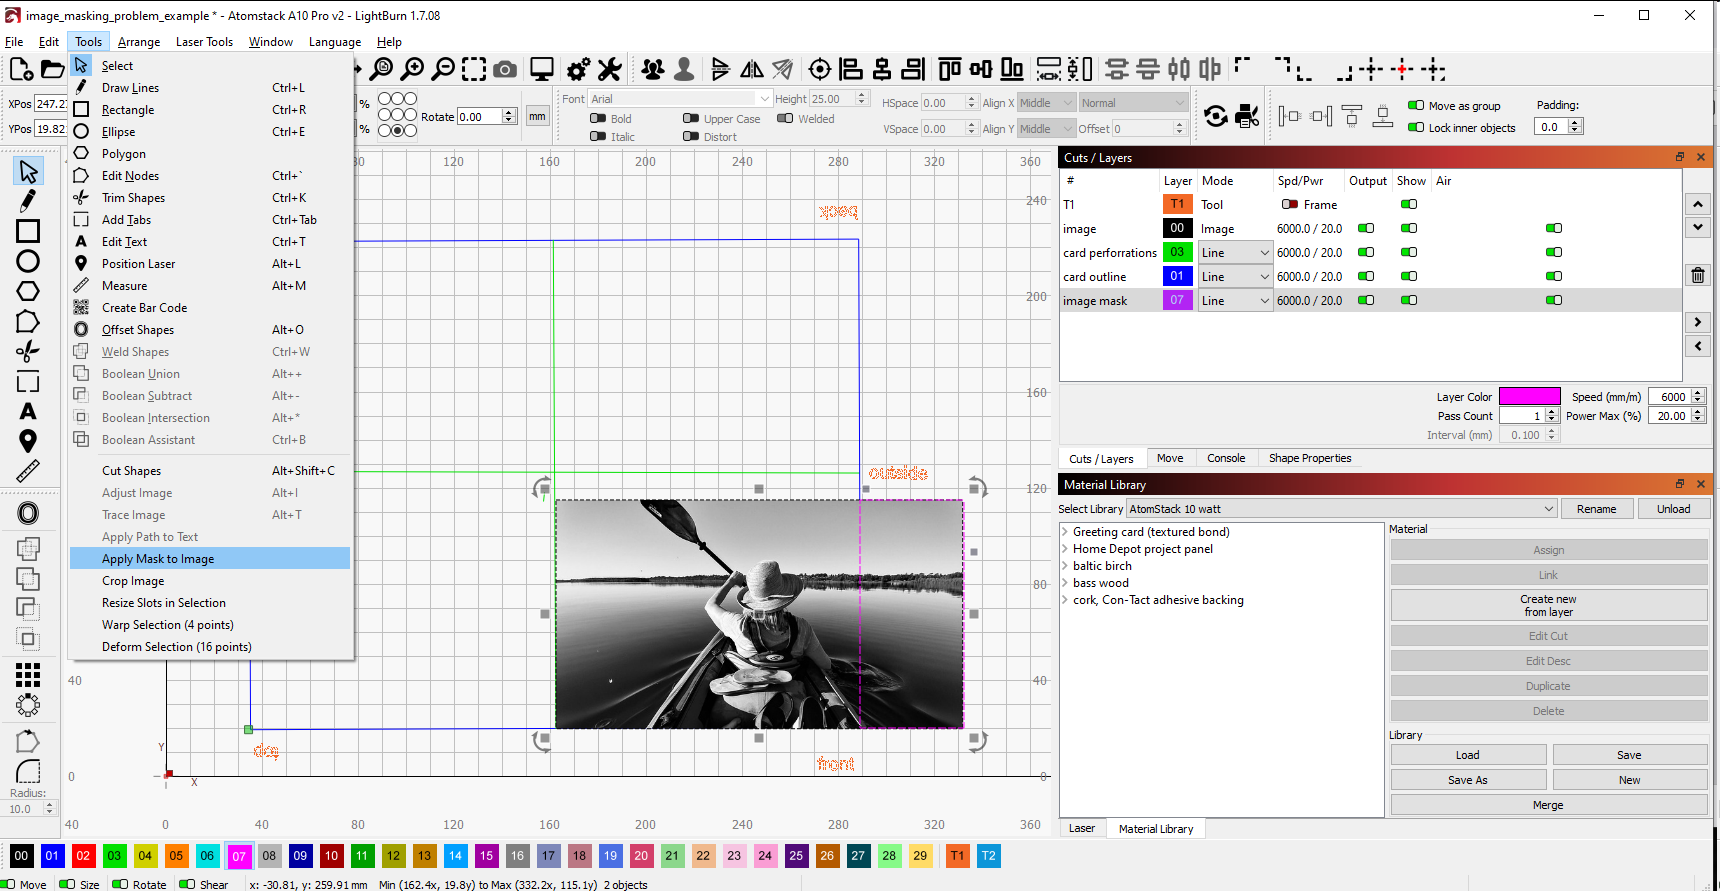
Also on right-mouse-click popup menu; same result.
- Result: Wrong part of the photo is gone.
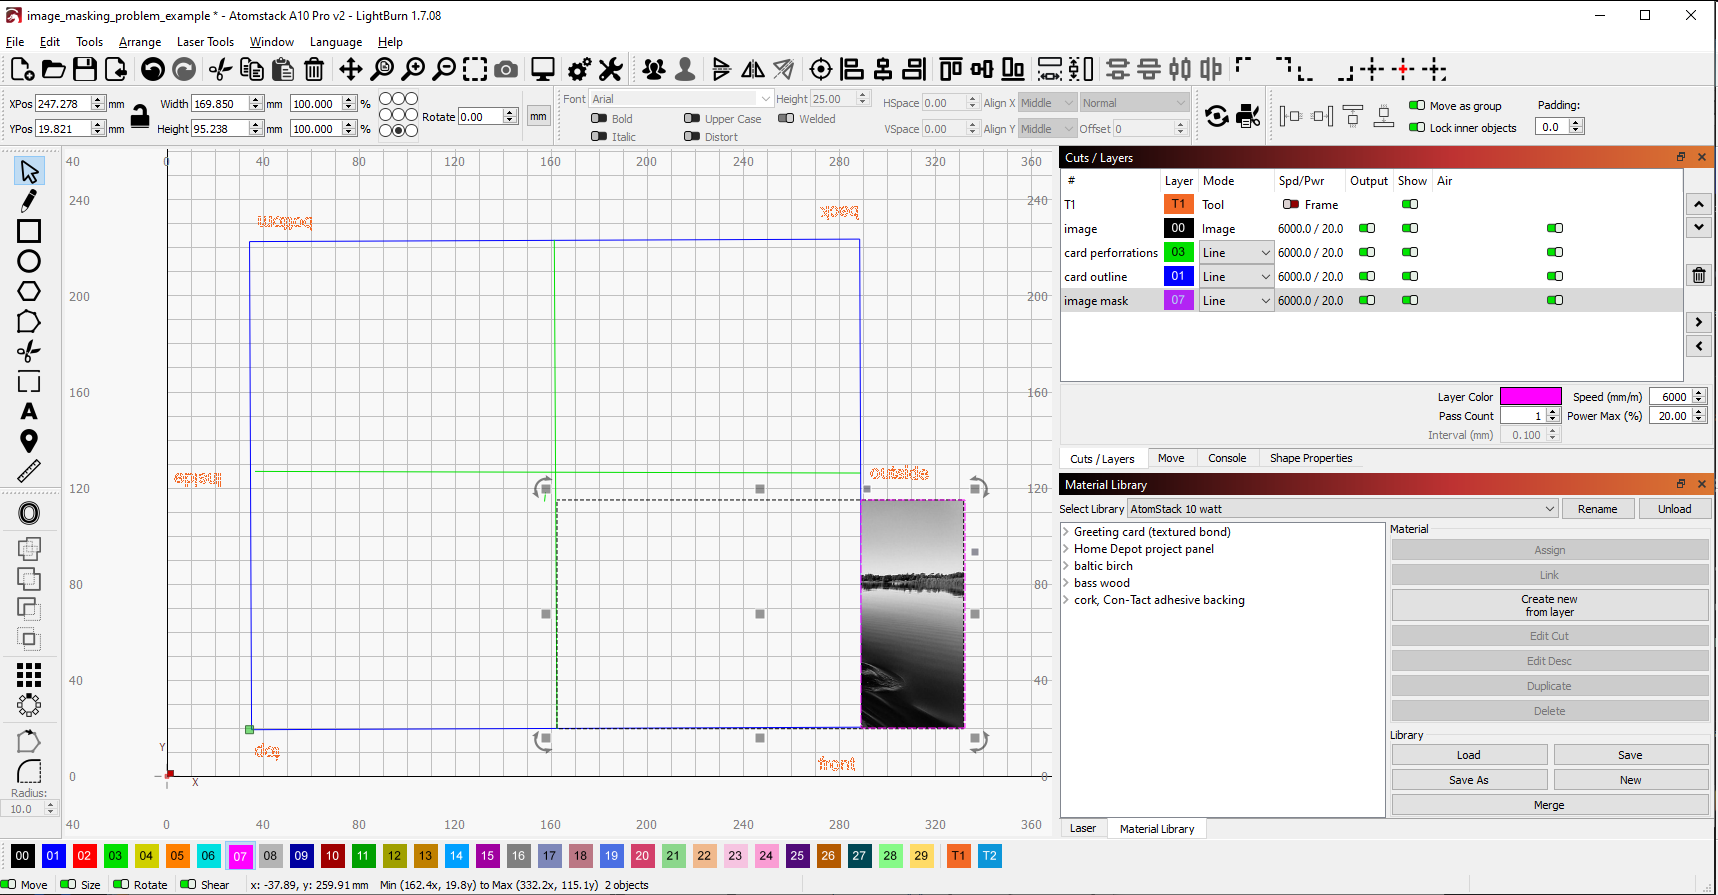
The part that remains is the part I’m trying to get rid of.
Any help, tips, pointers? Thanks in advance, Jerry