I am new to laser engraving please bare with me. I have set up my Atomstack and was running it and getting used to everything thru Lightburn, and than i decided to build an encloser for the smoke to be able to run in my office. When i installed he machine into the elcosure I started to have issues with it . at the time that i put it into the encloser i was also asked ot update Lightburn to version 1.3.01
The Issue that i am having is htat when i run a program. The laser fires fine and moves along the X axis just fine but will not move along the Y axis so it just sits on the one line and burns all the way through. Fist though was i thought the stepper motor ( thinks thats what you call them ) was out I also have checked all the wiring to make sure they are all secure as well and are fine. The funny part is that when i do a farming of the project it will run just fine and move along both x and y axis as it should … I dont know if some setting in Lightburn could be off. Clearance is more than adquet and i have taken it out of the encloser as well to test with the same results.
Any suggetions. and if its a motor any suggestions on where to purchase replacement parts ?
thank you
Michael
AtomStack A5 M40 Pro
Lightburn 1.3.01
Win 11 Desktop
Can you move the laser in all directions using the jog controls in Move window? Does the laser move smoothly and quietly?
If so, it’s likely not the stepper.
Did you make any configuration changes when you installed the enclosure? And can you confirm that the laser was working fine before putting it into the enclosure?
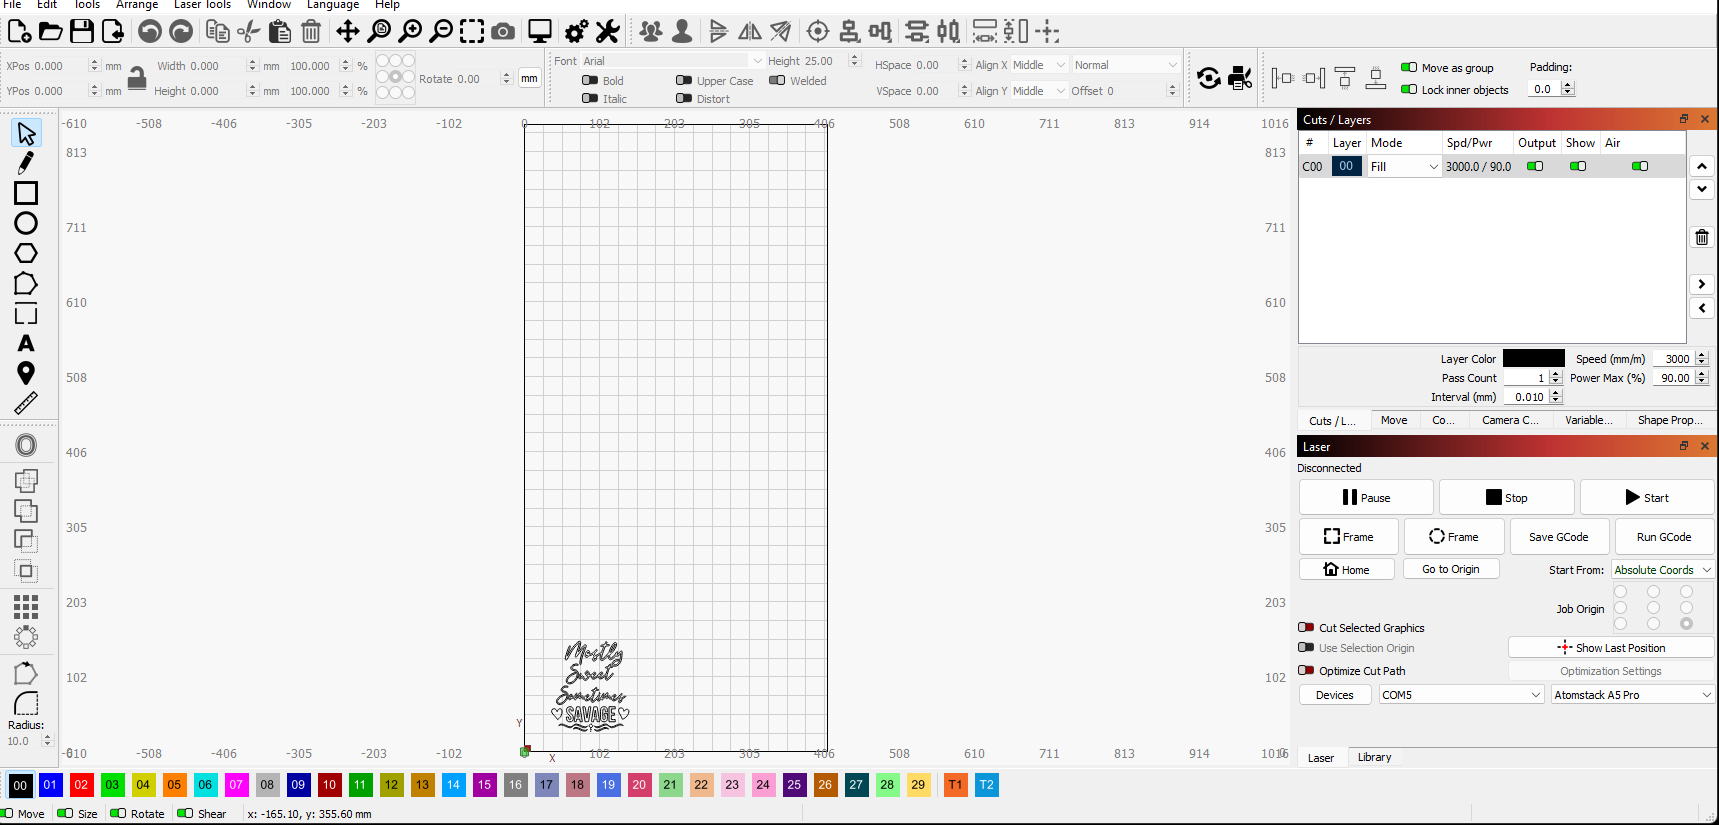
Can you provide the following:
full screenshot of LightBurn with your design loaded. Please have Laser window and Cut windows showing.
Yes the laser was working fine prior to putting it in the enclosure…
yes i can move the laser in all directions smoothly with the move controls as well
Command 1
$I
[VER:1.1h.2022011001:]
[OPT:VZ,15,128]
Target buffer size found
ok
The fill interval is unusually small. Are you sure it’s not working correctly but just taking a long time to complete the fill based on the unusually small interval?
I suggest taking a look through the preview to confirm.
Thank you yes itwas that setting that was off and i will try with your recommendations of .1 and see how it goes thanks you very much for taking the time to help me out with this issue