Hey everyone, newbie to laser use here. We have been outsourcing patches on laserable leatherette for a while but decided to bring this capability in-house so picked up an Atomstack A5 Pro and Lightburn to learn the ropes.
Things have gone pretty well but having some trouble figuring out the cause of this “striation” effect we’re getting. We don’t see anything like this when running the Lightburn Material test, but it shows up as soon as we try running an actual design. We’ve run about x30 tests adjusting speed and power up and down but always get the same general result, although to different degrees.
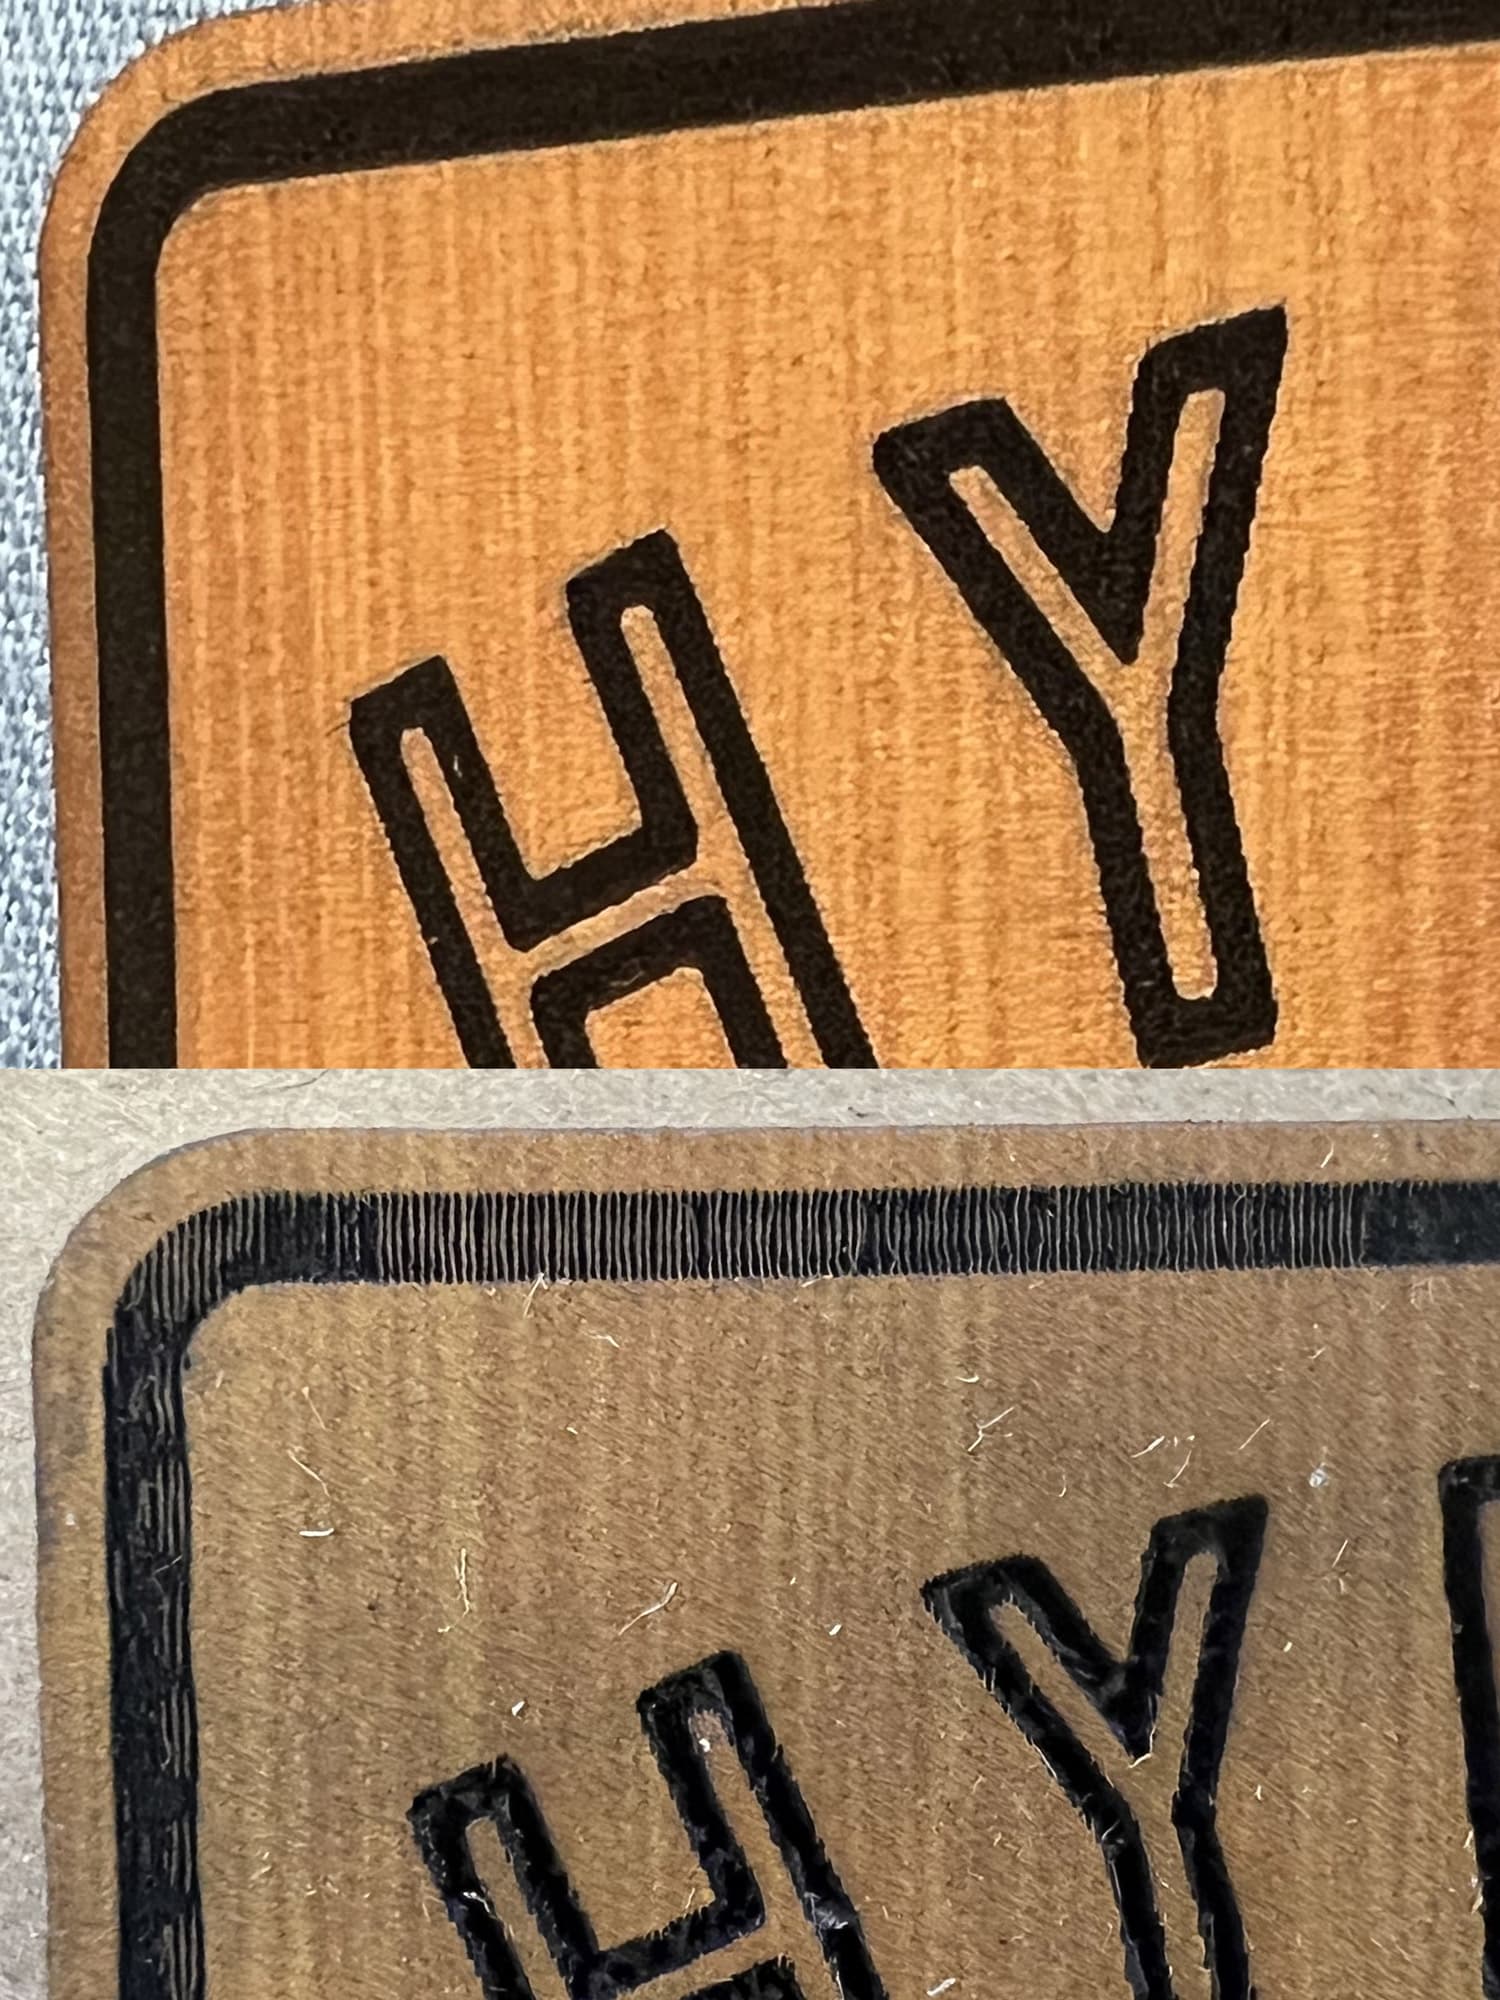
In the comparison pic below, the patch from our vendor has a very clean, solid black throughout. Our patches however end up looking “washed out” rather than dark black when viewed from a distance, due to this striated effect.
We had assumed it was maybe related to speed, but we still get this even when dialing things way back, to like a single 2x3 patch taking 20+ mins. What settings should we be messing with to sort this out? Line Interval? Lines per Inch? Something else?
In the event that it matters, the material we’re using is the “Bamboo” leatherette from Hydbond, whereas the vendor’s material is the “Bamboo” leatherette from JDS.
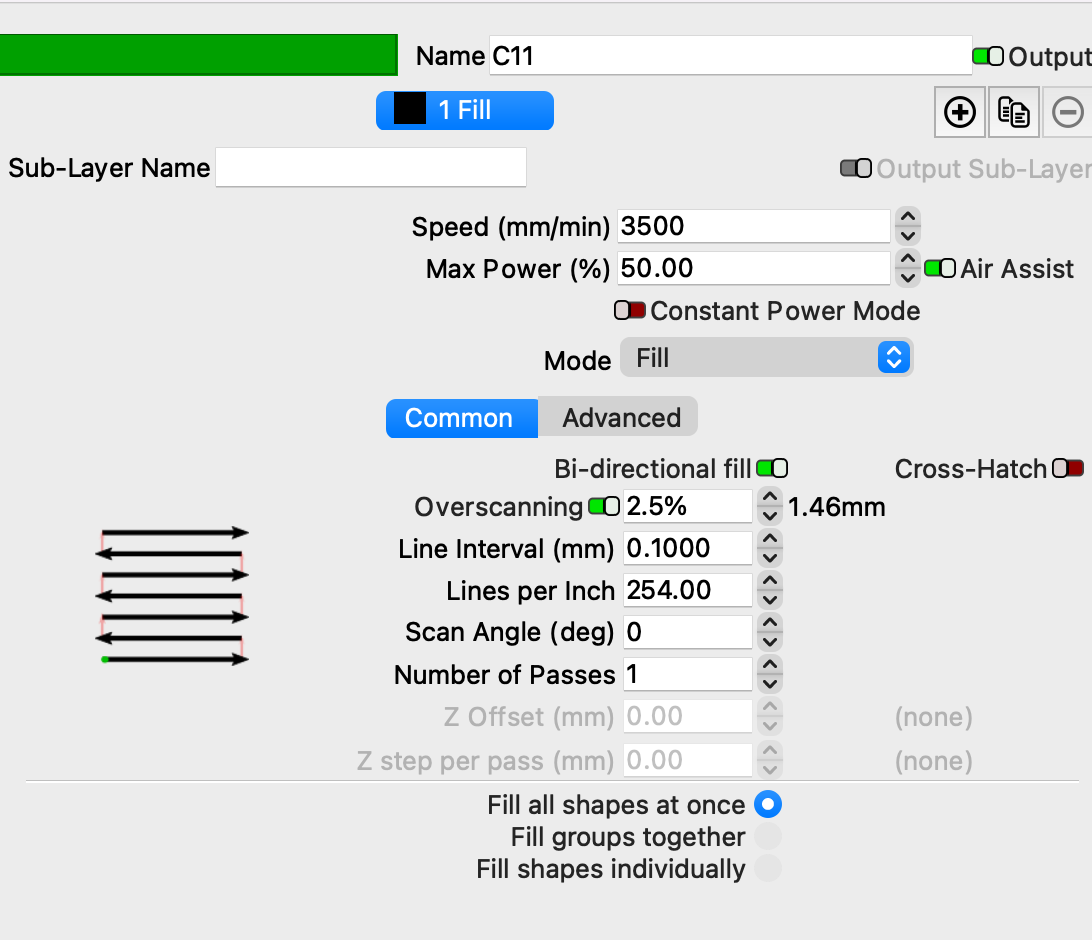
These are the settings that seem to be giving us the “best” results so far:
I guess now that I’m looking at these pics side by side, it occurs to me that it seems our laser is cutting this horizontal line in many vertical passes, which seems… not right. But there are certainly other parts of the design where vertical passes make much more sense.
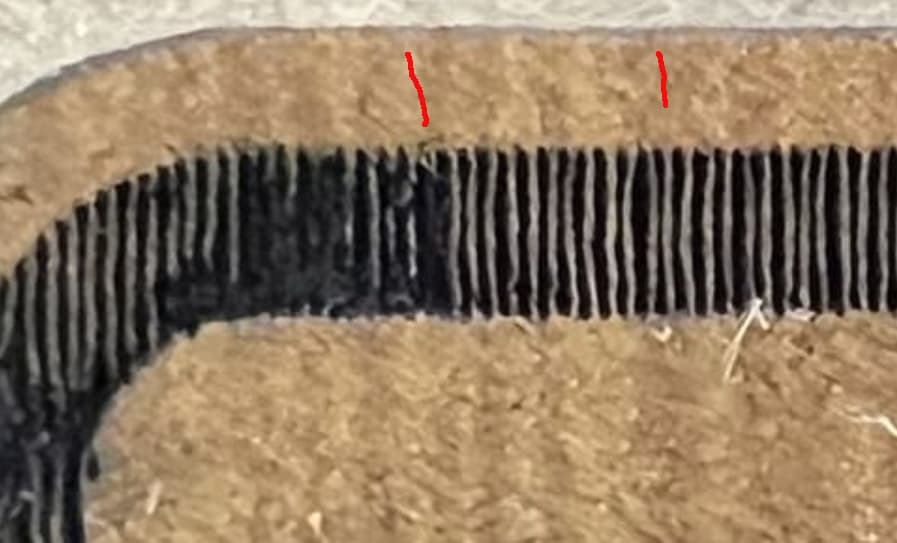
First is the material… although the changes in the material are fairly faint, it appears to change the results. Area between the red marks is lighter… The full size you posted may be easier to see.
The other is that I expect lines to be relatively straight and a tighter (smaller) interval. If you do go to a smaller 0.05mm interval it will likely double the run time.
I assume it was lased scanning in the direction of the lines that appear up and down in the photo?
The letters are totally different… same material and speed? different results? They look much more black.
I’ve never worked with this material… so these are just observations.
Thanks for the reply! The letters are in fact etched at different settings, yes. But it didn’t start out that way. The letters have always come out more of a solid black than the outline around the patch, I assume having something to do with the fact that the outline is a thicker overall line than that of the lettering. So we split out the outline into its own layer and started changing the settings, which helped some, but we still can’t get it dialed in.
It was definitely lased in the direction of the lines, yes. Which in this case was actually horizontally along the X-axis, as the patch was rotated vertically during lasing in order to align the “grain” of the bamboo pattern. I guess it’s worth seeing what happens if we fire it the other way instead…
I should also note that we’ve only had this thing for a few days, so not sure if this might be related to initial calibration issues such as belt tightness, etc.
When the lines wiggle, first suspicion is mechanical.
If you can tell what’s happening to the material where the beam strikes it can clue you into what’s happening.
Is it melting the material. are the dark area where it was struck by the beam or are the light parts struck by the beam?
Interval can make or break results with these…
I suggest you watch this Laser Everything video on photo engraving. They explain clearly how to use the proper interval. This will be useful as long a you laser things. Well worth the time.
Generally you run the X axes in a scan it has less mass and can run faster than the Y axes. If you rotate anything, rotate the material.
eliminate material. Throw a piece of masonite (hardboard) on it with just enough power to darken the surface and see what the vertical separation is on that. There is something in my head thinking about the particular material shrinking with heat drawing it away from the laser then relaxing. Probably a crazy thought but troubleshooting is about dividing in half until you find the answer. Eliminate the material. If you want to send me a scrap and the file, I’ll throw it up on mine. I’ve done a handful of leather and leatherette patches with good success.
Hey Greg! Intersting theory… I guess I should note that the setting in which the lasing is being performed is an unconditioned warehouse in the Southeast, so humidity could potentially be a factor. I had planned to run some additional tests but have been very wrapped up the past few days. Will hopefully get a chance to get to it tomorrow… Will keep everyone posted on results!
Circling back around on this. After many, many, many additional tests I finally have things dialed in for our Atomstack A5 Pro. It’s not fast, but the results are finally good enough to pass our QA process and be approved for wholesale to our retail partners.
The issues with the “wiggles” were apparently related to our material being slightly warped from ambient humidity, which was causing the laser head to occasionally make glancing contact with the material and therefor “stutter” slightly… I solved this by throwing the entire sheet of Hydbond leatherette into the heat press for a few seconds to flatten it as much as possible, and then placed a couple of pieces of wood on top to weigh down the center of the sheet while it was being cut. I didn’t try magnets at the time because there wasn’t space for the laser to pass over them (more on that below).
The issues with the striations were a focusing and LPI problem. Essentially all of the calibrations we had previously tried had the laser much too close to the material surface. My “perfect” etch settings ended up having the laser nearly three times farther from the material surface than the manufacturer’s recommended distance. This however meant that we then had a a lot of troubles cutting through the material at the end to pop out the patches. Either it wouldn’t get all the way through, or we would end up with lots of scorching and soot stains that ruined the patch. We finally found that x4 passes at a low power setting gets a perfect cut with zero scorching. Along the way we also found that turning up the LPI settings from whatever the Lightburn default was (~250 maybe?) to around 375-400 gave us the cleanest and darkest etching results.
So for now we have high quality output with absolutely no scorching and patches that don’t even need to be cleaned. But it’s very slow, averaging about 15-20 mins per patch depending on the artwork. We’ll do some further testing to see how much faster we can get these done with different LPI and power/speed.
I imagine that we mostly use this capability for prototyping and market testing new designs, and then just outsource the winners to our overseas partners (we typically order 600-1200 units per style at a time). But even for small test runs I imagine we’ll be in the market for a much more capable laser in the short term. For now though I’m very satisfied.
Thanks to the prior posters in this thread for their ideas and encouragement!