Using the R1 Chuck with my new Atomstack A70 Pro has a different setup than my old A40 Pro using the same R1 Chuck. Had to change the steps per rotation to 95 to eliminate stretch in the design. I think the steps setting per rotation was 165 for the A40 Pro. Also in laser setup turn on Mirror Output so the design isn’t reversed. One other change was to turn off Laser Offset Pointer so framing will work accurately. Now everything seems to work correctly. All kinds of makes sense.
Also the risers that came with the R1 worked fine for the A40 Pro but the base is different for the A70 Pro so the base will not fit into the slots on the riser. I fixed this by just turning the risers updide down and using the threaded inset with some 6mm thumb screws to attach the riser with the existing holes in the base of the A70 Pro.
Don’t you just love how there is no consistency in these products? Congrats on managing to get everything working on the new machine.
can I see your cable connection? I can’t get R1 & R2 to work, the R2 doesn’t even come with a correct cable. There is no 4 pin 4 hole port in A70. It gets stuck and vibrates when moving the roller.
It’s crazy i am buying this expensive laser for basic operation that i can’t make happen.
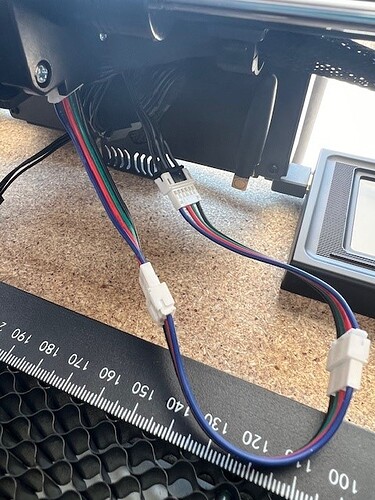
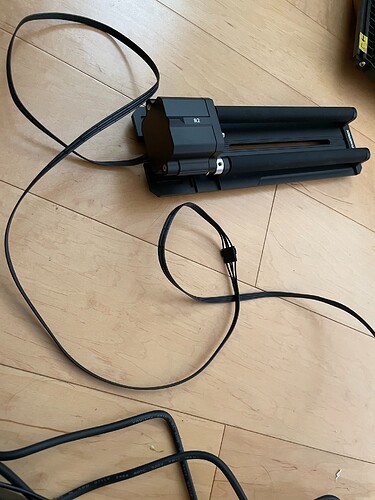
Here’s the cable you need to go from the R1 Chuck to the Y axis cable from the mother board on the Atomstack A70 Pro. It is a Stepper Motor Extension Cable 20in | “JST-PH 2.0 4 Wire 6pin Male to 6pin Female”. The cable is 6 pin but only has 4 wires on it. Here’s where you can get one in what ever length you need. But mine is about 36 inches.
Unplug the cable from the Y axis motor. Then plug the cable from the Chuck to the cable from the motherboard that you unplugged from the motor. I bought 2 little 3 inch extension cable and plugged it into the Y axis motor between the motor and the cable from the mother board. It hangs down a little and makes it easier to plug and unplug the cable from the Y axis motor. You dont have to tilt the machine or reach up under the carriage. Also, i don’t know if its good to plug and unplug these cables a lot. With my extensions and wear and tear on the connector will be on my extension cable and not on the connector on the motor or the cable coming from the mother board. So what you need is one long cable (25 inch) and 2 three in cables to do what i did.
Was that TMI (Too Much Information)
https://www.etsy.com/listing/1307694005/stepper-motor-extension-cable-20in-jst?ref=yr_purchases
As far as the risers so. I got 4 14.5 oz empty green bean cans and use them for risers. Their the same exact height as the old riser that came with the R1 Chuck. Works perfectly. Cut some 73mm circles out of 3mm birch plywood to plug the botton. Put some small fish tank pebbles in them to give them some weight and painted them black. My wife was laughing at me and said i had too much free time on my hands. She doesnt appreciate innovation. Or never saw MacGyver.
Now you know everything I do. ![]()
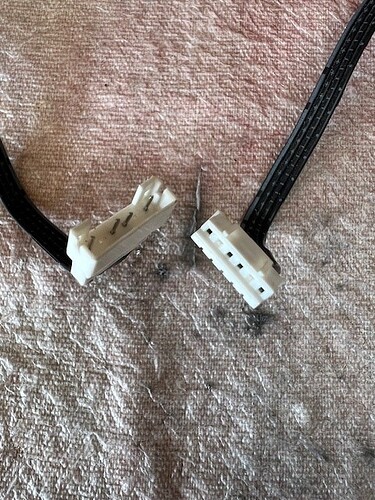
While seeing your cables, i was playing around with the cables from R1, I was checking what is the diff with the 6-4 port black converter that i never used and now try on A70… the pins are 4, just like yours… then i found out the mid2 cables are SWAPPED near one end. This is crazy. I happen to own two other black 6-4 roller port cables, so i connected the TWO same cables 6-6 to 6-6, so the swapped mid cables are reswapped. NOW it works!
Thank you
This topic was automatically closed 30 days after the last reply. New replies are no longer allowed.


