I have only run off a few tests since putting this machine together and just getting used to working with it & Lightburn.
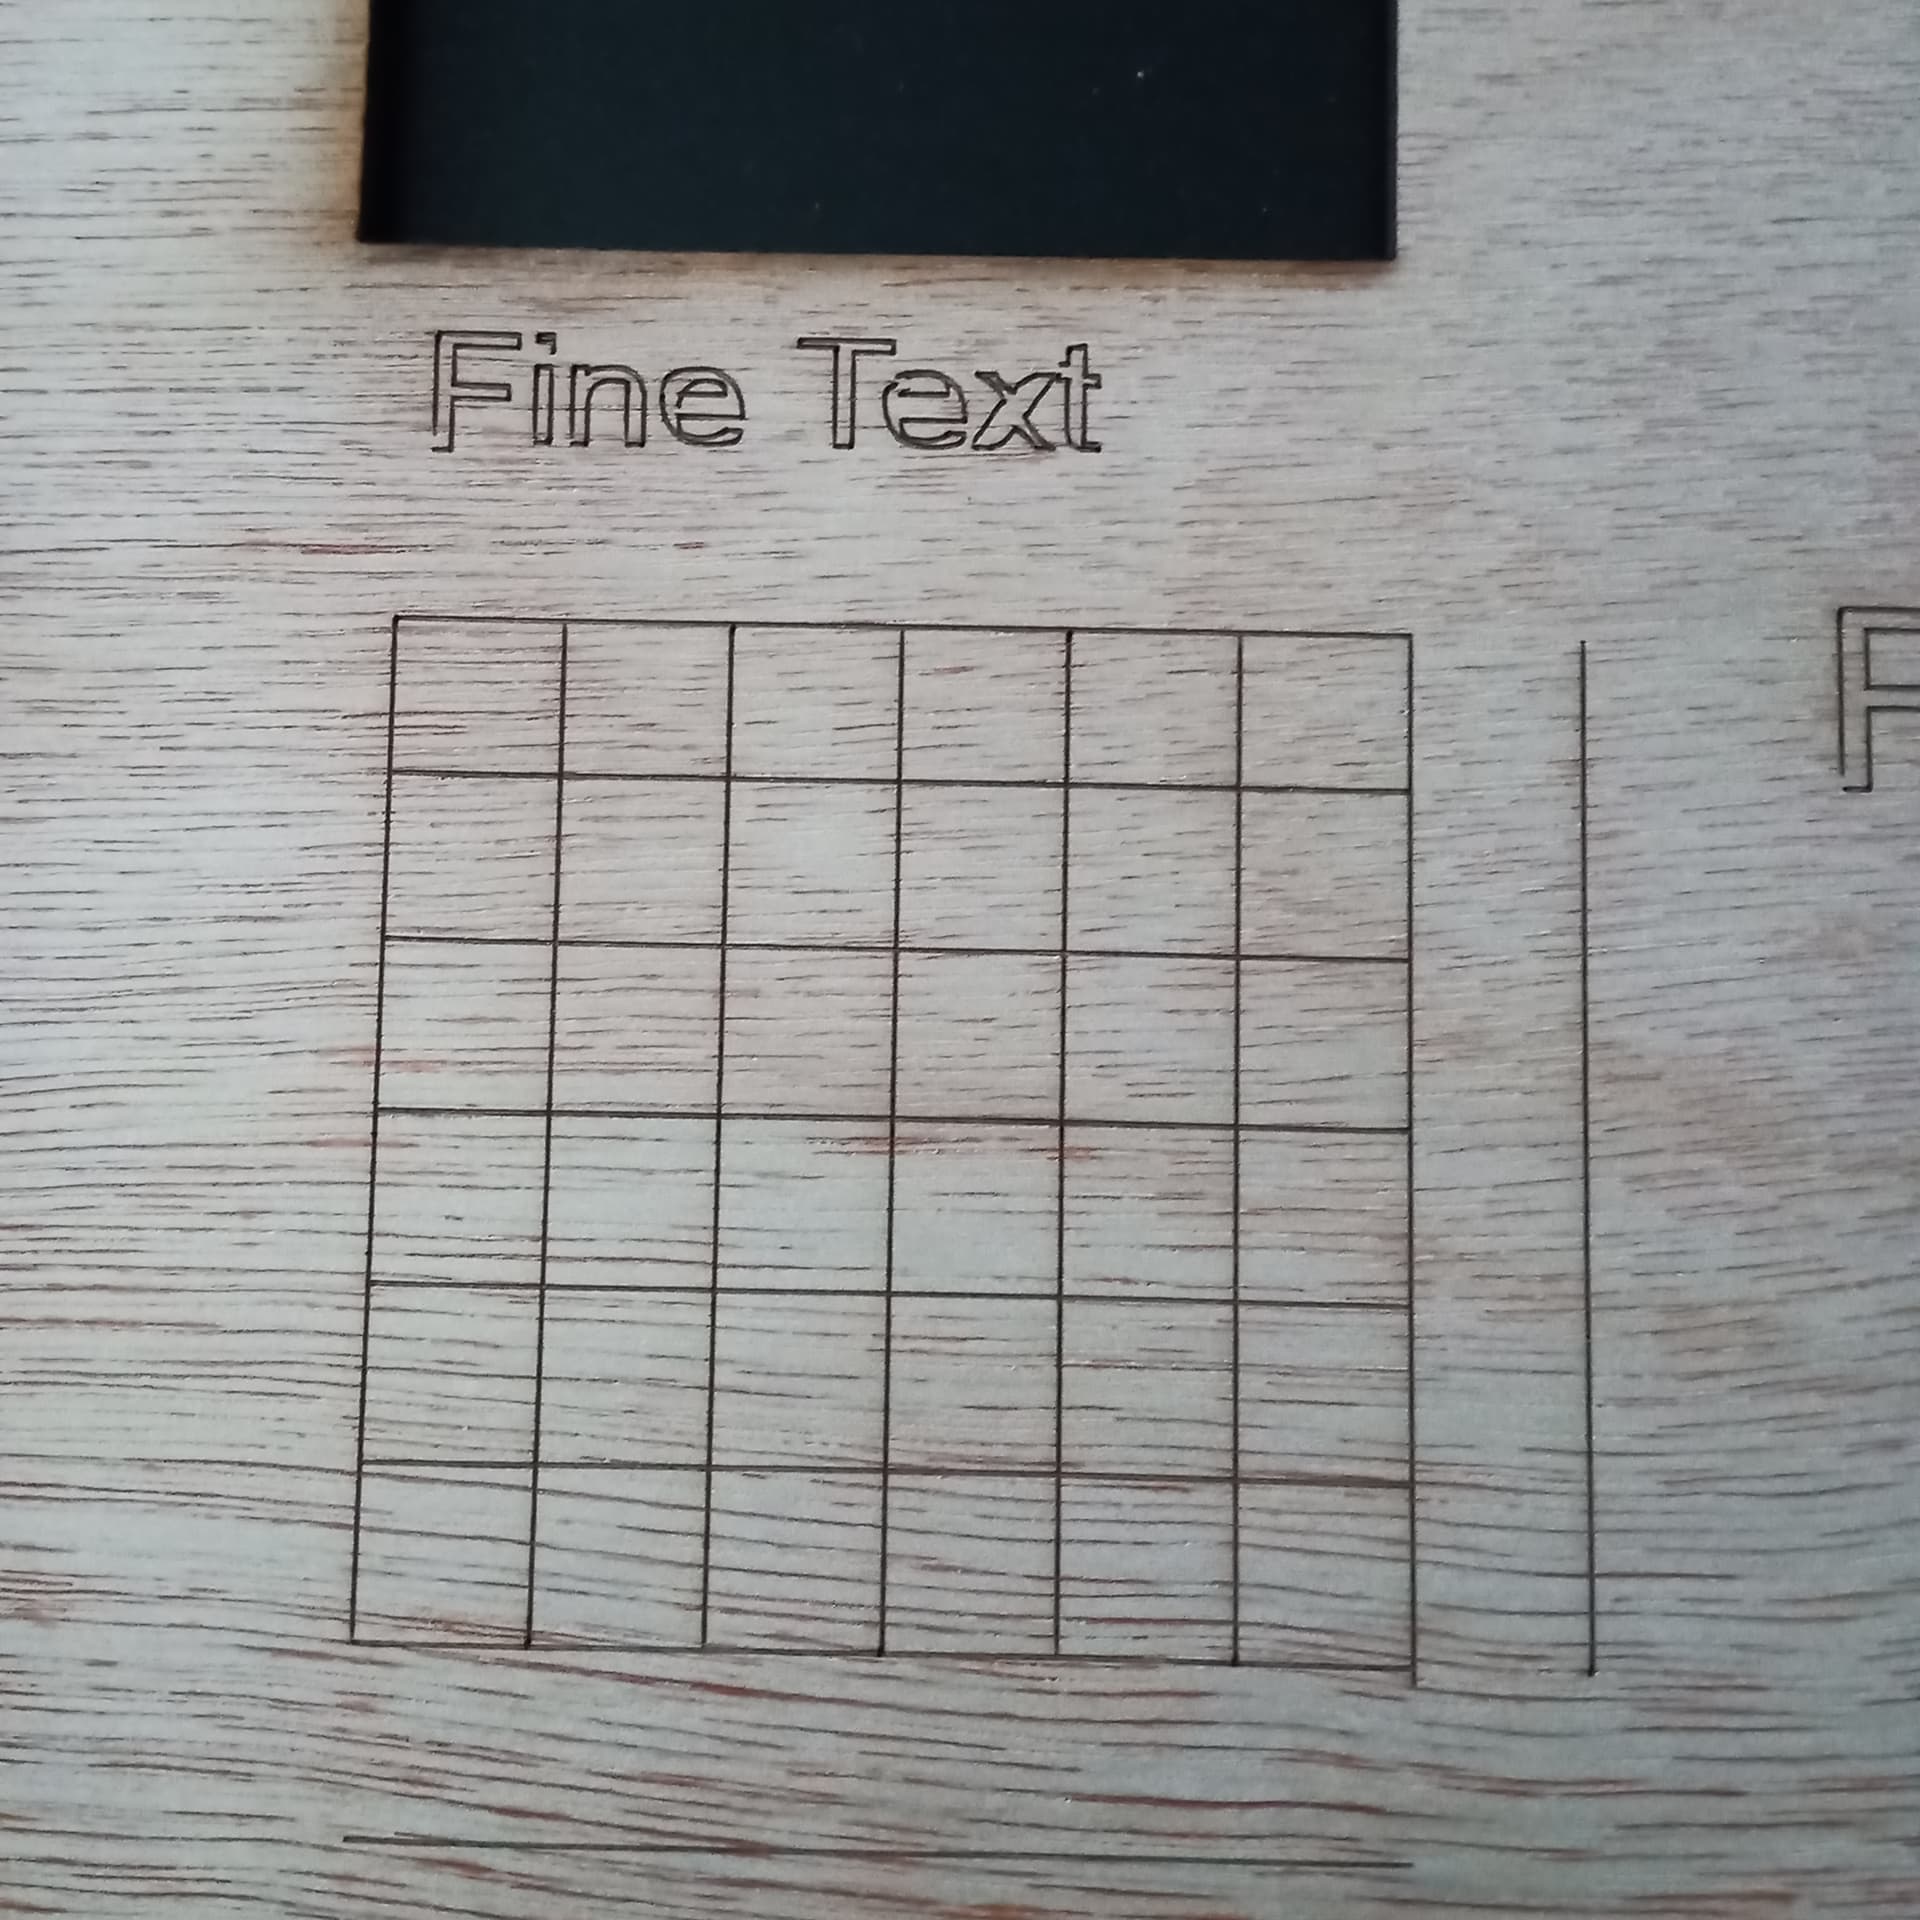
I am noticing that text and some lines are not cutting exactly as expected.
Examples:
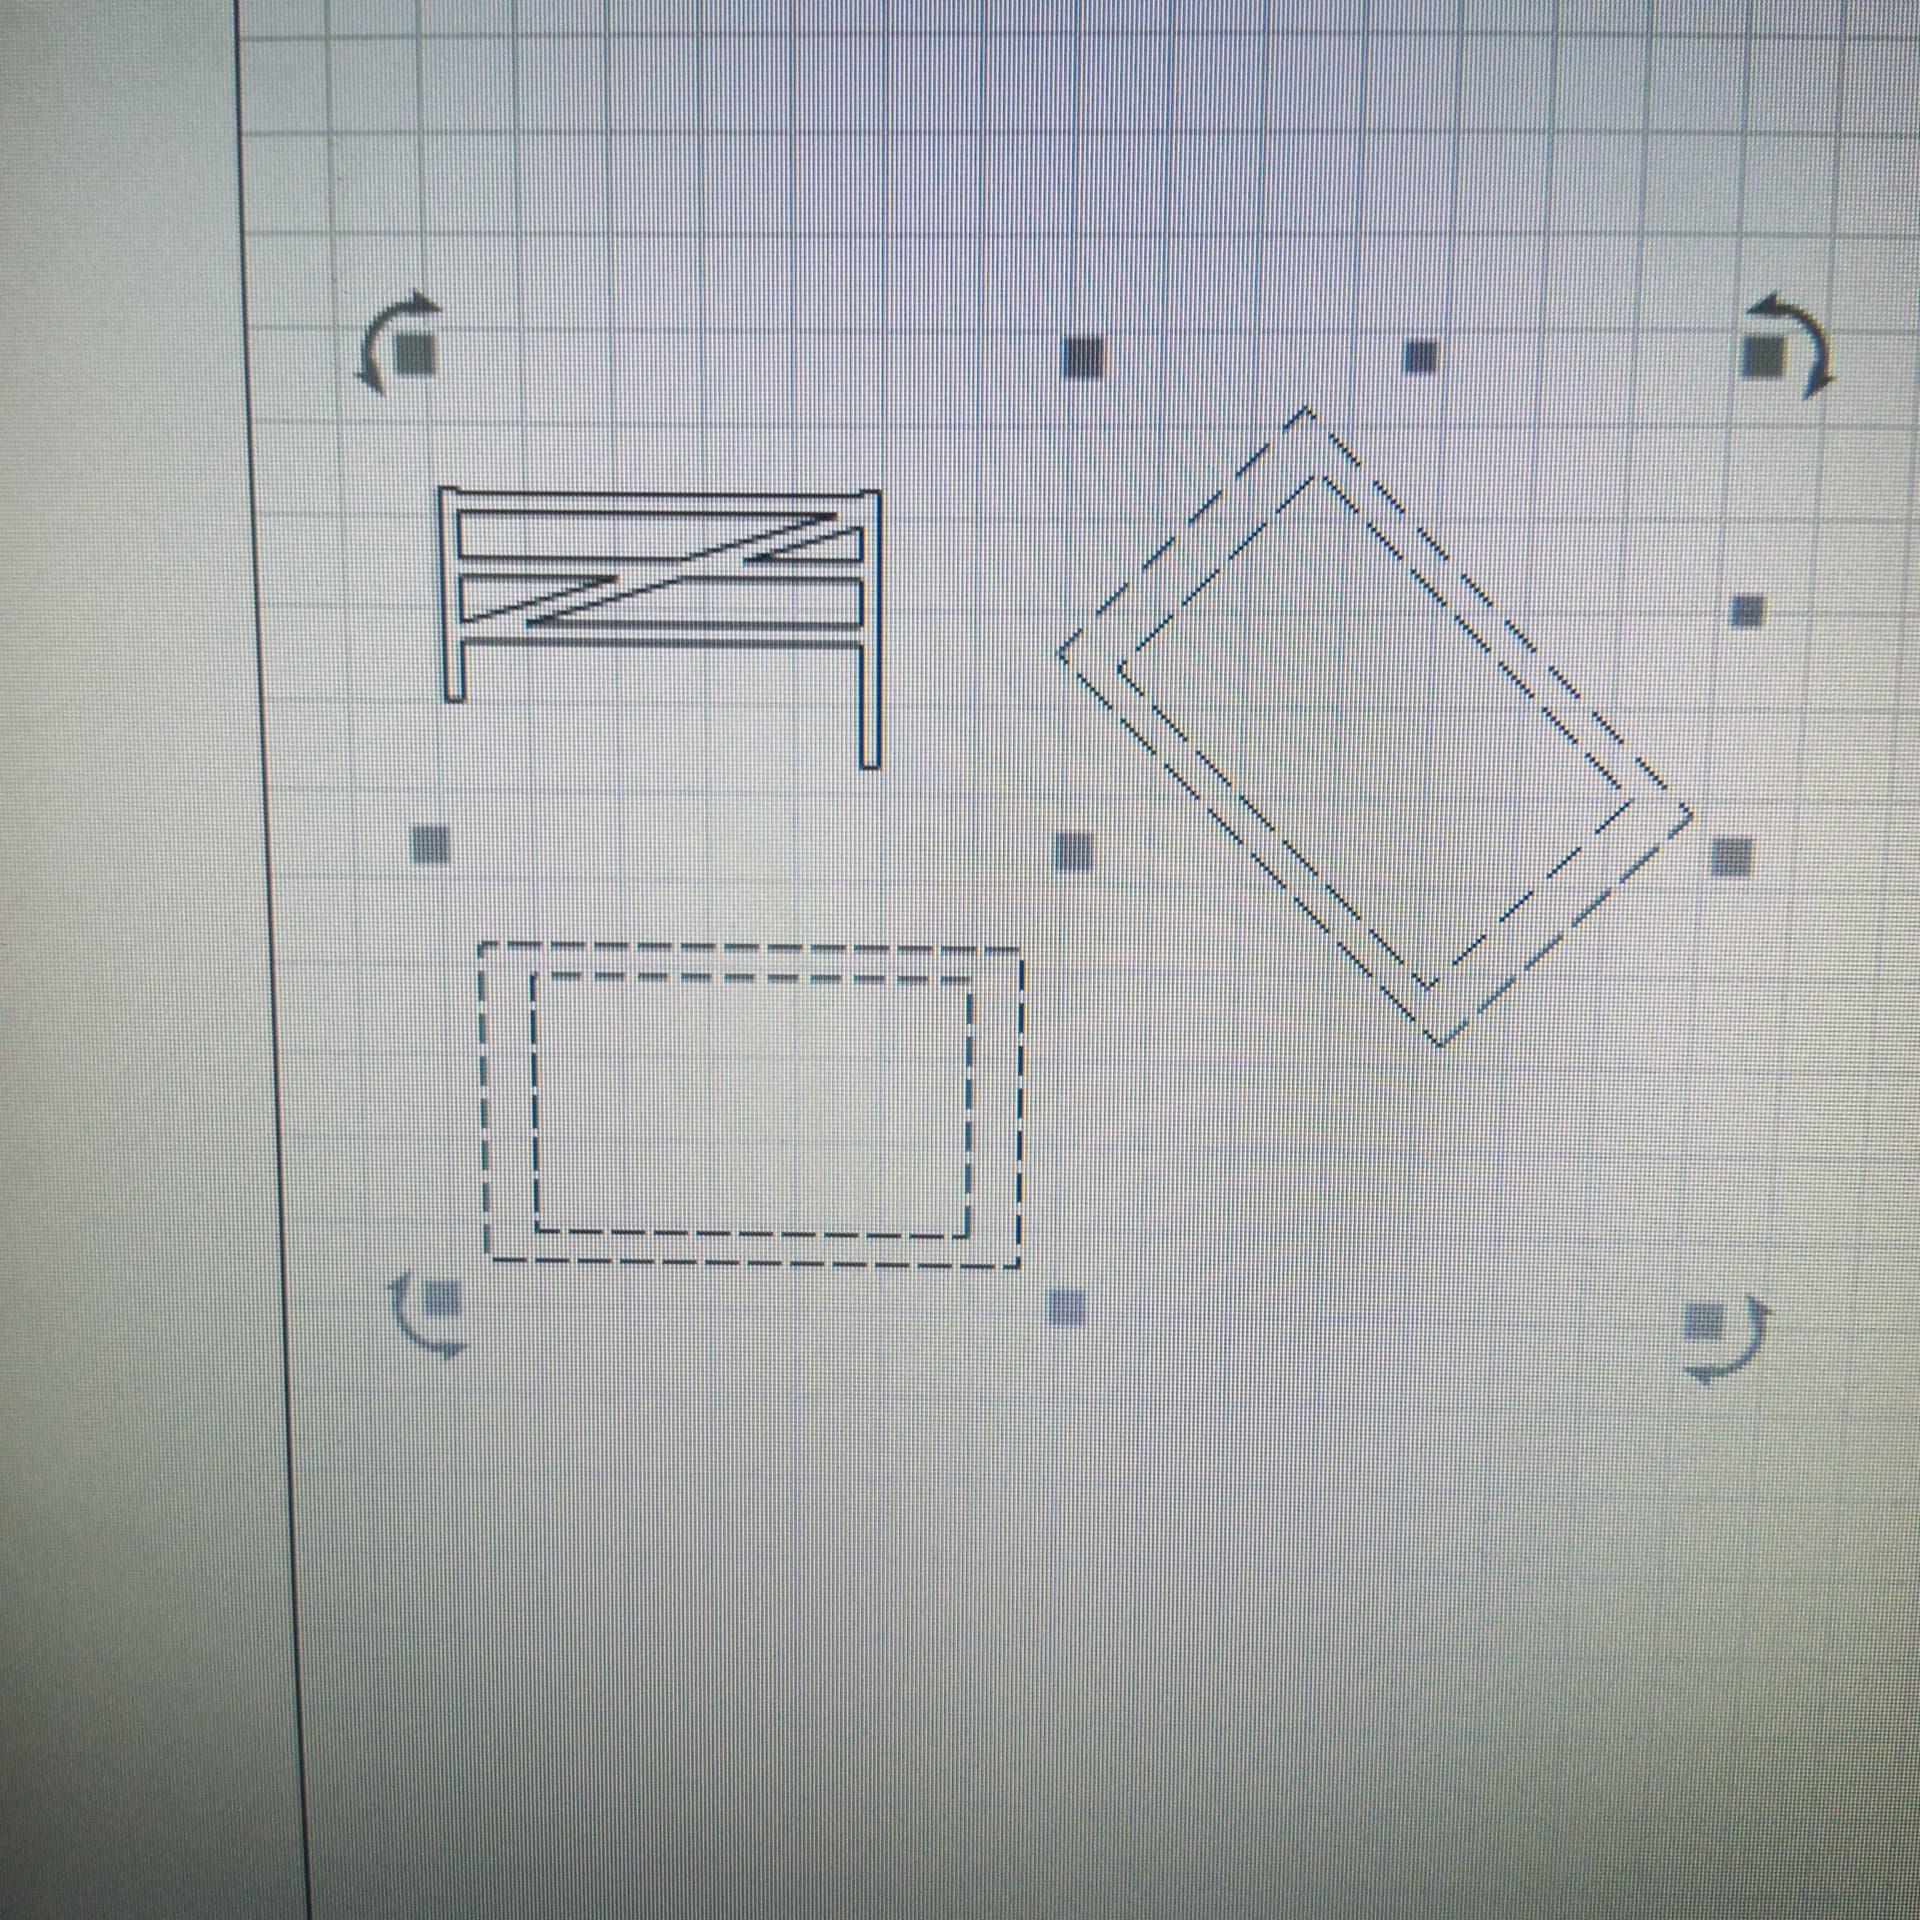
A square will cut but when it returns to the original point the line is either just short oif the corner oir just passed (bottom left) - Corners are also sometimes rounded off or not a sharp 90 deg turn (top right shape)
Its hard to tell but from watching the movement of the bridged axis that holds the laser, the right hand end seems to slightly spring back when it gets to the end of a move during cutting.
So… i know i can adjust the belts on either side, the tension on the running wheels etc but where to start?
I believe that your observation matches the behavior you’re seeing.
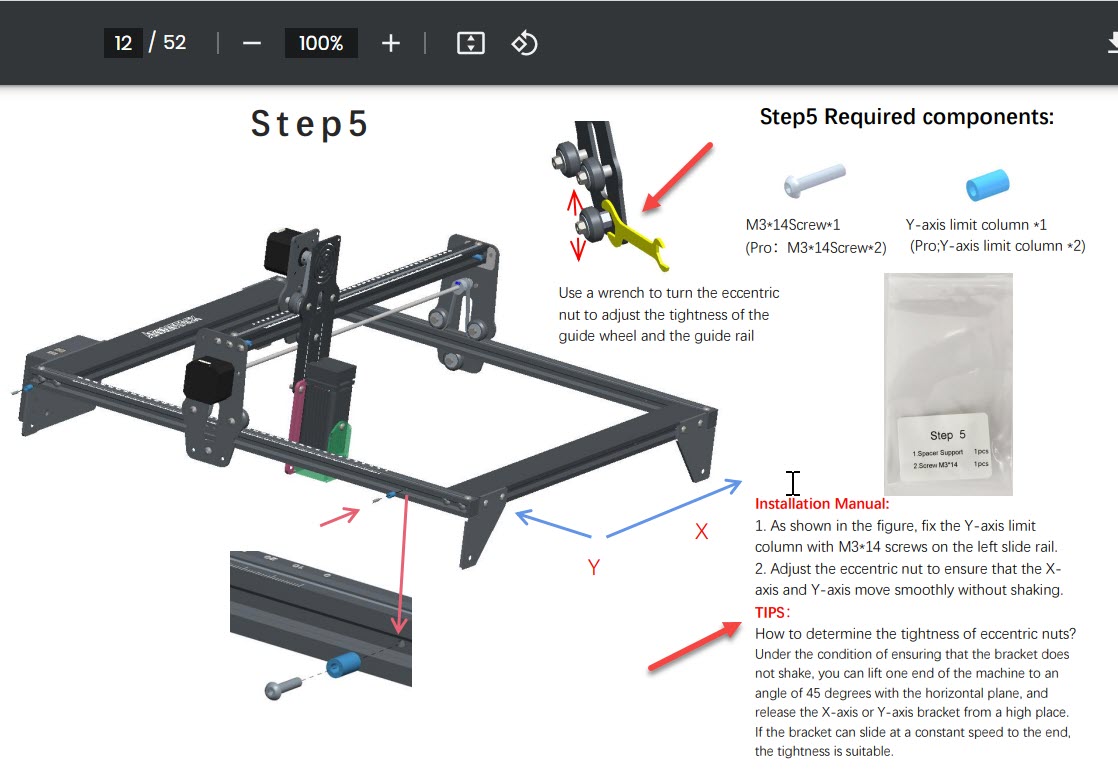
Most retail diode engravers have eccentric adjusters in the wheels that run along the gantry and frame. This is to make up for manufactuing differences and allow you to take the looseness out of the engraver.
The fast way to get started is to unplug the data and power cables from the engraver and slowly move the engrave head to the middle of the work area by hand. Once it’s there give it a little wiggle. Take the looseness out of the mechanism by moving the wheels closer to the rails that they run on. Be sure to not overtighten the adjustment.
Loosen and retighten the coupler on the cross shaft that connects the left to right belt. That will release the tension stopping the spring back you are observing. Any time the Y axis belts are adjusted this should be done to keep the X and Y square to each other.
I ran the head to the middle and got the looseness out of it and then also reset the coupler on the cross shaft.Working perfect now thanks for your help