Similar issues I found refer to photos and a dithering issue, but these are all vector. I have tried not using bilateral, not running other items that can pull power (exception of chiller but that’s on another circuit anyways), different DPIs, different powers, but still get the same result. This was provided acrylic, so let’s assume the worst and that it is extruded, but I’ve engraved extruded before and don’t get these lines.
Trying to narrow down if these are my settings or on my laser. Laser in question is a Boss LS3655 155W. Air assist was on but very little (keeps nozzle from clogging up), but I also tried no air at all.
Before you loose your mind, try keeping everything the same but going a bit out of focus, 2-5% of the optimum focal length. That will help the coverage by blending the edges of the cut path. You may have to go as far as 10-15% depending on the focal length of your lens.
Looks mechanical to me. Is it engraved in the pictured orientation? Upright “f” with X axis running left/right? What if you rotate the design 90 degrees or change your scan angle to engage both both axes?
Right, it was engraved as you see it, so the head was moving left to right. If I rotate my design, wouldn’t that just face the lines in that new direction? Or am I missing something? Or you mean have it engrave up and down? Is that even possible, or is that what the scan angle does? Sorry, for the bombardment of questions.
I see now that scan interval is the direction it engraves. So I tried one at 90 degrees, and another at 45 degrees. Both have the banding.
In the meantime, I reached out to Boss Laser and they gave me two possible causes:
Tube temperature
Electrical draw
We made a circuit dedicated to the laser when we first bought it, so while I think it’s still possible, seems less likely that the cause is electrical draw.
Looking at the results from the scan interval, I think it may be more of the tube temperature fluctuating. They sent me instructions on setting the chiller at a specific temperature, vs a range. Haven’t checked it, so I am not sure what mode it’s in now. Hopefully it’s in a range mode, and changing it to constant will fix it. If it doesn’t, then perhaps I will consider electrical again and pull out the amp meter and test draws but maybe it’s also “dirty” power?
Do you have it plugged into a UPS? Good ones may help with dirty power if that is an issue. Just being on an isolated circuit does not guarantee clean power.
I would think Boss would know, but I doubt the tube temperature and/or electrical issues.
What kind of speed/power/lens are you using?
Since it’s a Ruida or dsp, I’d try a change in interval and/or de-focus as @JimNM mentioned. I’ve seen this on mine and a change in the interval fixed it on the acrylic I was using… Something to do with laser and material combination.
Running the least amount of air pressure for lens protection with acrylic is correct.
So normally I am engraving at around 300 dpi for the interval (.085 mm) on the usual engraving jobs that consist of Duets acrylic 95% of the time. The facebook logo here and tests were all around 200 dpi.
On a perhaps related note, we had an Epilog and was used to having my engraving dpi at 600 or 400; 600 for nicer jobs, and 400 dpi for solar placards (Duets acrylic). The BOSS’ servo motor is way slower, so we’ve had to majorly lose out on quality because 600 dpi on anything takes forever.
For this job, I haven’t tried anything higher than 300 dpi.
Most of these, coming from the factory has a spot size of about 0.20mm - that relates to an maximum dpi of of 128. Anything higher in dpi (lower interval) means your laser is covering the same area multiple times… Probably why you get a smoother finish @ 600dpi.
It’s much like having a 1 inch beam and setting the interval to 1/8th inch… the last 1/8 inch will have had 8 passes over the same area…
What lens are you using?
Have you tried to de-focus and using a larger interval…?
With a lager spot (from de-focus) and a larger interval you might be able to creates the same burn effect… this would lower you job time by a bunch…
The materials test should assist in deriving a different set of values.
Not sure about the spot size, but maybe .127mm? That may be a generic focal point size, but I don’t see anything on the specs for the lens. The lens is a 2" ZnSe.
I haven’t attempted 600 dpi on this, but I’ll try it. If it works at the compromise of time, so be it. At this point I just want to get it right.
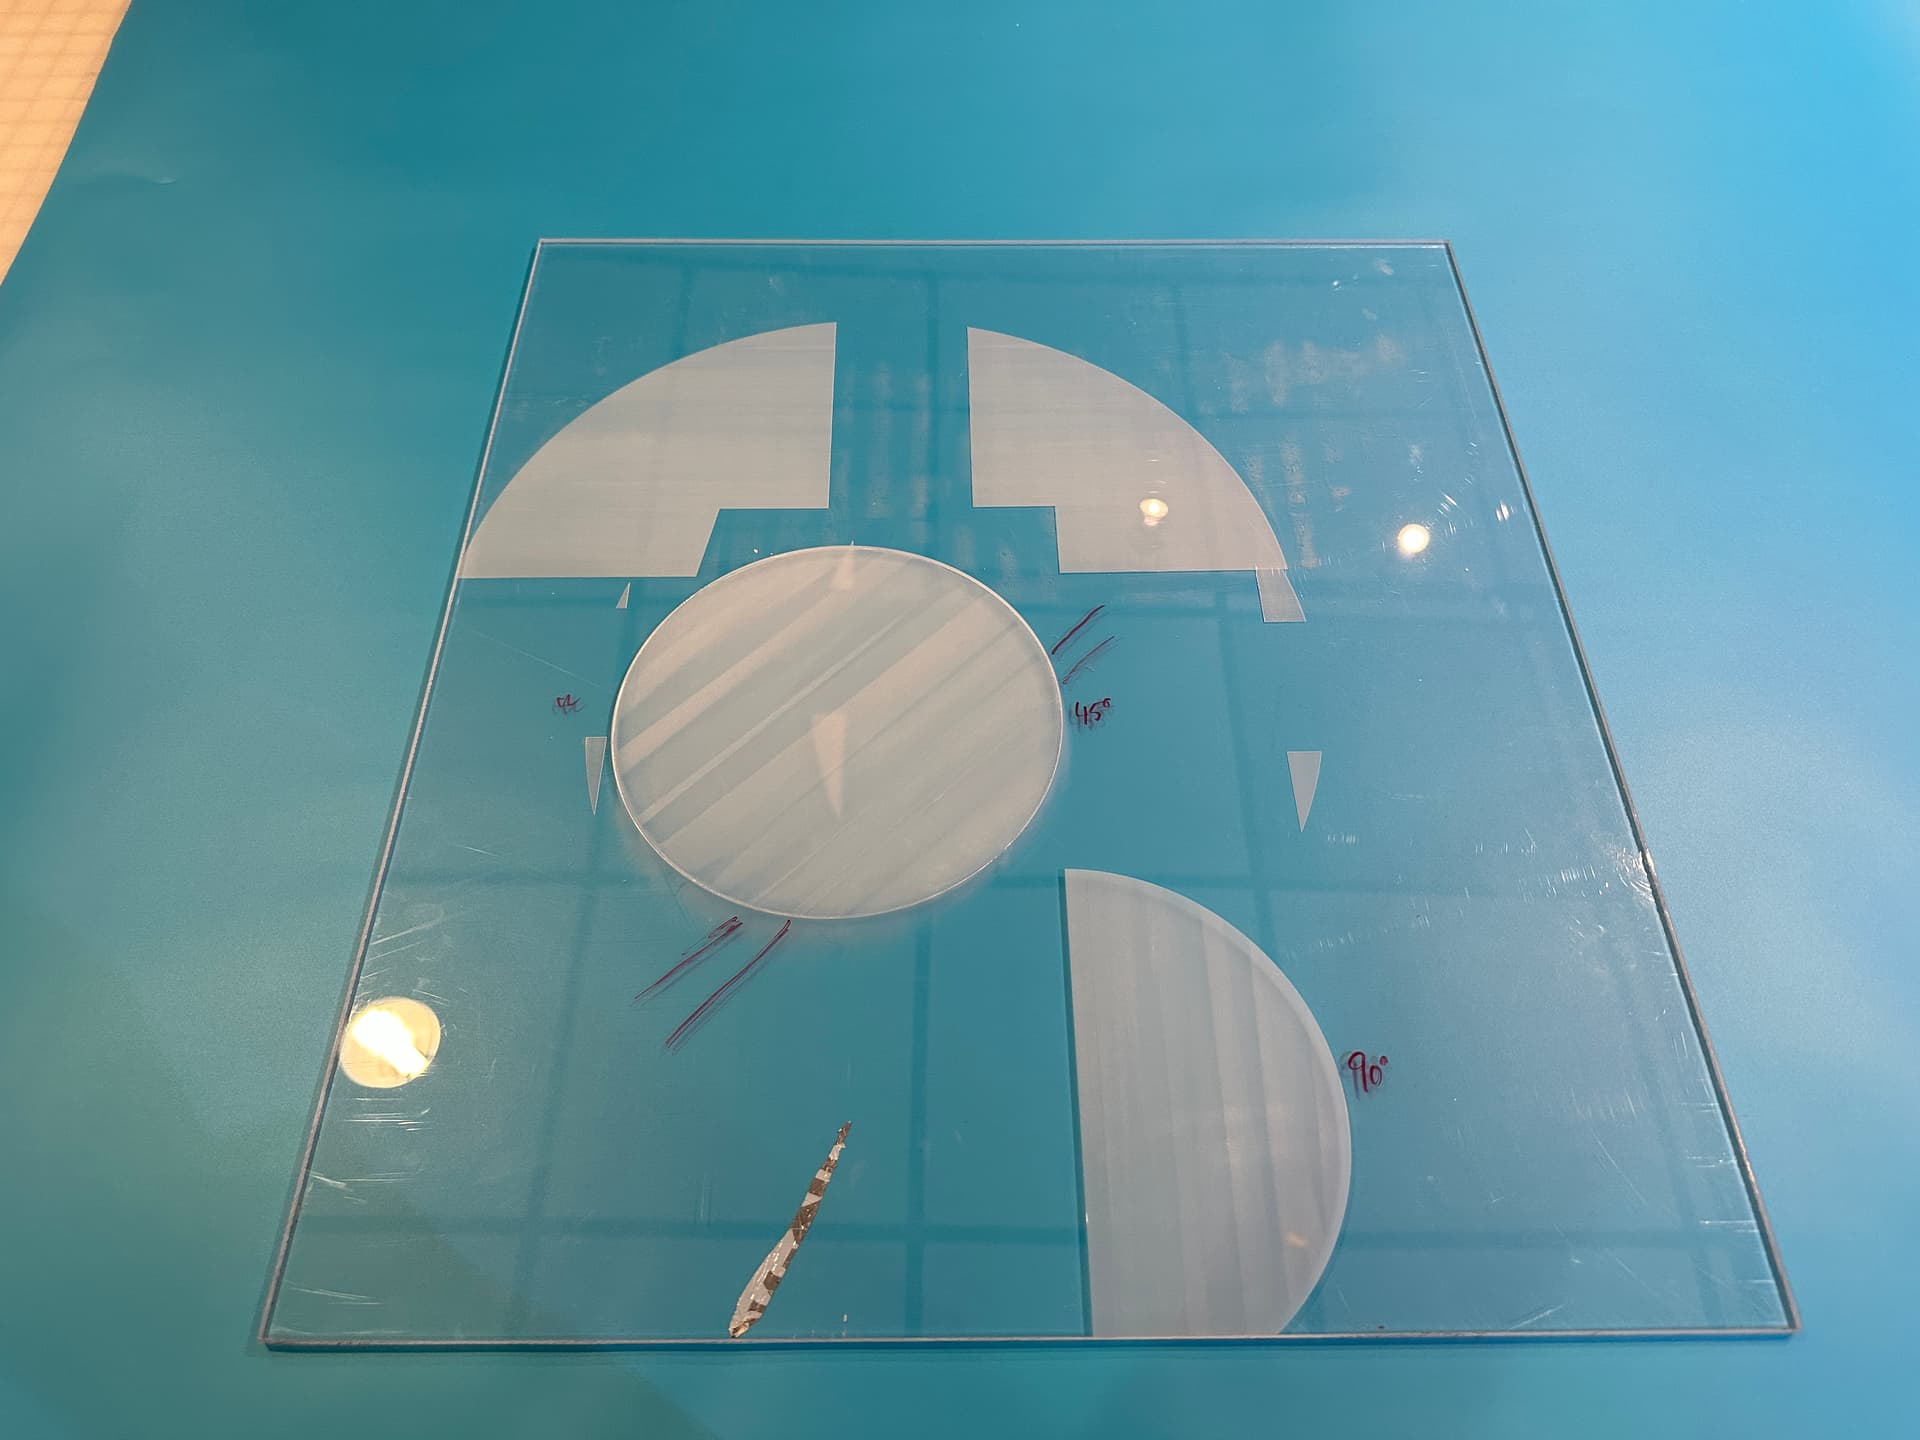
The previous photo was de focused at the same interval and one a larger internal, .06mm and .127mm respectively.
If it sheds light on anything, this photo was with an interval of .06mm, 300 speed, 15% power. If focus is what I need to nail down, I thought why not engrave on a ramp, so I tried it. Almost seems worse on lower end. Crude arrow is where the correct focus would be.
Looking at all my previous tests, it might be an interval thing and I’ll just have to bite the bullet on time. I’ll do a materials test with various intervals and see the results.
I’ll try this. Power seems high, I’ll likely cut through the acrylic but I’ll mess with it. Is this something you can achieve on LightBurn or another program?