What is the optimal number of lines per inch when engraving glass?
It very much depends on what kind of laser you use and what kind of glass you want to engrave.
As with all other materials, the best way is to find the optimal values, do some tests yourself and document the result in your material library.
But as a general rule, you can start with relatively low energy and moderate speeds, although glass is a hard material it does not “tolerate” too much power, it does not get as nice and it gets too hot if you are not careful, it can shatter.
Line spacing is approx. your laser beam thickness and a little extra. It also depends on how “milky” you want the result. (I like to use 0.075-0.125)
Thank you. I will follow up with the results. I have the FoxAlien 4040XE with the 40w laser.
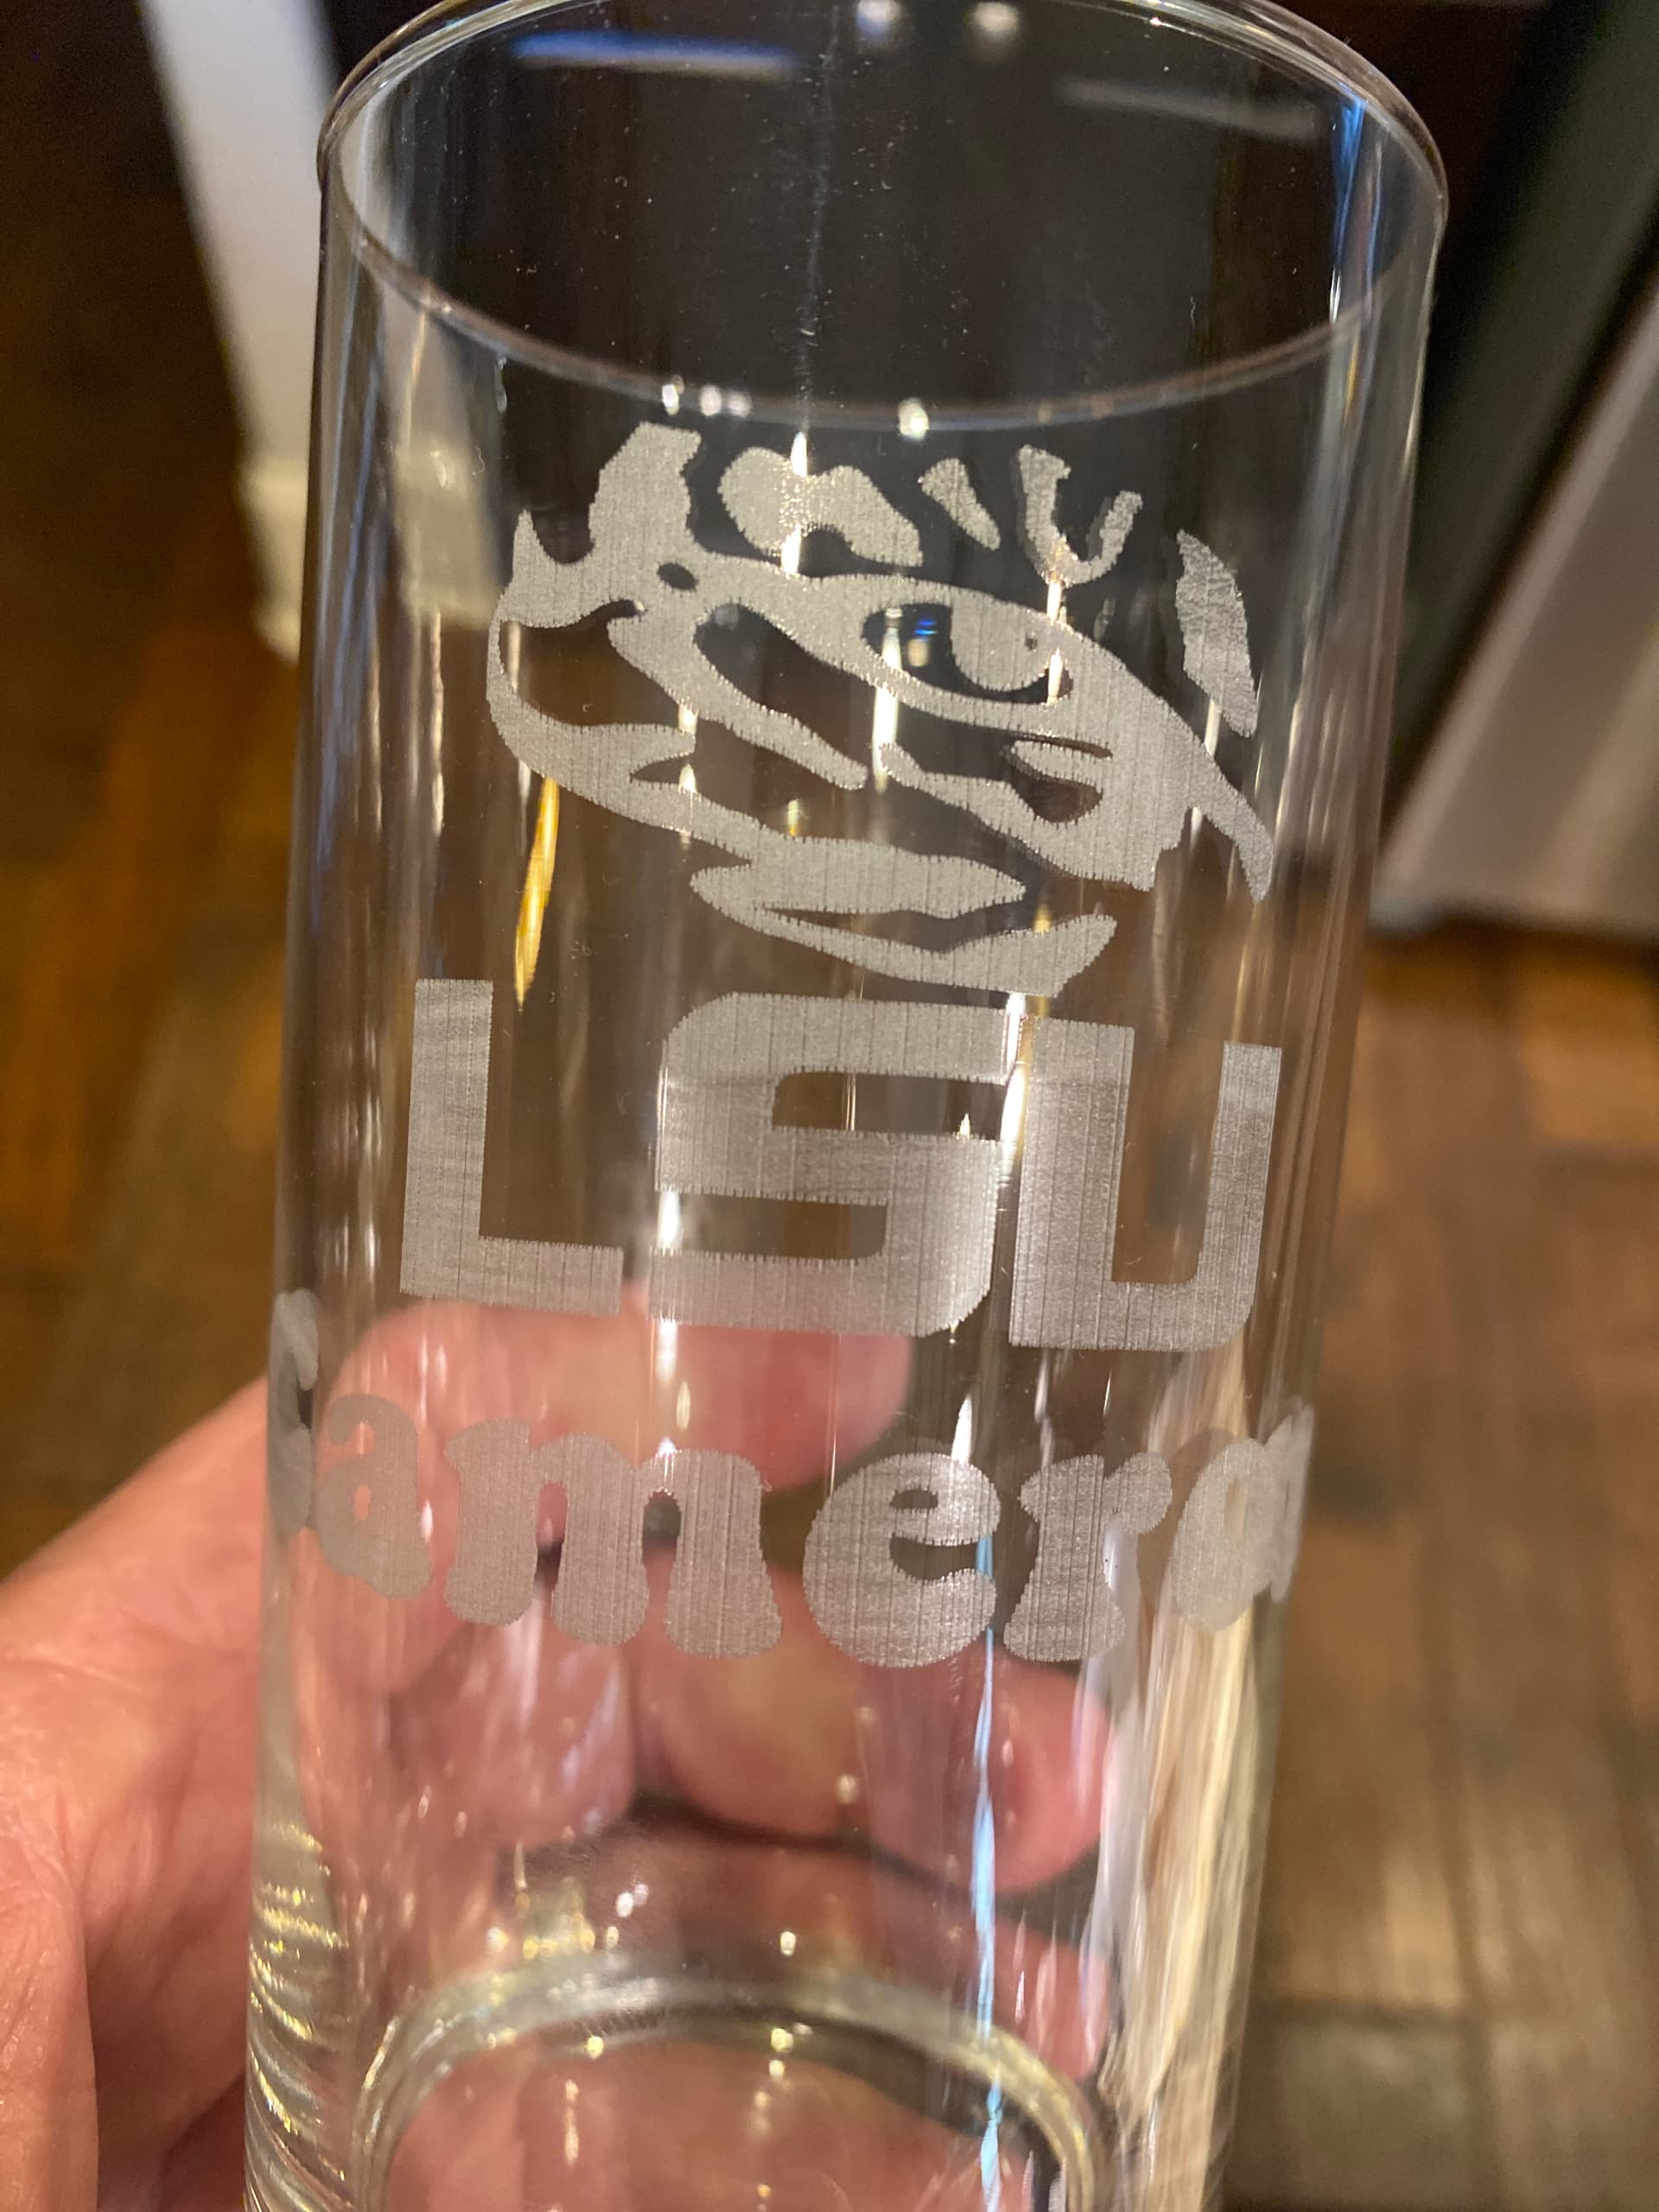
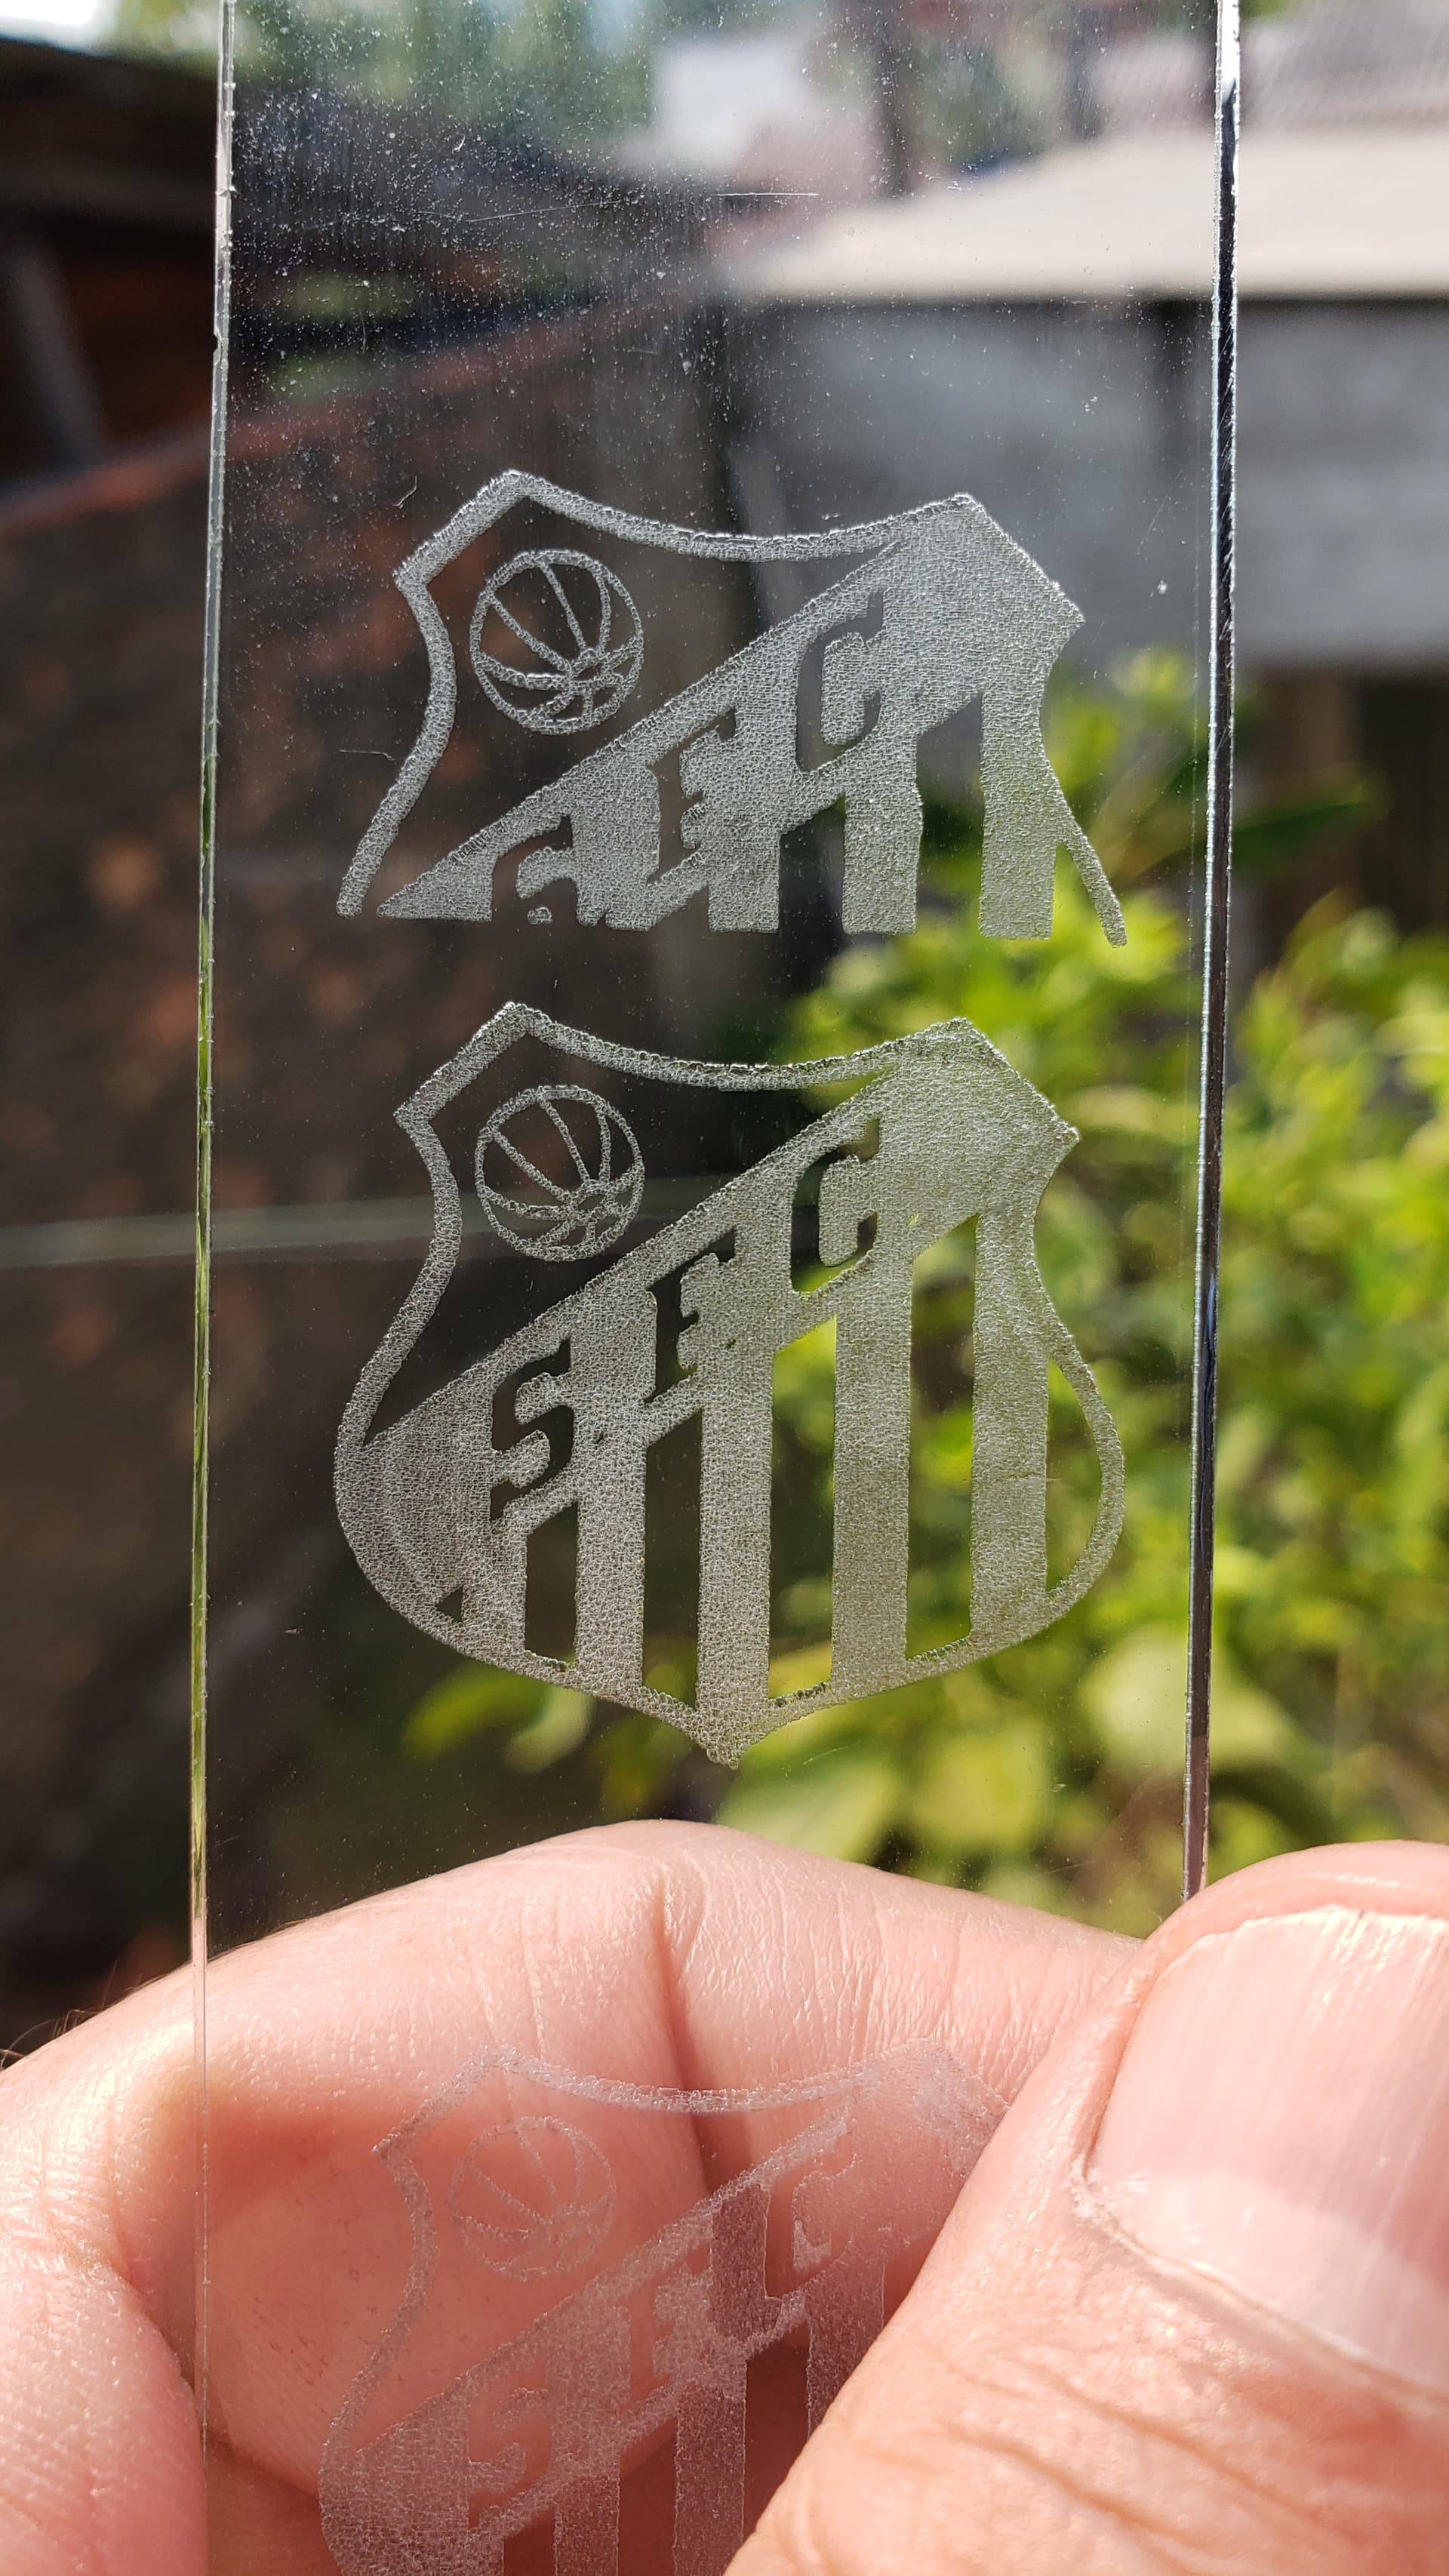
Any ideas what would cause this variation in shading? A good example would be the tops of the three letters LSU have different shading.
If this is your first attempt, then this is ok. ![]()
What settings did you use?
Difference in engraving is similar to power changes, do you have any “large consumer” of electricity that starts during the engraving? (pumps, exhaust, etc.)
The settings were 20 in./min., 45% power and 225 lines per inch. Would a 40 W laser take less power Percentage to achieve the same goal as a 20 W laser? Also if there were variations and the thickness of the tempora paint, I’m thinking that would make a difference. Whether using a brush or a sponge brush, they still appear to have streaking
With the little experience I have, I think that not much energy is needed to engrave glass. My speeds are also somewhat higher because I want to avoid heating the glass too much so that it breaks.
I have practiced on old jam jars and a glass broke because the local overheating gave a lot of tension.
I do not know if it is an advantage to replace your diode with a more powerful one, with my 60Watt CO2 laser I am very far down at the low% to engrave glass, but what it corresponds to your machine is hard to say .
Sorry but I do not quite understand. Is it tape you use when engraving? (I do not use it)
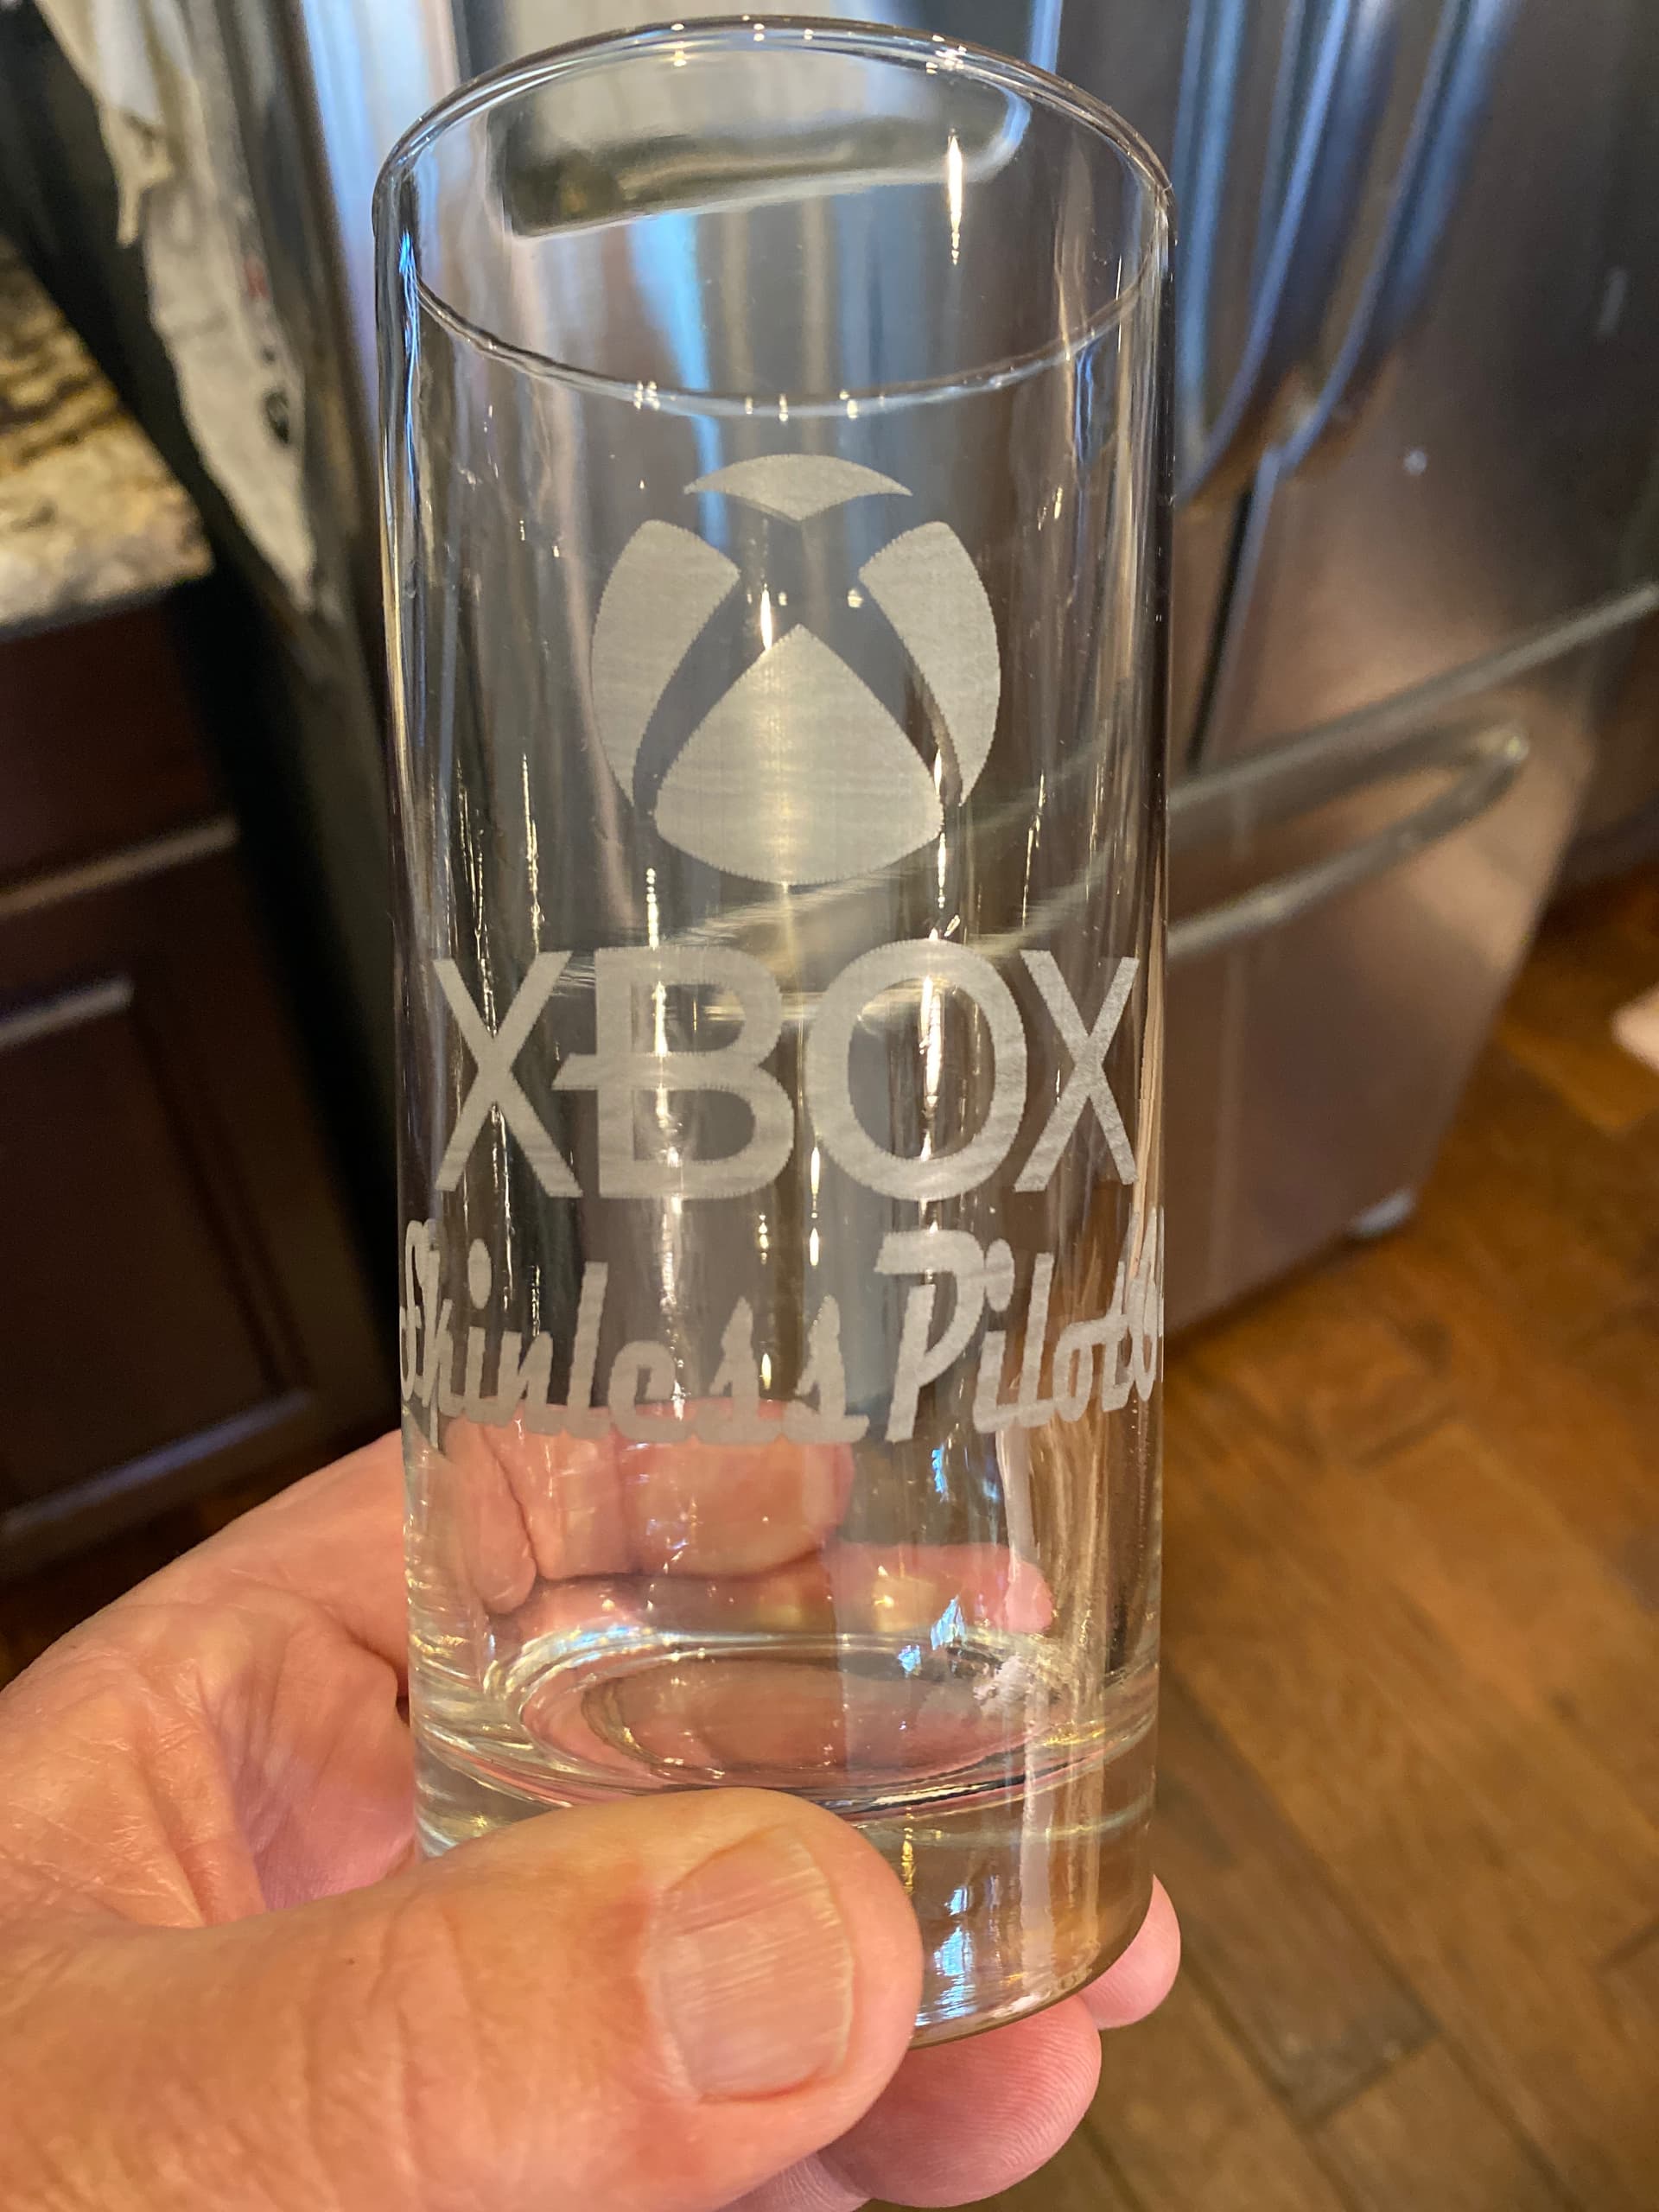
. This one appeared to come out better and the settings were 20 inches per minute, I dropped down from 45 to 40% power, and increased the lines per inch from 225 to 255. If you zoom in, you can still see some variations which were due to streaking in the tempera paint are used to cover the glass. Does this make any sense?
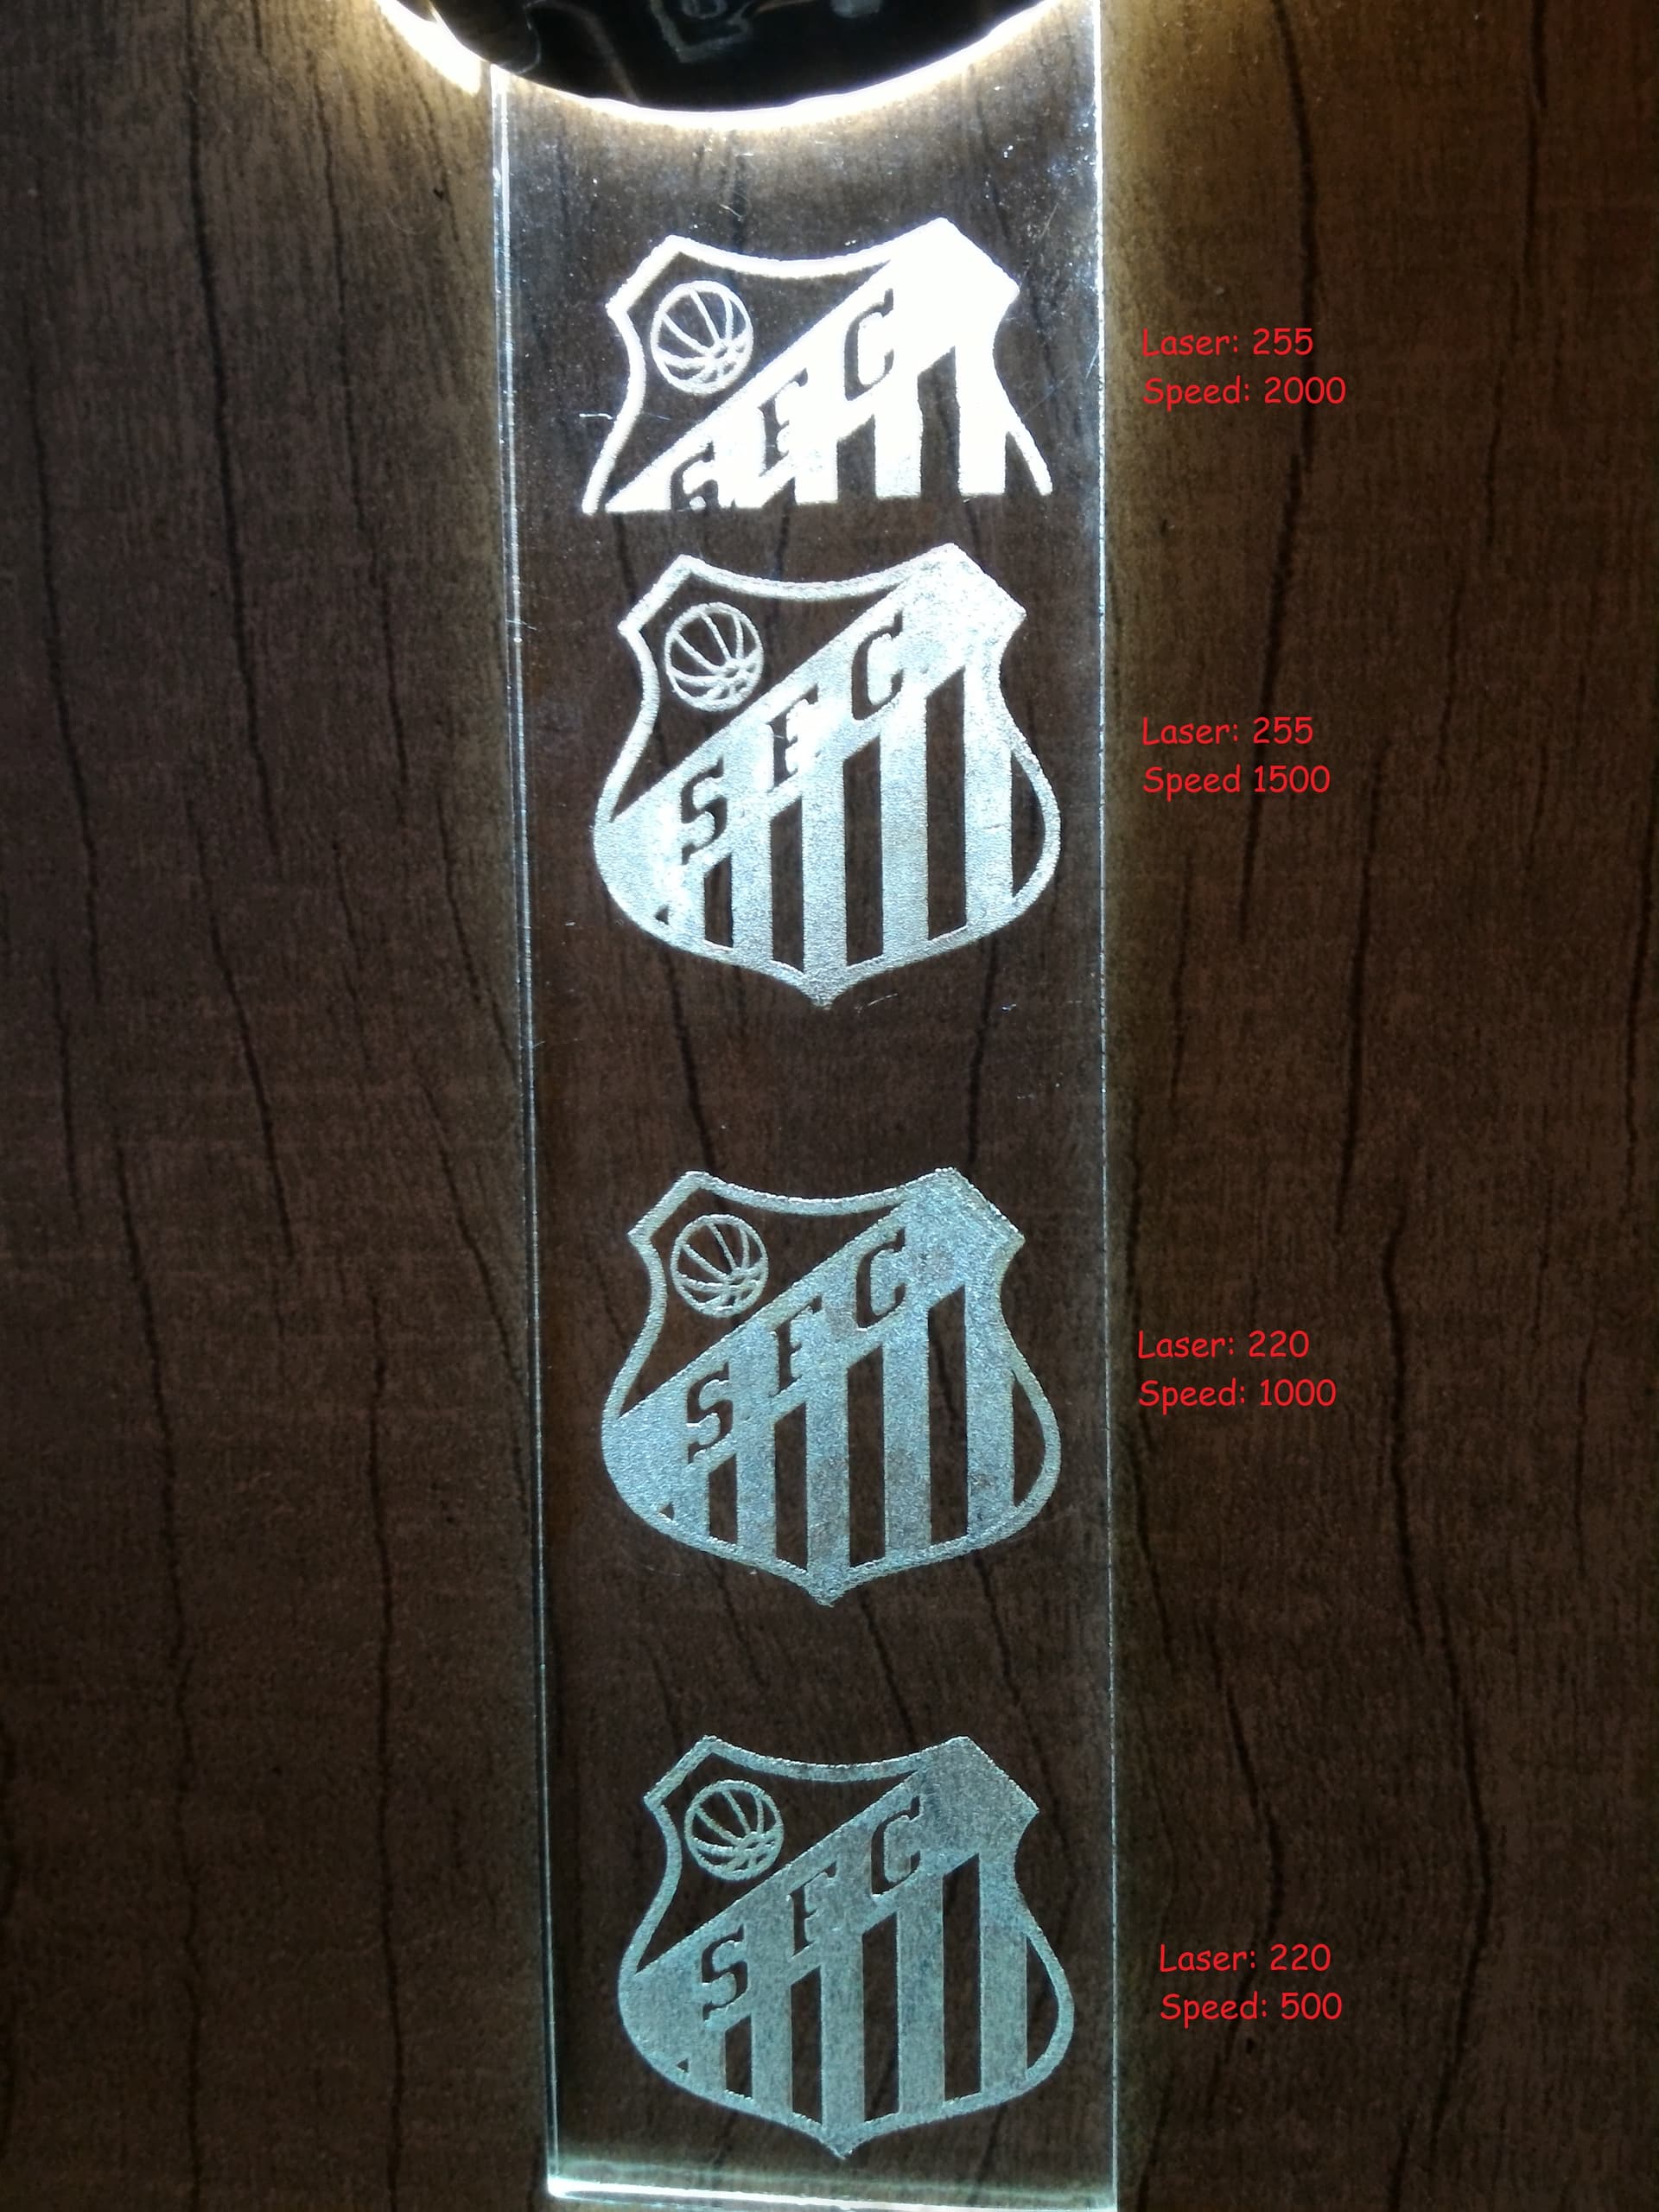
I saw a video on YouTube where someone made a grid with varying speeds and power percentages. This showed when he engraved wood, you can look at all the different ranges of speed in power. Perhaps one that is about 2“ x 2“ would work with glass and for that matter use it on any materials. The picture shown shows this grid.
. This did not come out very well as I did not have any air assist on it.

Yes, thanks for the explanation. But like I said, I do not use tape because there are no evaporated gases that can settle on the glass.
I think glass no. 2 looks better / nice.
Of course there is also a difference in glass, whether it is “normal” glass or tempered etc but if you find an old window glass (flat glass), then you could experiment with your settings and get an even better feel with this material, just like it you have made in wood.
By the way, cross hatch 45 degrees is an interesting way to get variations in the surface, I often use it with very large line spacing (0.4-0.6) and minimized power.
I’m a little confused when you mentioned using tape a couple of times. I coat the surface of the glass with tempera paint that after the engraving is finished it washes out very easily.
Ok, that’s my misunderstanding, sorry.
I do not know anything about “tempera paint”.
Can you suggest a better method? Using tempera paint is the only method I saw so far. What I don’t like about using tempera paint is if there are any streaks at all it shows up in the Engraving like the examples of showed above
No, I have simply not worked enough with glass which will have given me the necessary experience. The times I have made something with glass were without any kind of cover, relatively little power and reasonably fast. People I have made glassware for were happy.
Still green at all this. There were a couple of small areas that I did not have covered with paint and the laser had no affect on the glass at all so I don’t quite understand the process
Sorry, but I overlook that you’re on a diode laser. Your machine is running at a different wavelength like a CO2 laser, and it is usually not possible to work with glass or acrylic. I feel a little silly that I have not noticed it before.
Most material engraving requires you to know how big of a dot you can make on the material when your laser fires.
If you want to scan at 254 lpi/dpi you have to be able to make a 0.1mm dot, if larger it will cover the next scan.
I can produce a 0.1mm dot, but not on glass. It’s damage is around 0.2mm so the best dpi I can run is 128 dpi for detail.
Here’s a 0.1mm dot pattern you can play with and give you some idea about how small of a ‘damage’ area you create.
All materials act this way, some you can make as fine as you laser can produce, some, like glass actually shatter.
Make sense?
LED lasers go through glass and clear acrylic, so using paint on the causes the paint to heat up shattering the nearby glass. This usually give a lower resolution.
Some people have done incredible work with these things.
I think, like most of us, you need to spend some time varying things.
I looked at my materials library and I run 150mm/s @13/9.8 (speed @ power max/min).
Good luck.
You will need to click ![]() to view it.
to view it.
![]()
I always put a wet paper towel below my glass when I engrave it… helps dissipate the heat… especially on thin glass. Your comments are spot on.
2 Likes
My first glass engravings were made with a 5500mW diode laser. I would place a sheet of white printer paper underneath, the laser would go through the glass, burn the paper and mark the glass. The best results, always using 100% of the power, were with the highest speeds… 2000 mm/min feels practically nothing to the touch, it is very smooth. Unfortunately I don’t remember the resolution I used, but it was somewhere around 5 to 10 lines/mm. (Photos)
More recently I recorded the surface of a bottle by painting the spot with black CD permanent ink, with a 30W laser (5W output) at 50% and speed at 2000 mm/min (video). Not yet other attempts at these settings with less power.
 [Glass Engraving - Laser Diode 30W (5W) ]")
The variation in your engraving could also be caused if the distance to the laser head varies while burning. This allows the spot size to change and will affect the result quite significantly if the distance changes even slightly. In burning a flat object, this usually isn’t a problem, but a round object can cause issues if it’s out of round or if the carriage assembly positions it so that the distance can change as it rotates. Just another reason you might be having this issue.